

A good salon floor plan puts the reception right at the entrance, the styling stations in the brightest part of the room, the shampoo area between the stations and the back room, and the color bar, laundry and storage out of sight but within a few steps. Plan styling stations about 5 to 6 feet (about 1.5 to 1.8 m) apart, center to center, keep walkways of at least 36 inches (about 91 cm) behind the chairs, and count on 150 to 200 square feet (about 14 to 19 square meters) of total floor area per styling chair.
The layout decides how the salon feels to clients and how hard your team works every day. When I plan a salon floor plan, I fix the wash area and the plumbing first, then the stations, and only then the reception and the retail wall, because the water connections are the hardest thing to move later.

The Main Zones of a Salon Floor Plan
Every hair or beauty salon, whatever its size, is built from the same zones. The share of each zone changes with your services, but the order in which clients move through them stays the same.
| Zone | What it needs | Typical share of the floor area |
|---|---|---|
| Reception, waiting and retail | Desk near the entrance, two to four seats, product shelves | 10 to 15 percent |
| Styling floor | Stations with mirror, counter, chair, outlets and good light | 40 to 50 percent |
| Shampoo area | Backwash units, hot water, drains, towel storage | 10 to 15 percent |
| Color bar and dispensary | Counter, sink, ventilation, chemical storage | 8 to 12 percent, together with laundry |
| Back of house | Laundry, storage, staff room, small office | 8 to 12 percent |
| Restroom | Accessible toilet room for clients | 5 to 8 percent |
Nail, lash, brow and esthetics services add their own zones: manicure tables, pedicure chairs or closed treatment rooms. In a combined salon, keep these quieter services away from the hair dryers and the entrance.
Key Dimensions for a Salon Layout
These values are practical starting points. Furniture and equipment vary, so always check the real dimensions of the stations and shampoo units you plan to buy.
| Element | Practical dimension |
|---|---|
| Styling station spacing, center to center | 5 to 6 ft (about 1.5 to 1.8 m), never much less than 4 ft 6 in (about 1.4 m) |
| Depth from mirror wall incl. working space | 6 to 7 ft (about 1.8 to 2.1 m) |
| Walkway behind the chairs | At least 36 in (about 91 cm), better 42 to 48 in (about 107 to 122 cm) |
| Floor area per station incl. walkway | 40 to 60 sq ft (about 3.7 to 5.6 square meters) |
| Station side to wall or window | At least 2 ft (about 61 cm) |
| Shampoo unit width | 30 to 36 in (about 76 to 91 cm) per unit |
| Shampoo area depth from wall | 7 to 8 ft (about 2.1 to 2.4 m) incl. reclined chair and stylist |
| Reception desk | 6 to 8 ft (about 1.8 to 2.4 m) long for one or two people |
| Color bar counter | 6 to 8 ft (about 1.8 to 2.4 m) in a mid-sized salon |
| Wheelchair turning space (US) | 60 in (about 1.5 m) circle |
Most salons plan one shampoo unit for every two to four styling chairs. A salon with a strong color business needs the higher number, because clients come back to the bowl more often and processing takes longer.
Salon Layout Ideas
Wall Stations Along the Perimeter
The classic layout places all styling stations along one or two walls, with the mirrors facing the room. It uses space efficiently, keeps the electrical outlets simple and leaves the center of the room open for walkways. It works especially well in long, narrow storefronts: reception at the front, stations along one long wall, shampoo area and back room at the rear.
Island Stations in the Middle
Back-to-back stations in the center of the room look modern and open and let you fit more chairs into a wide space. They need walkways on both sides and power through the floor, so the room should be at least about 20 feet (about 6.1 m) wide. A common compromise is wall stations on both sides and one island in the middle.
L-Shaped and U-Shaped Layouts
In square rooms, stations along two or three walls create an L or U shape around a central open area. The stylists can see each other, which is great for team culture and training, and the reception can overlook the whole styling floor.
Front Stage and Back Stage
Some salons split the space clearly: a bright front stage with reception, retail and styling, and a calmer back stage with the shampoo area, color processing seats and treatment rooms. Clients get a quiet, spa-like wash experience, and the noise of dryers stays at the front.
Salon Suites
For booth renters, a salon suite layout divides the floor into small private studios of about 100 to 200 square feet (about 9 to 19 square meters), each with its own station, often its own shampoo bowl, along a central corridor. The plumbing has to reach every suite, so plan the corridor and the drains together.

Salon Floor Plans by Size
Small Salon: 3 to 4 Chairs
A small salon typically needs about 500 to 900 square feet (about 46 to 84 square meters). In a narrow space of about 15 by 45 feet (about 4.6 by 13.7 m), a practical plan is a reception desk and two waiting seats at the window, four wall stations along one side, two shampoo units at the rear wall and a compact back room with washer, dryer, color counter and storage. The restroom usually sits next to the back room to share the plumbing.
Mid-Sized Salon: 6 to 8 Chairs
With about 1,000 to 1,600 square feet (about 93 to 149 square meters), you can arrange stations along both long walls or add an island. Plan two or three shampoo units, a separate color bar between the styling floor and the wash area, a staff room and a small office. A retail wall near the reception becomes worth the space at this size.
Large Salon: 10 Chairs and More
Large salons of 2,000 square feet (about 186 square meters) and more often combine wall and island stations, a dedicated shampoo lounge, processing seats, treatment rooms for nails or esthetics and a larger staff area. Here the routes matter most: clients should never have to cross the staff corridor, and the stylists should reach the wash area and the color bar in a few steps from every chair.
Common Salon Floor Plan Mistakes
Placing the Shampoo Area Where the Drains Are Not
Backwash units need water supply, hot water and drains. Placing them far from the existing lines means breaking up the floor slab, which is one of the most expensive surprises in a salon fit-out.
Walkways Directly Behind Working Stylists
If the main route from the reception to the wash area runs right behind the chairs, every client who passes interrupts a stylist. Plan the main route along the other side of the room or through the center.
Too Little Back-of-House Space
Towels, color tubes, retail stock and the laundry need a place. Giving up the back room for one more chair often makes the whole salon slower.
Forgetting Light and Power
Every station needs outlets for dryers, irons and clippers, and good, even light on the client’s face. Plan the electrical layout together with the station positions, not after.

How to Draw a Salon Floor Plan
You can draw a first salon layout in an afternoon if you work in this order:
- Measure the space and draw the walls, columns, windows and entrance with exact dimensions. Our guide to creating floor plans with dimensions explains how to do this.
- Mark the plumbing: existing water lines, drains and the restroom.
- Place the shampoo units close to the drains, then the color bar and the laundry next to them.
- Arrange the stations with real chair and station sizes, keeping the spacing and walkways from the table above.
- Add reception, waiting area and retail at the entrance.
- Plan outlets and lighting for every station.
- Check the result in 3D and walk the client route from the door to the chair and back.
In Plan7Architect, you draw the walls with exact lengths, place doors and windows, and furnish the plan with chairs, counters, sinks and seating from the 3D object library. The 3D view updates with every change, so you can test a wall layout against an island layout in minutes. For the general planning aspects of a commercial space, read our article on commercial building plans.
Design Your Salon Floor Plan with Plan7Architect
With Plan7Architect Pro, you can create professional floor plans for your salon: styling stations, shampoo area, reception, color bar, back room and restroom with exact dimensions, plus outlets, lighting and plumbing, checked instantly in 3D. You can work in feet and inches or in metric units, compare layout variants and export your plans as PDF, DWG or DXF for your landlord, contractor or permit application. Every purchase includes a 14-day right of withdrawal, so you can simply cancel your purchase by email if the software is not right for you.

Plan your project with Plan7Architect

Plan7Architect Pro 5 for Original price was: $259.99.$99.99Current price is: $99.99.
You don’t need any prior experience because the software has been specifically designed for beginners. The planning process is carried out in 5 simple steps:
1. Draw Walls

2. Windows & Doors

3. Floors & Roof

4. Textures & 3D Objects

5. Plan for the Building Permit

6. Export the Floor Plan as a 3D Model for Twinmotion

- – Compliant with international construction standards
- – Usable on 3 PCs simultaneously
- – Option for consultation with an architect
- – Comprehensive user manual
- – Regular updates
- – Video tutorials
- – Millions of 3D objects available
Why 85,000+ Home Planners Choose Plan7Architect
Why choose Plan7Architect over other home design tools?
Watch how a complete house is planned from start to finish – in under 25 minutes
Detailed House Planning (25 Min)

Small Home Planning Demo (12 Min)

Short House Planning Demo (6 Min)

Your Plan + AI
Plan your house in Plan7Architect and take it further with today’s AI tools. Your design stays exactly as you planned it.


Plan7ArchitectAI
Photorealistic AI Renderings
Turn any 3D view of your Plan7Architect project into a photorealistic image in seconds.
How to render your design with AI →Free prompt generator with 11 examples →
AI Videos of Your HouseNew
A short film like real drone footage, made from your Plan7Architect 3D views.
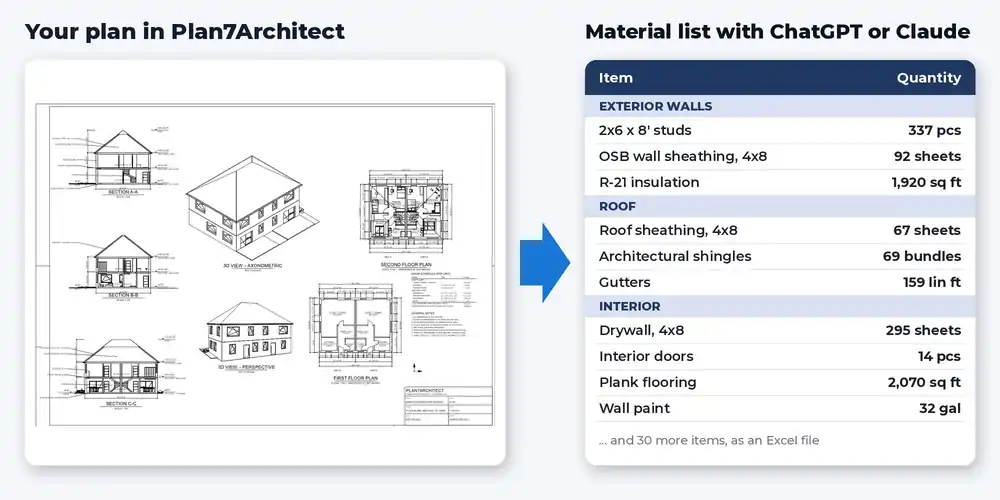
Material List & Cost Estimate
Export your plan as DXF and let ChatGPT or Claude create quantities and a cost estimate.

Digitize Floor Plans with AI
Paper, PDF or photo to an exact DXF file you can trace in Plan7Architect.
The 3 Plan7Architects

Suitable for small hobby projects
No garden planning and only limited floor plan creation with few wall types
★★★★★

For medium-sized projects
Unrestricted floor plan creation & garden planning
No export options for your architect and no plans for building permit applications
★★★★★
For projects of any size
Import & export for working with an architect
Create plans for real building permit applications
Much larger range of features than the other two versions
★★★★★