

A floor plan is a scaled drawing of a room, apartment, or house seen from above. To draw one as a beginner, follow these steps:
-
Measure your space accurately
-
Choose scale and units (metric or imperial)
-
Draw the outer walls
-
Add interior walls
-
Place doors and windows
-
Mark fixed installations such as stairs or bathrooms
-
Add furniture and details
-
Review proportions and adjust if necessary

Tools You Can Use for Drawing Floor Plans
Traditional Tools
You can begin with simple tools: graph paper, a pencil, a ruler, and an eraser. This method is inexpensive and requires no technical knowledge. However, it can be less precise and difficult to modify if you make changes later.
Digital Tools and Software
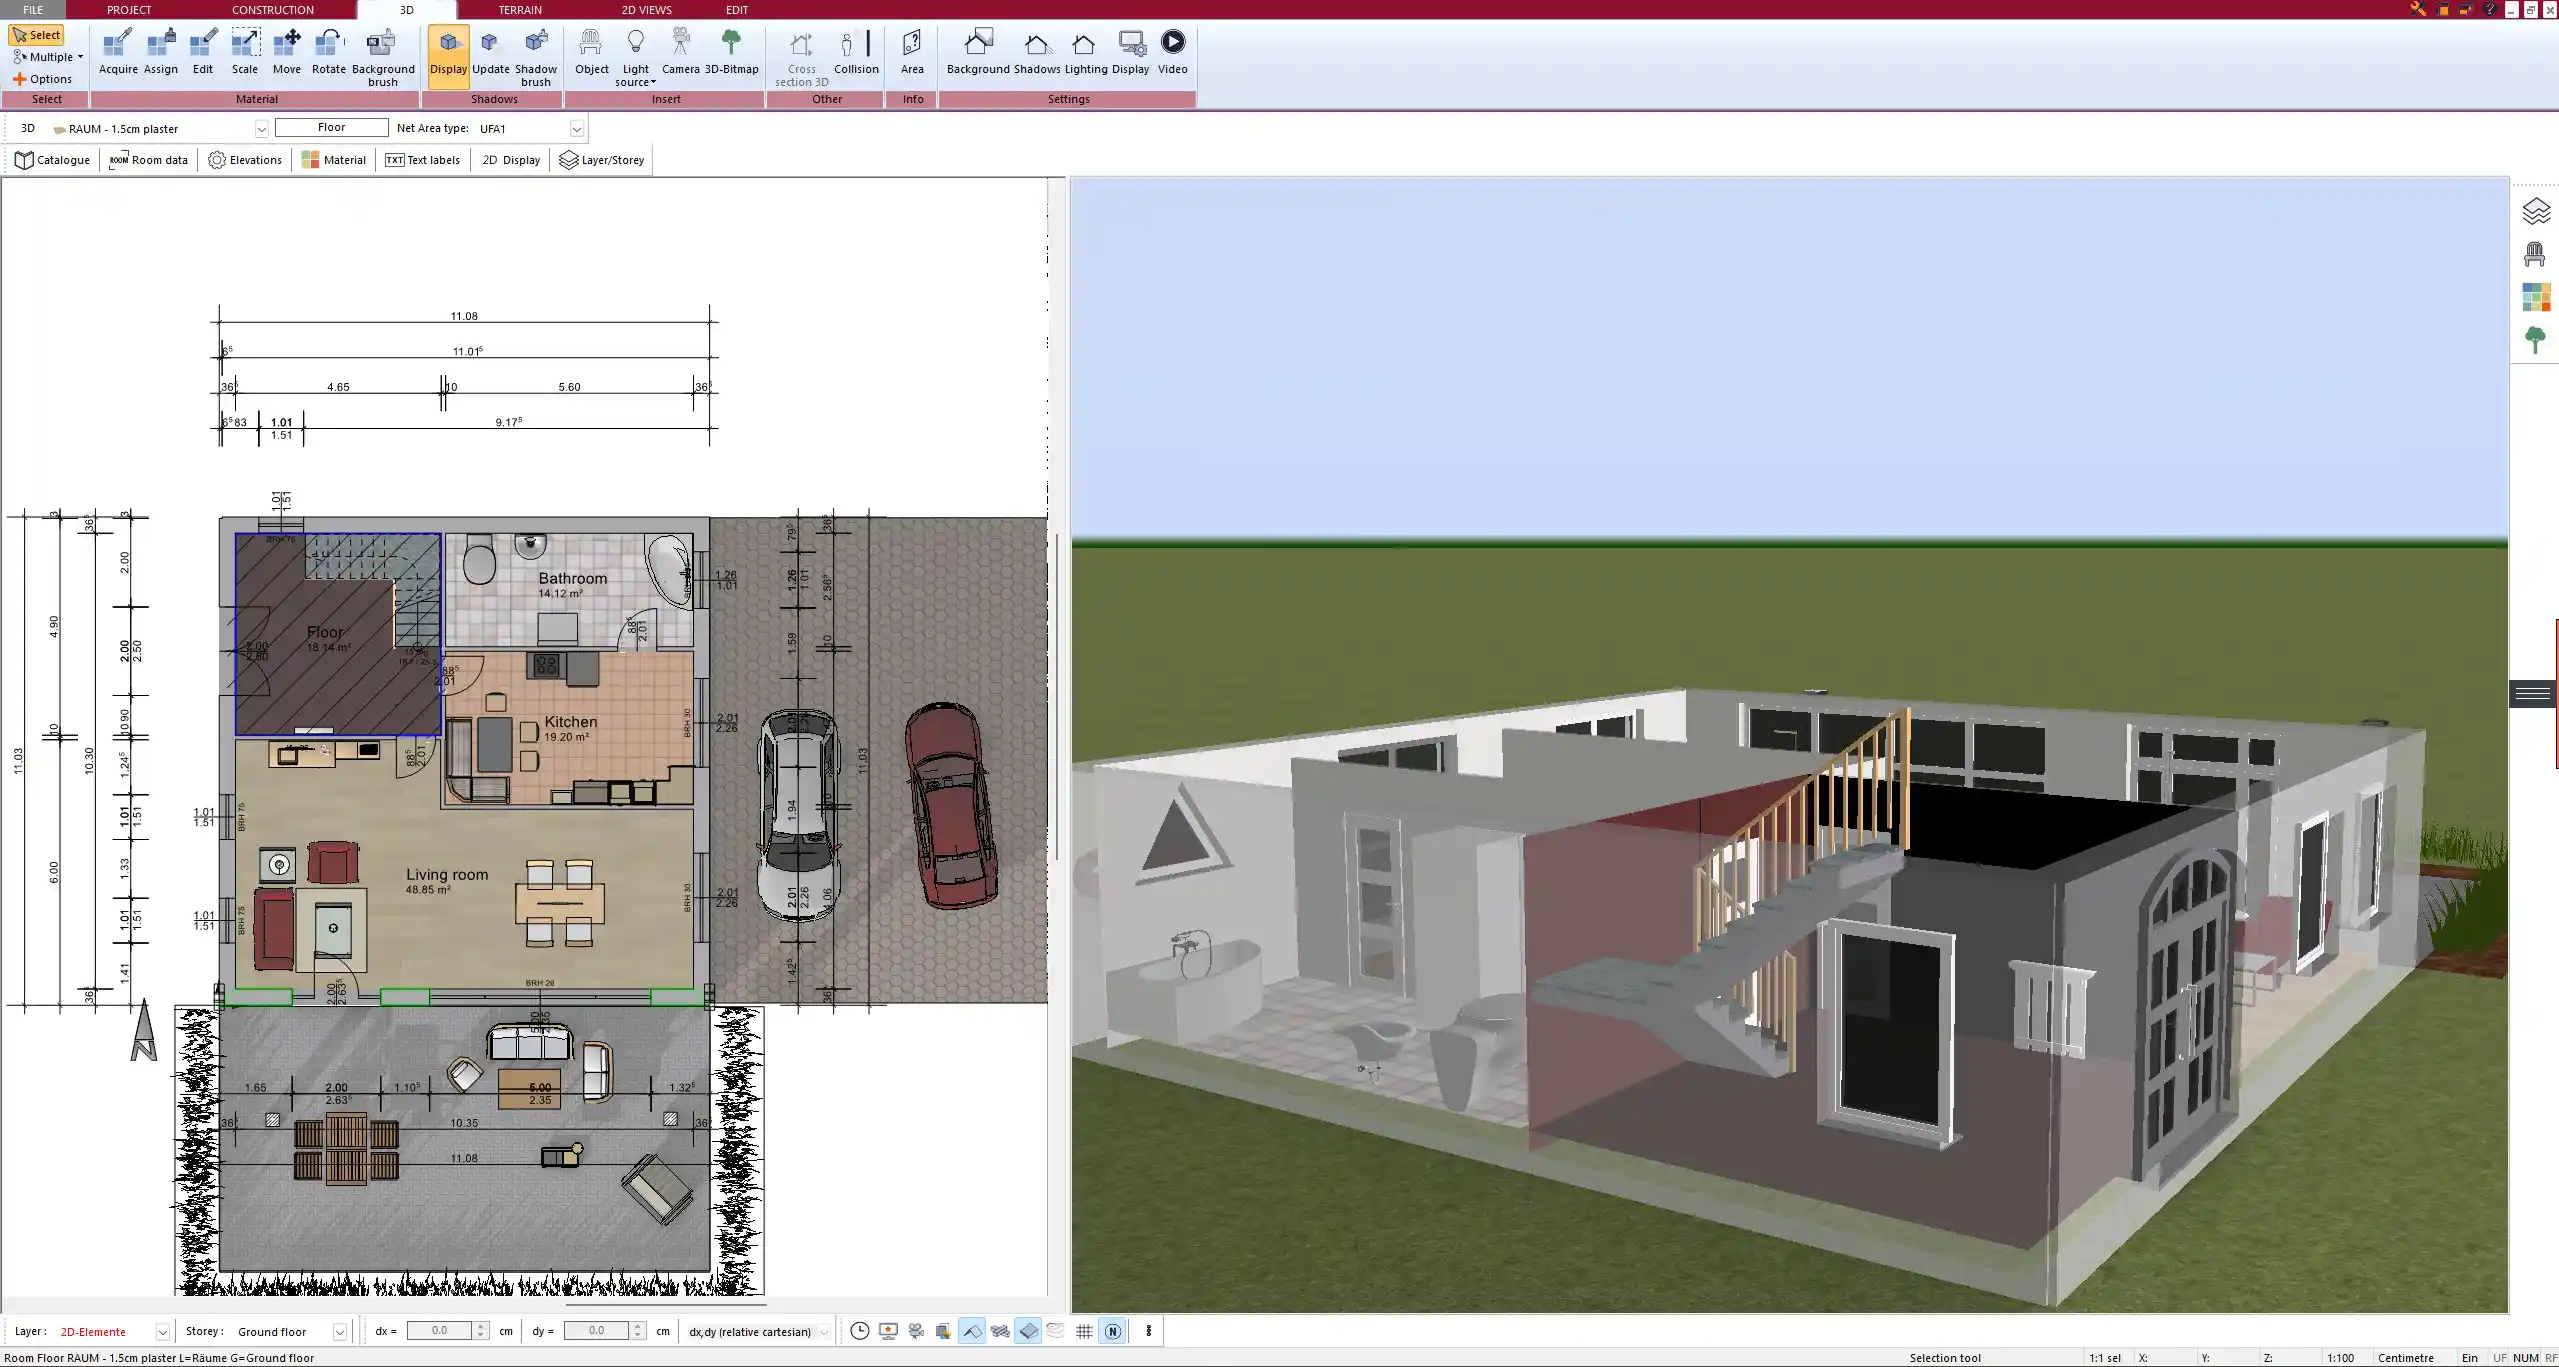
Digital planning tools allow you to create accurate drawings quickly and adjust them whenever you need to. With software like Plan7Architect, you can set your project to either metric units (meters, centimeters) or imperial units (feet, inches). This makes it suitable for users worldwide. Digital planning also allows you to view your floor plan in both 2D and 3D, which helps beginners better understand proportions and room flow.
Step-by-Step Guide in Detail
Step 1 – Measure Your Space
Begin by measuring every wall, door, and window. Write the dimensions clearly. If you want a complete overview, also measure ceiling height and note where beams or sloping areas are. Always decide on either metric or imperial units before you start and stick to them consistently.
Step 2 – Decide on Scale
You need a scale so your plan fits onto paper or a digital page while keeping proportions correct.
-
Common beginner scales:
-
Metric: 1:50 (1 cm represents 0.5 m)
-
Imperial: 1/4″ represents 1′
-
| Scale | Metric Example | Imperial Example |
|---|---|---|
| Large rooms | 1:100 (1 cm = 1 m) | 1/8″ = 1′ |
| Standard | 1:50 (1 cm = 0.5 m) | 1/4″ = 1′ |
| Detailed | 1:20 (1 cm = 0.2 m) | 3/4″ = 1′ |
Turn your measurements into drawing dimensions with the scale converter: metric 1:50 or 1:100 and imperial scales like 1/4 in = 1 ft. It also shows which sheet size your plan fits on.
Step 3 – Draw the Outer Walls
Start with the overall shape of the house or room. Draw the outline carefully and ensure that wall thickness is included. This provides a realistic base for everything else.
Step 4 – Add Interior Walls
Add partition walls to separate spaces such as bedrooms, bathrooms, and kitchens. Think about how the rooms connect and how you would move between them.
Step 5 – Insert Doors and Windows
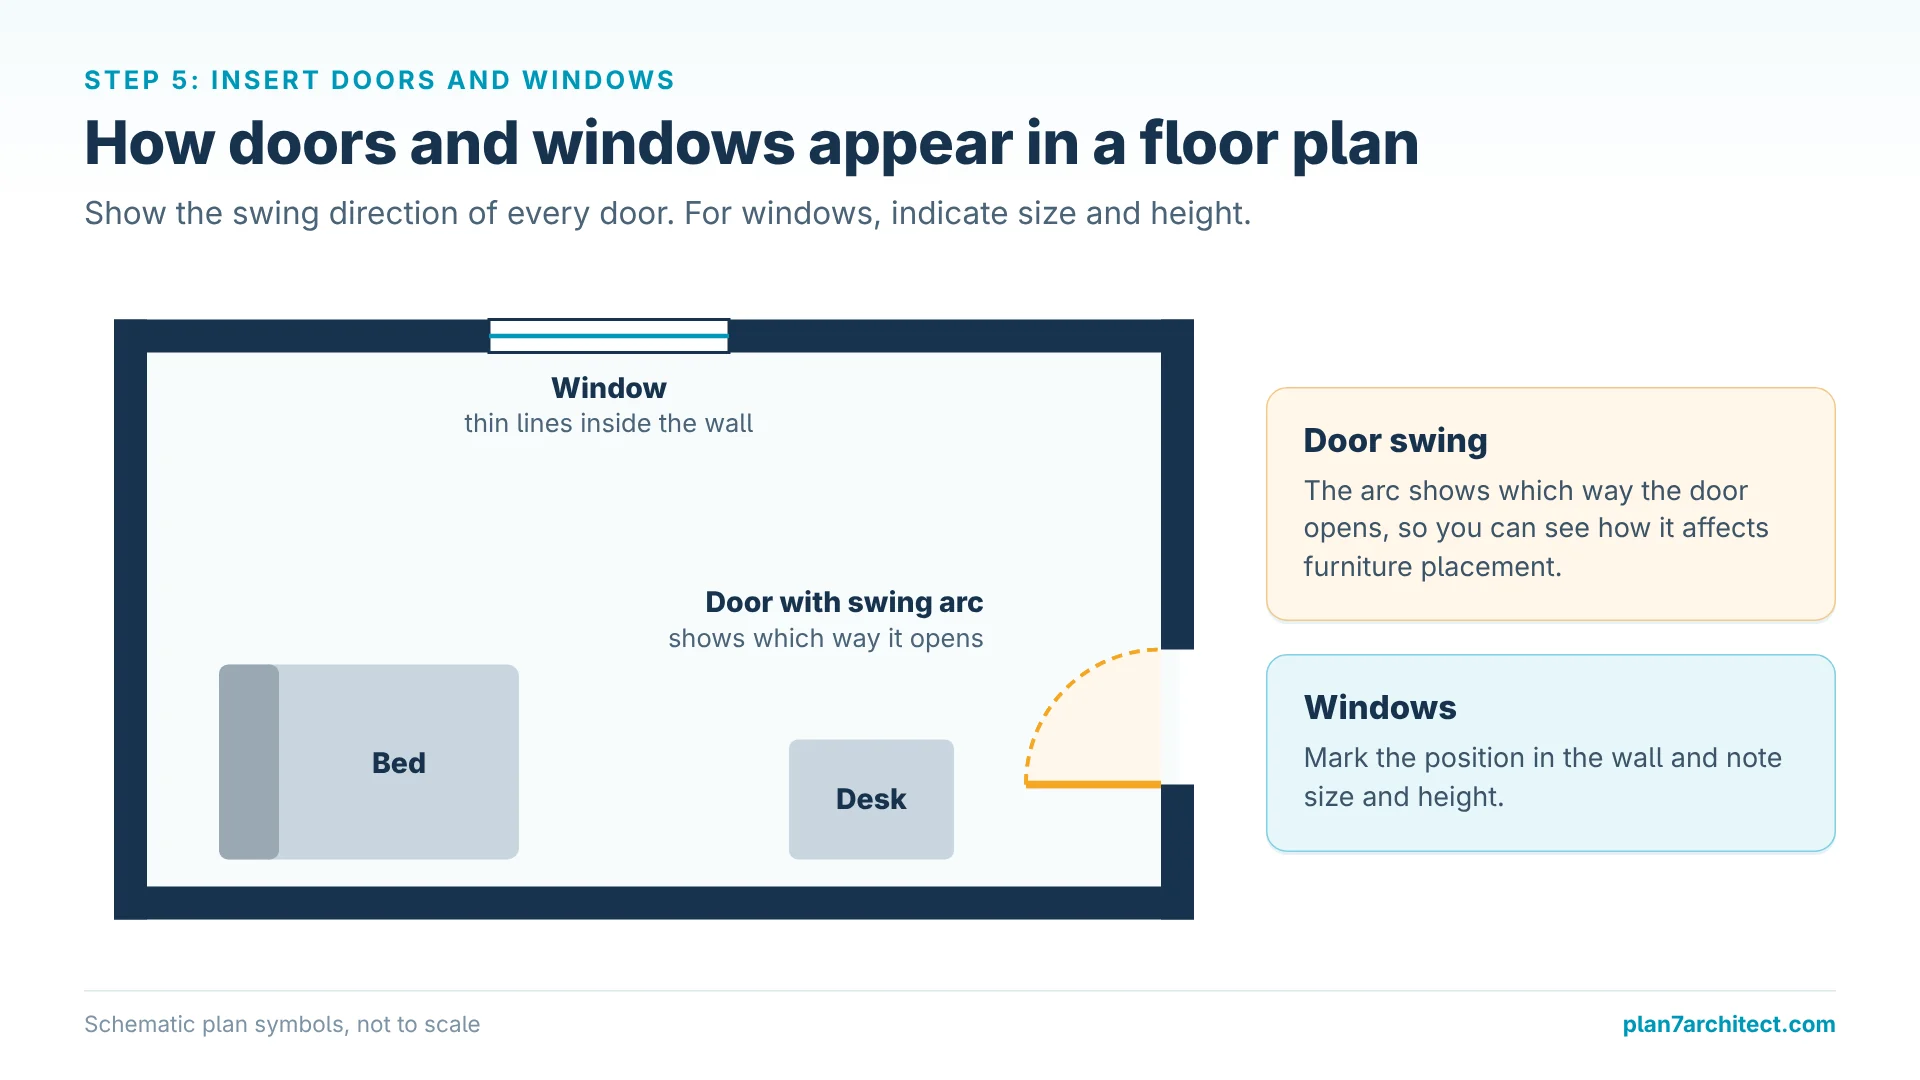
Mark the position of each door and window. Show the swing direction of doors so you can see how they affect furniture placement. For windows, indicate size and height.
Step 6 – Mark Fixed Installations
Permanent elements such as staircases, fireplaces, kitchen counters, or bathroom fixtures must be added at this stage. These installations determine how you can use the space around them.
Step 7 – Add Furniture and Details
Place furniture pieces like sofas, beds, or dining tables. This step helps you test if your design is practical. Leave enough room for walking paths and circulation.
Tip: In digital software, use furniture libraries to drag and drop elements. This makes it easier to move items around until you find the best layout.
Step 8 – Review and Adjust
Step back and check your plan. Does the furniture fit comfortably? Are windows in the right place for natural light? Adjust until the proportions feel correct and the design is functional.
Tips for Beginners
-
Double-check all measurements before drawing
-
Keep walls, furniture, and notes separated in layers when using digital software
-
Avoid adding too much detail in the beginning, start with the basics
-
Think about how natural light enters the room and place windows accordingly
Common Mistakes to Avoid
-
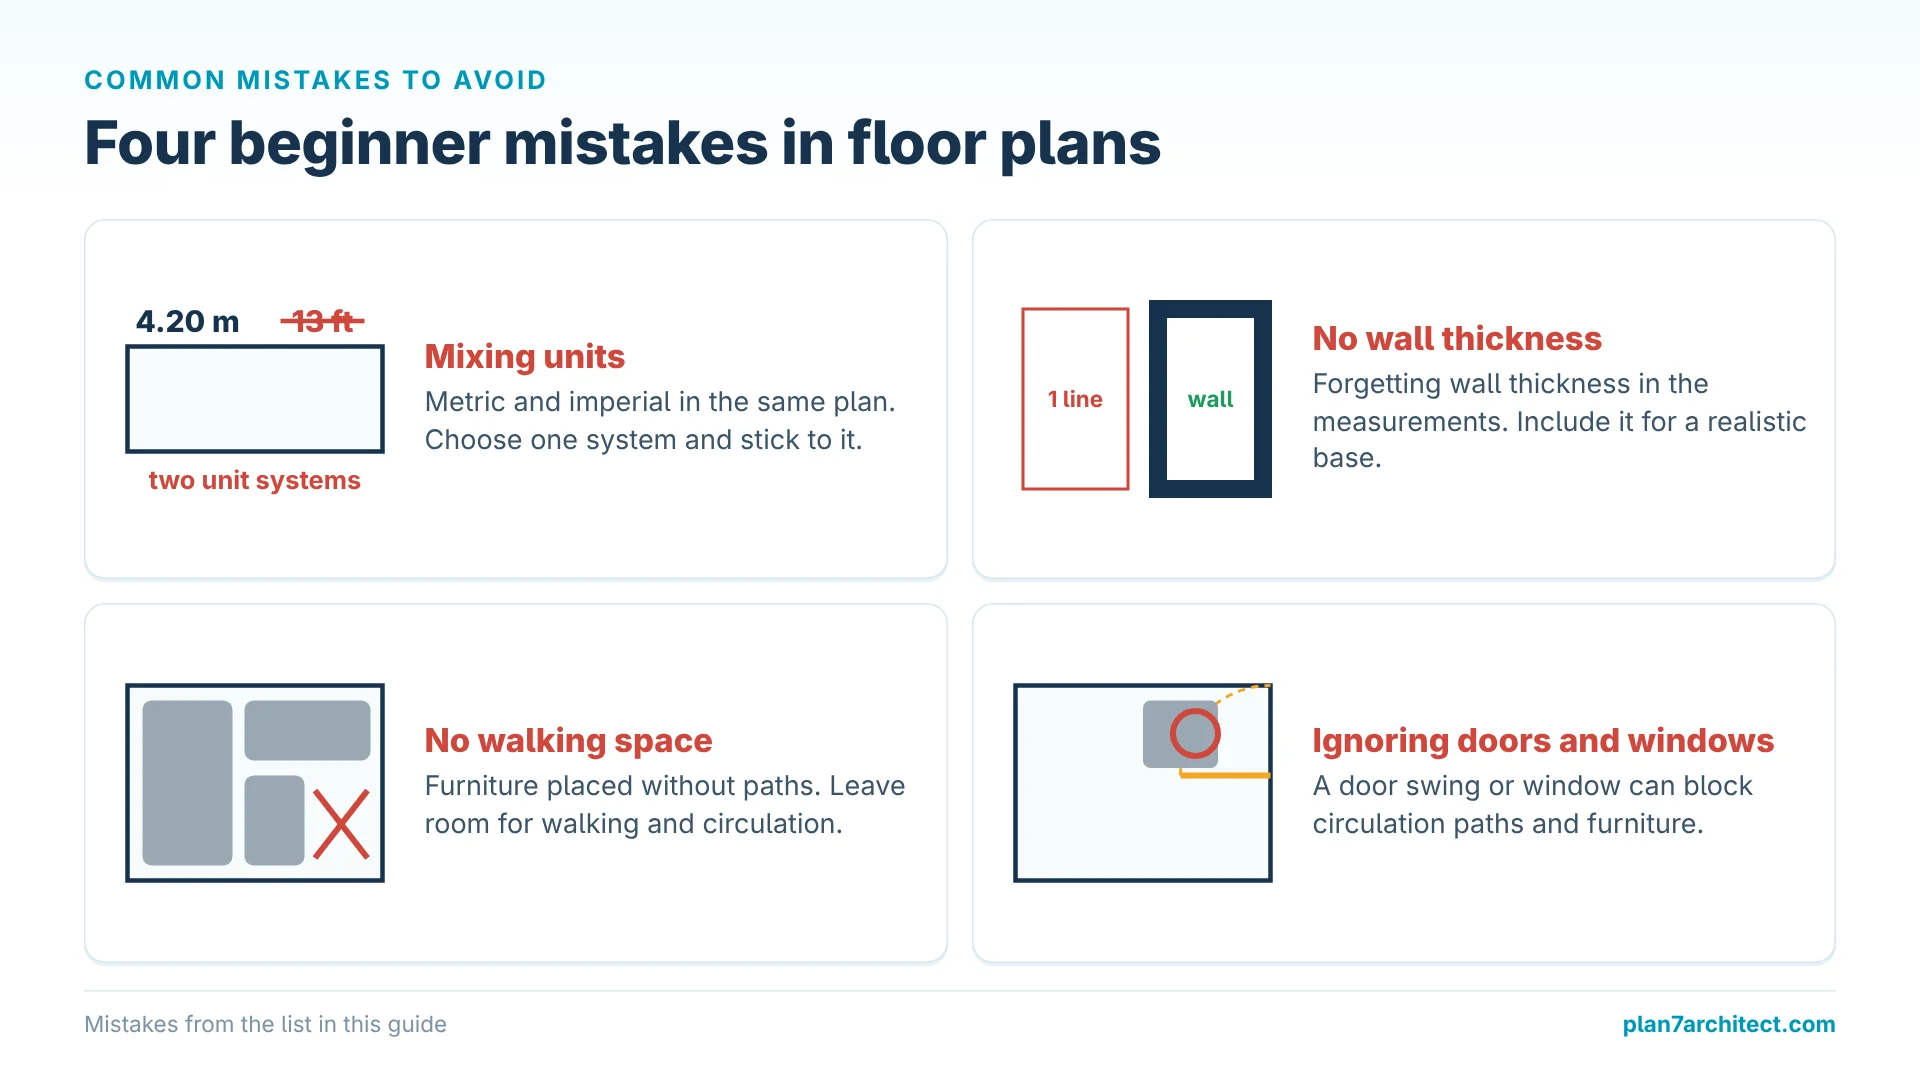
Mixing metric and imperial units within the same plan
-
Forgetting to include wall thickness in measurements
-
Placing furniture without enough walking space
-
Ignoring how doors and windows affect circulation paths
Example Floor Plan Workflow with Software
-
Open a new project and set your preferred units (metric or imperial)
-
Sketch the outline or import an existing plan
-
Place walls, doors, and windows
-
Switch to 3D view to check space proportions
-
Add furniture and adjust the layout until satisfied

Create Professional Floor Plans with Plan7Architect
With Plan7Architect, you can create floor plans professionally and with ease. The software allows you to design using either metric or imperial units, making it suitable for international projects. You can plan walls, doors, windows, furniture, and installations exactly as described in this article and view them in 2D and 3D. If you are looking for a simple yet powerful solution for professional floor plan design, Plan7Architect is an excellent choice. As a customer, you have a 14-day money-back guarantee and can request a refund easily by email, which replaces the need for a test version.

Plan your project with Plan7Architect

Plan7Architect Pro 5 for Original price was: $259.99.$99.99Current price is: $99.99.
You don’t need any prior experience because the software has been specifically designed for beginners. The planning process is carried out in 5 simple steps:
1. Draw Walls

2. Windows & Doors

3. Floors & Roof

4. Textures & 3D Objects

5. Plan for the Building Permit

6. Export the Floor Plan as a 3D Model for Twinmotion

- – Compliant with international construction standards
- – Usable on 3 PCs simultaneously
- – Option for consultation with an architect
- – Comprehensive user manual
- – Regular updates
- – Video tutorials
- – Millions of 3D objects available
Why 85,000+ Home Planners Choose Plan7Architect
Why choose Plan7Architect over other home design tools?
Watch how a complete house is planned from start to finish – in under 25 minutes


Your Plan + AI
Plan your house in Plan7Architect and take it further with today’s AI tools. Your design stays exactly as you planned it.


Plan7ArchitectAI
Photorealistic AI Renderings
Turn any 3D view of your Plan7Architect project into a photorealistic image in seconds.
How to render your design with AI →Free prompt generator with 11 examples →
AI Videos of Your HouseNew
A short film like real drone footage, made from your Plan7Architect 3D views.
Material List & Cost Estimate
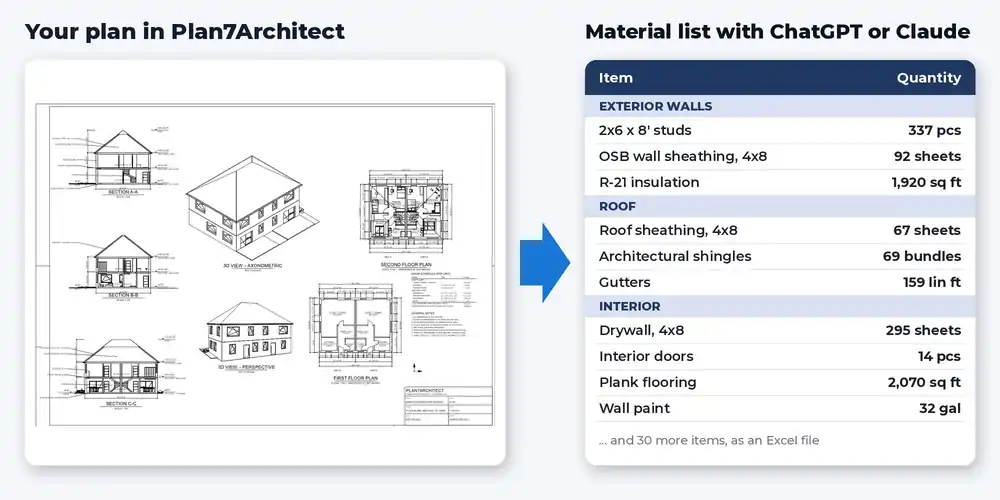
Export your plan as DXF and let ChatGPT or Claude create quantities and a cost estimate.

Digitize Floor Plans with AI
Paper, PDF or photo to an exact DXF file you can trace in Plan7Architect.
The 3 Plan7Architects

Suitable for small hobby projects
No garden planning and only limited floor plan creation with few wall types
★★★★★

For medium-sized projects
Unrestricted floor plan creation & garden planning
No export options for your architect and no plans for building permit applications
★★★★★
For projects of any size
Import & export for working with an architect
Create plans for real building permit applications
Much larger range of features than the other two versions
★★★★★
Verified Customer Reviews
More on this topic: Floor Plans & House Design Guides – all articles
You might also like:
- How to Draw a Floor Plan with Dimension Lines
- How to Draw Sloped Ceilings in a Floor Plan with Plan7Architect
- How to Find the Perfect Floor Plan – Step-by-Step Guide with Practical Tips
- How to Draw a Floor Plan by Hand – Step-by-Step Guide & Essential Tips
- How to Draw a Building Plan with Plan7Architect