If you want to create a floor plan of an old building—whether for renovation, documentation, or remodeling—Plan7Architect makes the process surprisingly simple and precise. I’ve used the software myself to map out the entire structure of an early 20th-century building, including irregular wall layouts, high ceilings, and historical design features. The process starts with taking accurate measurements and ends with a fully visualized and editable 3D model. You can use the software with both metric and imperial measurement systems, which is especially helpful if you’re working with original plans or collaborating with international teams.
Here’s how it works:
-
Measure your rooms manually or scan existing blueprints
-
Recreate the walls and spaces digitally in the 2D editor
-
Switch to 3D mode to check the structure visually
-
Add ceilings, multiple floor levels, and roof types
-
Include original elements like thick walls or wooden beams
-
Export your floor plan for renovation, visualization, or permit documentation
Step-by-Step: How to Digitize an Old Building Floor Plan
Step 1 – Take Measurements or Use Old Blueprints
In many older homes, blueprints either don’t exist anymore or don’t reflect the current state of the building after decades of changes. If you do have existing plans, you can scan and import them into Plan7Architect as a visual guide. I’ve done this myself when working with a client who found a blueprint from the 1970s. I layered it in the background and used it to trace the layout exactly.
If you’re starting from scratch, you’ll need to measure manually. Use a tape measure or laser distance measurer to record:
-
The length and width of each room
-
Wall thicknesses (often around 30 to 50 centimeters or 12 to 20 inches in old buildings)
-
Ceiling heights (usually higher than modern standards)
-
Window and door placements
Be aware of irregularities such as slanted walls, rounded corners, or niches. Older buildings were often constructed without today’s standardized angles and layouts, so accuracy is key here.
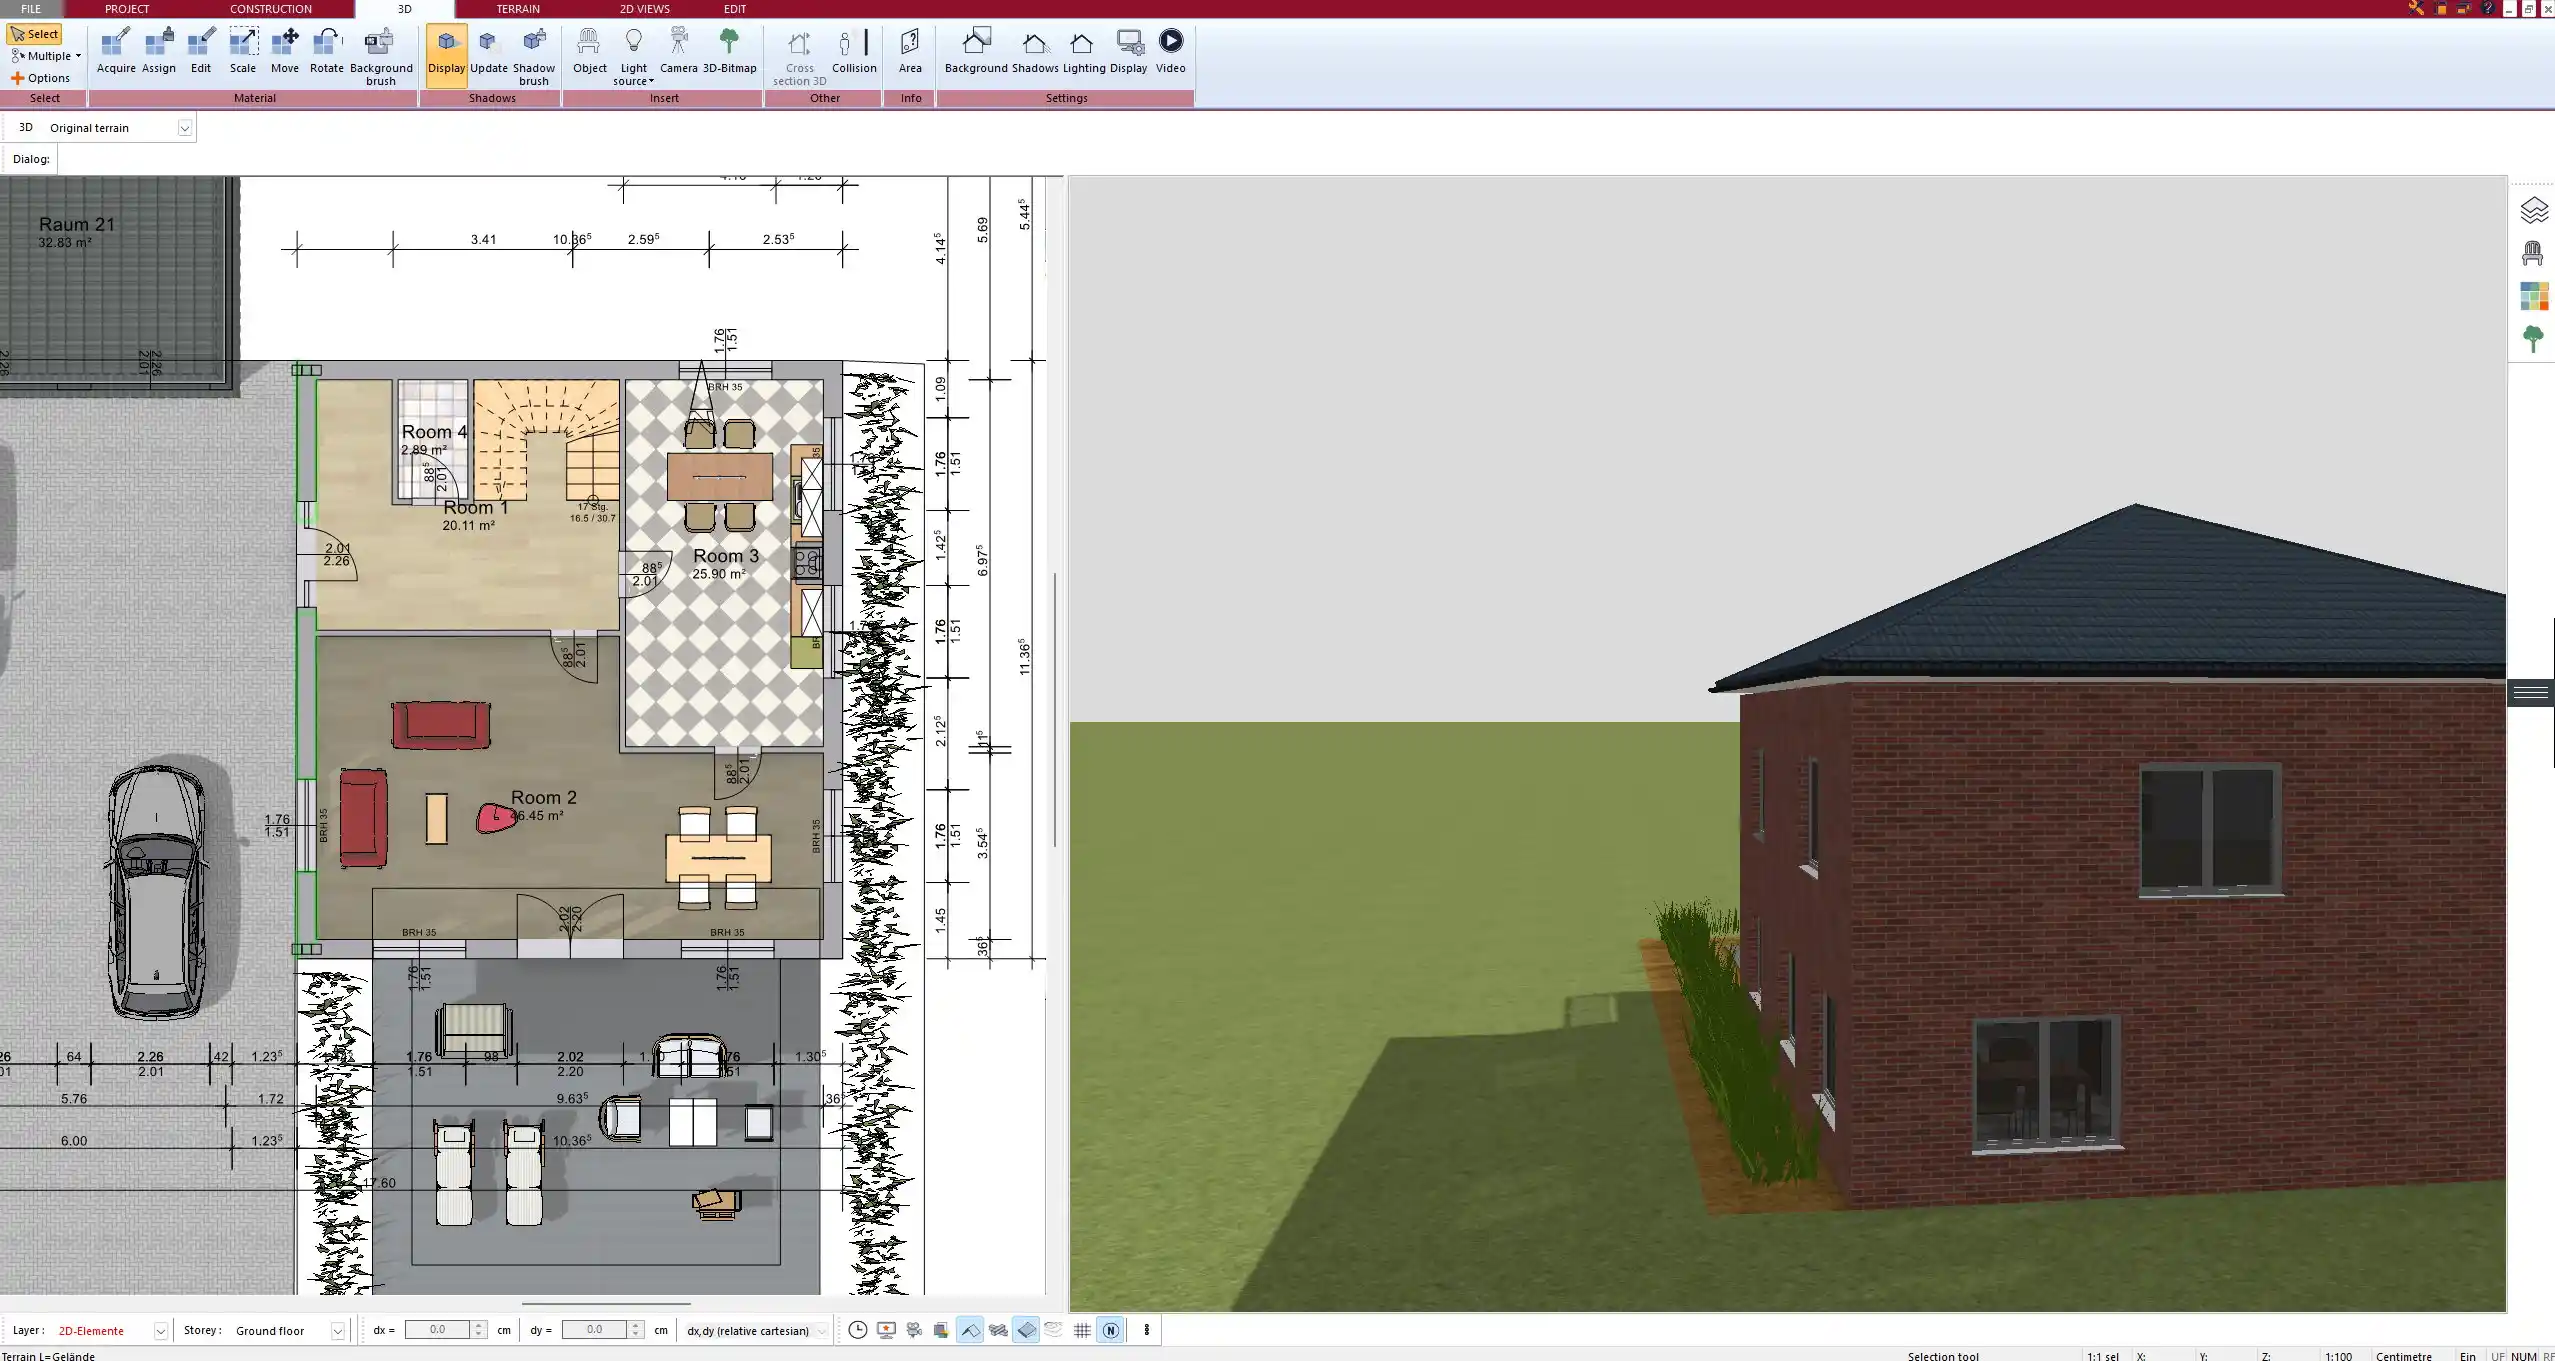
Step 2 – Create Walls and Rooms in 2D
Once you have your data, open the Plan7Architect 2D editor. Start by drawing exterior walls, adjusting the wall thickness as needed to reflect the real building. From my experience, this step is much smoother than using pen and paper, since the software allows snapping, alignment, and precise measurements. You can easily add interior walls, room divisions, and open areas like hallways.
Use the “free wall” tool if some walls are not at 90-degree angles or have custom shapes. The software also allows for curves and non-standard geometry, which I found particularly helpful when I had to recreate an old stairwell corner with a curved wall.
If the original house had split-level sections or different floor heights, you can set this accurately in the software using floor level settings. This becomes important later when adding stairs or roofs.
Step 3 – Add Historical Features
Older buildings often include architectural elements that modern software doesn’t always handle well—but Plan7Architect surprised me here. It offers tools to replicate:
-
Bay windows
-
Archways
-
Chimneys
-
Decorative ceilings
-
Exposed beams
You can modify textures and materials to reflect original surfaces like brick, plaster, or wood. I once created a digital twin of a historic timber-framed home and used custom textures from the software’s library to apply realistic wooden beam visuals in both 2D and 3D.
Tip:
Use the built-in object and material libraries to make your plan feel authentic. You can add wall finishes, flooring styles, and even antique furniture models to better visualize the final result.
Special Tools in Plan7Architect That Help with Old Buildings
Layer Management
When dealing with a renovation or conversion, layers become your best friend. I always create a separate layer for demolition—walls that are going to be removed—and another for new installations. That way, I can switch between the original and modified layouts with one click. This helps communicate your plan clearly to contractors or city officials.
You can also use layers for:
-
Plumbing
-
Electrical systems
-
Interior design variants
-
Furniture and decor layouts
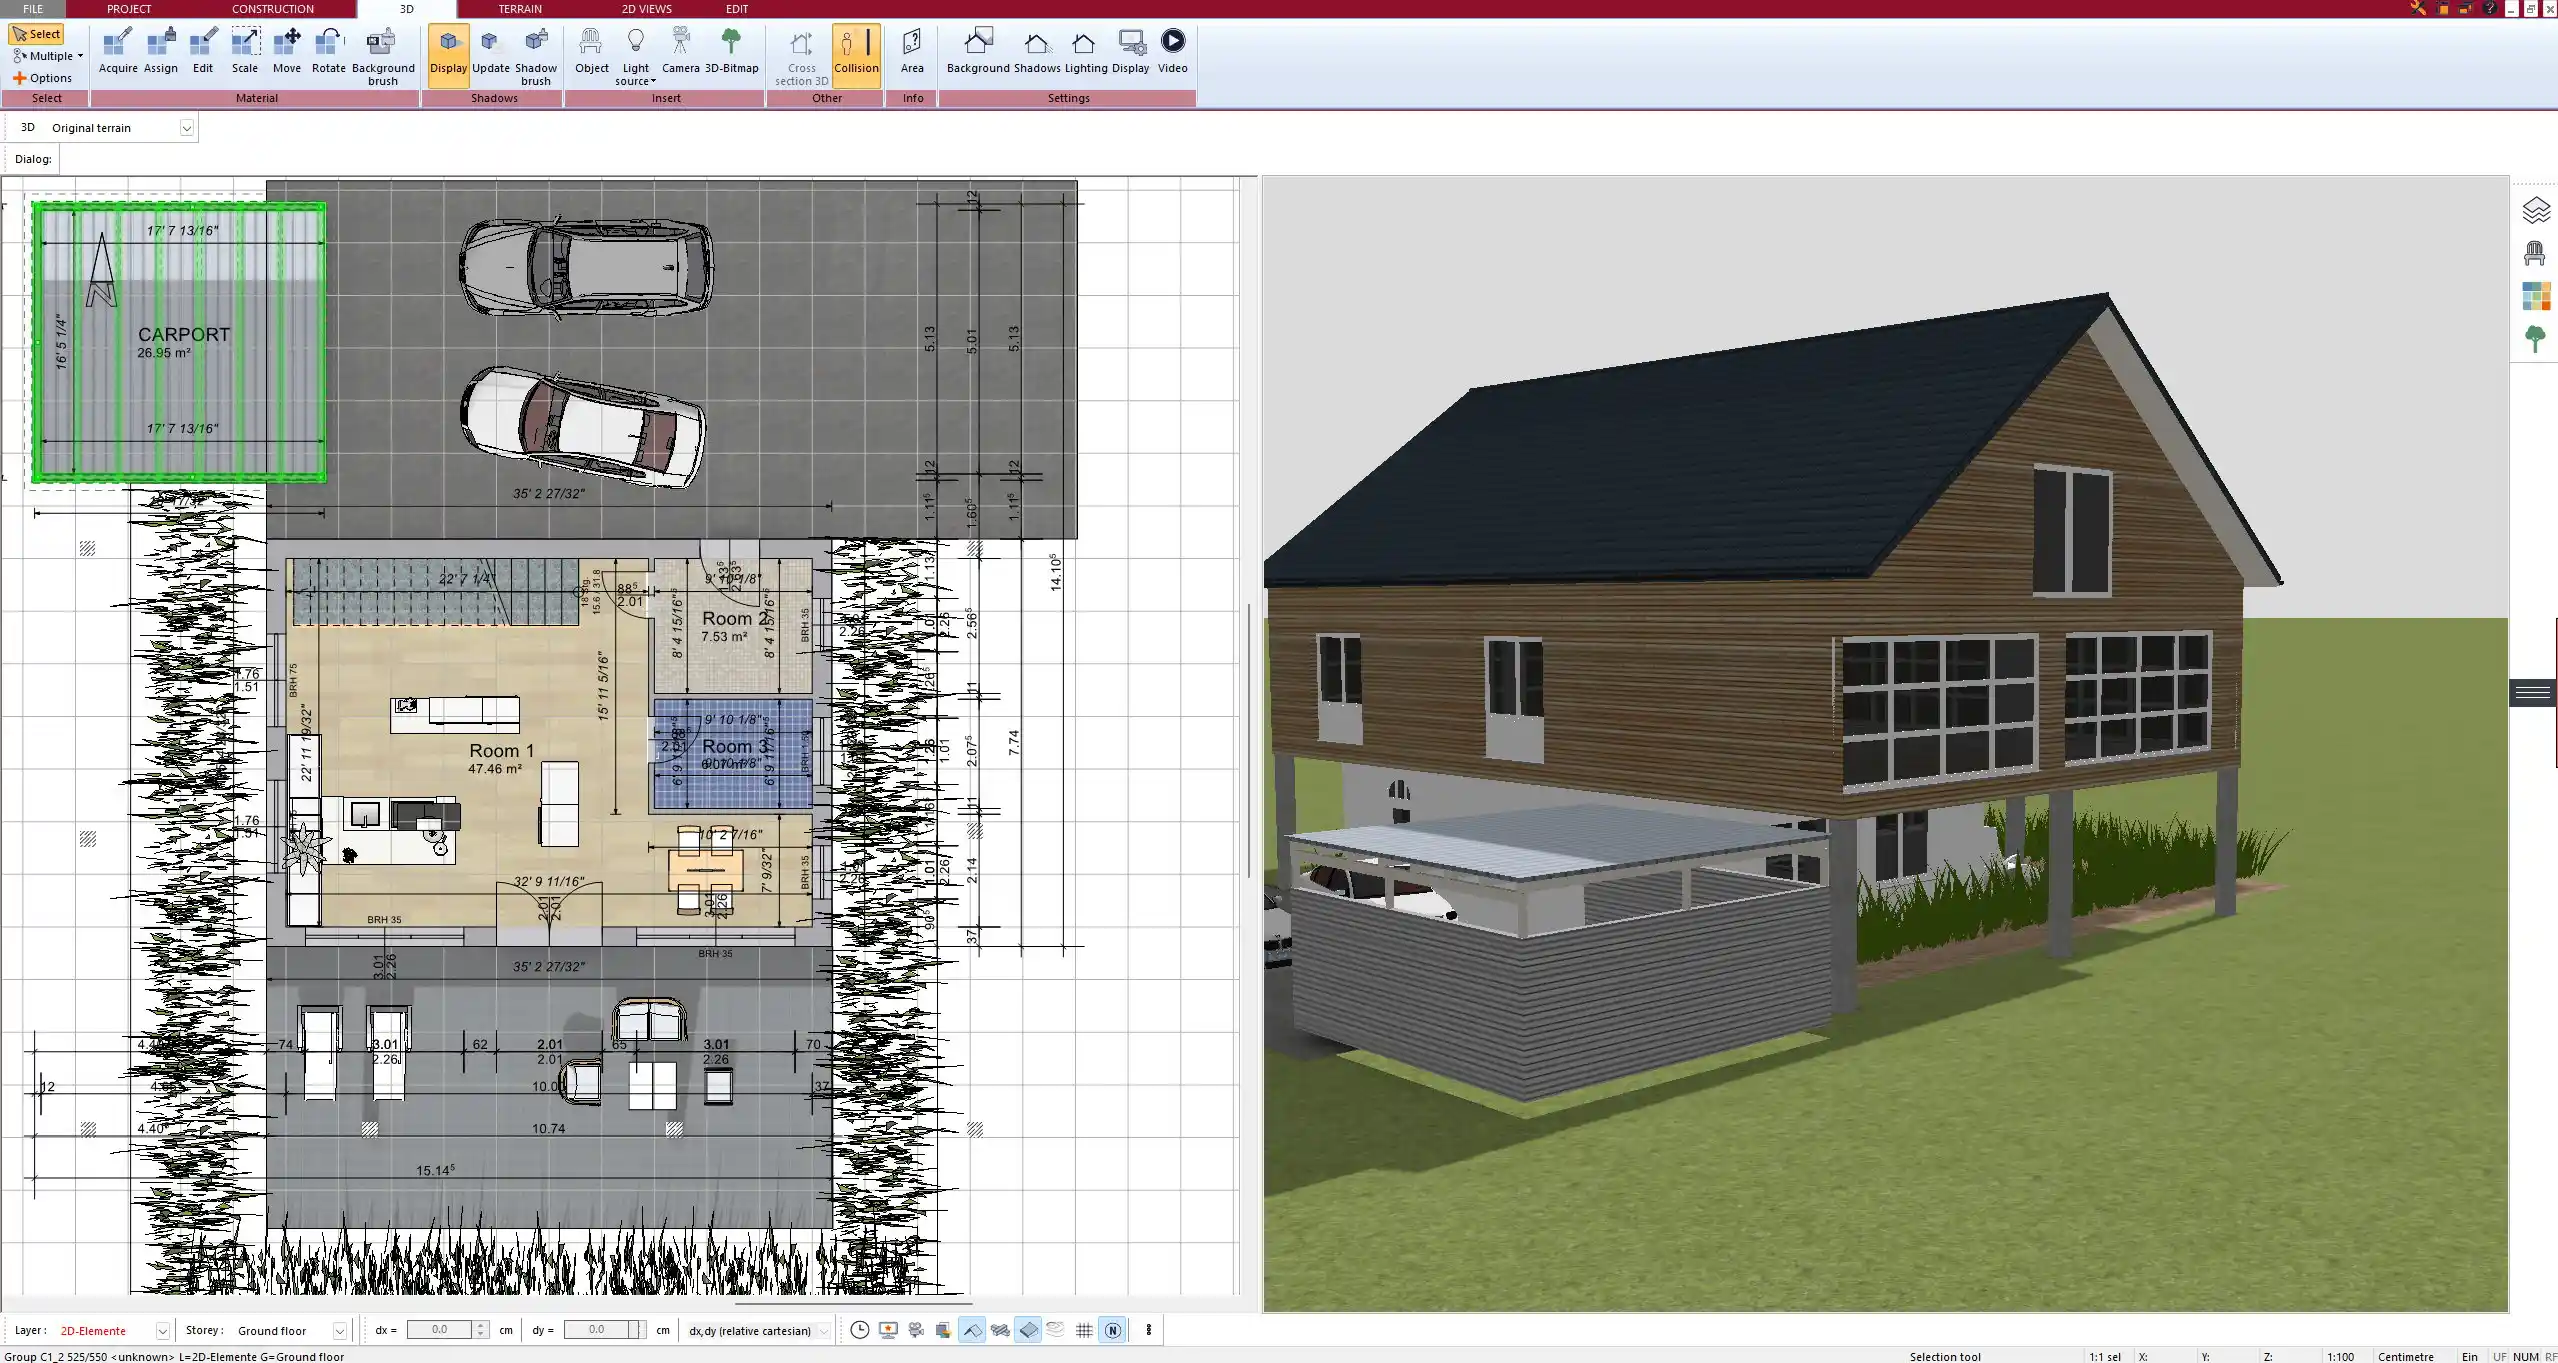
Work with Floors and Roofs
Old buildings rarely have a consistent ceiling height. In one of my projects, the attic had a 2.8 meter (or about 9.2 foot) peak height, while the adjacent room was only 2.4 meters high. In Plan7Architect, you can define different heights for each room or floor level.
Roofs are just as complex. Many older homes use steep-pitched roofs or multi-gable constructions. The software allows you to configure:
-
Mansard roofs
-
Hip and gable combinations
-
Dormers and skylights
-
Overhangs and roof breaks
You can also place beams manually using the timber construction tool if you want to simulate or update an old wooden roof.
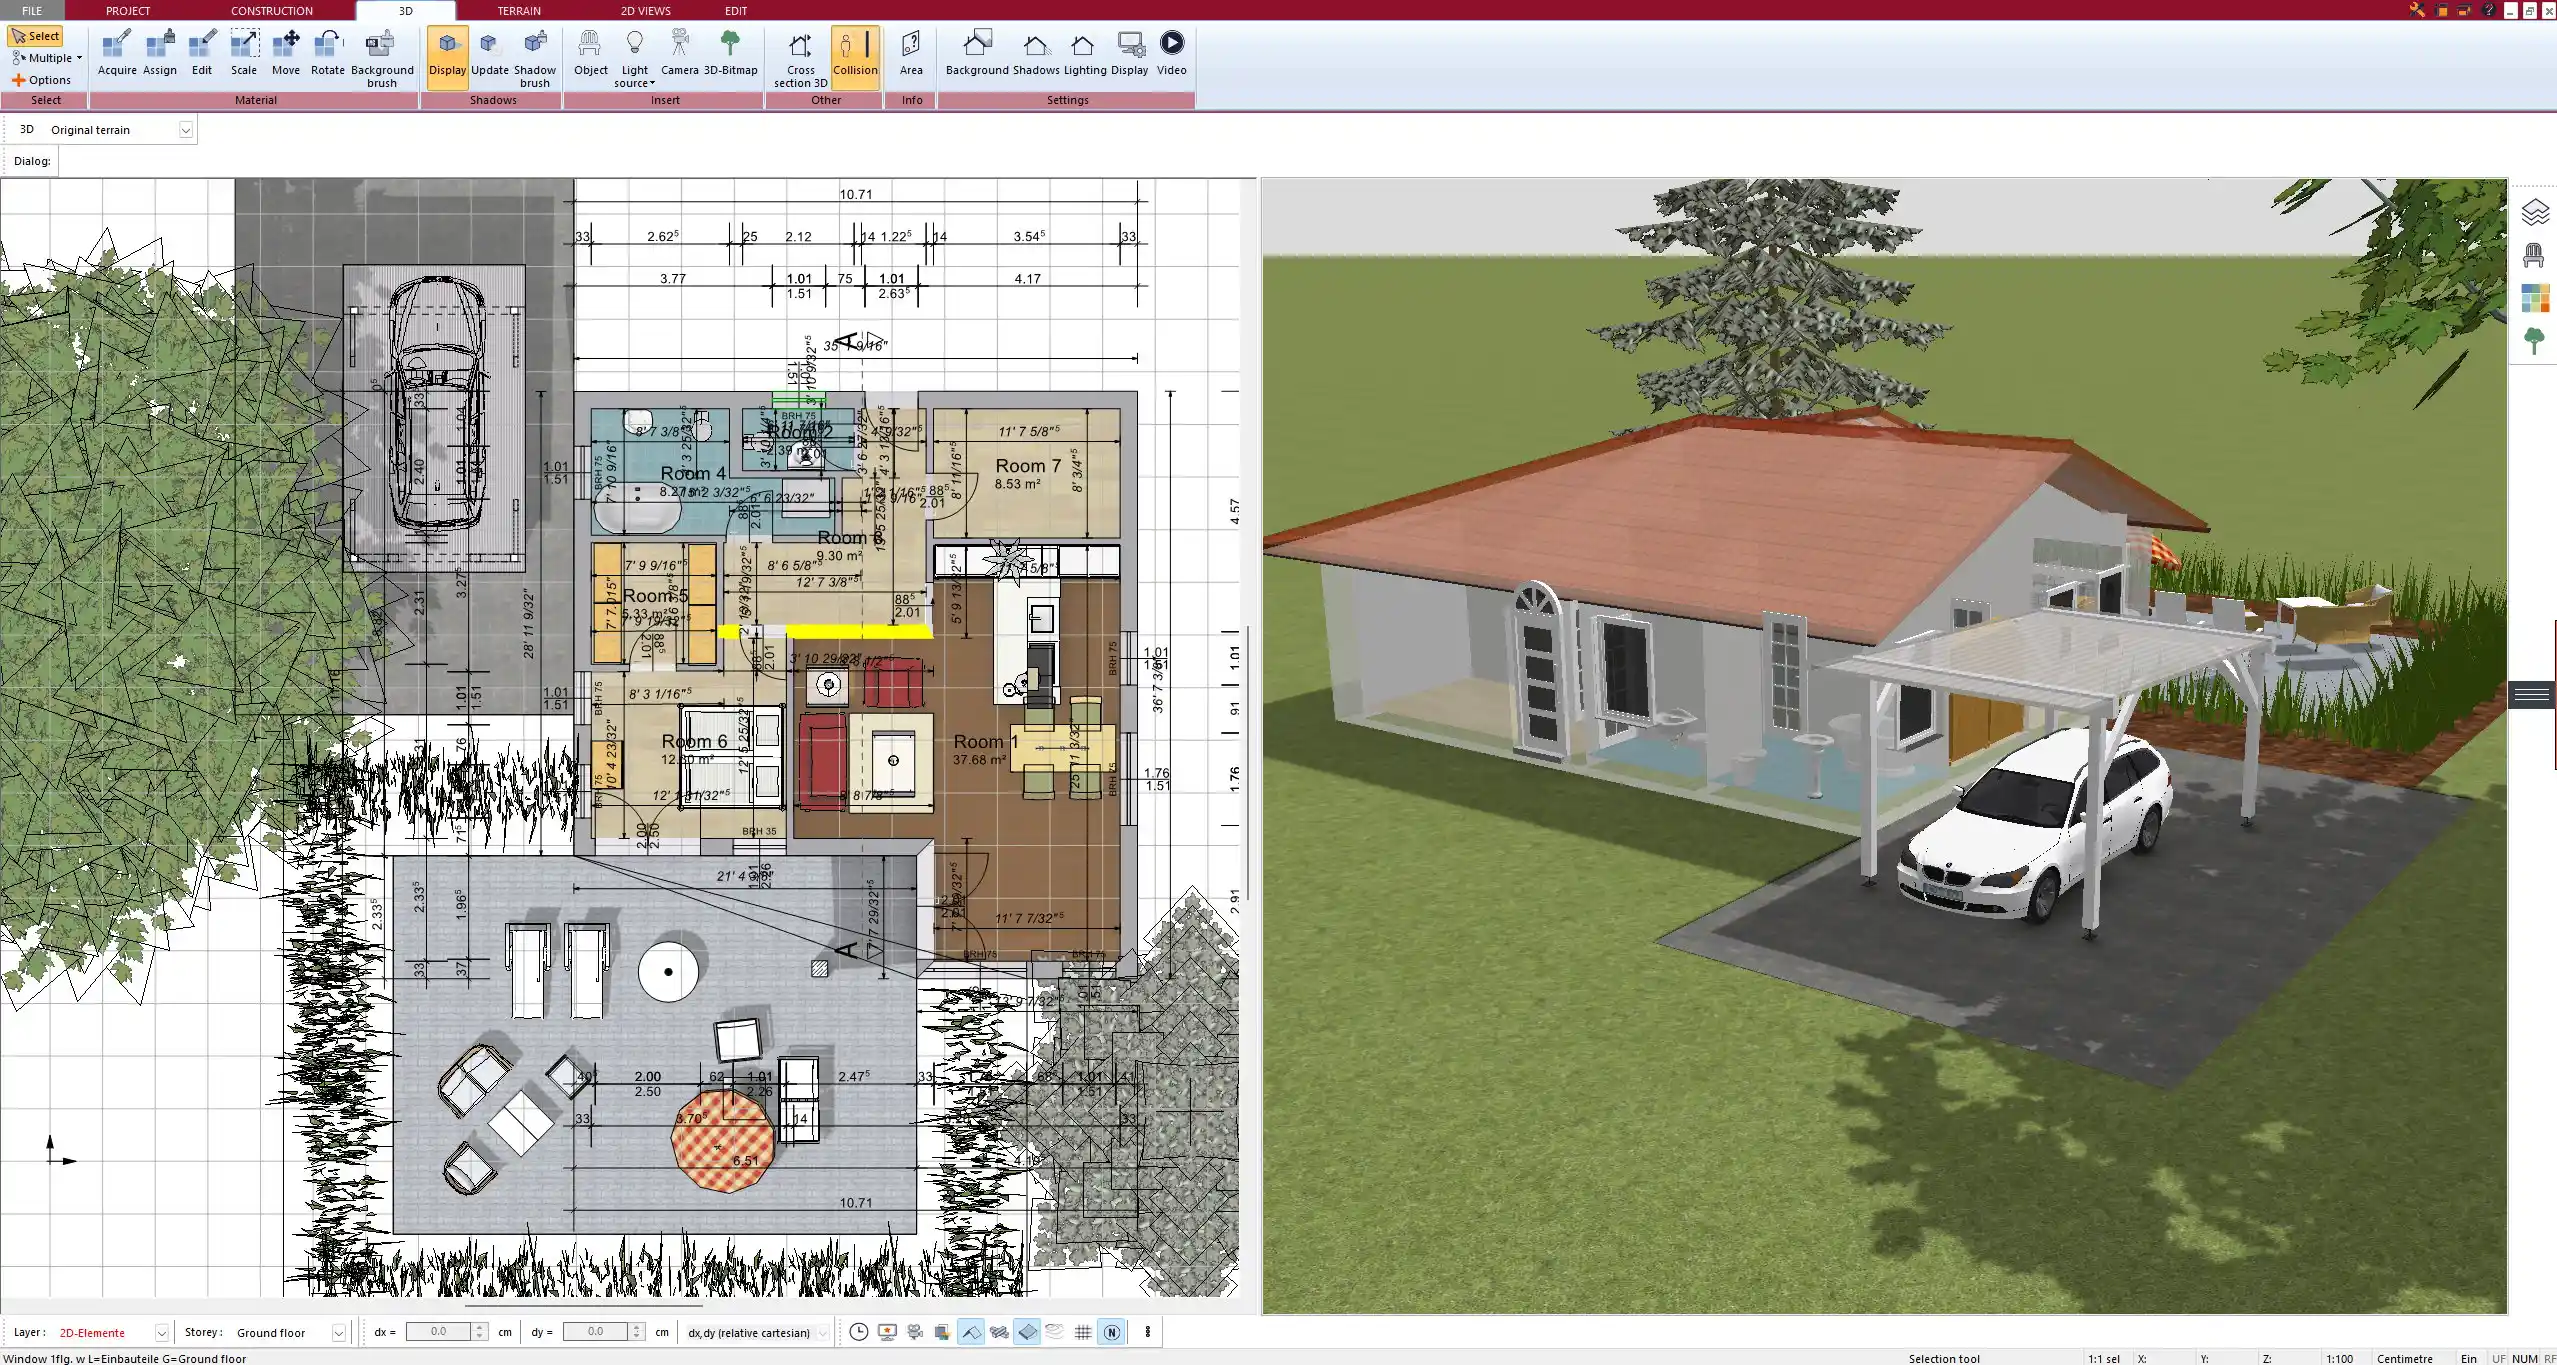
Use 3D Mode to Catch Mistakes
Switching from 2D to 3D is almost instant in Plan7Architect. I use this all the time to spot design errors I missed in 2D—like misplaced windows, uneven floor transitions, or missing ceiling closures. You can even simulate light and shadow to understand how natural light will fall into each room throughout the day.
In some older homes, daylight planning is crucial due to limited or oddly placed windows. With 3D rendering, you can virtually walk through the space and make decisions before anything is built or changed.
Exporting and Using the Old Building Floor Plan
Export Options
Plan7Architect supports all common export formats used internationally:
| Format | Use Case |
|---|---|
| Paper documentation or printable plans | |
| DWG/DXF | Collaboration with architects or authorities |
| JPG/PNG | Visuals for clients or marketing |
| 3D Formats | Presentations or VR walkthroughs |
You can set the scale manually and export in imperial or metric units depending on the project’s requirements. This is essential when sharing plans with contractors who are used to one system or the other.
Use for Construction, Renovation, or Real Estate
The finished plan is versatile. I’ve used mine to:
-
Apply for renovation permits
-
Communicate with interior designers
-
Present 3D visuals to potential buyers
-
Calculate surface areas for renovation quotes
-
Share with craftsmen or engineers
Plan7Architect allows you to save and duplicate your project in multiple stages, so you can create “before and after” versions to compare or present different concepts.
Practical Tips for Floor Plans in Older Homes
Older buildings require a bit more attention when planning. Based on multiple restoration projects I’ve handled with the software, here are some helpful notes:
-
Measure ceiling heights in every room separately—they may vary
-
Don’t assume floors are level; use a laser level if possible
-
Mark load-bearing walls clearly
-
Keep extra room for new insulation or HVAC installations
-
Check for hidden or closed-off areas like old chimneys or crawlspaces
-
Plan modern features like underfloor heating or smart home wiring in new layers
Tip:
Create multiple views of your plan—technical, electrical, and furnishing layers—so you can switch between renovation planning and visual presentation effortlessly.
Conclusion: Why Plan7Architect Is Ideal for Old Building Projects
Plan7Architect gives you all the tools you need to turn a centuries-old floor plan into a modern digital model. The interface is intuitive enough for personal use but powerful enough for professional renovation planning. Whether you’re creating a simple sketch or a complex renovation plan, it handles thick walls, angled layouts, complex roofs, and historic details with ease. You can switch between metric and imperial measurements any time, which makes it useful for international teams or mixed projects. Best of all, it’s a one-time purchase—no subscription—and comes with a 14-day money-back guarantee in case it’s not the right fit for you.
Plan your project with Plan7Architect

Plan7Architect Pro 5 for $99.99
You don’t need any prior experience because the software has been specifically designed for beginners. The planning process is carried out in 5 simple steps:
1. Draw Walls

2. Windows & Doors

3. Floors & Roof

4. Textures & 3D Objects

5. Plan for the Building Permit

6. Export the Floor Plan as a 3D Model for Twinmotion

- – Compliant with international construction standards
- – Usable on 3 PCs simultaneously
- – Option for consultation with an architect
- – Comprehensive user manual
- – Regular updates
- – Video tutorials
- – Millions of 3D objects available


