If you want to design a professional-looking show home floor plan yourself, you can easily do it with the Plan7Architect software. Start by creating a new project and choose whether you want to work with metric or imperial units. The software supports both European (meters, centimeters) and American (feet, inches) measurement systems, so you can work according to your local standards.
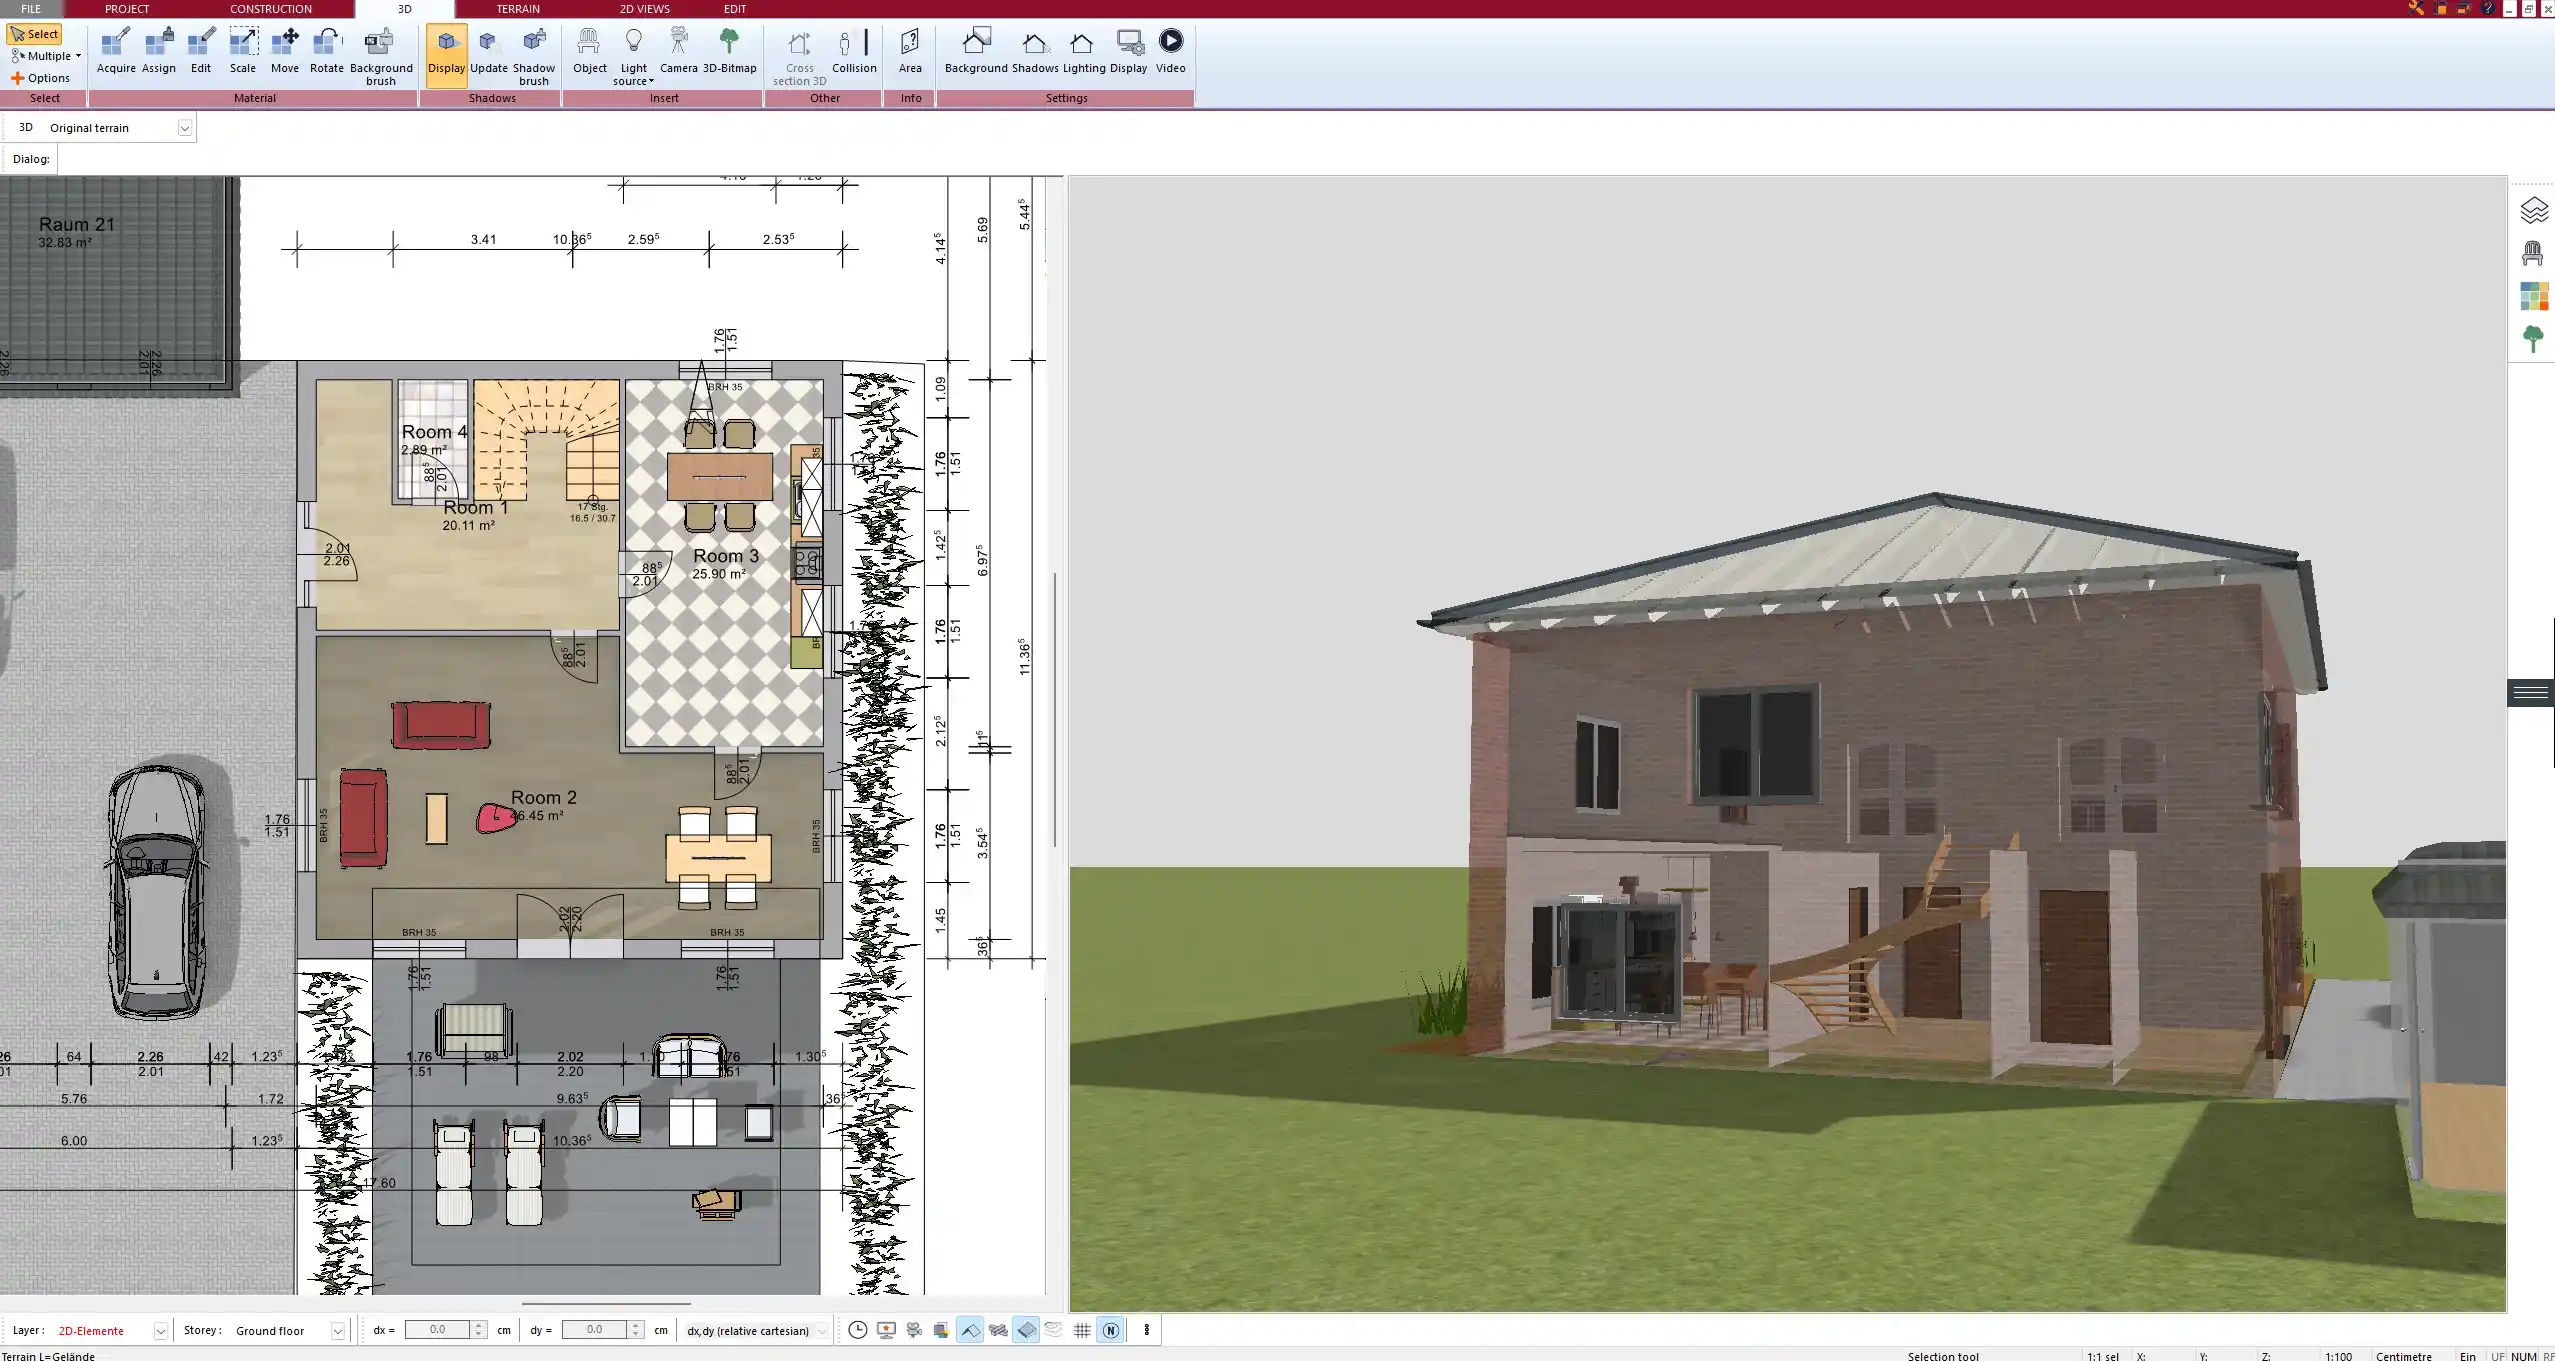
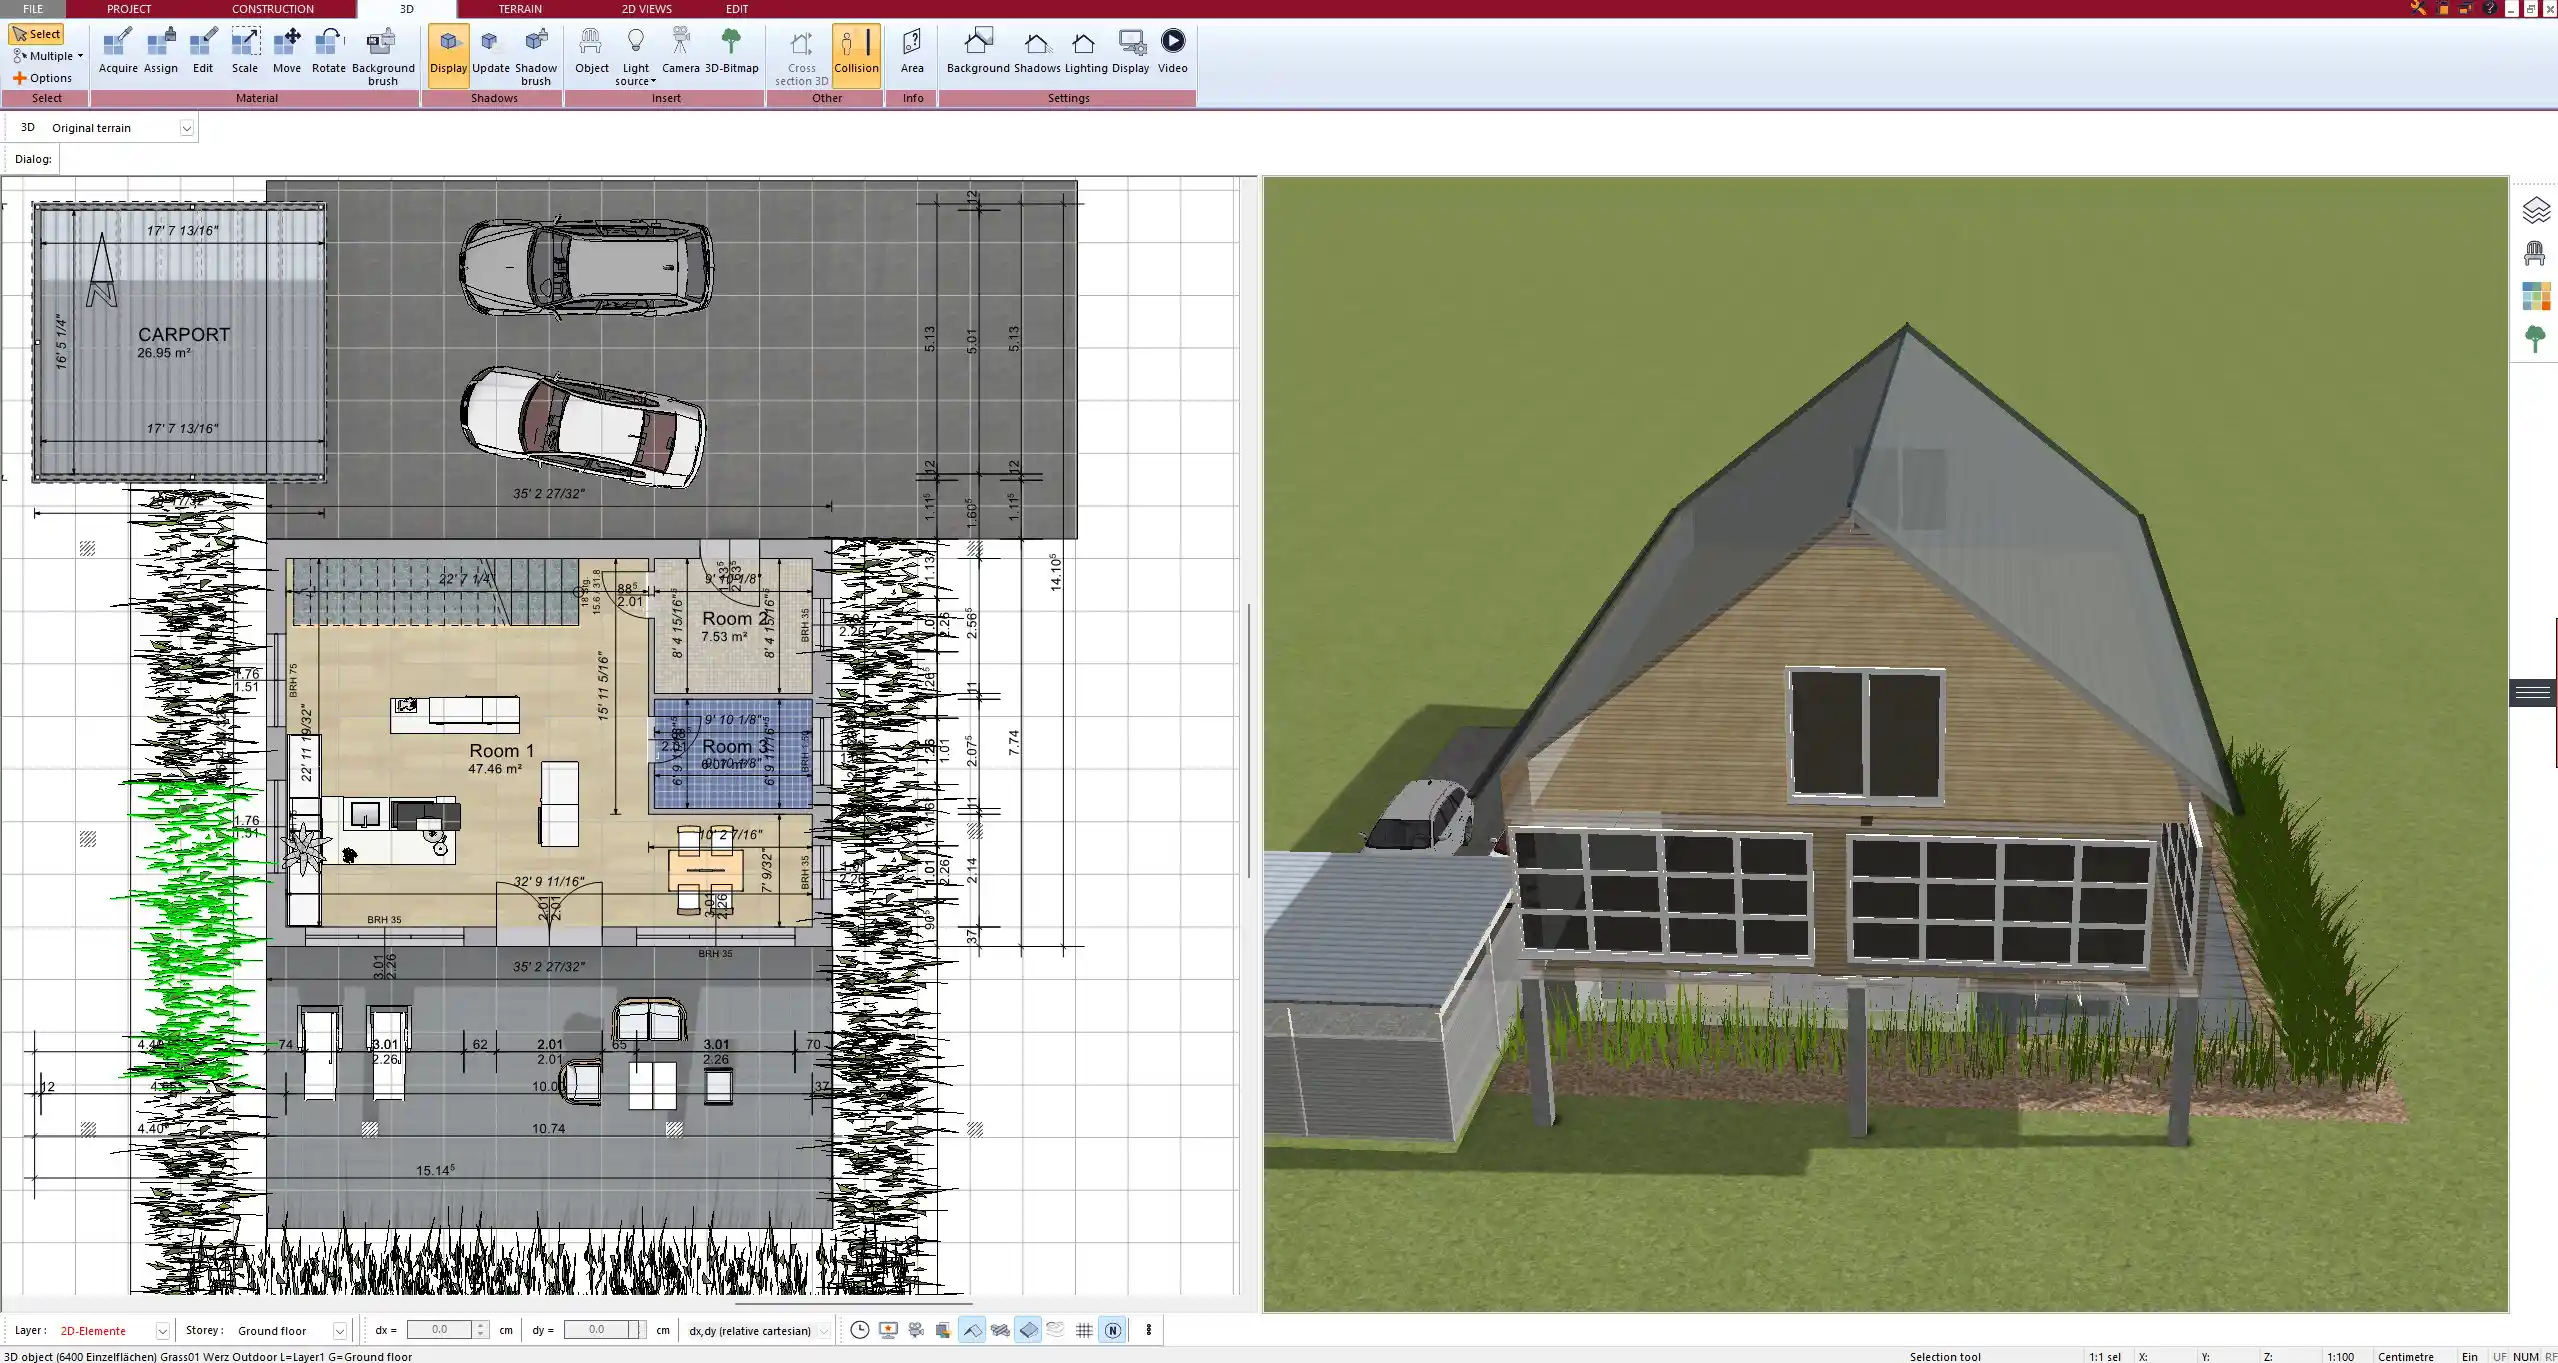
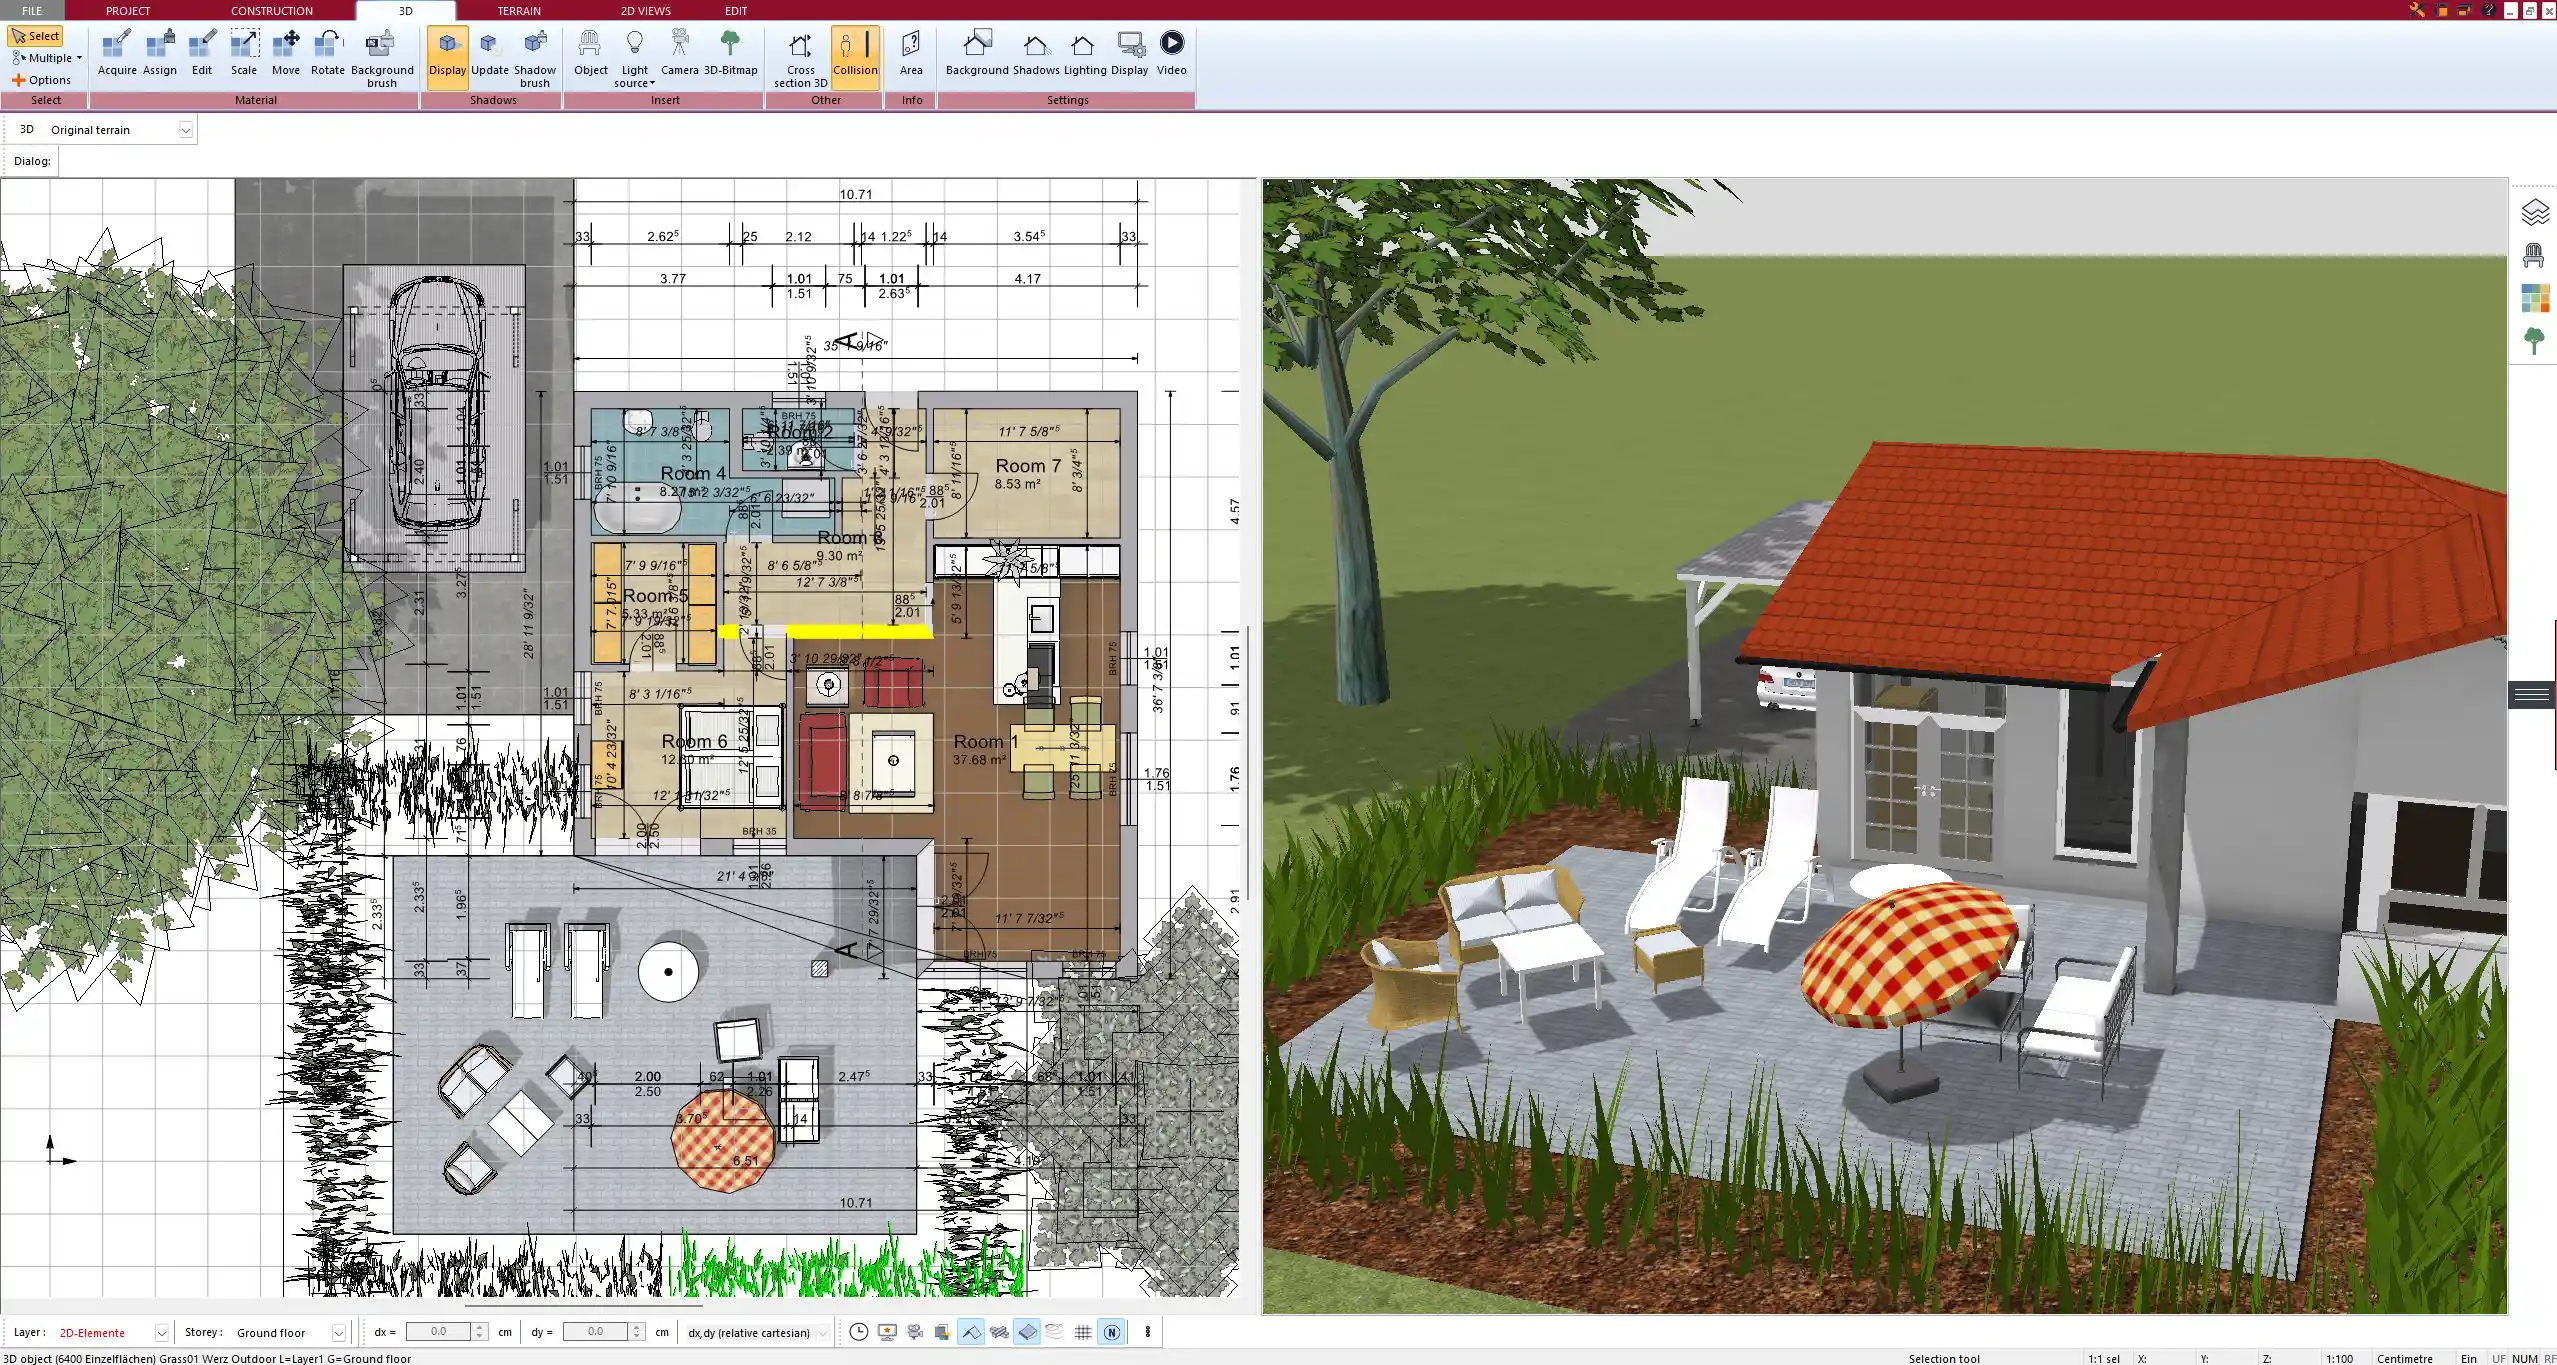
Draw the outer walls using the wall tool and define each wall’s dimensions, materials, and height. Add interior walls, windows, and doors by dragging them from the integrated object catalog. You can switch between 2D and 3D views at any time to check proportions and layout. Then furnish the rooms using pre-built furniture objects or by importing additional models from external libraries like SketchUp.
You can walk through the entire design in real time, simulate lighting and shadows, and generate high-quality 3D visuals. When the floor plan is complete, you can export it as a scaled PDF drawing, an image, or a 3D model for presentations.
Tip: Use the predefined object groups (e.g. complete kitchens, bathrooms) to save time and instantly give your show home a furnished, realistic feel.
What Makes a Good Show Home Floor Plan?
Clear Zones and Layout
A successful show home should have a well-structured layout with clearly separated functional zones. The entrance should feel open and inviting, leading logically into living areas such as the kitchen and living room. Private areas like bedrooms and bathrooms should be placed in more secluded parts of the layout. Always think about how guests and potential buyers will move through the space during a walkthrough.
Important layout considerations include:
-
Centralized living and dining spaces
-
Sightlines from the entry to the main living area
-
Separate guest and private zones
-
Direct access to outdoor spaces like terraces or patios
Balanced Size and Proportions
For most show homes, the total floor area should be realistic and achievable for future homeowners. A typical size range is between 100 and 150 square meters or 1000 to 1600 square feet. Within that space, the proportions should be balanced so that no room feels oversized or cramped.
Example size guidelines:
| Room Type | Metric Size Range | Imperial Size Range |
|---|---|---|
| Living Room | 25–35 m² | 270–380 ft² |
| Kitchen | 12–20 m² | 130–215 ft² |
| Bedroom | 10–18 m² | 110–195 ft² |
| Bathroom | 6–10 m² | 65–110 ft² |
Market-Specific Customization
Regional trends should always influence the design of a show home. In North America, show homes often include a garage and a basement, while in Southern Europe or Australia, outdoor terraces and large windows for passive cooling are more common. Modern designs now frequently feature a home office or flexible multipurpose room. These elements can be easily added and adjusted in Plan7Architect depending on your target audience.
Step-by-Step: Designing a Show Home in Plan7Architect
1. Set Up the Project and Choose Units
Begin by opening Plan7Architect and creating a new project. You’ll be asked to choose the unit system. Select either metric or imperial depending on the region for which you’re designing. This ensures that all dimensions, scale, and printed exports will be correct.
Tip: You can switch between unit systems later if needed. This is especially helpful if you’re working with clients or colleagues from different countries.
2. Draw the Building Outline
Use the wall tool to draw the external walls of the house. You can enter exact values for length, height, thickness, and material. Choose from different wall types depending on the structural concept. The snapping system and angle indicators help keep everything straight and aligned.
Define key structural features such as:
-
Floor height (e.g. 2.50 m or 8.2 ft)
-
Roof overhangs
-
Exterior cladding (e.g. plaster, wood, or brick)
3. Add Internal Structures
Switch to the 2D view and use the interior wall tool to divide the space into rooms. Use the door and window catalog to insert different types of elements with predefined measurements. You can adjust their placement using snapping points, or enter values manually for perfect positioning.
Popular insert options:
-
Sliding glass doors for terrace access
-
Floor-to-ceiling windows for the living room
-
Interior double doors for open-plan connections
4. Design Roofs, Terraces, and Outdoor Spaces
Plan7Architect lets you choose from various roof types including gabled, hipped, and flat roofs. You can draw the roof outline manually or use the automatic roof generator. For terraces, balconies, or porches, use the platform and railing tools.
If your show home is meant to showcase outdoor living, this is the stage to define garden areas, pool zones, or outdoor kitchens. These elements can be planned directly in the same floor plan.
5. Furnish and Decorate
Use the built-in catalog to furnish the home room by room. The software includes complete furniture sets for kitchens, bathrooms, bedrooms, and living areas. You can resize, rotate, and move every item freely.
For more advanced customization, you can import models from external platforms like SketchUp and save them to your own favorites catalog.
Use realistic elements such as:
-
Kitchen cabinets and appliances
-
Bathroom fittings with tiled walls
-
Sofas, dining tables, and beds
-
Decorative elements like carpets, plants, and artwork
6. Visualize in 3D and Make Adjustments
Switch to 3D mode to check the layout from every angle. You can walk through the project in real time, toggle walls on and off, and adjust the view height to simulate a standing person. Use the lighting simulation to test different times of day and shadow placements.
Add light sources and adjust brightness and color temperature to fine-tune the interior atmosphere.
Tip: Use the “Recalculate Shadows” button in the lighting settings if any surface textures don’t appear correctly at first.
7. Prepare Floor Plans and Exports
Once your show home design is complete, you can prepare technical floor plans with all necessary labels and measurements. These can be used for brochures, websites, or building permit submissions. You can export files as PDF, image (PNG, JPG), or CAD format (DWG, DXF). All exports can be scaled, for example 1:100 or 1/4″ = 1’.
You can also create presentation documents showing the 3D model from different angles. For high-end marketing visuals, you can export the model into Twinmotion and render photorealistic scenes.
Helpful Features of Plan7Architect for Show Homes
| Feature | Benefit |
|---|---|
| 2D & 3D Planning Modes | Allows seamless switching between technical layout and realistic preview |
| Realistic Lighting Simulation | Helps evaluate sunlight exposure and interior ambiance |
| Imperial & Metric Support | Suitable for international planning requirements |
| Object Library + SketchUp Link | Gives access to millions of furniture and decor elements |
| Construction-ready Exports | Enables generation of plans for permits and marketing use |
| Twinmotion Integration | Ideal for creating high-end 3D visuals and walkthroughs |
Common Questions When Creating a Show Home Floor Plan
Can I use real-world measurements and building codes?
Yes. Plan7Architect lets you input precise dimensions and apply construction layers according to international standards. You can also customize layers, materials, and text styles to match regional planning requirements.
Can multiple team members work on the same plan?
Yes. A single license allows you to install the software on up to three devices. This is perfect for sharing a project across different workstations or collaborating with a designer or assistant.
Can I showcase multiple versions of the same show home?
Yes. You can create multiple variations of the same layout within one project by duplicating levels or saving different versions under new project names. This is useful if you want to test different kitchen layouts, façade styles, or furniture arrangements.
Pro Tips for Better Show Home Planning
Tip: Create multiple furnishing variants like “minimalist,” “family-friendly,” or “luxury” so that potential buyers can better visualize their own lifestyle within the same floor plan.
Tip: Use the zone labeling feature to mark each room with names and sizes. This helps guide the viewer during presentations and allows better orientation in 2D exports.
Tip: Consider adding mirrored layouts or rotated versions for customers with specific land plots or driveway positions.
Tip: Use transparent walls or section cuts in 3D to showcase both layout and structure in a single view – perfect for marketing images or videos.
Plan your project with Plan7Architect

Plan7Architect Pro 5 for $99.99
You don’t need any prior experience because the software has been specifically designed for beginners. The planning process is carried out in 5 simple steps:
1. Draw Walls

2. Windows & Doors

3. Floors & Roof

4. Textures & 3D Objects

5. Plan for the Building Permit

6. Export the Floor Plan as a 3D Model for Twinmotion

- – Compliant with international construction standards
- – Usable on 3 PCs simultaneously
- – Option for consultation with an architect
- – Comprehensive user manual
- – Regular updates
- – Video tutorials
- – Millions of 3D objects available


