If you are looking to design a luxury, modern, or custom high-end home floor plan yourself, the good news is: yes, you can do it without hiring an architect. With Plan7Architect, you can create a detailed, professional designer home plan entirely on your own. The software provides intuitive 2D drawing tools and powerful 3D visualization features that allow you to design and explore your home exactly the way you imagine it.
The interface is built for private builders and design enthusiasts who want to have full control over layout, proportions, materials, and finishes—without a steep learning curve. You can switch between metric and imperial units at any time, so whether you’re used to working in meters and centimeters or in feet and inches, the software adapts to your preferences instantly.
Plan7Architect allows you to create custom walls, glass facades, floating staircases, interior zoning, roof designs, terraces, and more—all within one unified platform. No prior architectural knowledge is necessary.
What Defines a Designer Home Floor Plan?
Key Features of Designer Homes
Designer homes are more than just living spaces—they are architectural statements. When planning your own designer house, you’ll want to consider several signature elements that are typically associated with upscale residential architecture.
-
Large, open-concept living areas with seamless flow
-
Expansive windows and glass walls to maximize light and views
-
Clean, minimalistic lines and symmetry in layout
-
Custom-designed kitchens with islands and built-in features
-
Master suites with spa bathrooms, walk-in closets, and private terraces
-
Integrated outdoor living areas such as roof decks, patios, and pools
-
Architectural features like floating stairs, skylights, and gallery walls
Planning Needs for Designer Homes
Designing a luxury home requires more than placing rooms on a floor plan. You need to think in layers—structure, lighting, mood, flow, and even future upgrades. Plan7Architect helps you focus on these needs with tools for precise spatial planning and real-time 3D feedback.
Modern designer homes also increasingly integrate:
-
Smart home features: lighting, heating, security
-
Energy-efficient design: passive solar, insulation zones, green roofs
-
Unconventional room layouts: wellness areas, in-home studios, split levels
Step-by-Step – How to Design a Designer Floor Plan with Plan7Architect
Step 1 – Set Up Your Project
Start by creating a new project in Plan7Architect. Choose your preferred unit system—metric or imperial—depending on your region or comfort level. You can always change this later. Define your building’s basic properties: wall thickness, ceiling height, and number of floors.
You also decide at this point whether you want a flat terrain, a sloped one, or a specific topography around the house. For designer homes, even the environment is part of the design.
Step 2 – Create the Building Envelope
Use the 2D mode to draw your building outline. You can either use predefined shapes or completely free-draw every wall segment. Designer homes often feature asymmetrical or L-shaped layouts, and the software allows you full flexibility here.
You can add oversized glass walls, recessed entries, cantilevered elements, and flat or sloped roof sections. Floor-to-ceiling windows and frameless sliding doors can be placed exactly where you want them.
Step 3 – Configure the Interior Layout
Once your outer shell is in place, switch to designing the interior. Use the wall tool to divide your spaces into zones: living, sleeping, utility, wellness, and entertainment. With Plan7Architect, you can easily plan:
-
Open kitchen-dining-living combinations
-
Double-height living rooms with galleries
-
Walk-in pantries and closets
-
Master suites with en-suite spa bathrooms
-
Multi-purpose guest or hobby rooms
You can experiment with curved walls, niches, integrated storage, and even floating walls that don’t touch the ceiling. Everything can be customized.

Step 4 – Add Premium Interior Design Elements
Import luxury furnishings and designer objects from the integrated SketchUp 3D Warehouse. This includes designer sofas, kitchen islands, wall-mounted fireplaces, sculptural bathtubs, and much more.
Assign materials like polished concrete, dark wood, or natural stone to walls and floors. Upload your own textures if needed or choose from a rich catalog of materials. You can even create moodboards within the software by saving sets of materials and furnishings as reusable templates.
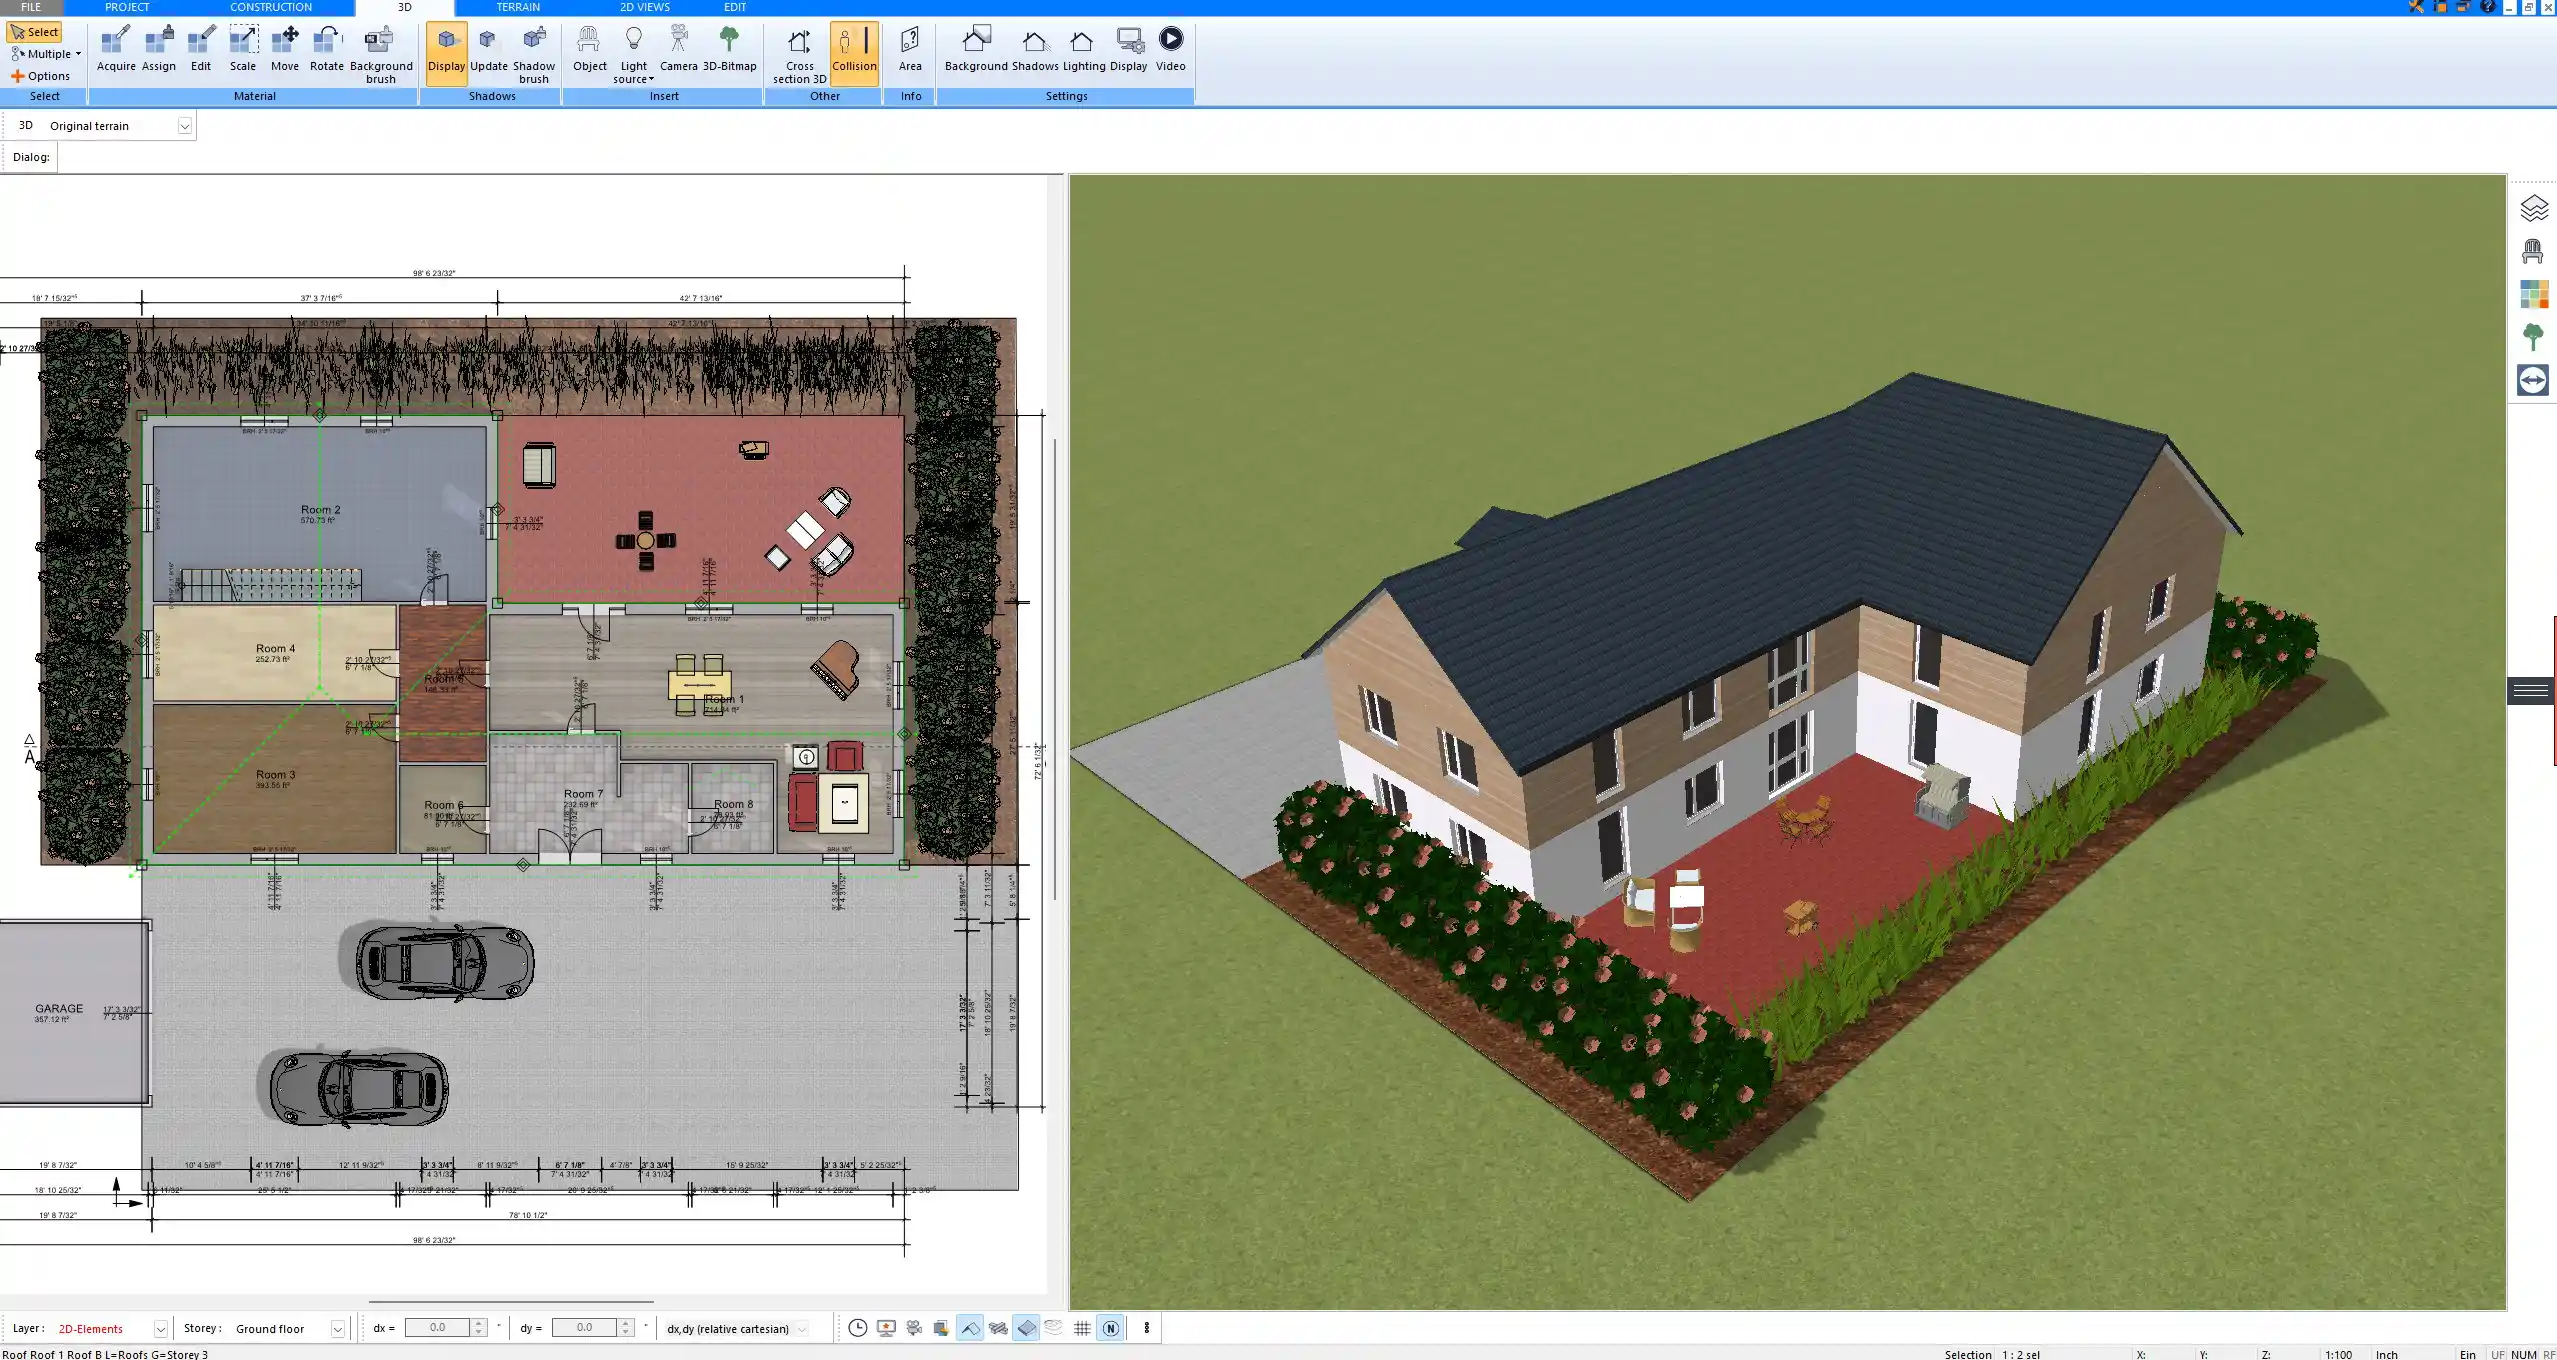
Step 5 – Visualize Your Design in 3D
Switch to the 3D view and walk through your project in real-time. This mode gives you a perfect understanding of scale, proportions, lighting, and atmosphere.
You can enter each room virtually, check visibility lines, test different lighting settings, and adjust materials as you go. If you plan open spaces with high ceilings or large windows, this 3D view is essential to catch design flaws early and experiment with variations.
Step 6 – Generate Plans and Views
Once your design is complete, you can generate:
-
Floor plans with exact dimensions and labels
-
Section views (vertical cuts)
-
Elevation drawings (facade views)
-
Roof and terrain plans
-
Export files for permits or contractors
You can print or export your plans in image, PDF, DWG, or DXF format. Scaling is fully customizable, which is particularly helpful when working with builders or authorities in different countries.
Advanced Tools for High-End Planning
Roof, Terrain, and Exterior Zones
You can model flat roofs, green roofs, and complex geometric designs like butterfly or multi-angled roofs. The software also lets you define slopes and drainage, as well as place elements like skylights, solar panels, or rooftop decks.
The terrain editor lets you shape outdoor areas, such as:
-
Garden landscapes
-
Swimming pools and water features
-
Driveways and pergolas
-
Outdoor lounges and firepits
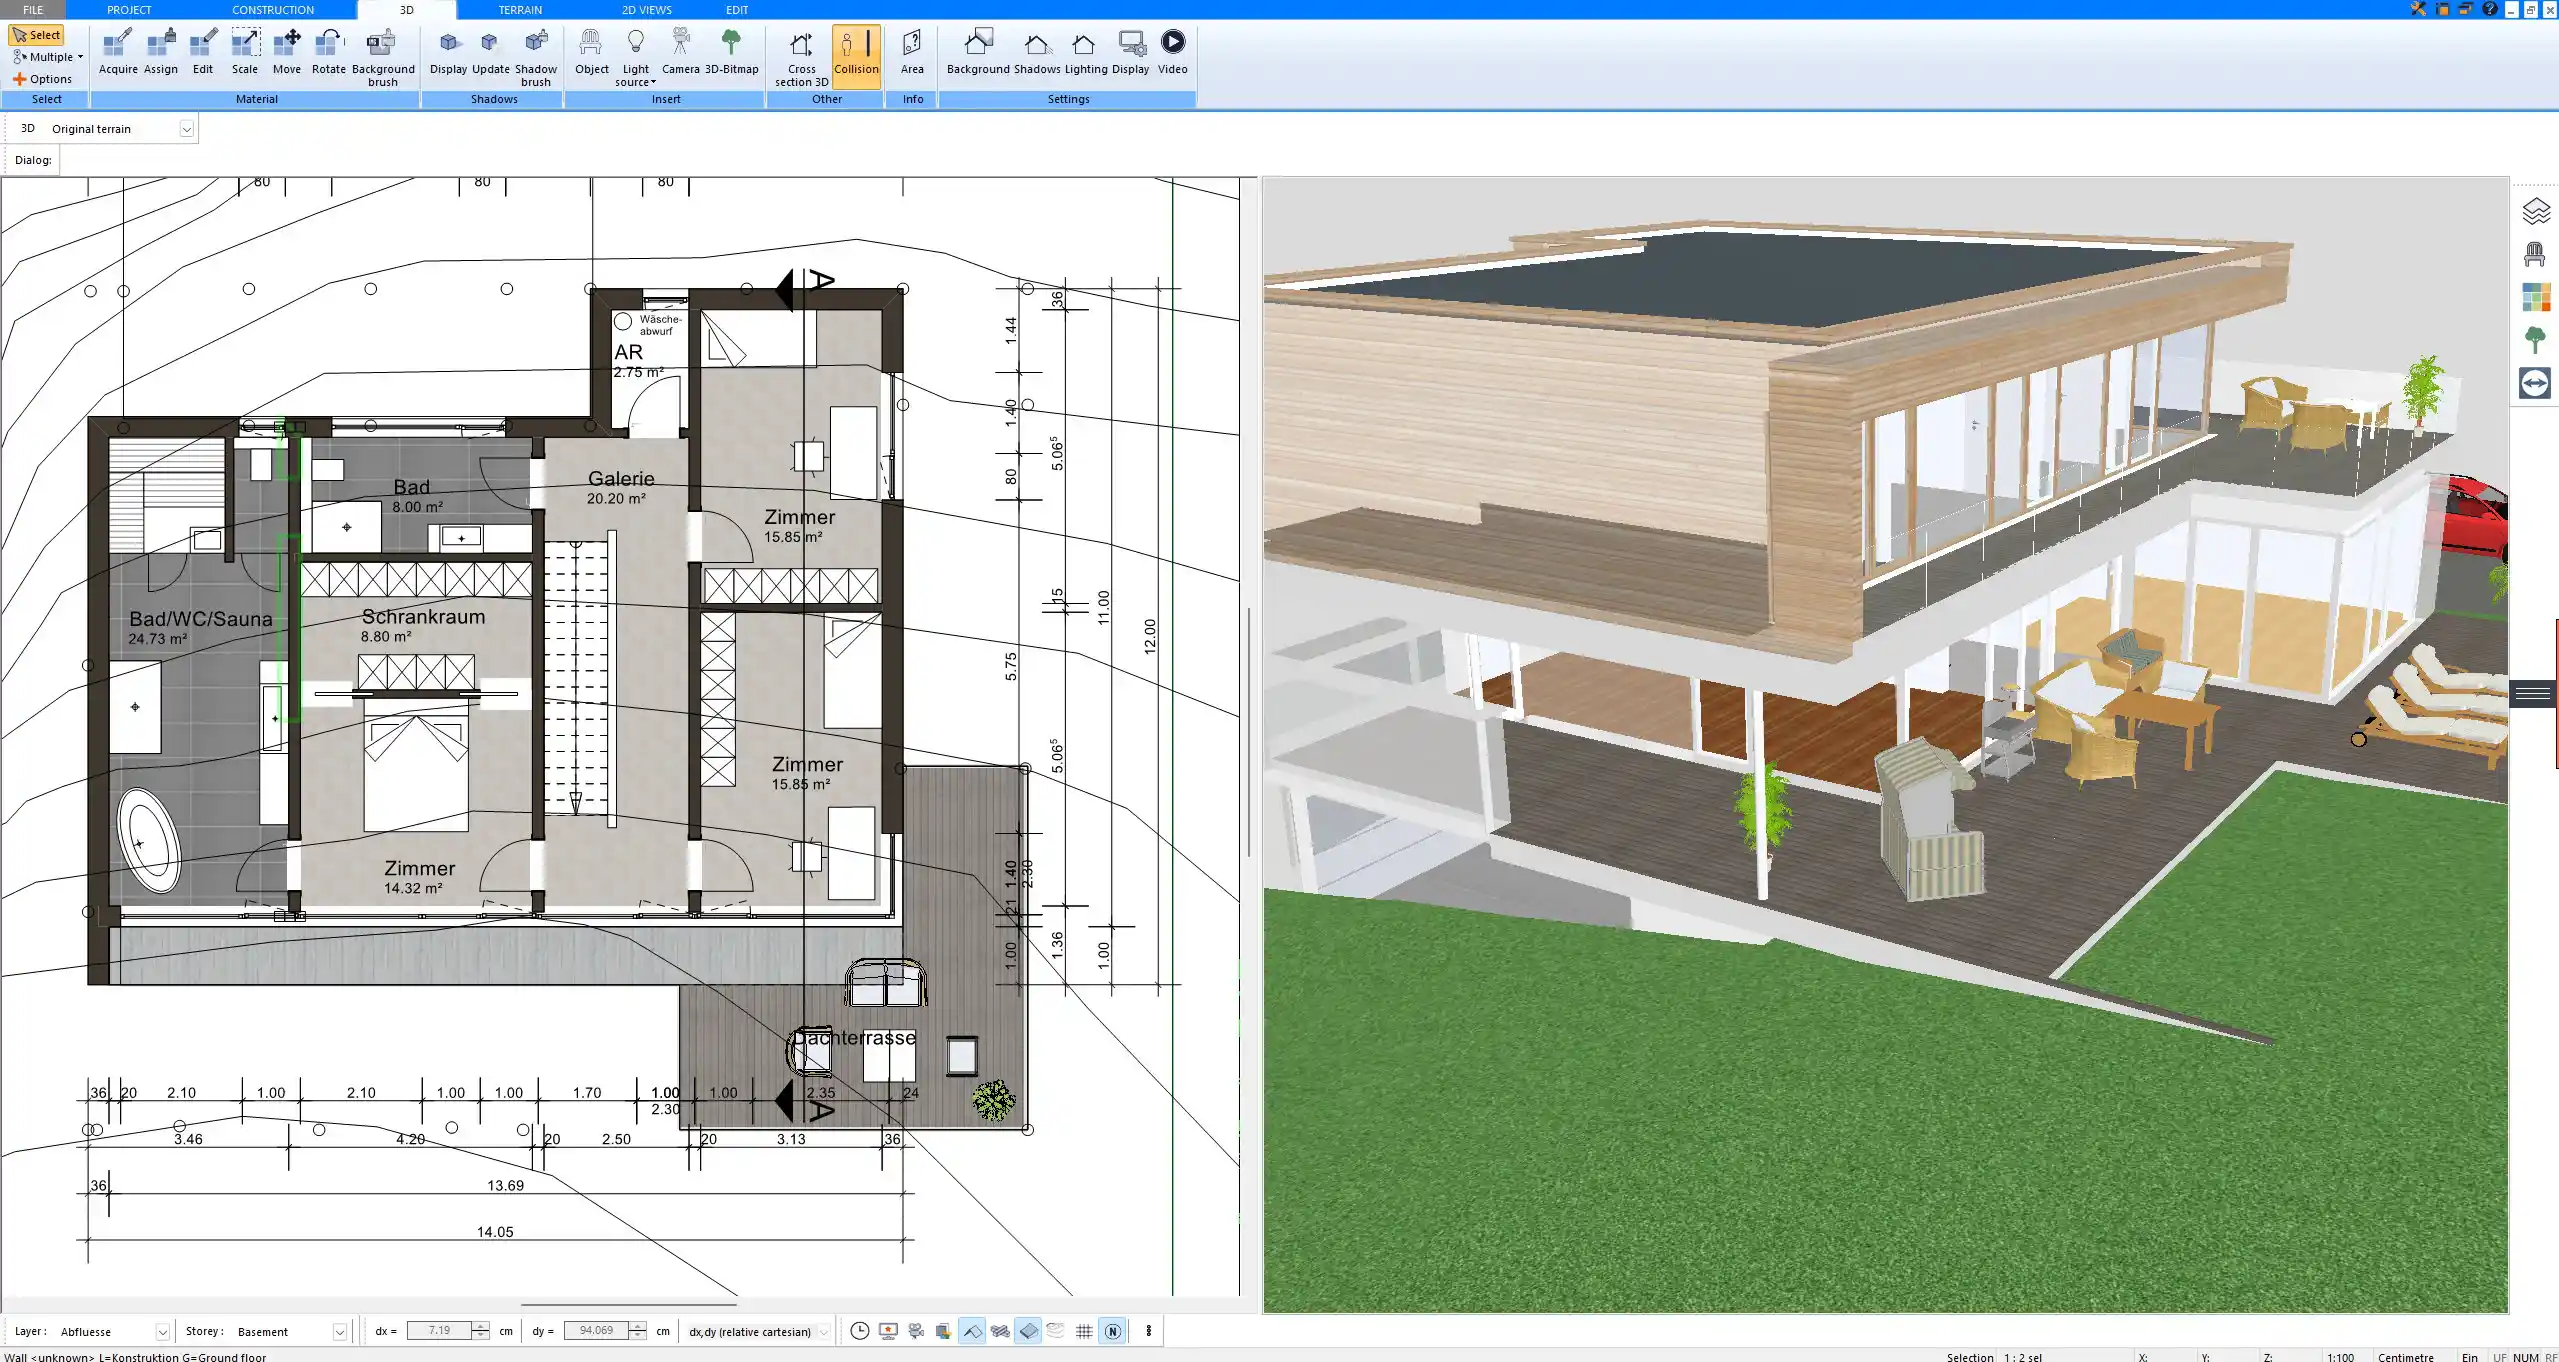
Multi-Storey Designer Homes
If you’re planning a house with multiple levels, Plan7Architect makes it simple to define separate storeys and connect them via staircases or open voids. You can model:
-
Floating mezzanines
-
Split levels
-
Roof lounges
-
Basement garages
Each floor can be designed independently but linked visually in the 3D view.
Smart Features
Plan7Architect includes symbols and components for:
-
Electrical outlets, lights, and switches
-
Plumbing and ventilation
-
Smart home tech hubs
-
Heating and air conditioning layouts
You can preview where your sunlight will fall throughout the day and adjust your layout accordingly for better energy performance.
Example Layout Elements for Designer Homes
| Area | Recommended Features |
|---|---|
| Kitchen | Cooking island, minimalist cabinetry, hidden appliances |
| Master Suite | Spa bath, custom walk-in, private access to balcony or terrace |
| Living Room | Open to above, panoramic windows, fireplace as room divider |
| Office / Studio | Sound-insulated walls, creative lighting, garden-facing windows |
| Outdoor Spaces | Infinity pool, dining pergola, outdoor cinema or sauna |
Pro Tips for Planning Like an Architect
-
Align windows and doors symmetrically across facades for a clean modern look
-
Use zones of varying ceiling heights to define space without walls
-
Place large windows toward the south (or north in the Southern Hemisphere) to optimize natural light
-
Plan your lighting early – mix direct, ambient, and decorative lights
-
Leave technical zones accessible for future smart home installations
Tip: You can import a rough sketch (hand-drawn or digital) as a background image in Plan7Architect and trace over it in 2D mode. This speeds up the process and ensures your vision stays intact from concept to final layout.
Why Plan7Architect Is Ideal for Designer Homes
-
One-time purchase – no subscription fees
-
Works on up to 3 devices at the same time
-
2D and 3D planning in a single interface
-
Import/export DWG, DXF, PDF, image formats
-
Use metric or imperial units without conversion hassle
-
Includes powerful terrain and roof editing tools
-
14-day money-back guarantee – no risk, no subscription trap
If you’re serious about designing a home that reflects your lifestyle and aesthetic standards, Plan7Architect gives you the tools to do it yourself—accurately, beautifully, and without the high costs of hiring a full-service architect.
Plan your project with Plan7Architect

Plan7Architect Pro 5 for $169.99
You don’t need any prior experience because the software has been specifically designed for beginners. The planning process is carried out in 5 simple steps:
1. Draw Walls

2. Windows & Doors

3. Floors & Roof

4. Textures & 3D Objects

5. Plan for the Building Permit

6. Export the Floor Plan as a 3D Model for Twinmotion

- – Compliant with international construction standards
- – Usable on 3 PCs simultaneously
- – Option for consultation with an architect
- – Comprehensive user manual
- – Regular updates
- – Video tutorials
- – Millions of 3D objects available


