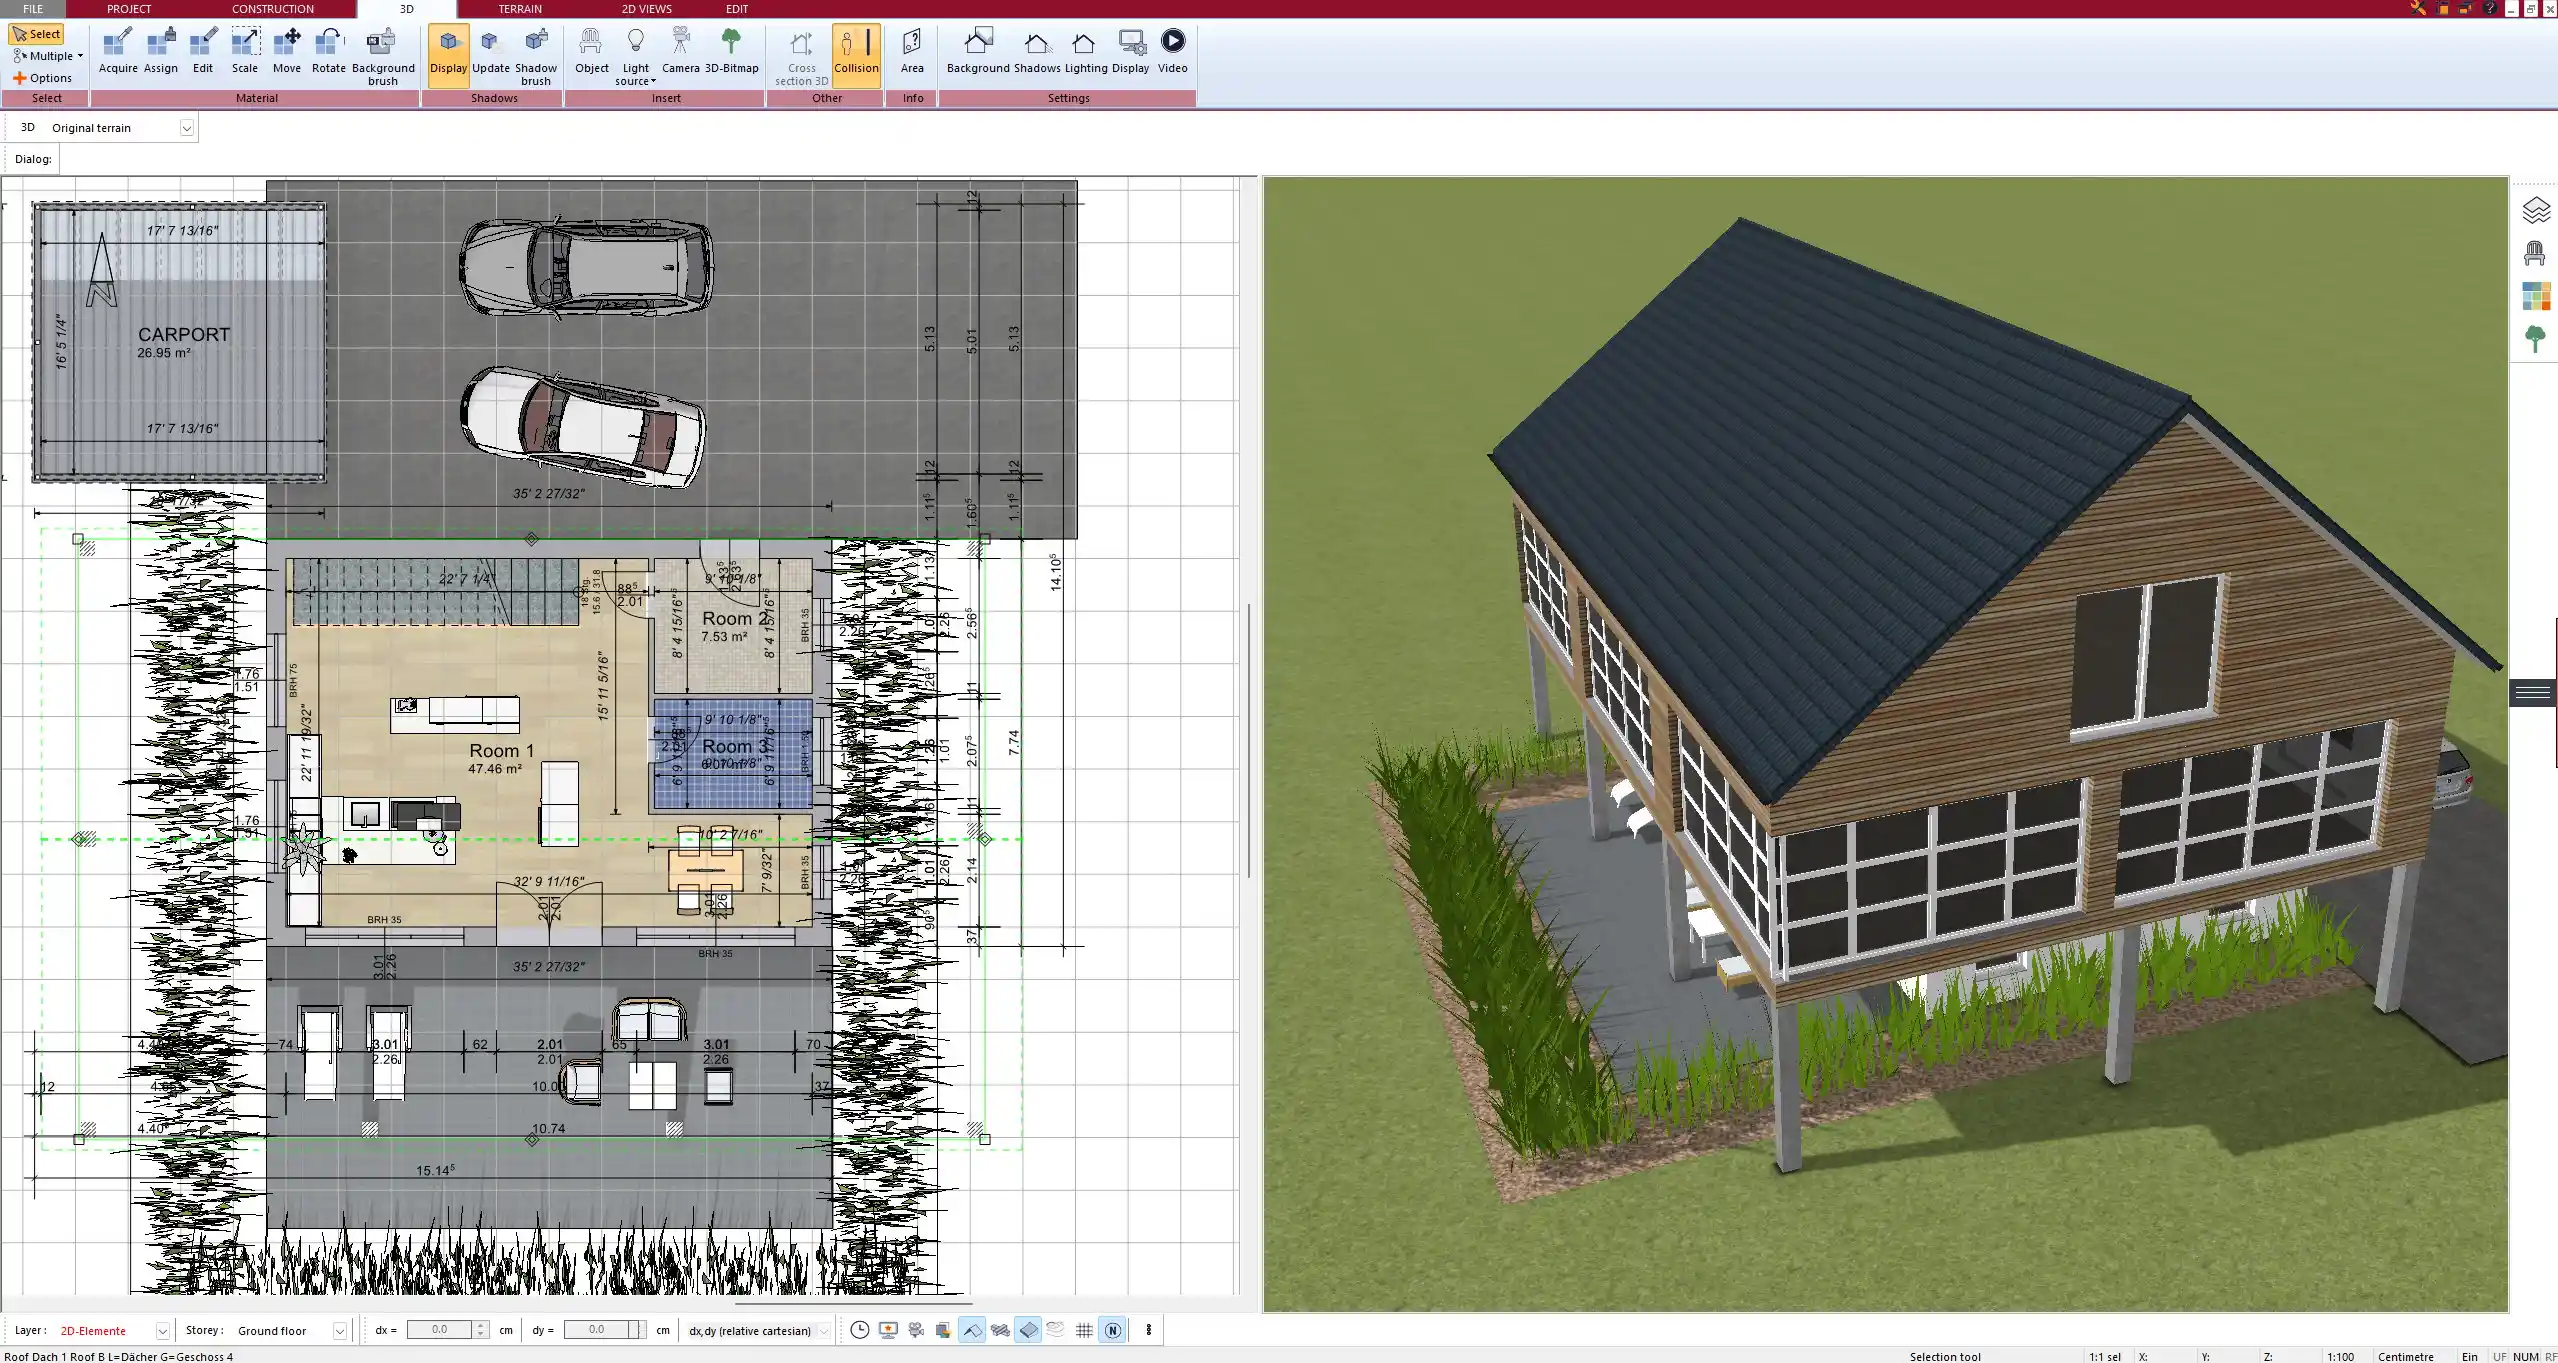
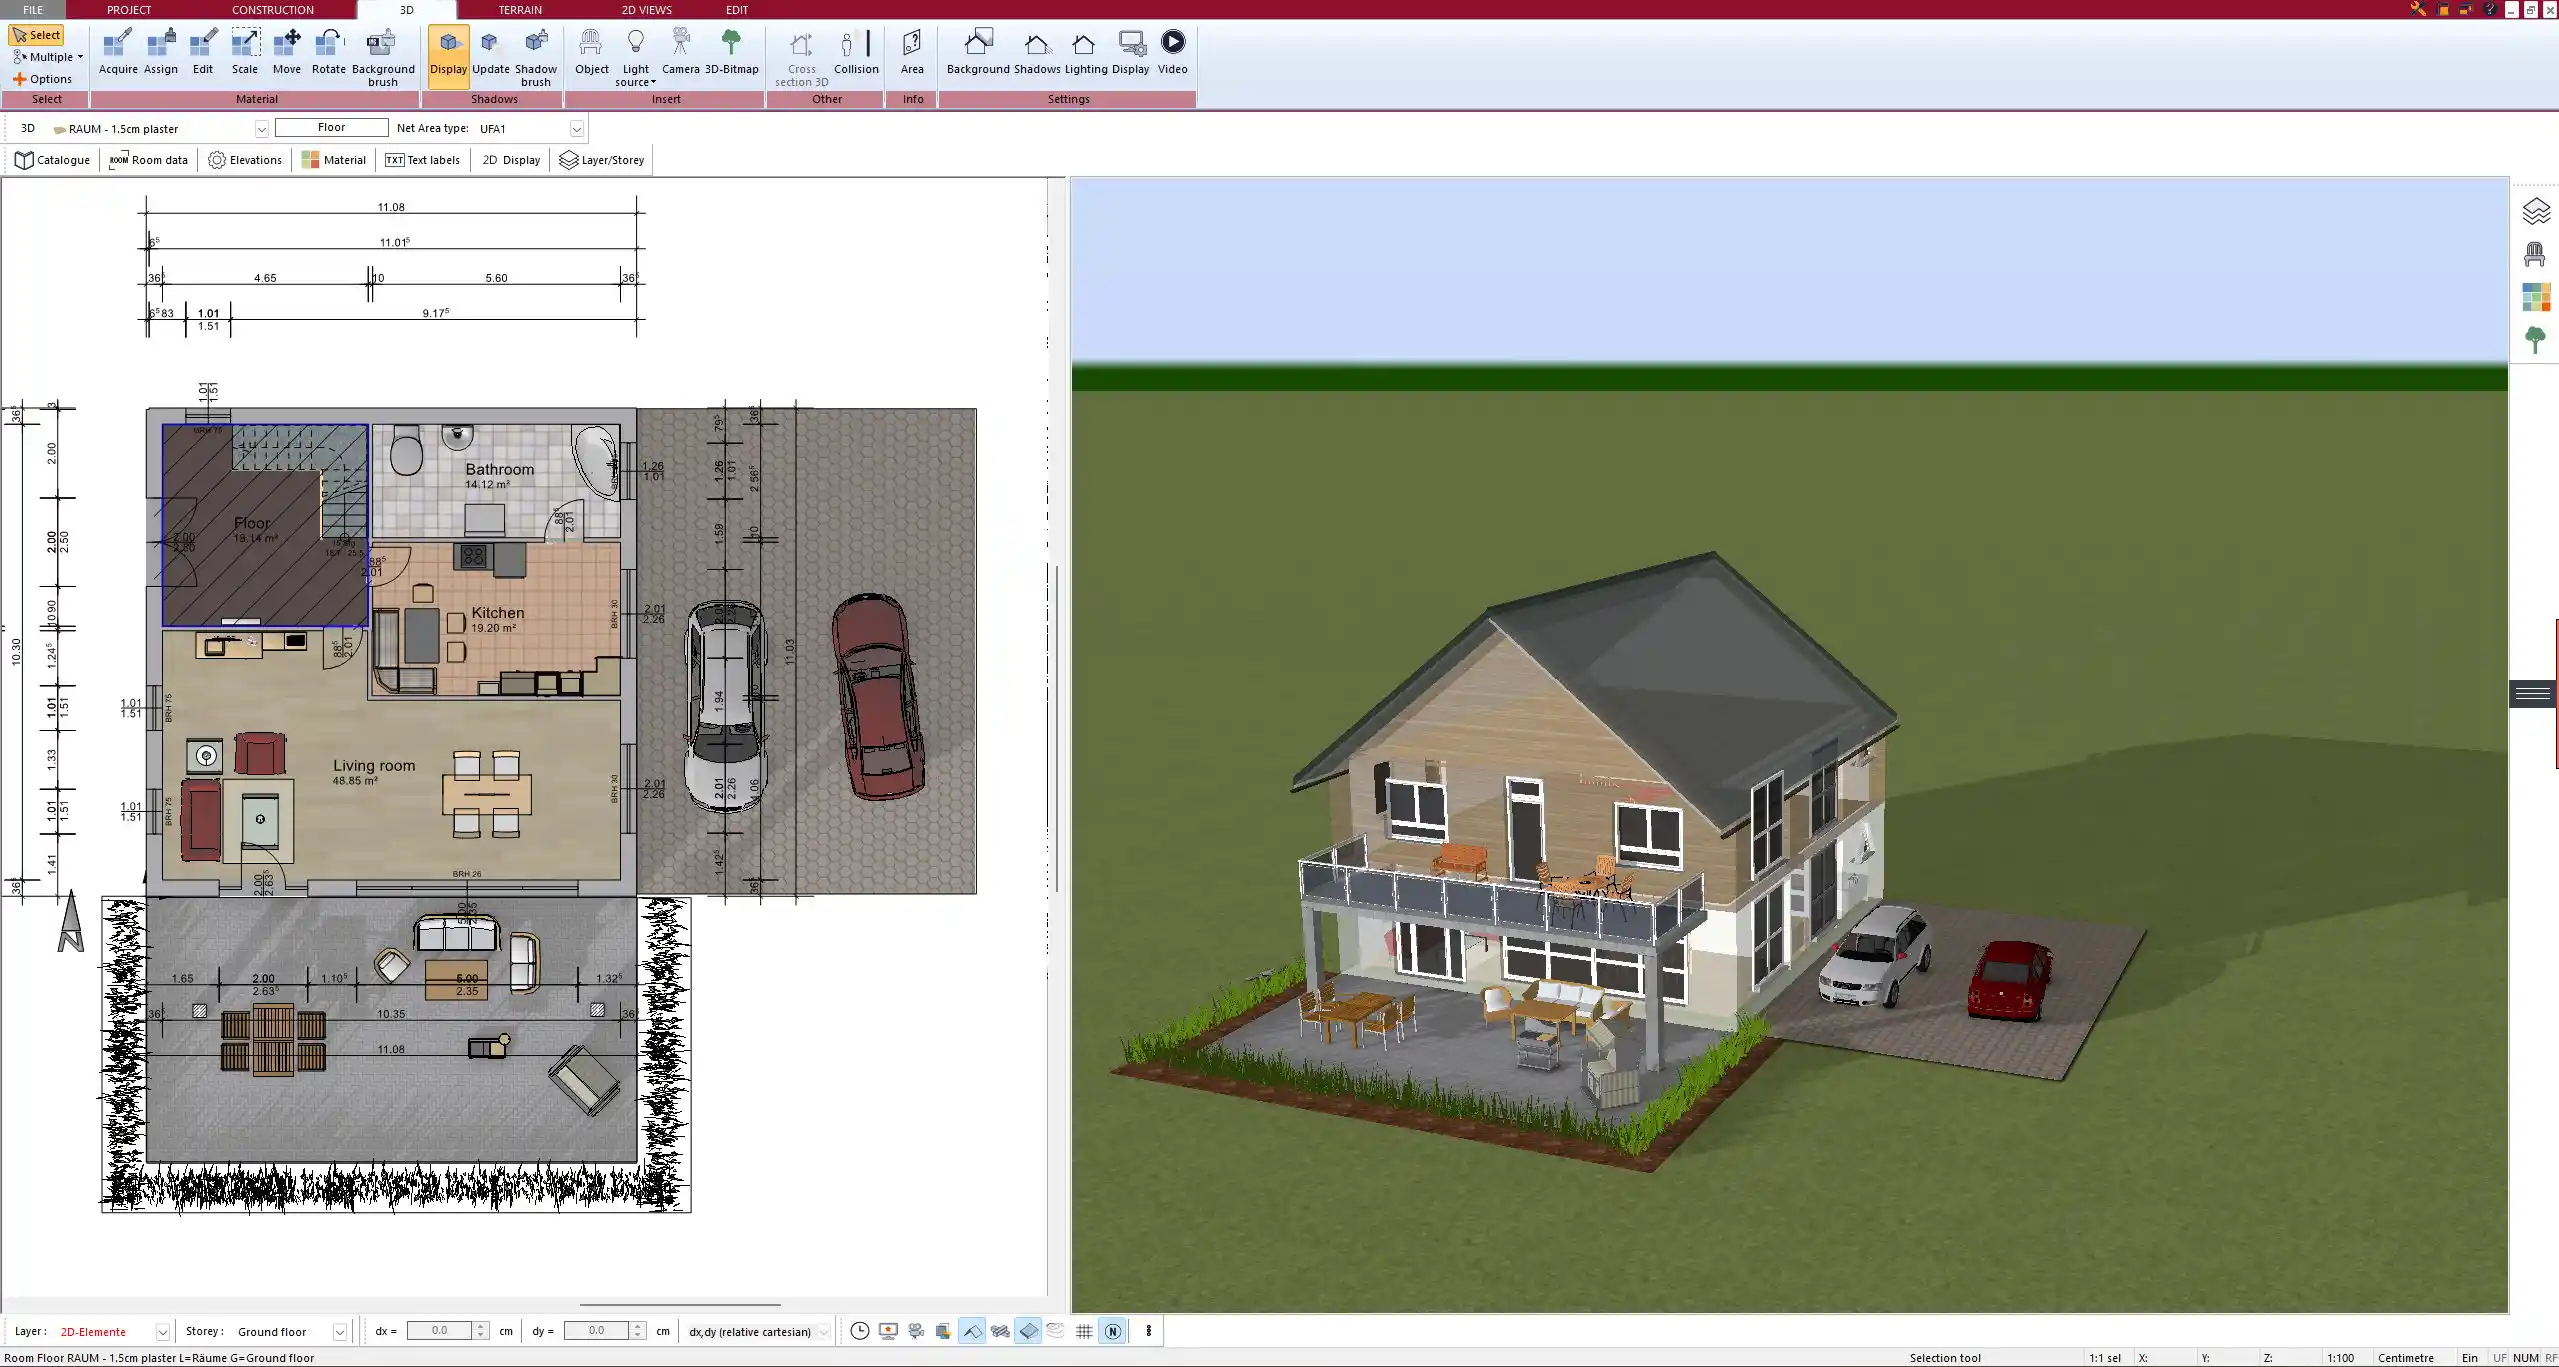
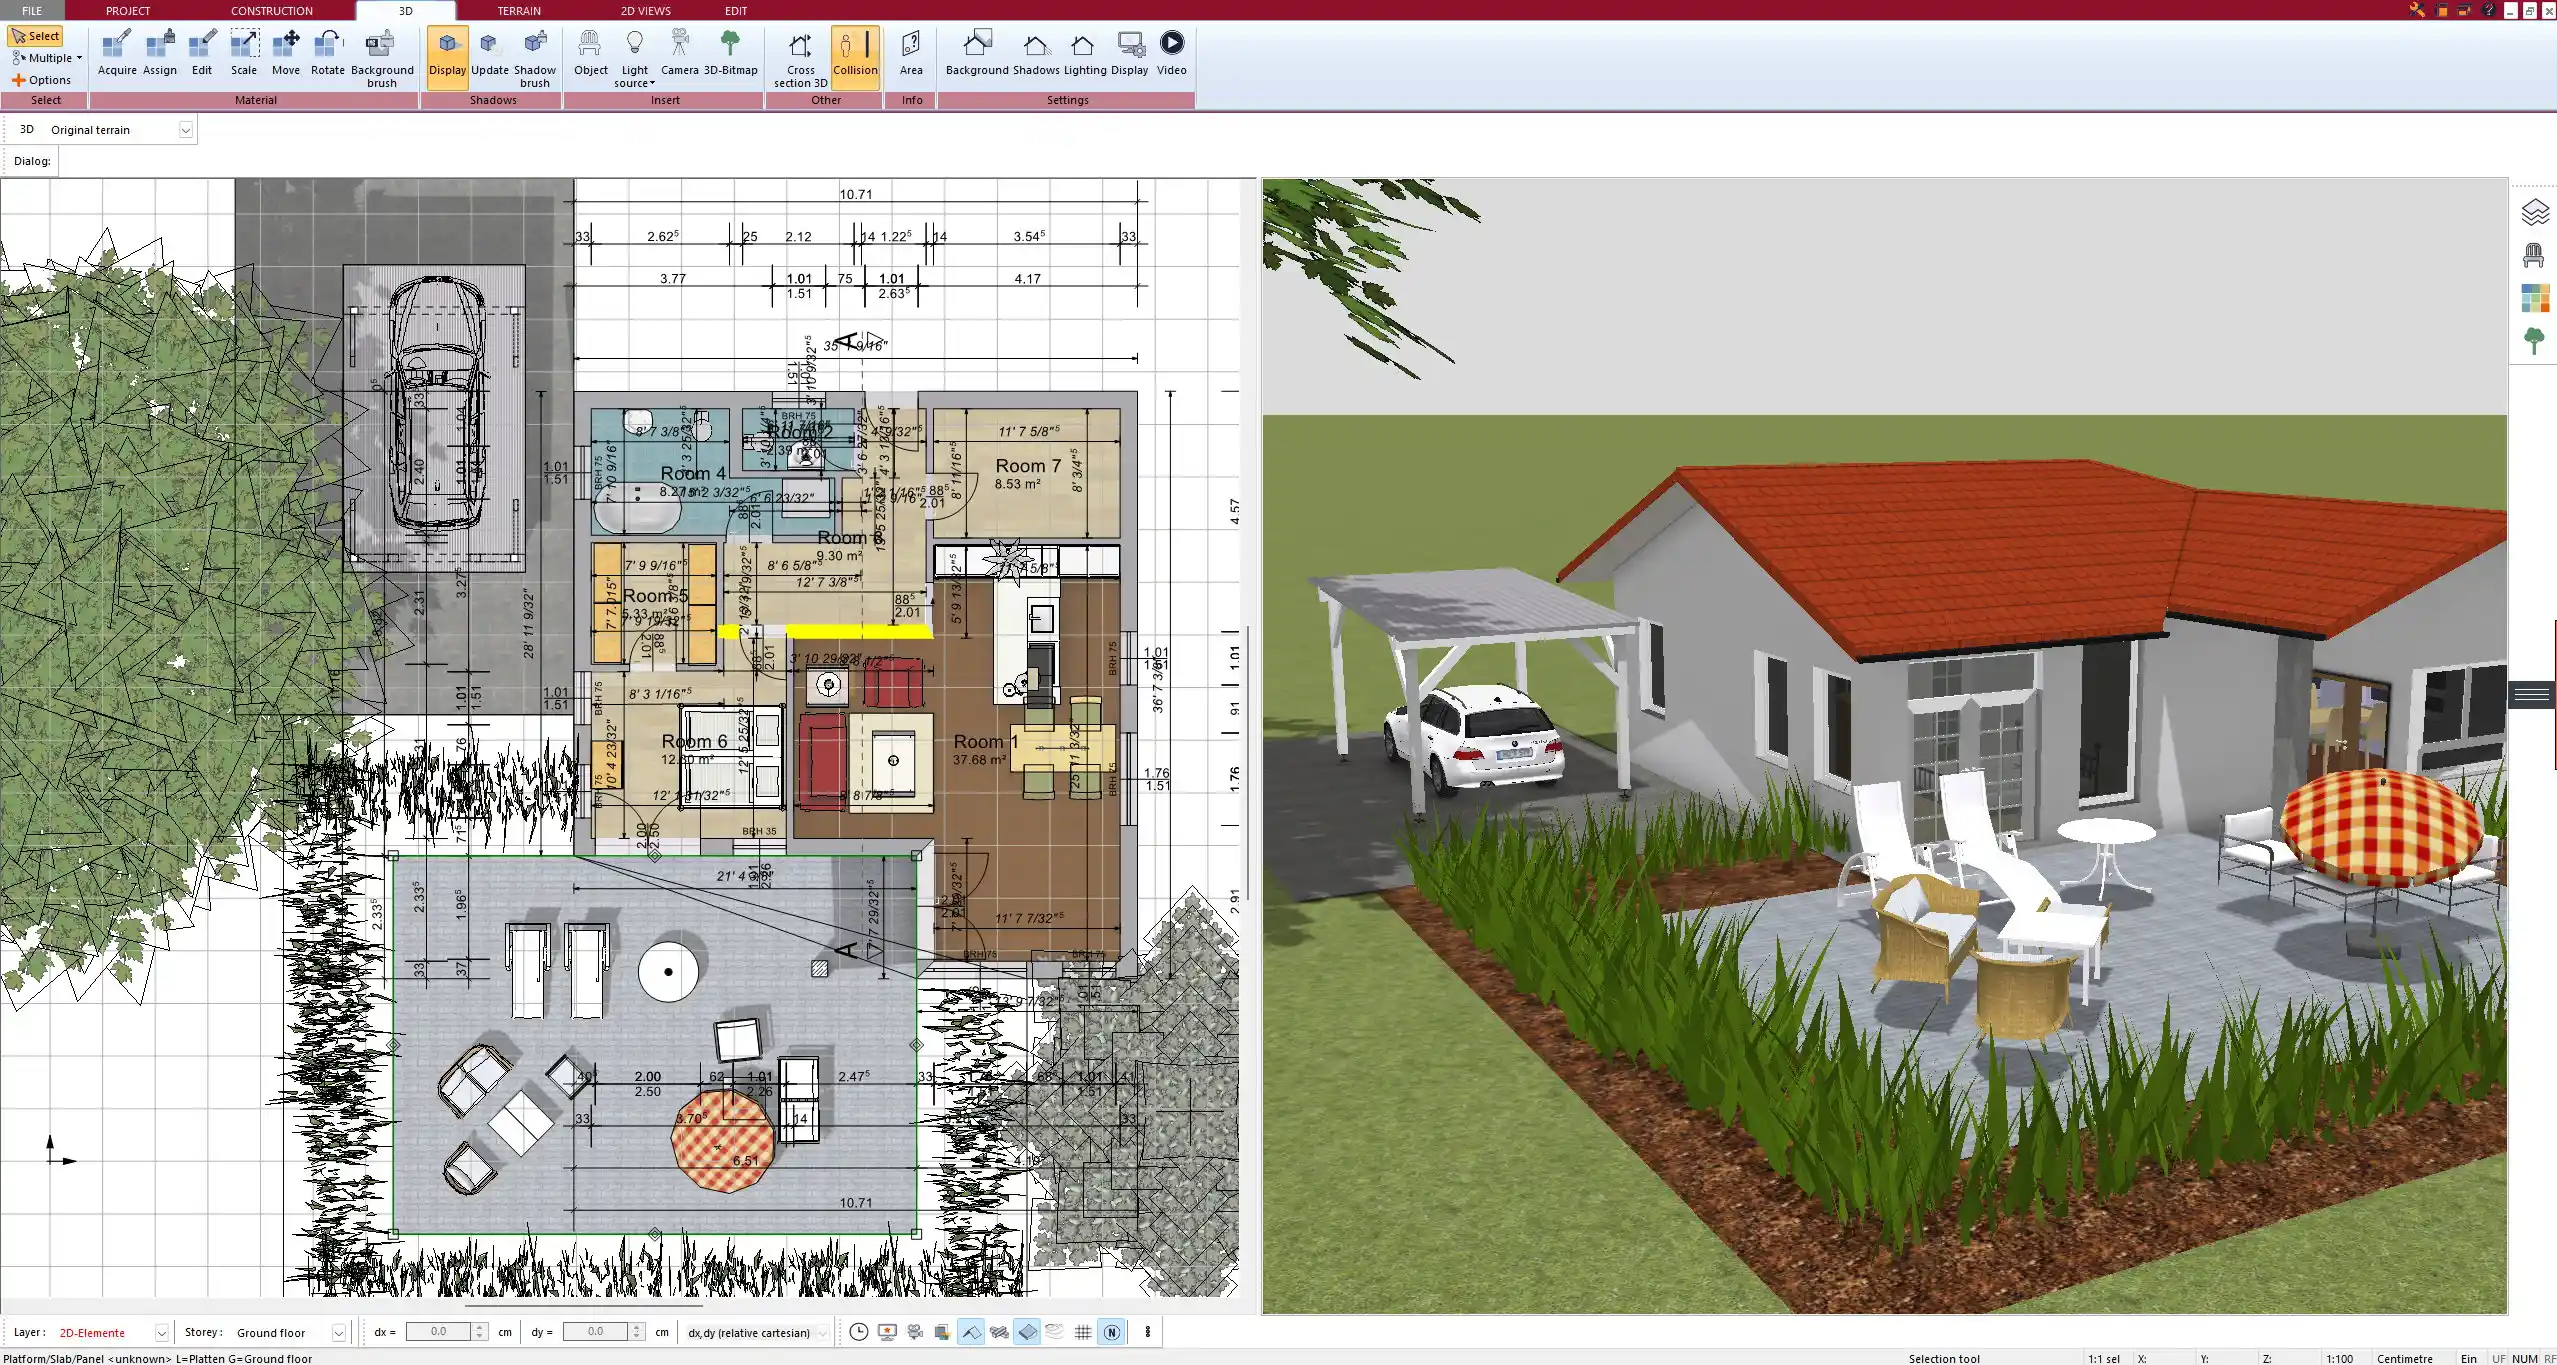
In Plan7Architect, sloped ceilings are automatically drawn and displayed in your floor plan based on the roof design you create. As soon as you define a roof and adjust its shape, pitch, or height, the software instantly generates the corresponding sloped ceilings in both the 2D floor plan and the 3D model.
You do not need to manually draw the ceiling slopes yourself. Plan7Architect ensures they appear correctly and precisely, saving you time and reducing errors.
You can also freely work in both metric units (meters, centimeters) and imperial units (feet, inches). The software automatically adapts to your selected measurement system, making it flexible for users worldwide.
Step-by-Step: Setting and Adjusting Sloped Ceilings
Drawing and adjusting sloped ceilings with Plan7Architect is a straightforward process. Here is how I personally do it when planning new floor plans:
-
Create or Import Your Floor Plan
Start by either drawing your own floor plan from scratch or importing an existing layout. -
Add a Roof Structure
Select the roof tool and choose the type of roof you want: gable roof, hip roof, shed roof, mansard roof, or a customized roof. -
Adjust Roof Settings
Set important parameters such as:-
Roof pitch (angle)
-
Roof height
-
Wall height
-
Overhang length
-
As you adjust these settings, Plan7Architect will automatically calculate and draw the matching sloped ceilings inside the building.
-
Review and Fine-Tune
Switch to the 3D view to check if the sloped ceilings fit your expectations. You can easily go back and modify the roof settings if needed.
Tip:
When working on designs with sloped ceilings, I always recommend activating the 3D cross-section tool. This allows you to instantly check ceiling heights at different points inside the room without guessing or switching views repeatedly.
Which Roof Types Create Sloped Ceilings?
Not every roof creates visible interior slopes. Based on my experience with Plan7Architect, these roof types automatically generate sloped ceilings:
| Roof Type | Sloped Ceiling Created? | Typical Use Case |
|---|---|---|
| Gable Roof | Yes | Standard houses, cabins, chalets |
| Hip Roof | Yes | Villas, bungalows, residential homes |
| Mansard Roof | Yes | Urban houses with usable attics |
| Shed Roof | Yes | Modern designs, tiny houses |
| Flat Roof | No (unless manually modified) | Industrial or minimalist buildings |
Flat roofs will only show slopes if you manually design an inclined structure, which is more of an advanced option.
Editing and Fine-Tuning Sloped Ceilings
Fine-tuning sloped ceilings in Plan7Architect is extremely flexible. After setting the basic roof, you can easily adapt the interior slopes by adjusting:
-
Roof Pitch
For example, you might want a steep 45° pitch for a traditional look or a flatter 30° pitch for more usable attic space. -
Wall Heights
You can adjust the heights of exterior and interior walls individually. This is useful for creating features like half-height walls or adding dormers. -
Roof Segments
For complex houses, you can combine multiple roof sections at different angles and heights. Plan7Architect handles these transitions automatically.
Tip:
Whenever I create complex roof shapes, I save different versions of the file. It allows me to experiment with different ceiling slopes without the risk of losing a preferred earlier version.
Changes you make are immediately visible in both the 2D floor plan and the 3D model. You can see exactly how much headroom is available in every room.
Working with Different Units (Metric and Imperial)
Plan7Architect supports both metric and imperial measurement systems seamlessly. This makes the software ideal whether you are used to working in meters and centimeters or in feet and inches.
-
You can easily switch the unit system in the program settings.
-
All dimensions, inputs, and measurements adapt automatically to your choice.
-
There is no need for manual conversions or recalculations.
This feature has saved me a lot of time, especially when collaborating with international clients or adapting designs for different countries.
Additional Tips for Planning with Sloped Ceilings
Planning living spaces under sloped ceilings can be challenging if not done carefully. From my experience, here are practical tips to make the most out of sloped ceiling spaces:
-
Place taller furniture along the higher walls
Avoid placing wardrobes or bookcases where the ceiling is low. -
Use 3D Views to Check Headroom
Always walk through your design in the 3D model to spot low clearance areas early. -
Create cozy, functional zones
Use the lower ceiling areas for seating areas, shelves, or decorative elements. -
Highlight Ceiling Variations
Visually emphasize different ceiling heights by using varying colors, wall textures, or lighting. -
Plan Dormers or Skylights
If needed, add dormers or skylights to maximize usable space and bring in more natural light.
| Planning Element | Recommendation |
|---|---|
| Bed Placement | Under highest part of the slope |
| Storage Solutions | Custom-built furniture for lower ceiling areas |
| Lighting | Recessed lights or wall-mounted fixtures |
| Colors and Materials | Bright colors to avoid a cramped feeling |
Why Plan7Architect Makes It Easy
After many projects, I can say confidently: Plan7Architect takes all the complexity out of drawing sloped ceilings.
-
Sloped ceilings are created automatically based on the roof settings.
-
Adjustments are intuitive and visible in real-time.
-
You can work in metric or imperial units without any hassle.
-
The software combines professional-quality output with an easy learning curve.
Even if you have never drawn a floor plan with sloped ceilings before, Plan7Architect makes it accessible and enjoyable. It saves valuable time, avoids planning mistakes, and provides realistic visualizations that help during both design and construction phases.
Plan your project with Plan7Architect

Plan7Architect Pro 5 for $119.99
You don’t need any prior experience because the software has been specifically designed for beginners. The planning process is carried out in 5 simple steps:
1. Draw Walls

2. Windows & Doors

3. Floors & Roof

4. Textures & 3D Objects

5. Plan for the Building Permit

6. Export the Floor Plan as a 3D Model for Twinmotion

- – Compliant with international construction standards
- – Usable on 3 PCs simultaneously
- – Option for consultation with an architect
- – Comprehensive user manual
- – Regular updates
- – Video tutorials
- – Millions of 3D objects available


