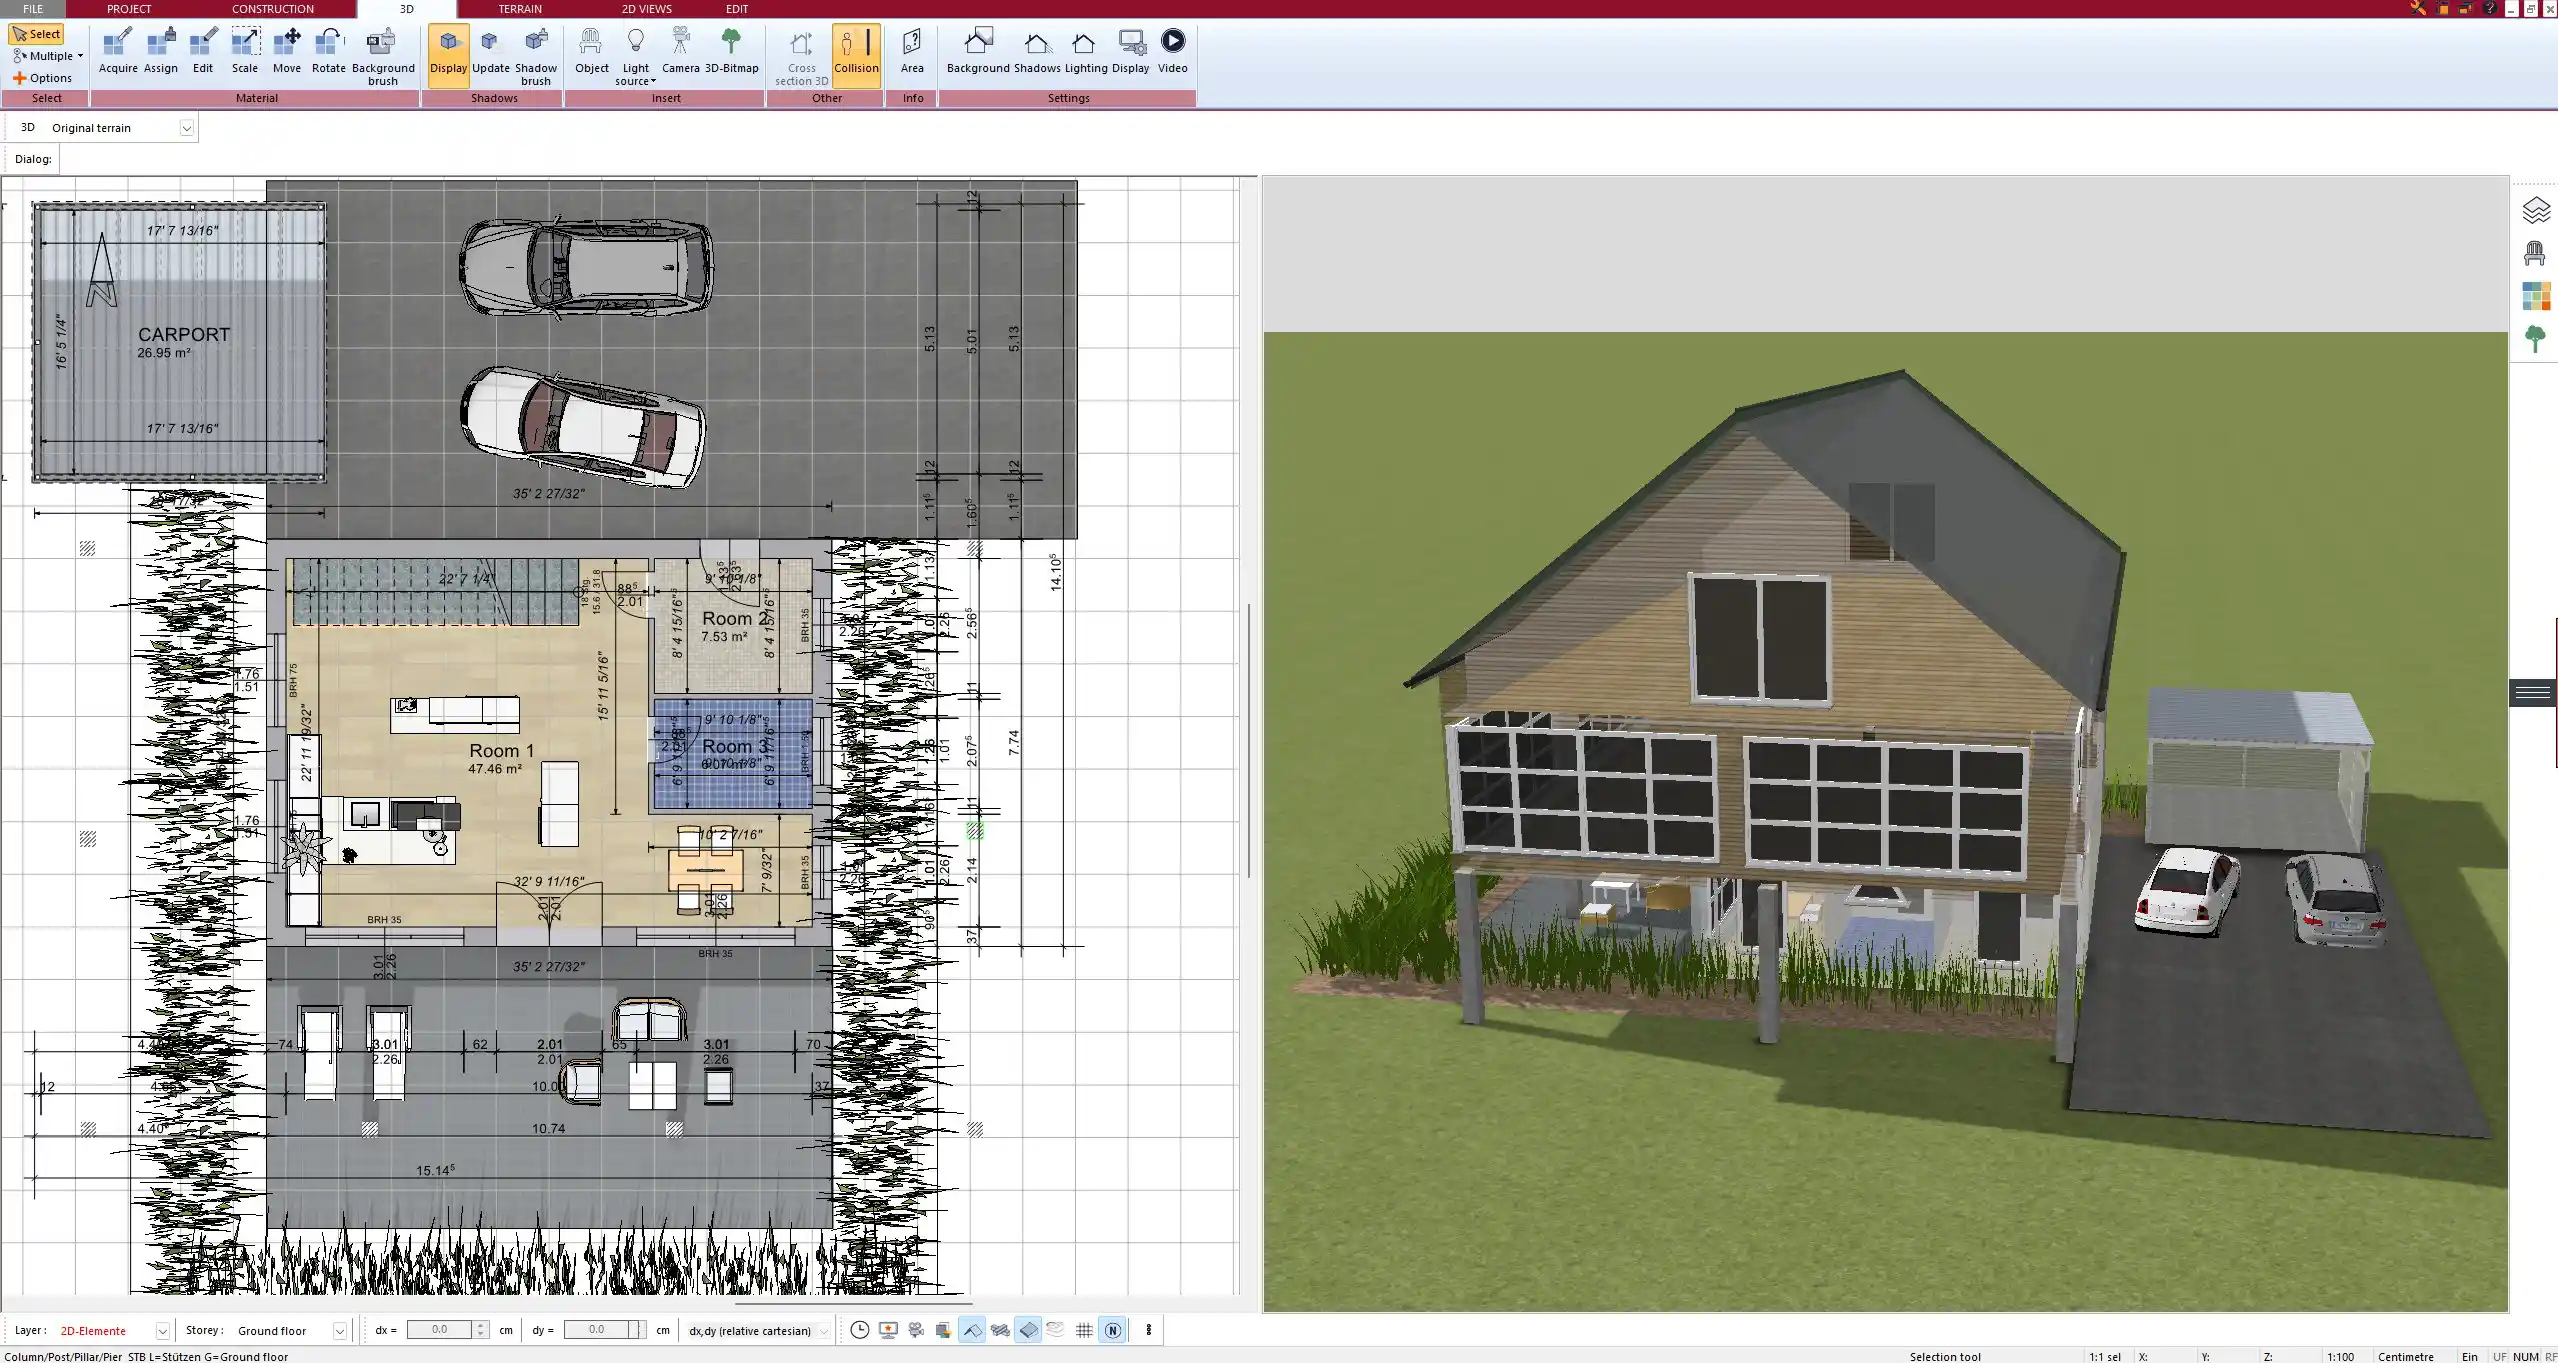
To plan a hip roof with the Plan7Architect software, open your building project and make sure your floor plan is complete. Use the integrated roof tool to add a hip roof with a few clicks. You can then edit pitch, overhang, height, and materials individually for each side. The changes are instantly visible in the 3D view, giving you a realistic visualization of your design.
Plan7Architect supports both metric and imperial units. Whether you work in meters or feet, all values can be entered and displayed in the format that suits your location and building standards. Switching between systems is simple in the project settings.
This makes the software ideal for planning hip roofs for residential homes, villas, and modern bungalows—both in Europe and North America.
Step-by-Step: Creating a Hip Roof in Plan7Architect
Start with Your Floor Plan
Before adding a roof, you need a solid base: the floor plan of your building. You can either create it directly within Plan7Architect or import it from an existing file. Drawing walls is straightforward—just click and drag to define each segment. If you already have architectural measurements, you can enter the exact lengths manually.
For a clean hip roof placement, ensure that your outer walls form a closed shape. Hip roofs work best with rectangular or square layouts, but even L-shaped or more complex layouts are supported with individual roof segments.
Activate the Roof Tool
Once the floor plan is ready, go to the building section of the toolbar and open the roof editor. From the list of roof types, choose “hip roof.” In some regions, this might be called a “pavilion roof” or “four-sided roof”—they all refer to the same structure: a roof that slopes downward on all four sides.
With one click, the software places a standard hip roof on your structure. From there, you can start customizing.
Adjust Roof Parameters
The real power of Plan7Architect lies in the fine-tuning options. Every part of the hip roof can be tailored to your needs.
Key parameters to define:
| Parameter | Description | Example |
|---|---|---|
| Pitch | Slope of each roof side | 30° or 6:12 pitch |
| Overhang | Length of the eaves beyond the wall | 0.5 m / 20 in |
| Eave Height | Distance from floor to the start of the roof | 2.3 m / 7.5 ft |
| Roof Base Height | Optional offset if the roof starts higher/lower | 0.2 m / 8 in |
| Material | Roofing finish like tiles, shingles, or metal | Clay tiles or asphalt shingles |
You can also define whether the ridge should run centrally or be offset, which is helpful for asymmetrical buildings. All values can be entered in your preferred unit system—meters or feet—in the same project.
Tip:
If you’re planning a roof for a snowy or rainy region, increase the pitch to ensure better runoff. A steeper roof also adds visual height to single-story buildings.
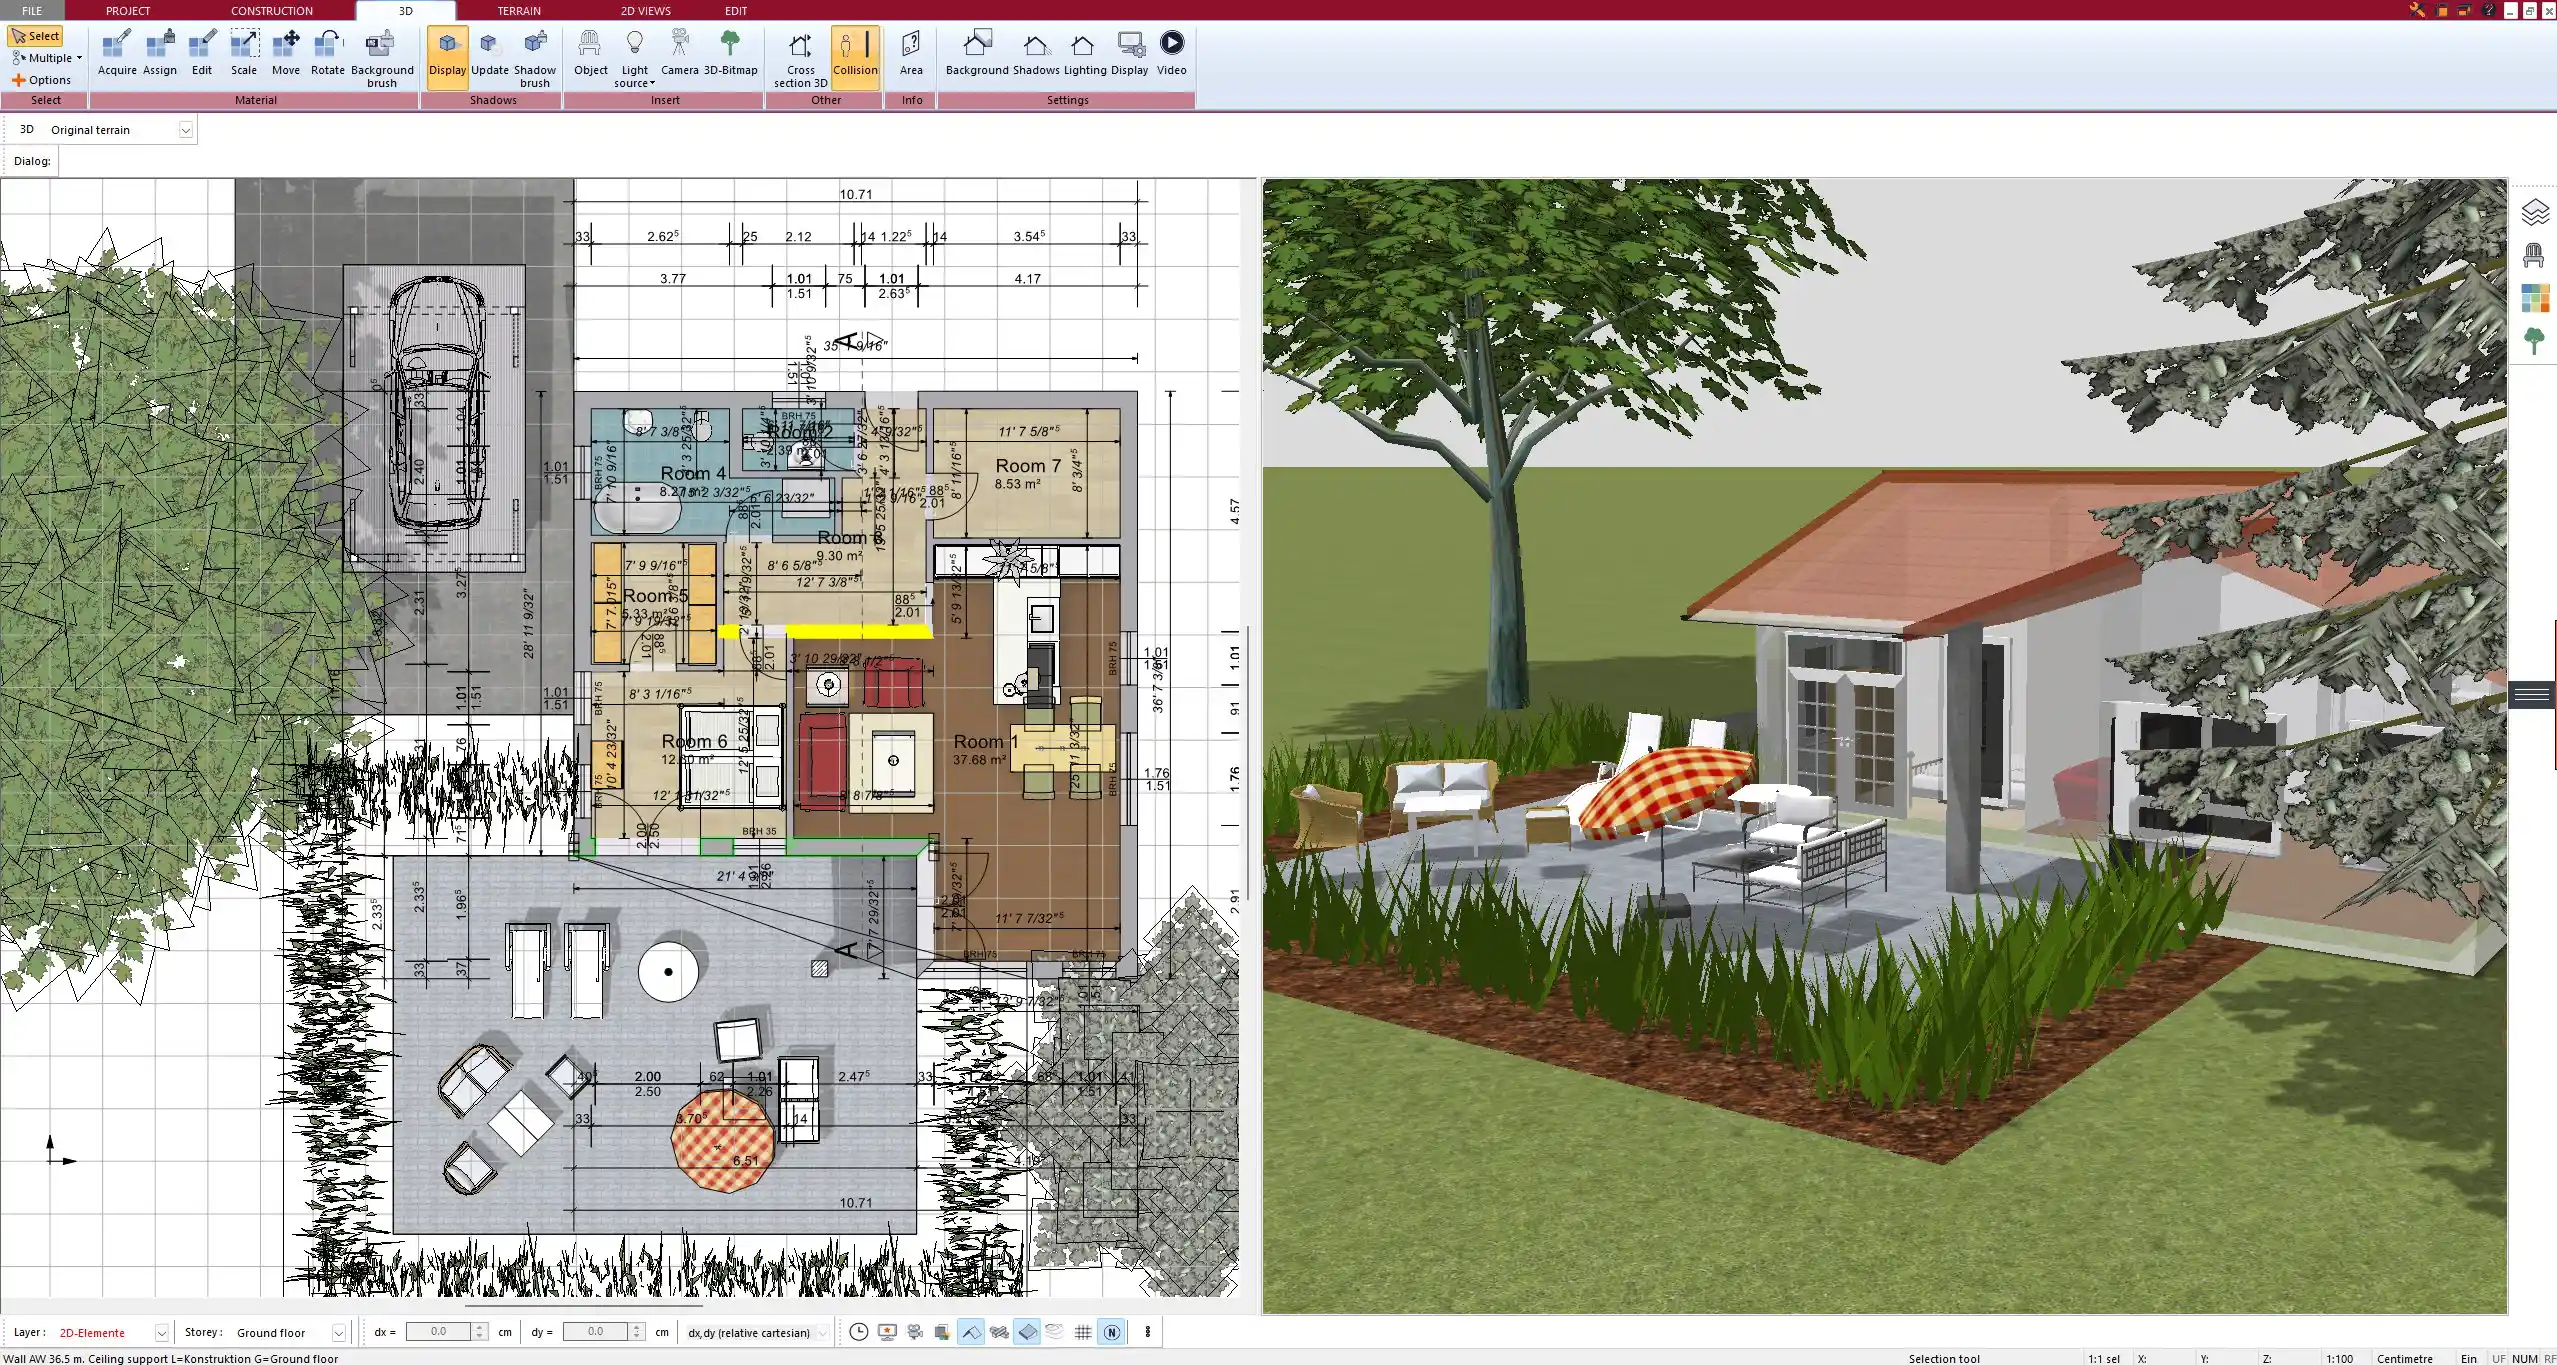
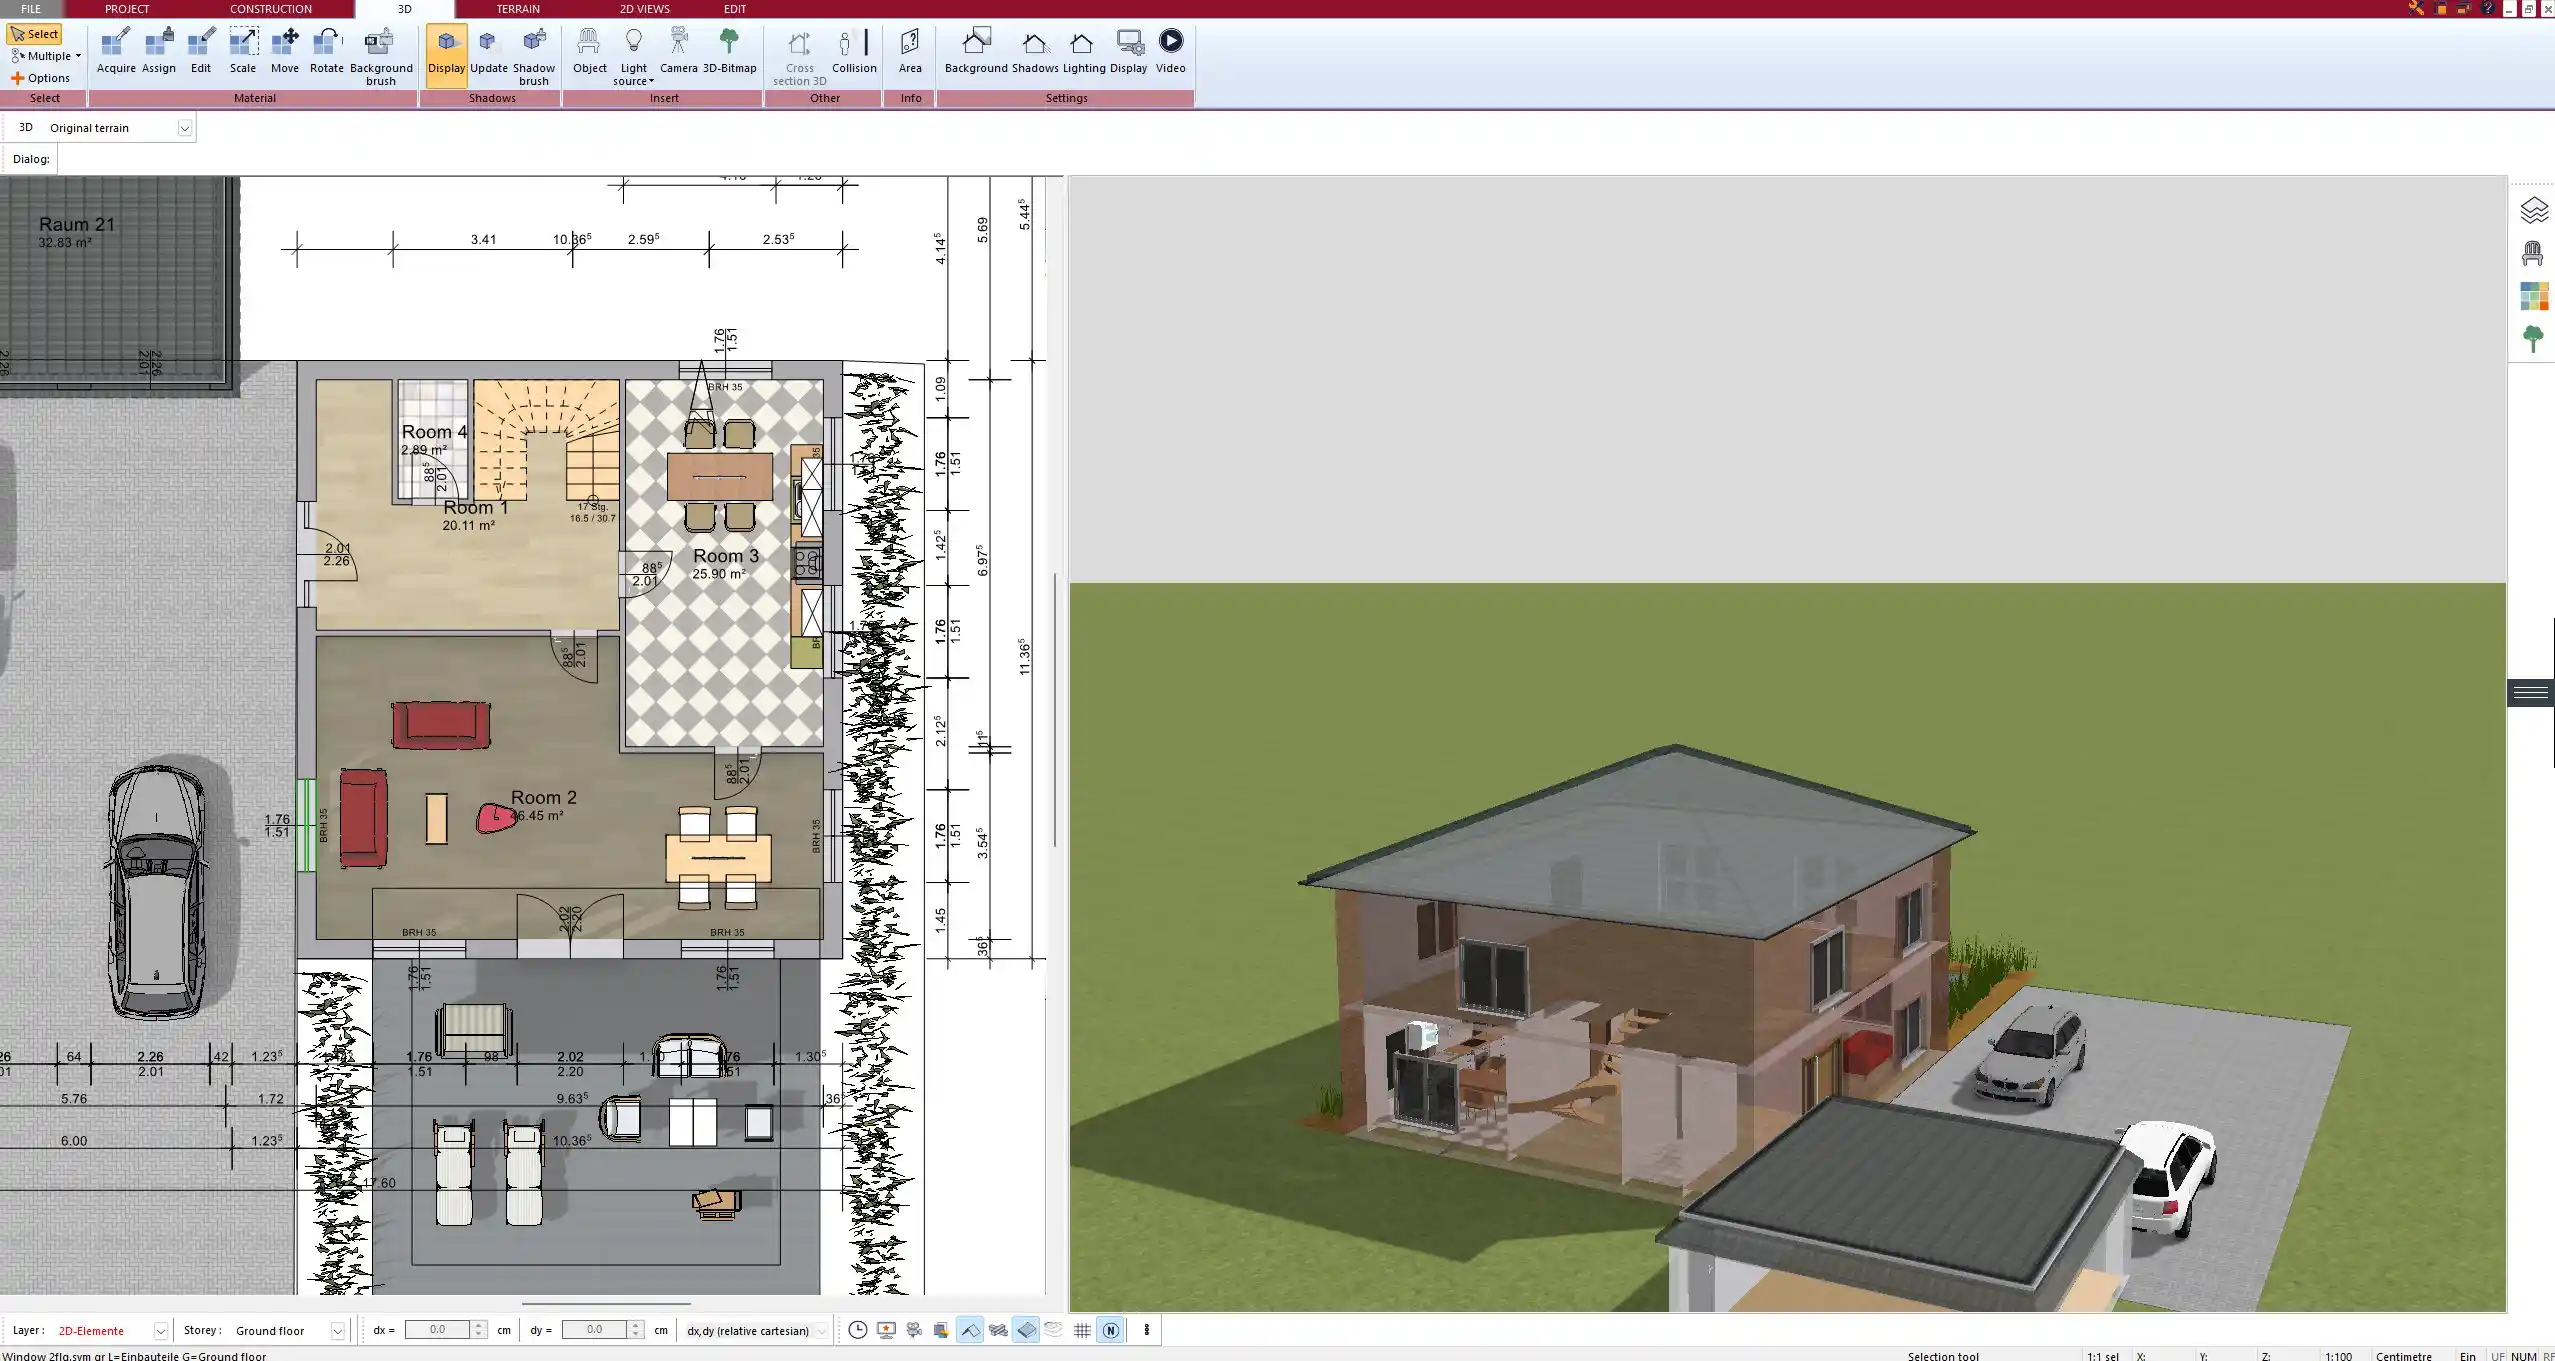
View in Real-Time 3D
While you adjust your roof in 2D, you can immediately see the result in 3D. Simply switch to the 3D view and rotate the model freely. This is especially helpful for spotting design issues like overlapping walls, improper slopes, or aesthetic inconsistencies.
The real-time rendering includes lighting, shadows, and materials, so you get a near-photorealistic idea of how your hip roof will look in reality.
You can even walk through the house in virtual mode and view the roof from the inside or switch to a transparent roof layer to see the interior structure while the roof remains in place.
Save and Export Your Roof Plan
Once satisfied with your roof design, you can export the results in multiple formats. Whether you need professional CAD data or a clean PDF with all measurements, Plan7Architect offers flexible export options.
Available export formats:
-
2D plans with measurements (PDF, JPG, PNG)
-
3D images and screenshots (JPG, PNG)
-
CAD-compatible files (DWG, DXF)
-
Project files for editing later
These exports can be used for submitting building applications, coordinating with engineers or roofers, or simply documenting your project progress.
Why Plan a Hip Roof? – Benefits and Use Cases
Hip roofs are among the most stable and wind-resistant roof forms available. Unlike gable roofs, which have two open ends, a hip roof slopes down on all four sides. This creates a compact, aerodynamic structure that holds up well in rough weather conditions.
Typical advantages of hip roofs:
-
All sides slope downward, improving wind resistance
-
No gables—clean, modern appearance
-
Efficient rain and snow runoff on every side
-
Balanced weight distribution
-
Ideal for homes in exposed locations
Hip roofs are commonly used on:
-
Modern single-family homes
-
Villas and estates
-
Mediterranean-style homes
-
Bungalows and ranch-style houses
If you prefer a timeless, symmetrical look with strong structural performance, the hip roof is an excellent choice. In Plan7Architect, you can even combine it with other roof forms for more architectural variety.
Hip Roof Customization Features in Plan7Architect
The roof system in Plan7Architect is highly flexible and goes far beyond standard forms. After placing your basic hip roof, you can add multiple details to increase realism and function.
You can add:
-
Dormers – Small roofed structures projecting from the main roof
-
Chimneys – Predefined blocks or custom 3D models
-
Skylights and Roof Windows – Adjustable by size and position
-
Solar Panels – From the object catalog or custom import
Each element is individually movable, resizable, and automatically adapts to the slope of the roof.
You can also split the roof into different segments and define varying pitches or materials per segment—ideal for L-shaped buildings or extensions.
Tip:
Use the layer control to separate different construction elements. This helps you isolate and work on just the roof structure without interfering with interior planning.
Working with Units and International Standards
Whether you’re designing in Europe, North America, or elsewhere—Plan7Architect gives you full flexibility with units. You can switch between metric (meters, centimeters) and imperial (feet, inches) systems at any time during the planning process.
This is especially useful when collaborating with international professionals or adapting plans to regional standards. All dimensions, angles, and areas update automatically to match your selected unit system.
Pitches can be entered in degrees or as ratios (e.g., 4:12 or 35°), depending on your preference.
You don’t need to convert anything manually. Once the project unit system is set, everything works seamlessly.
Compatible Export & Print Options
When your roof design is ready, you can generate professional outputs in just a few clicks.
You can export:
-
2D plans for contractors with exact measurements
-
Scaled PDF plans for permit applications
-
3D perspectives for client presentations
-
Technical data for integration with other CAD systems
Prints can be made in standard architectural formats (A4, A3, ANSI sizes) and adjusted with custom title blocks, legends, and dimension styles.
For professional collaboration, the DWG and DXF export options are essential. These allow integration with AutoCAD and other construction software platforms.
Tips for Realistic Roof Planning
-
Consider local climate: Steeper pitches work better in snow-heavy regions, while flatter versions are common in warmer zones.
-
Plan for insulation: Make sure there’s space between the roof deck and ceiling for thermal protection.
-
Combine roof styles: A hip roof can be merged with dormers or gable ends to create visual interest.
-
Test with terrain: Place your hip-roofed house on sloped or flat terrain to see how it interacts with its environment.
-
Integrate energy features: Plan for solar panels, roof ventilation, or rainwater systems directly in the model.
Tip:
Use the real-time shadow simulation to test how sunlight will interact with your hip roof throughout the day and year. This is helpful when positioning solar panels or planning terrace shading.
Plan your project with Plan7Architect

Plan7Architect Pro 5 for $109.99
You don’t need any prior experience because the software has been specifically designed for beginners. The planning process is carried out in 5 simple steps:
1. Draw Walls

2. Windows & Doors

3. Floors & Roof

4. Textures & 3D Objects

5. Plan for the Building Permit

6. Export the Floor Plan as a 3D Model for Twinmotion

- – Compliant with international construction standards
- – Usable on 3 PCs simultaneously
- – Option for consultation with an architect
- – Comprehensive user manual
- – Regular updates
- – Video tutorials
- – Millions of 3D objects available


