Planning a duplex floor plan with Plan7Architect is straightforward and highly flexible. Whether you are designing a side-by-side duplex or a stacked version, the software provides all the tools necessary to create a professional design in both 2D and 3D. You can easily work with either European units (meters) or American units (feet), adjusting the measurement settings with just a few clicks. The program is designed for private users, builders, and architects alike, making it accessible even if you have no previous design experience.
Plan7Architect offers features specifically useful for duplex design, such as mirrored layouts, separate entrances, shared walls, and real-time visualization. You can start with a ready-to-use template or create your own floor plan from scratch, depending on how much freedom you want in your project.
How to Plan a Duplex Floor Plan with Plan7Architect
Step 1 – Setting Up the Project
When beginning your duplex floor plan, the first step is to set up your project correctly. Plan7Architect allows you to choose between metric (meters, centimeters) and imperial (feet, inches) unit systems. This is particularly useful if you are planning a project either in Europe or North America.
You should define the lot size, which could be for example 15 meters (approx. 50 feet) wide and 30 meters (approx. 100 feet) deep for a typical urban plot. Plan7Architect gives you full control over the dimensions from the very beginning.
Checklist for setting up the project:
-
Choose unit system: meters or feet
-
Set plot dimensions
-
Define building perimeter
-
Adjust wall thickness and floor height
Step 2 – Designing the Basic Structure
Once the project setup is complete, you can start drawing the basic structure. In a duplex, the defining feature is the shared wall or adjoining structure between two homes. In Plan7Architect, you can easily create these by drawing two layouts side-by-side or stacking them vertically if you are planning a two-level duplex.
You have two options:
-
Mirror the two units for a symmetrical duplex
-
Design each unit individually for more variety
Walls can be drawn freehand, snapped to exact lengths, or customized with different thicknesses depending on your local building standards.
Example layout types:
| Layout Type | Description |
|---|---|
| Side-by-side | Two homes next to each other |
| Stacked | One unit above the other |
| Offset layout | Slightly shifted for privacy |
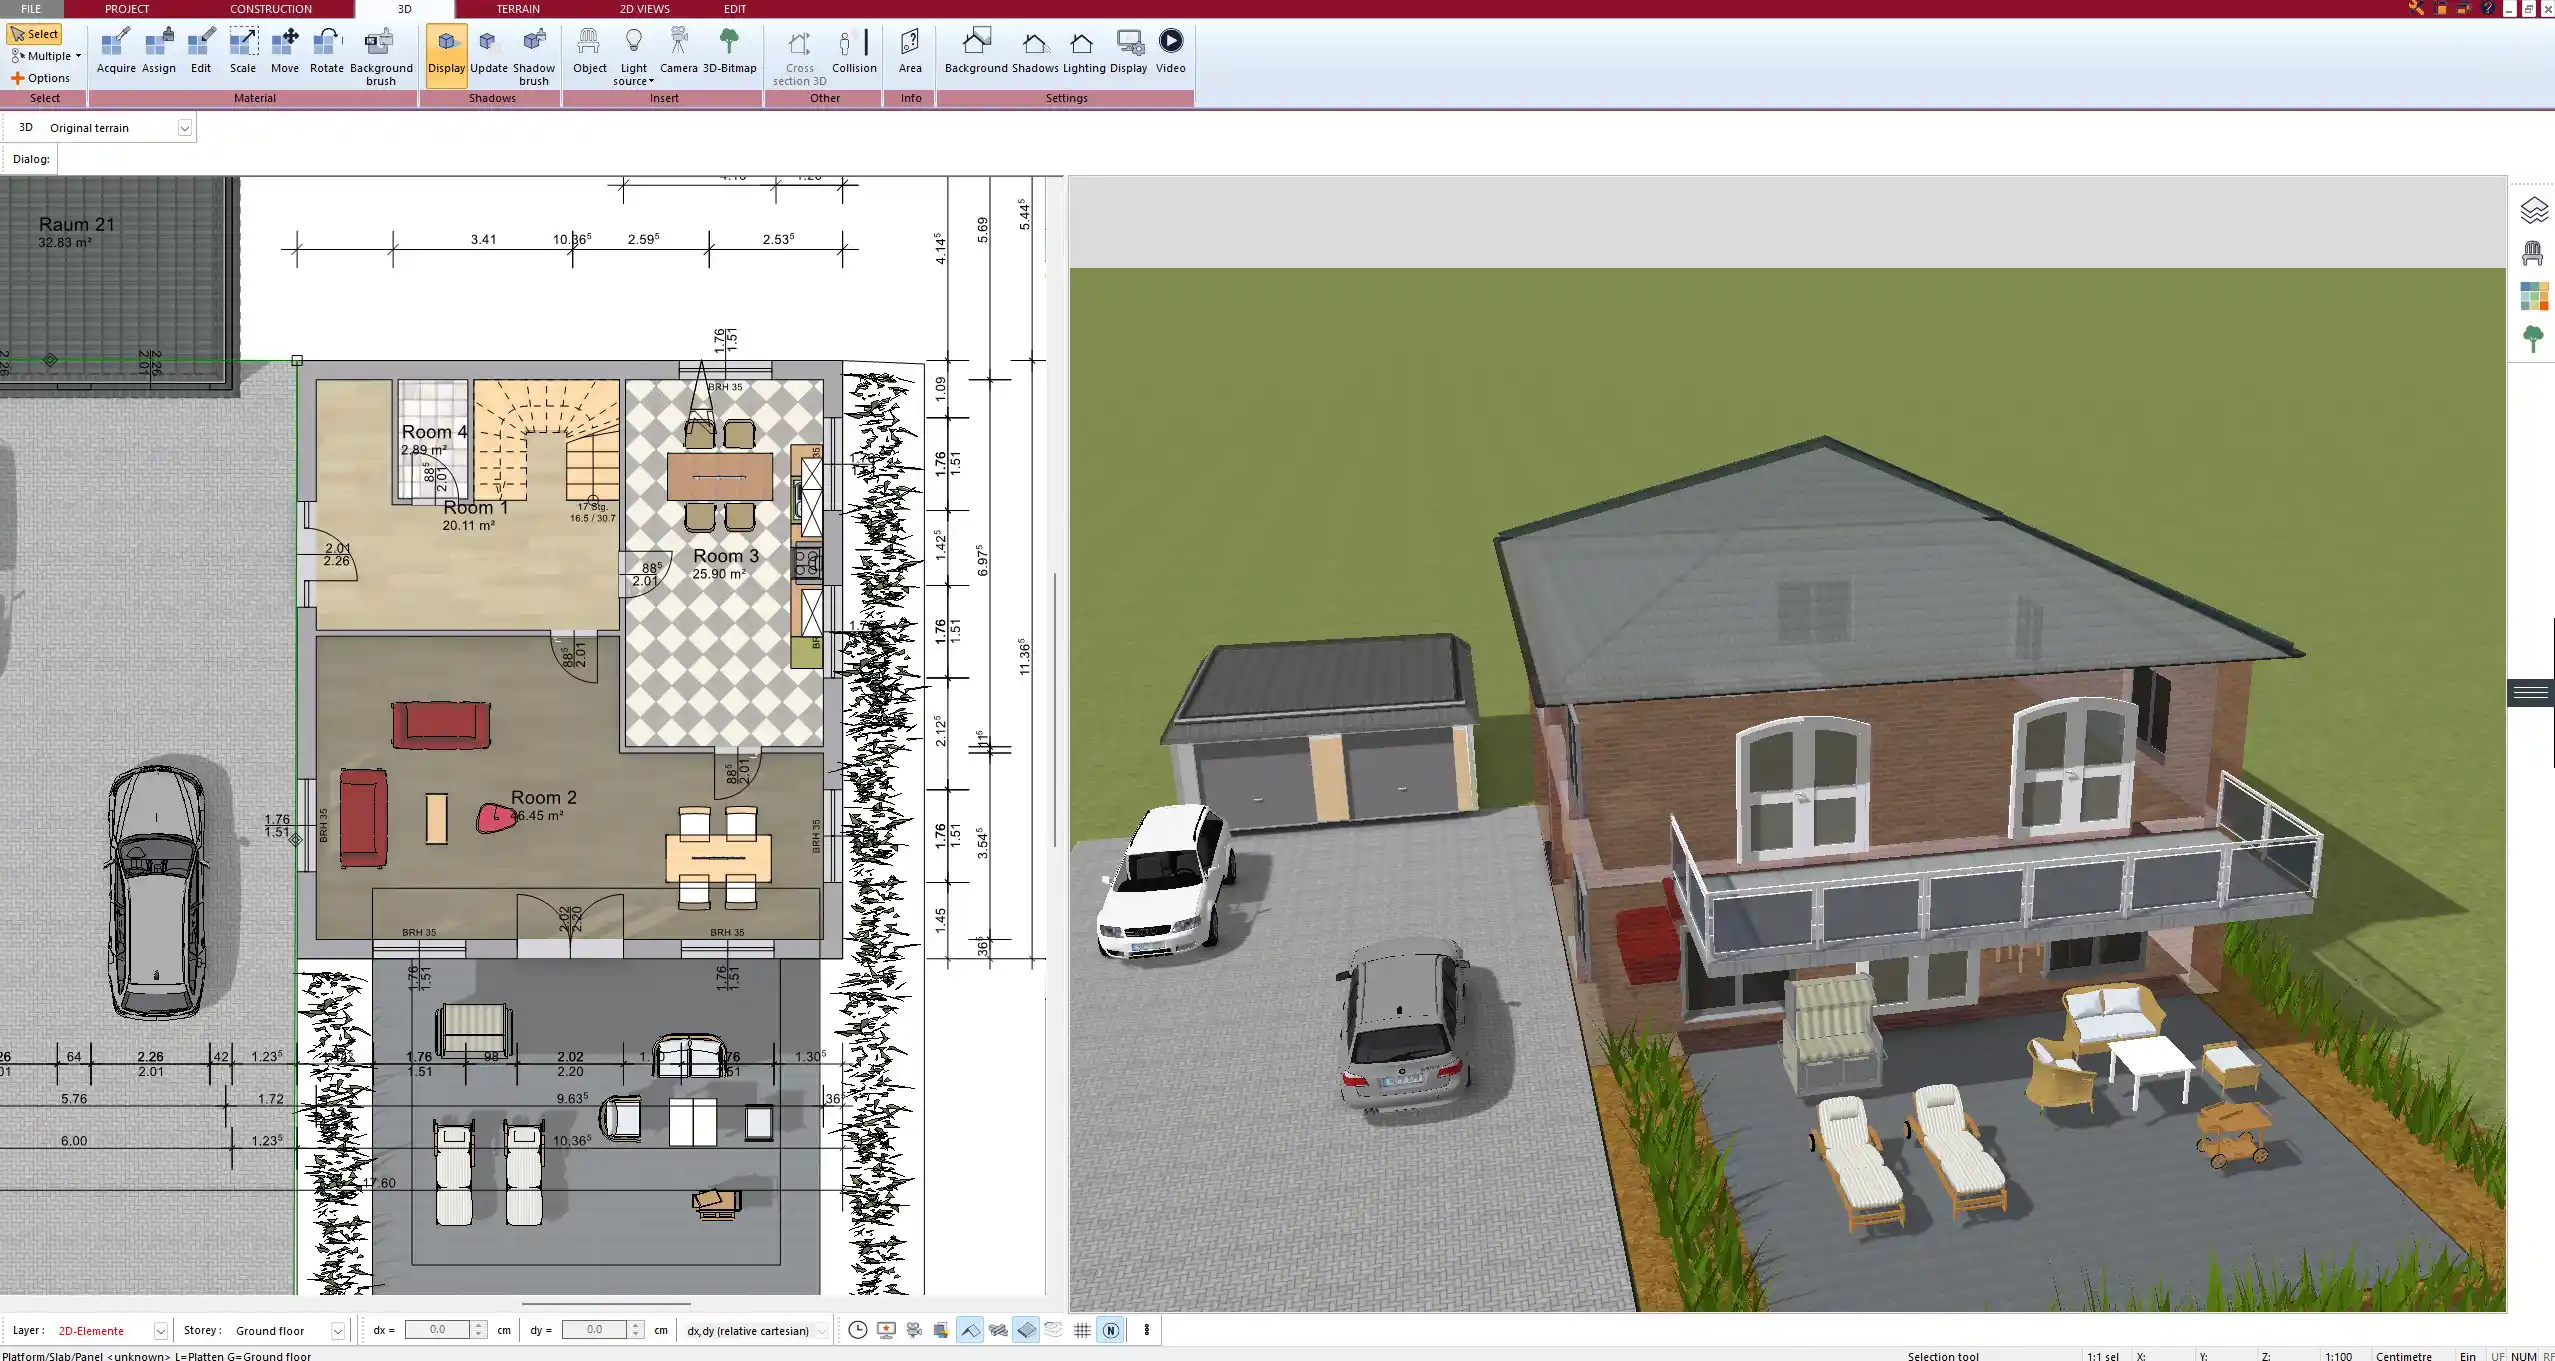
Step 3 – Adding Rooms and Internal Features
Next, you need to add rooms and define internal layouts. With Plan7Architect, you can create rooms simply by drawing closed wall shapes, and then label them accordingly (e.g., Living Room, Bedroom, Kitchen).
In a duplex, it’s important to think carefully about the layout to balance privacy and convenience. Typically, bedrooms and private areas are located further away from shared walls.
Typical room areas:
-
Living Room: around 25–30 m² (270–320 ft²)
-
Kitchen: around 15–20 m² (160–215 ft²)
-
Bedroom: 12–20 m² (130–215 ft²)
-
Bathroom: 6–10 m² (65–110 ft²)
Each unit should have its own full kitchen, bathrooms, and private bedrooms.
Step 4 – Adding Doors, Windows, and Staircases
After the basic room layout is completed, you can add structural features like doors and windows. Plan7Architect offers a large library of customizable elements. Each duplex unit should have a clearly defined, separate main entrance to ensure privacy.
For multi-story duplexes, staircases must be added inside each unit. You can choose between straight, spiral, or U-shaped staircases depending on the available space and design.
Tip:
When placing windows, ensure that each unit receives enough natural light without compromising the privacy of the neighboring unit.
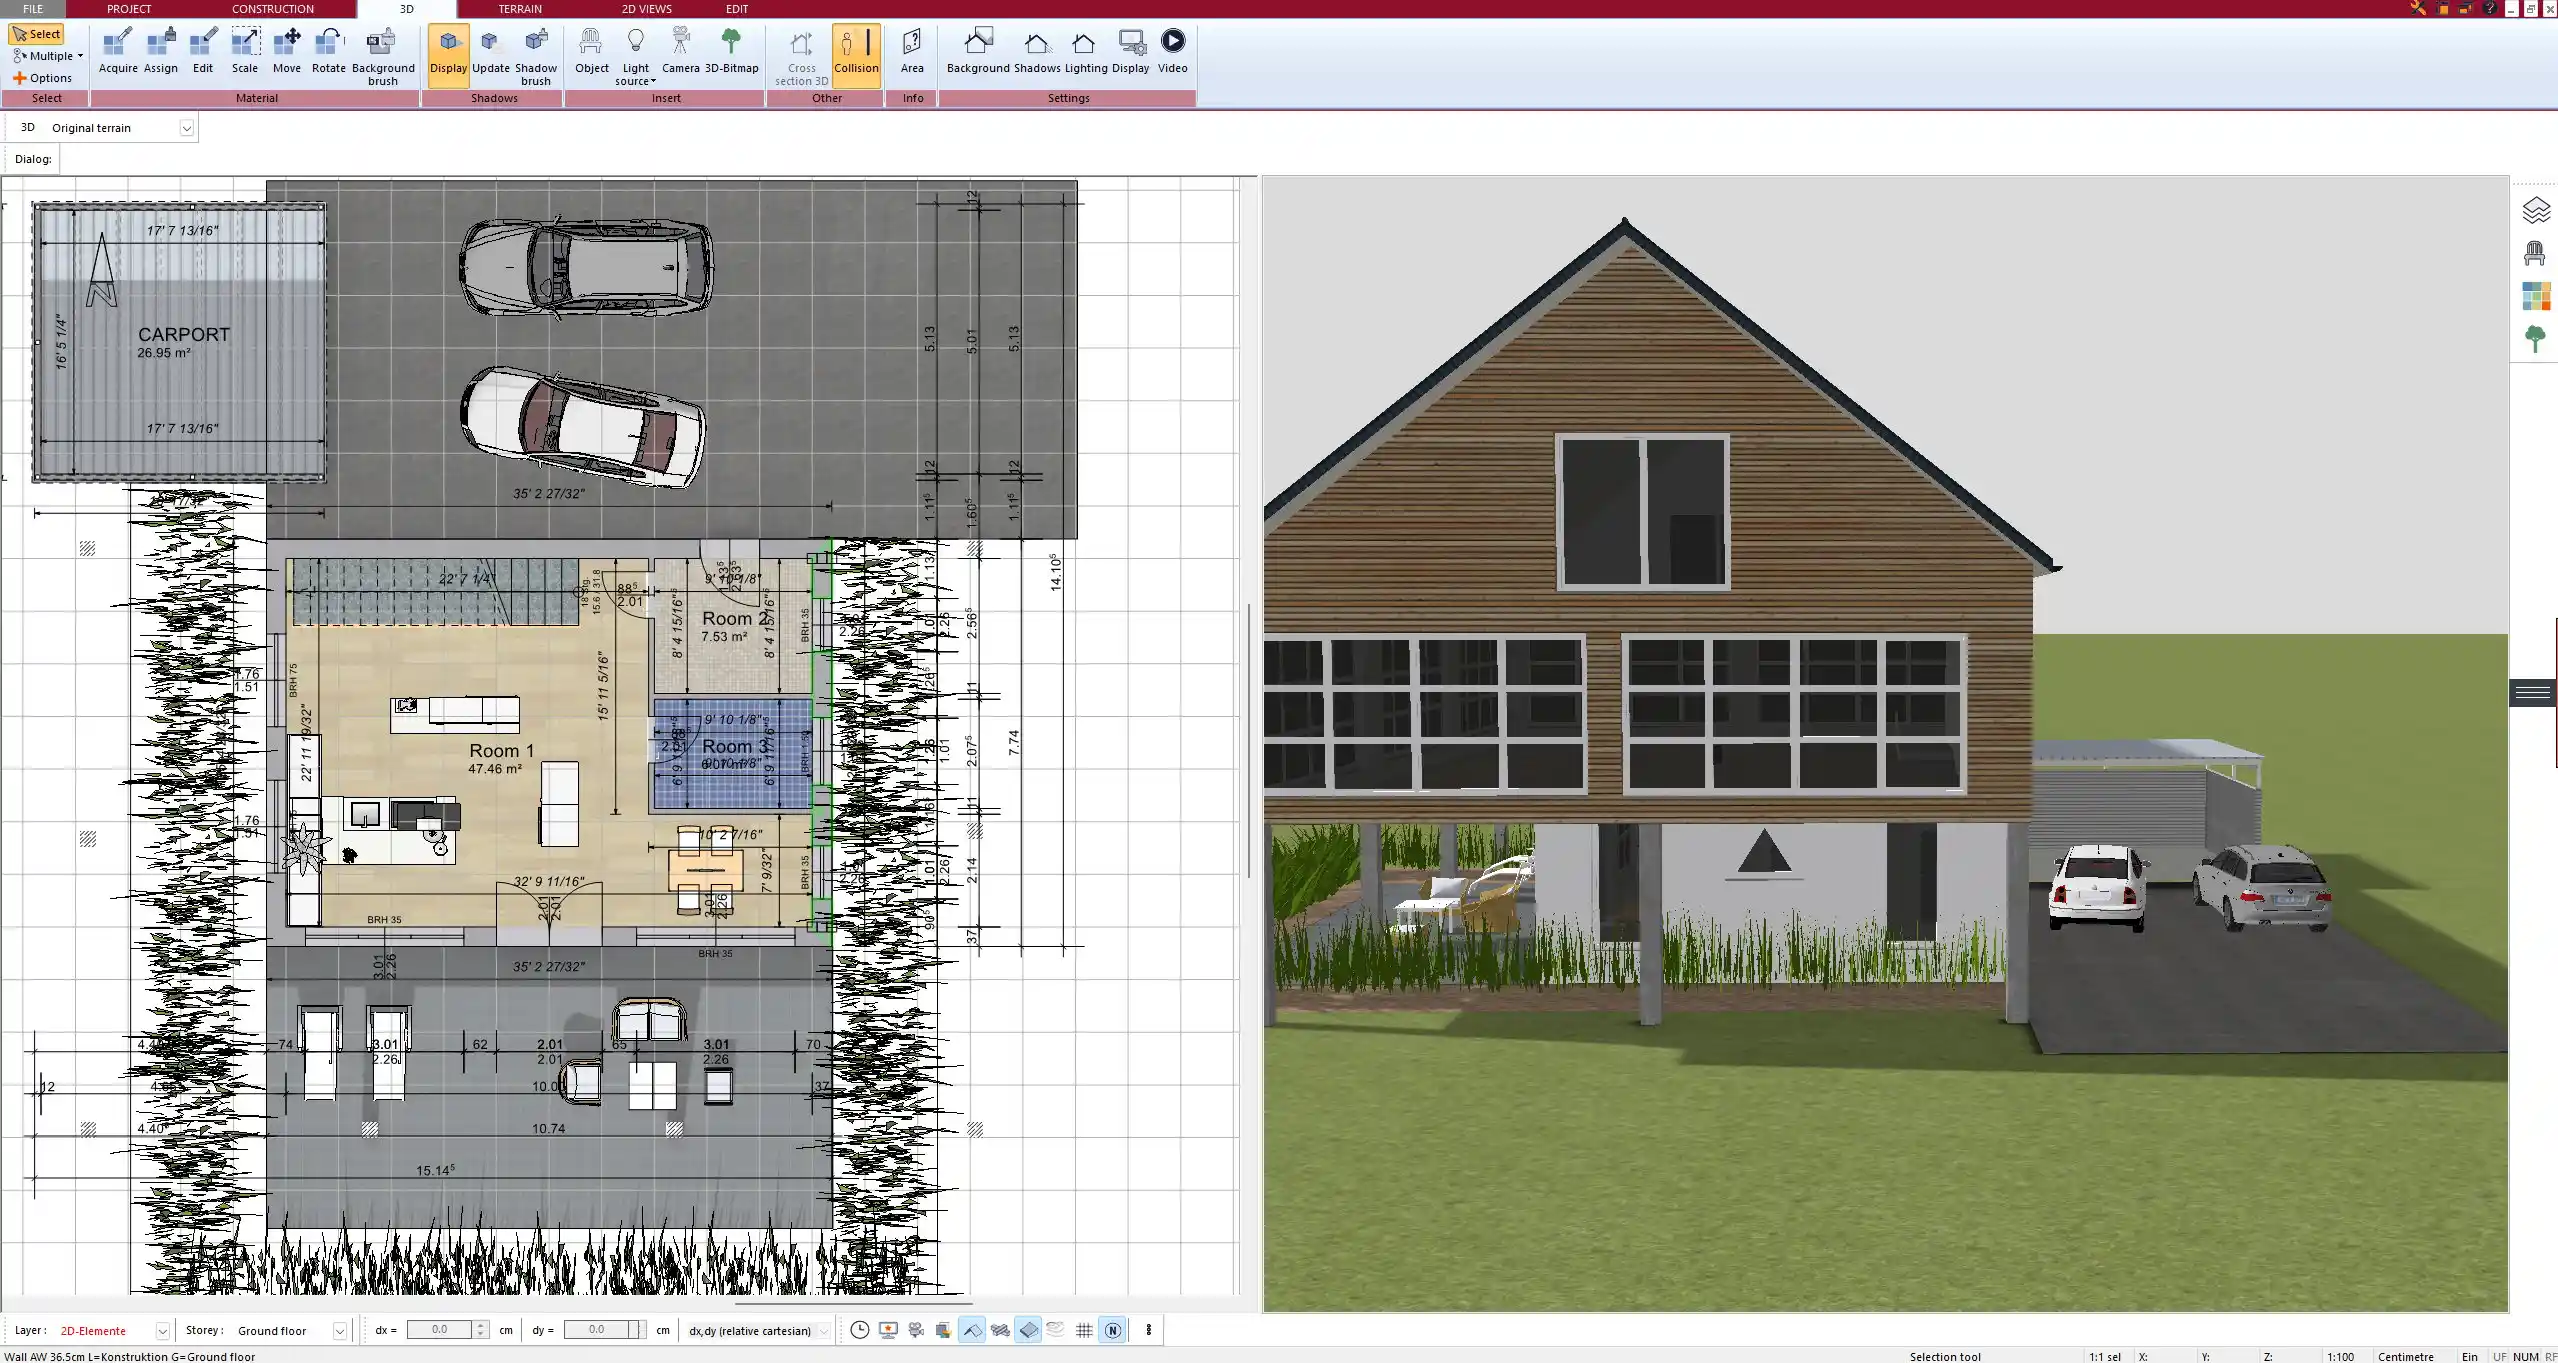
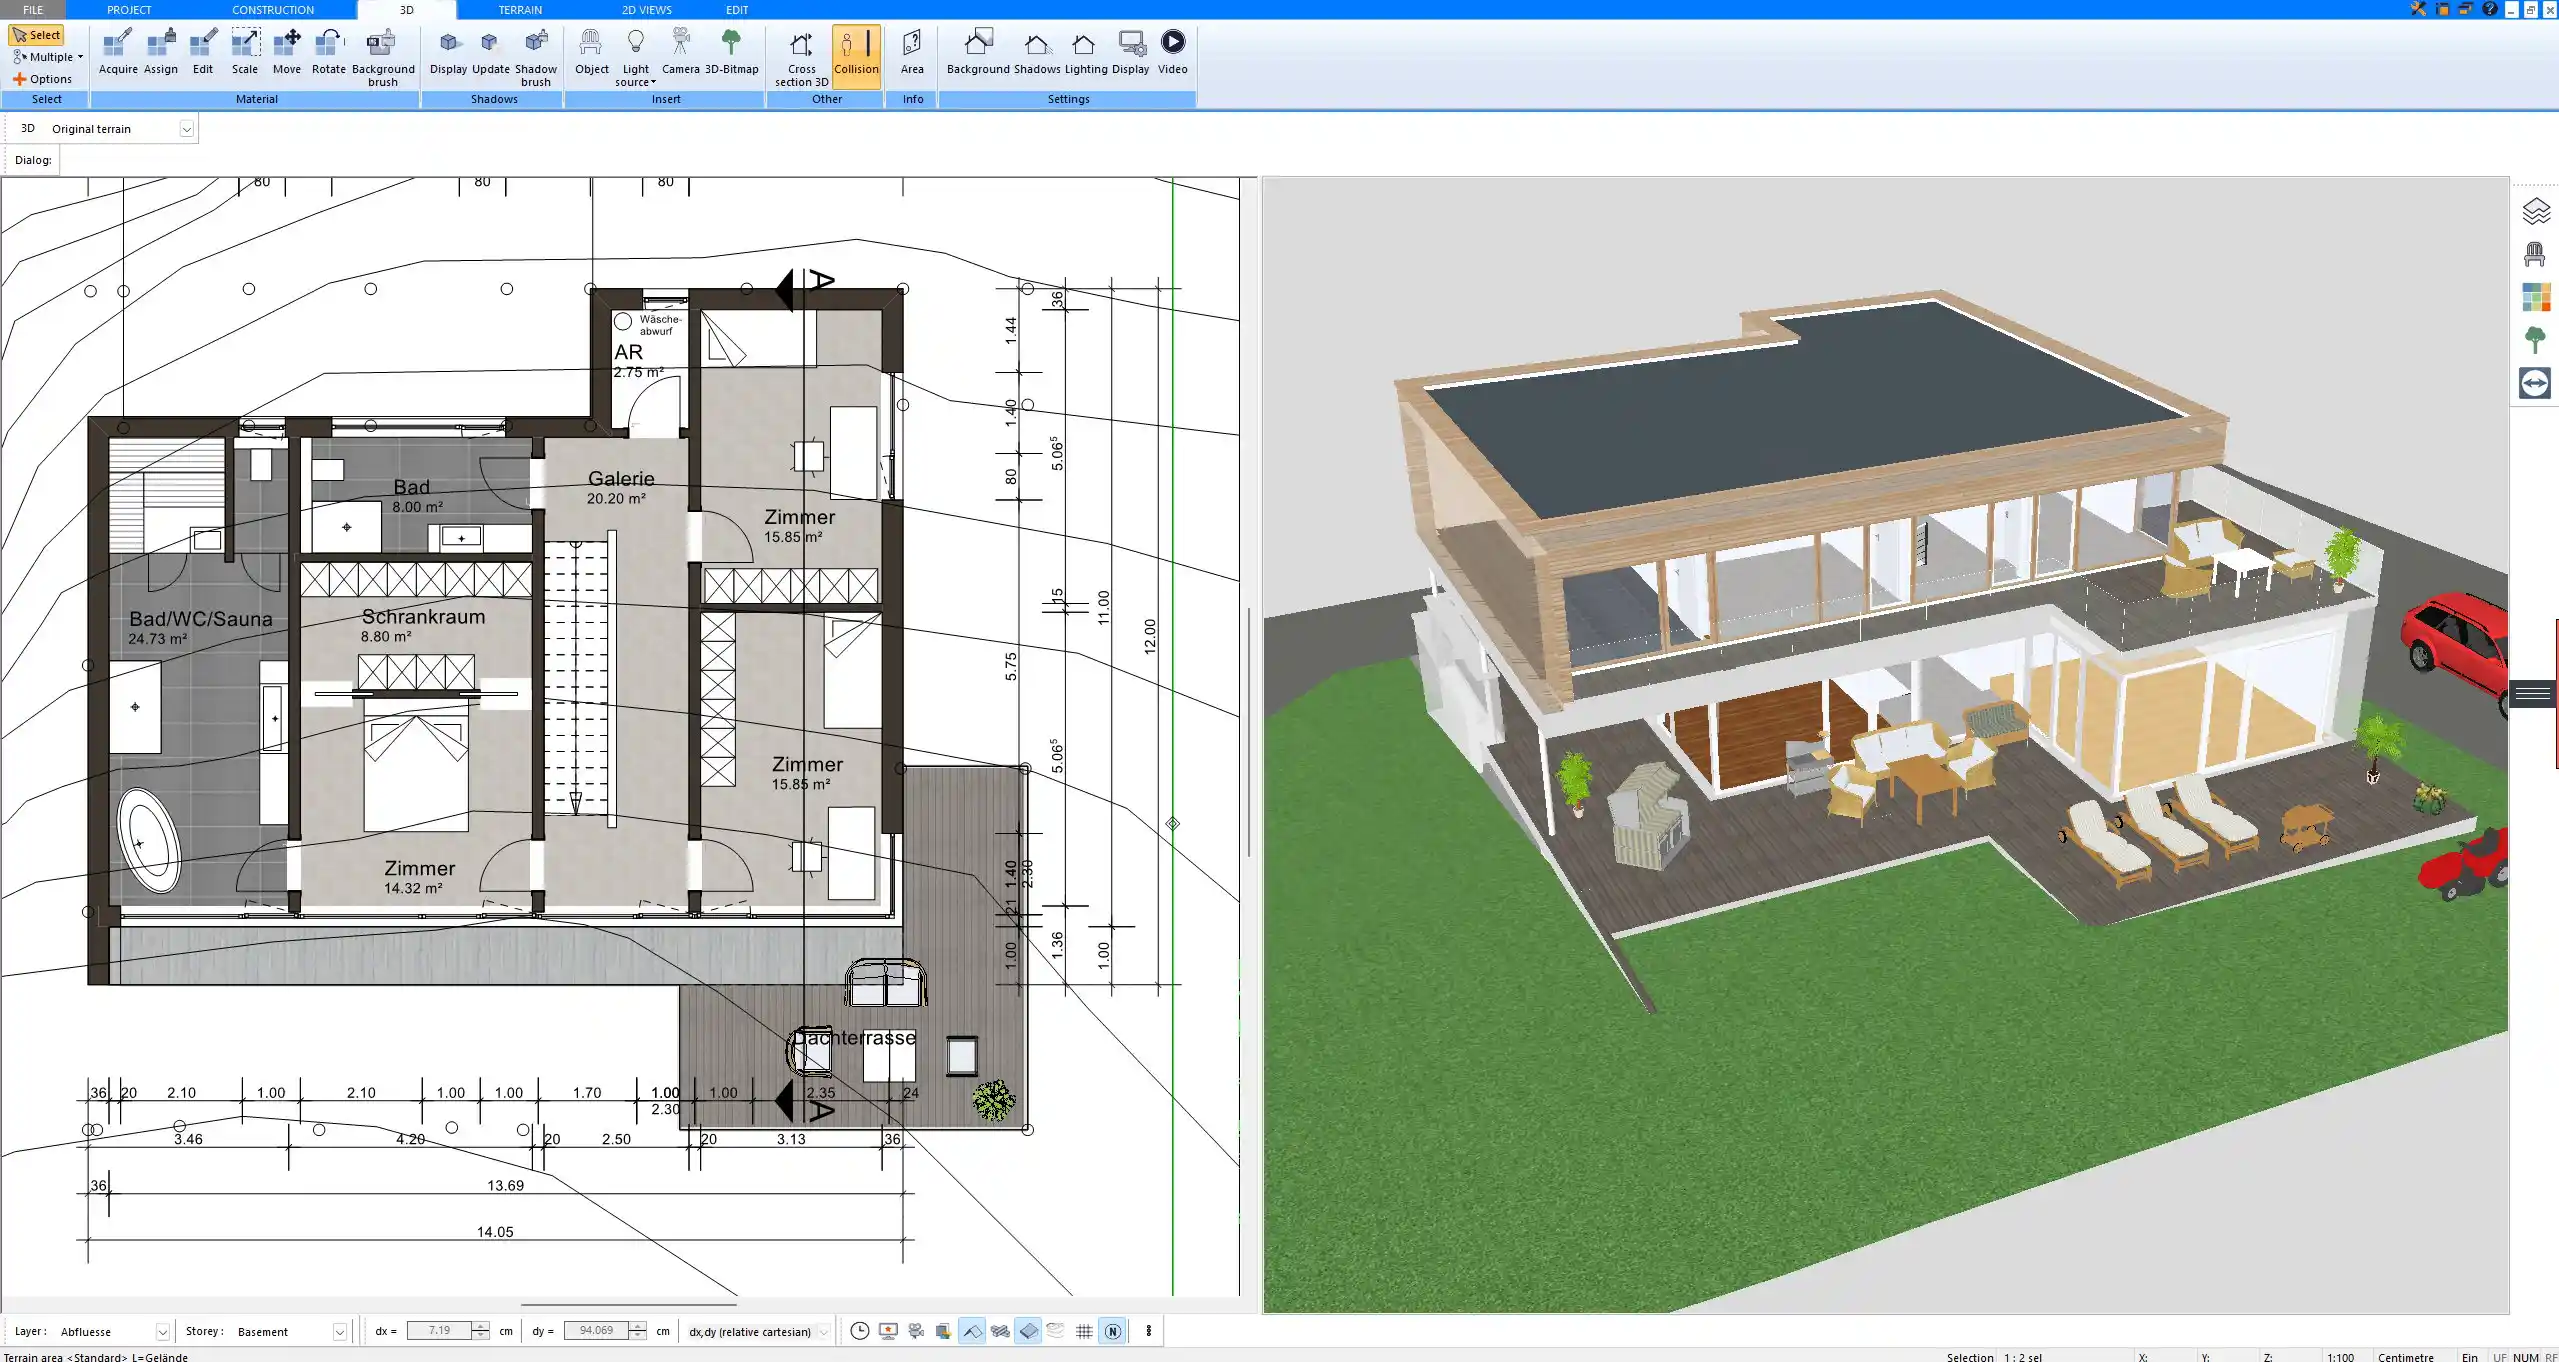
Step 5 – Working in 3D
Switching to 3D mode allows you to view your duplex floor plan from different perspectives and check how the proportions and exterior designs feel in reality. You can immediately spot any inconsistencies or improve the aesthetics by adjusting roof styles, façade elements, and landscaping around the building.
Common roof styles for duplexes:
-
Gable roof (classic pitched roof)
-
Flat roof (modern style)
-
Hip roof (sloped on all sides)
You can add balconies, terraces, and other outdoor spaces individually for each unit.
Important Tips for Planning a Duplex
Consider Privacy Between Units
Duplexes are unique because two separate households share one structure. Ensuring privacy is crucial.
Key privacy aspects:
-
Use sound-insulated walls
-
Position entrances on opposite sides if possible
-
Design separate outdoor spaces (private patios or small gardens)
Plan for Efficient Land Use
A duplex can maximize land value if planned efficiently. Using every square meter (or foot) wisely makes a big difference, especially in urban areas.
Space-saving ideas:
-
Shared driveway with split garages
-
Compact outdoor areas
-
Vertical designs to minimize footprint
Meet Local Building Codes
Always ensure that your duplex design complies with local building regulations. Setbacks, minimum distances between structures, fire walls, and unit separation requirements vary from region to region.
Tip:
Plan7Architect allows you to quickly modify dimensions, wall types, and layouts if adjustments are necessary during the permit process.
Special Features in Plan7Architect for Duplex Planning
Plan7Architect includes several features that are particularly useful for duplex floor plan projects:
Overview of key features:
| Feature | Description |
|---|---|
| Mirroring Function | Automatically create mirrored layouts |
| Separate Address Fields | Assign different addresses to each unit |
| Flexible Units | Work in meters or feet without manual conversion |
| Real-Time Area Calculation | Calculate living space per unit and combined |
| 3D Visualization | Check the building appearance immediately |
These tools allow you to plan professionally while saving a significant amount of time.
Advantages of Using Plan7Architect for Duplex Planning
Using Plan7Architect to plan your duplex offers numerous advantages:
-
Intuitive handling even for beginners
-
Professional 2D technical drawings for permits
-
Powerful 3D visualization to impress clients or partners
-
Easy corrections and real-time adjustments
-
Export in formats suitable for builders and contractors (e.g., PDFs, DXF)
Tip:
The software’s flexibility allows you to create several duplex versions quickly and compare them side-by-side before making a final decision.
Example Ideas for Duplex Floor Plans
There are many creative approaches to designing a duplex. Here are some ideas that can be easily realized with Plan7Architect:
Types of duplex plans:
-
Side-by-Side Duplex: Two identical or mirrored units next to each other.
-
Stacked Duplex: One unit on the ground floor, the second unit on the upper floor.
-
L-Shaped Duplex: Perfect for corner plots with maximum privacy.
-
Duplex Over Garages: Living units above individual or shared garages.
Each type has specific advantages depending on your lot shape, size, and neighborhood.
Conclusion: Create Your Duplex Floor Plan Easily with Plan7Architect
With Plan7Architect, you can create a professional, detailed duplex floor plan quickly and intuitively. Whether you are designing a side-by-side duplex, a stacked version, or a more creative layout, the software provides all the necessary tools. Thanks to flexible unit settings (meters or feet), real-time 2D and 3D views, and powerful adjustment functions, turning your vision into a buildable reality is easier than ever.
Plan your project with Plan7Architect

Plan7Architect Pro 5 for $109.99
You don’t need any prior experience because the software has been specifically designed for beginners. The planning process is carried out in 5 simple steps:
1. Draw Walls

2. Windows & Doors

3. Floors & Roof

4. Textures & 3D Objects

5. Plan for the Building Permit

6. Export the Floor Plan as a 3D Model for Twinmotion

- – Compliant with international construction standards
- – Usable on 3 PCs simultaneously
- – Option for consultation with an architect
- – Comprehensive user manual
- – Regular updates
- – Video tutorials
- – Millions of 3D objects available


