Can You Plan a Basement Yourself with Plan7Architect?
Yes, you absolutely can plan a basement on your own using the Plan7Architect software. I’ve done it myself, and it works incredibly well for anyone who wants to visualize and design a basement space without hiring an architect.
With this program, you can draw and edit your floor plan in both 2D and 3D, and it’s fully compatible with both metric (meters, centimeters) and imperial (feet, inches) units. The software allows you to switch between the two measurement systems at any time, which is especially helpful if you’re working on an international project or simply prefer one over the other.
You don’t need prior experience in architecture or engineering. Everything is done visually — you place walls, doors, stairs, and furniture using drag-and-drop tools, and you can view the results in 3D instantly. Whether you’re finishing an existing basement, renovating an old one, or planning a new build, Plan7Architect gives you full control over the design.
You can customize everything from the room layout and wall types to lighting, windows, insulation, and technical details. It’s suitable for homeowners, DIY builders, and even small construction companies that need a cost-effective planning tool.

Step-by-Step: How to Plan a Basement with Plan7Architect
Start with the Right Settings
The first thing you do is set up the project file with the correct floor level. In Plan7Architect, you can define the basement as a separate floor, often labeled as “cellar” or “basement.” Once that’s selected, choose your measurement system. I personally prefer working in meters, but if you’re used to feet and inches, you can switch to imperial units with one click.
You then set up basic parameters like:
-
Wall thickness (e.g., 30 cm or 12 inches for concrete walls)
-
Ceiling height (e.g., 2.4 m or 8 ft)
-
Floor slab and insulation layer
These values can be adjusted later, but it’s good to set them early to avoid rework.
Tip:
If your basement will be partially or fully below ground, set exterior wall types to “foundation wall” or “retaining wall” to reflect structural needs.
Draw the Basement Floor Plan in 2D
The 2D editor is where the layout begins. You use the wall tool to draw the perimeter of the basement, followed by interior walls that define rooms and zones.
Some common areas you might include:
-
Storage rooms
-
Laundry or utility rooms
-
Workshop
-
Guest room
-
Home office
-
Staircases
Doors and windows are added with a click, and you can adjust their sizes and positions freely. There are pre-configured styles for basement windows (smaller and higher positioned) and exterior doors that lead to garden levels or garages.
You can also define room types in the software. Each room can be labeled and assigned a purpose, which helps during visualization and later when exporting plans.
Example Table: Typical Room Dimensions in a Basement
| Room Type | Area (m² / ft²) | Suggested Ceiling Height (m / ft) |
|---|---|---|
| Storage Room | 6–10 / 65–110 | 2.2–2.4 / 7.2–8 |
| Laundry Room | 8–12 / 85–130 | 2.4 / 8 |
| Guest Bedroom | 12–18 / 130–195 | 2.4 / 8 |
| Hobby Room | 10–20 / 110–215 | 2.4–2.5 / 8–8.2 |
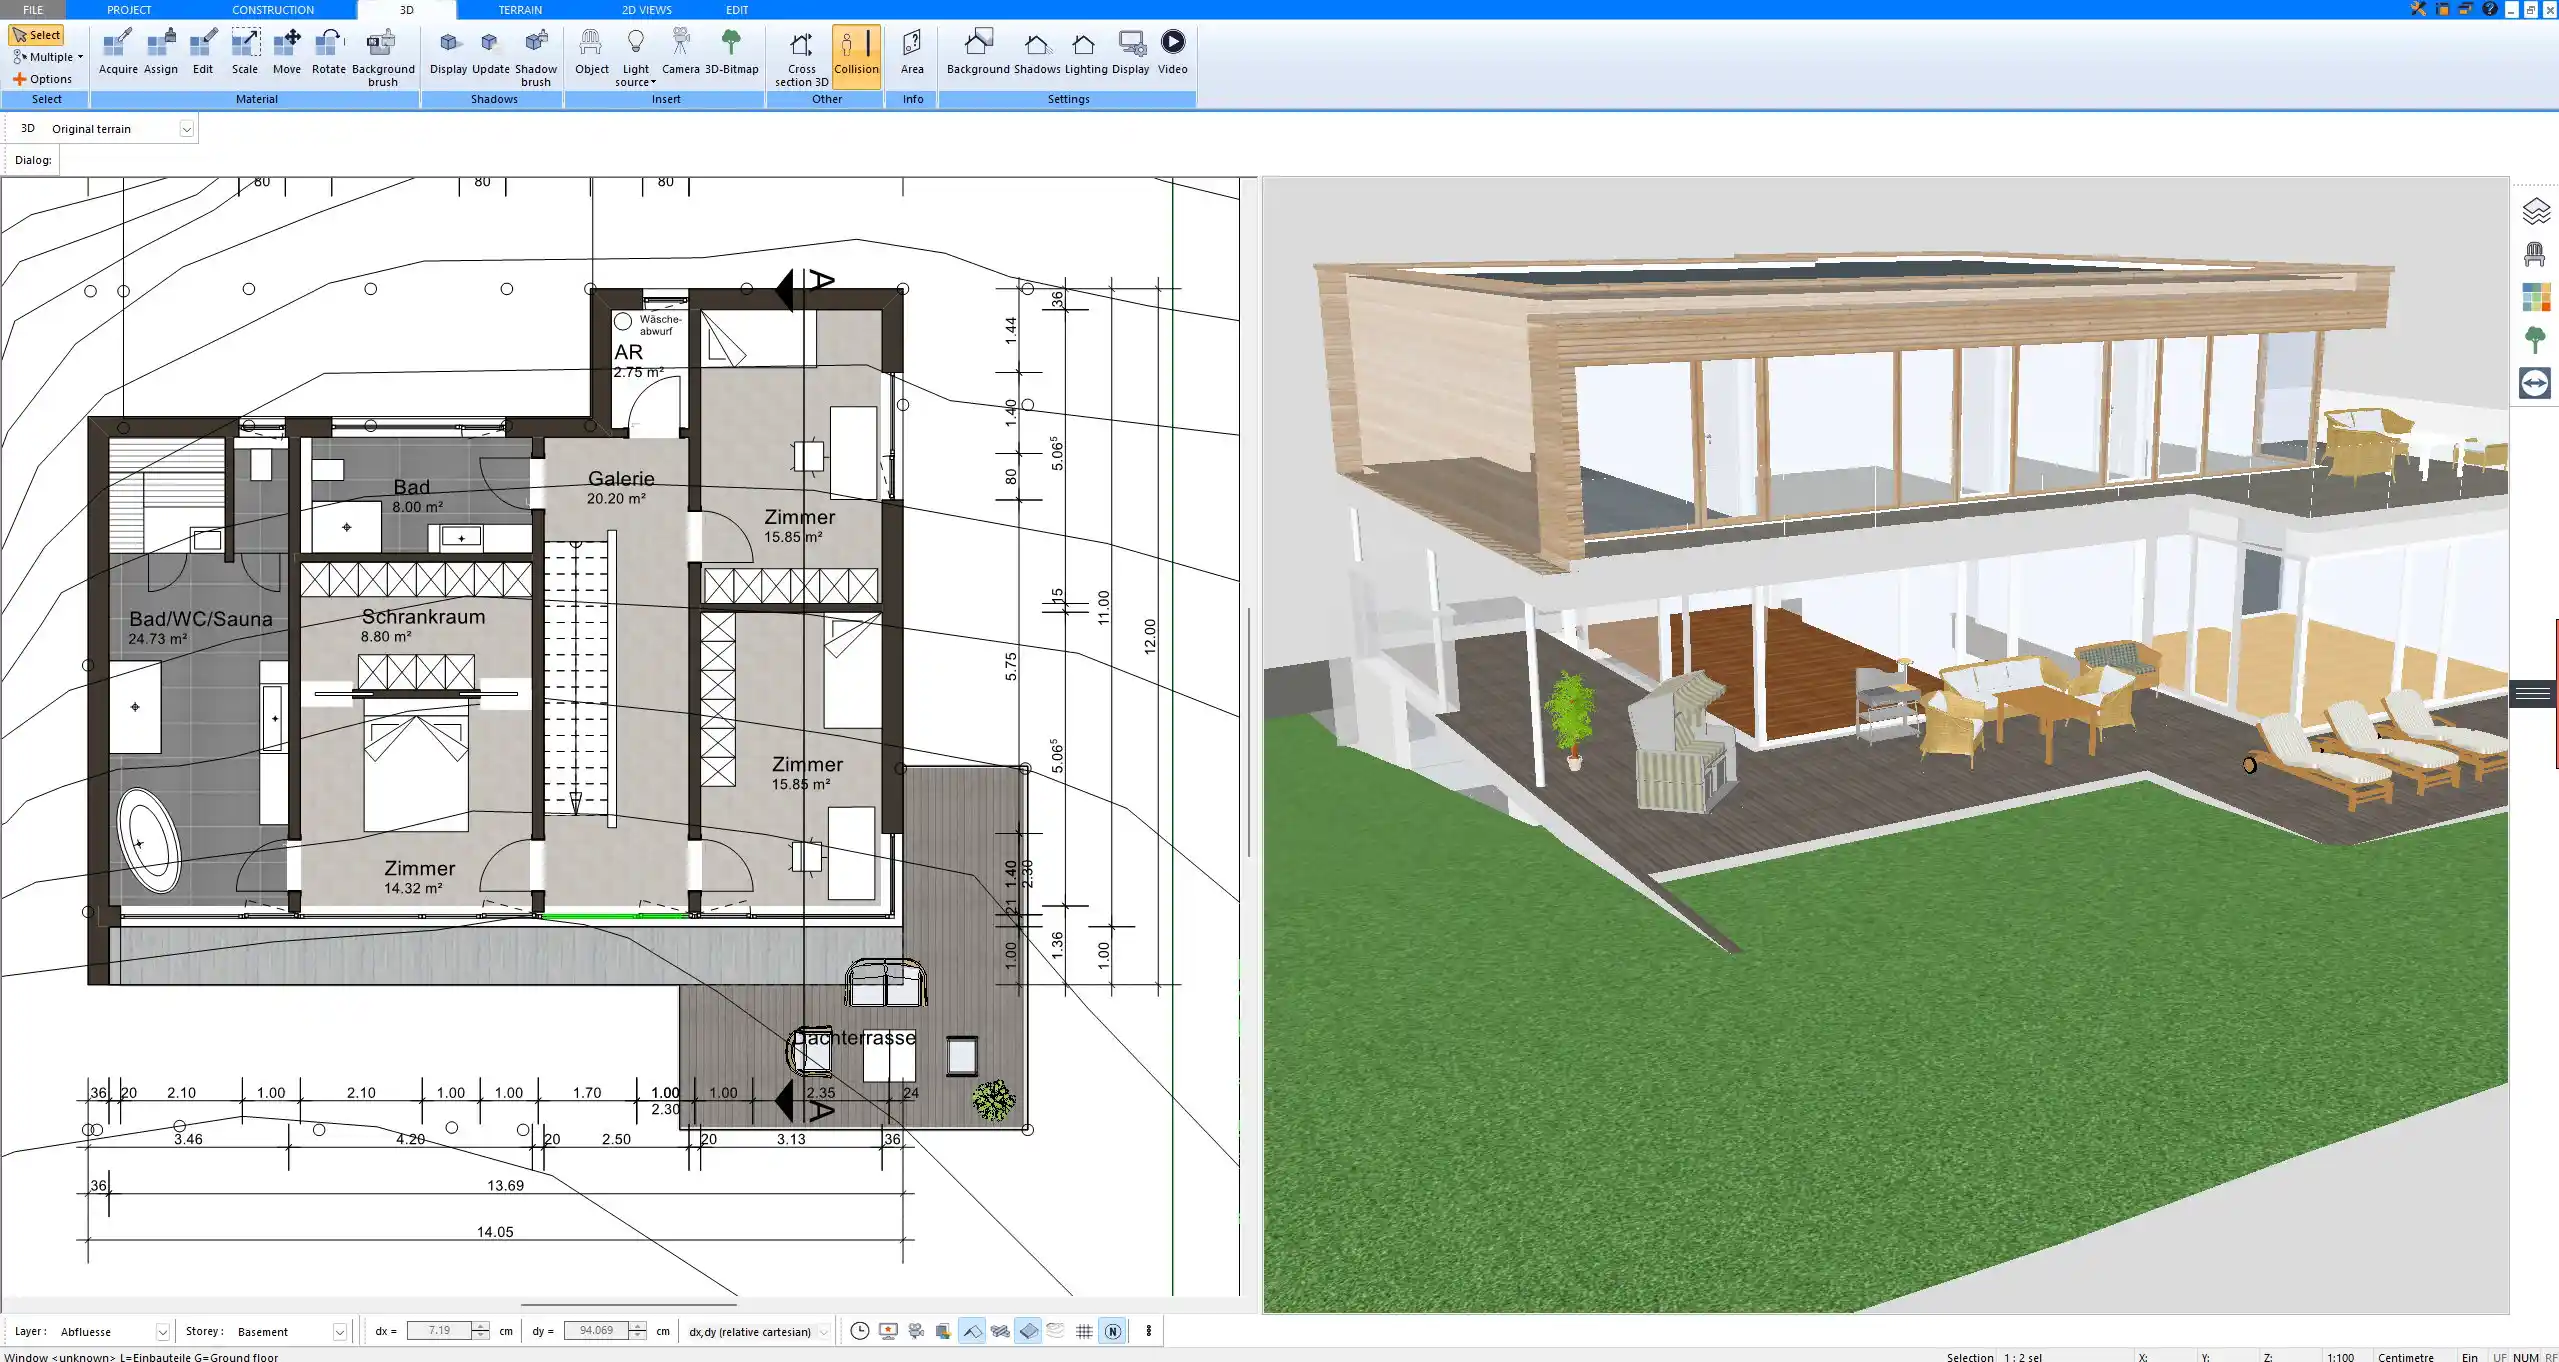
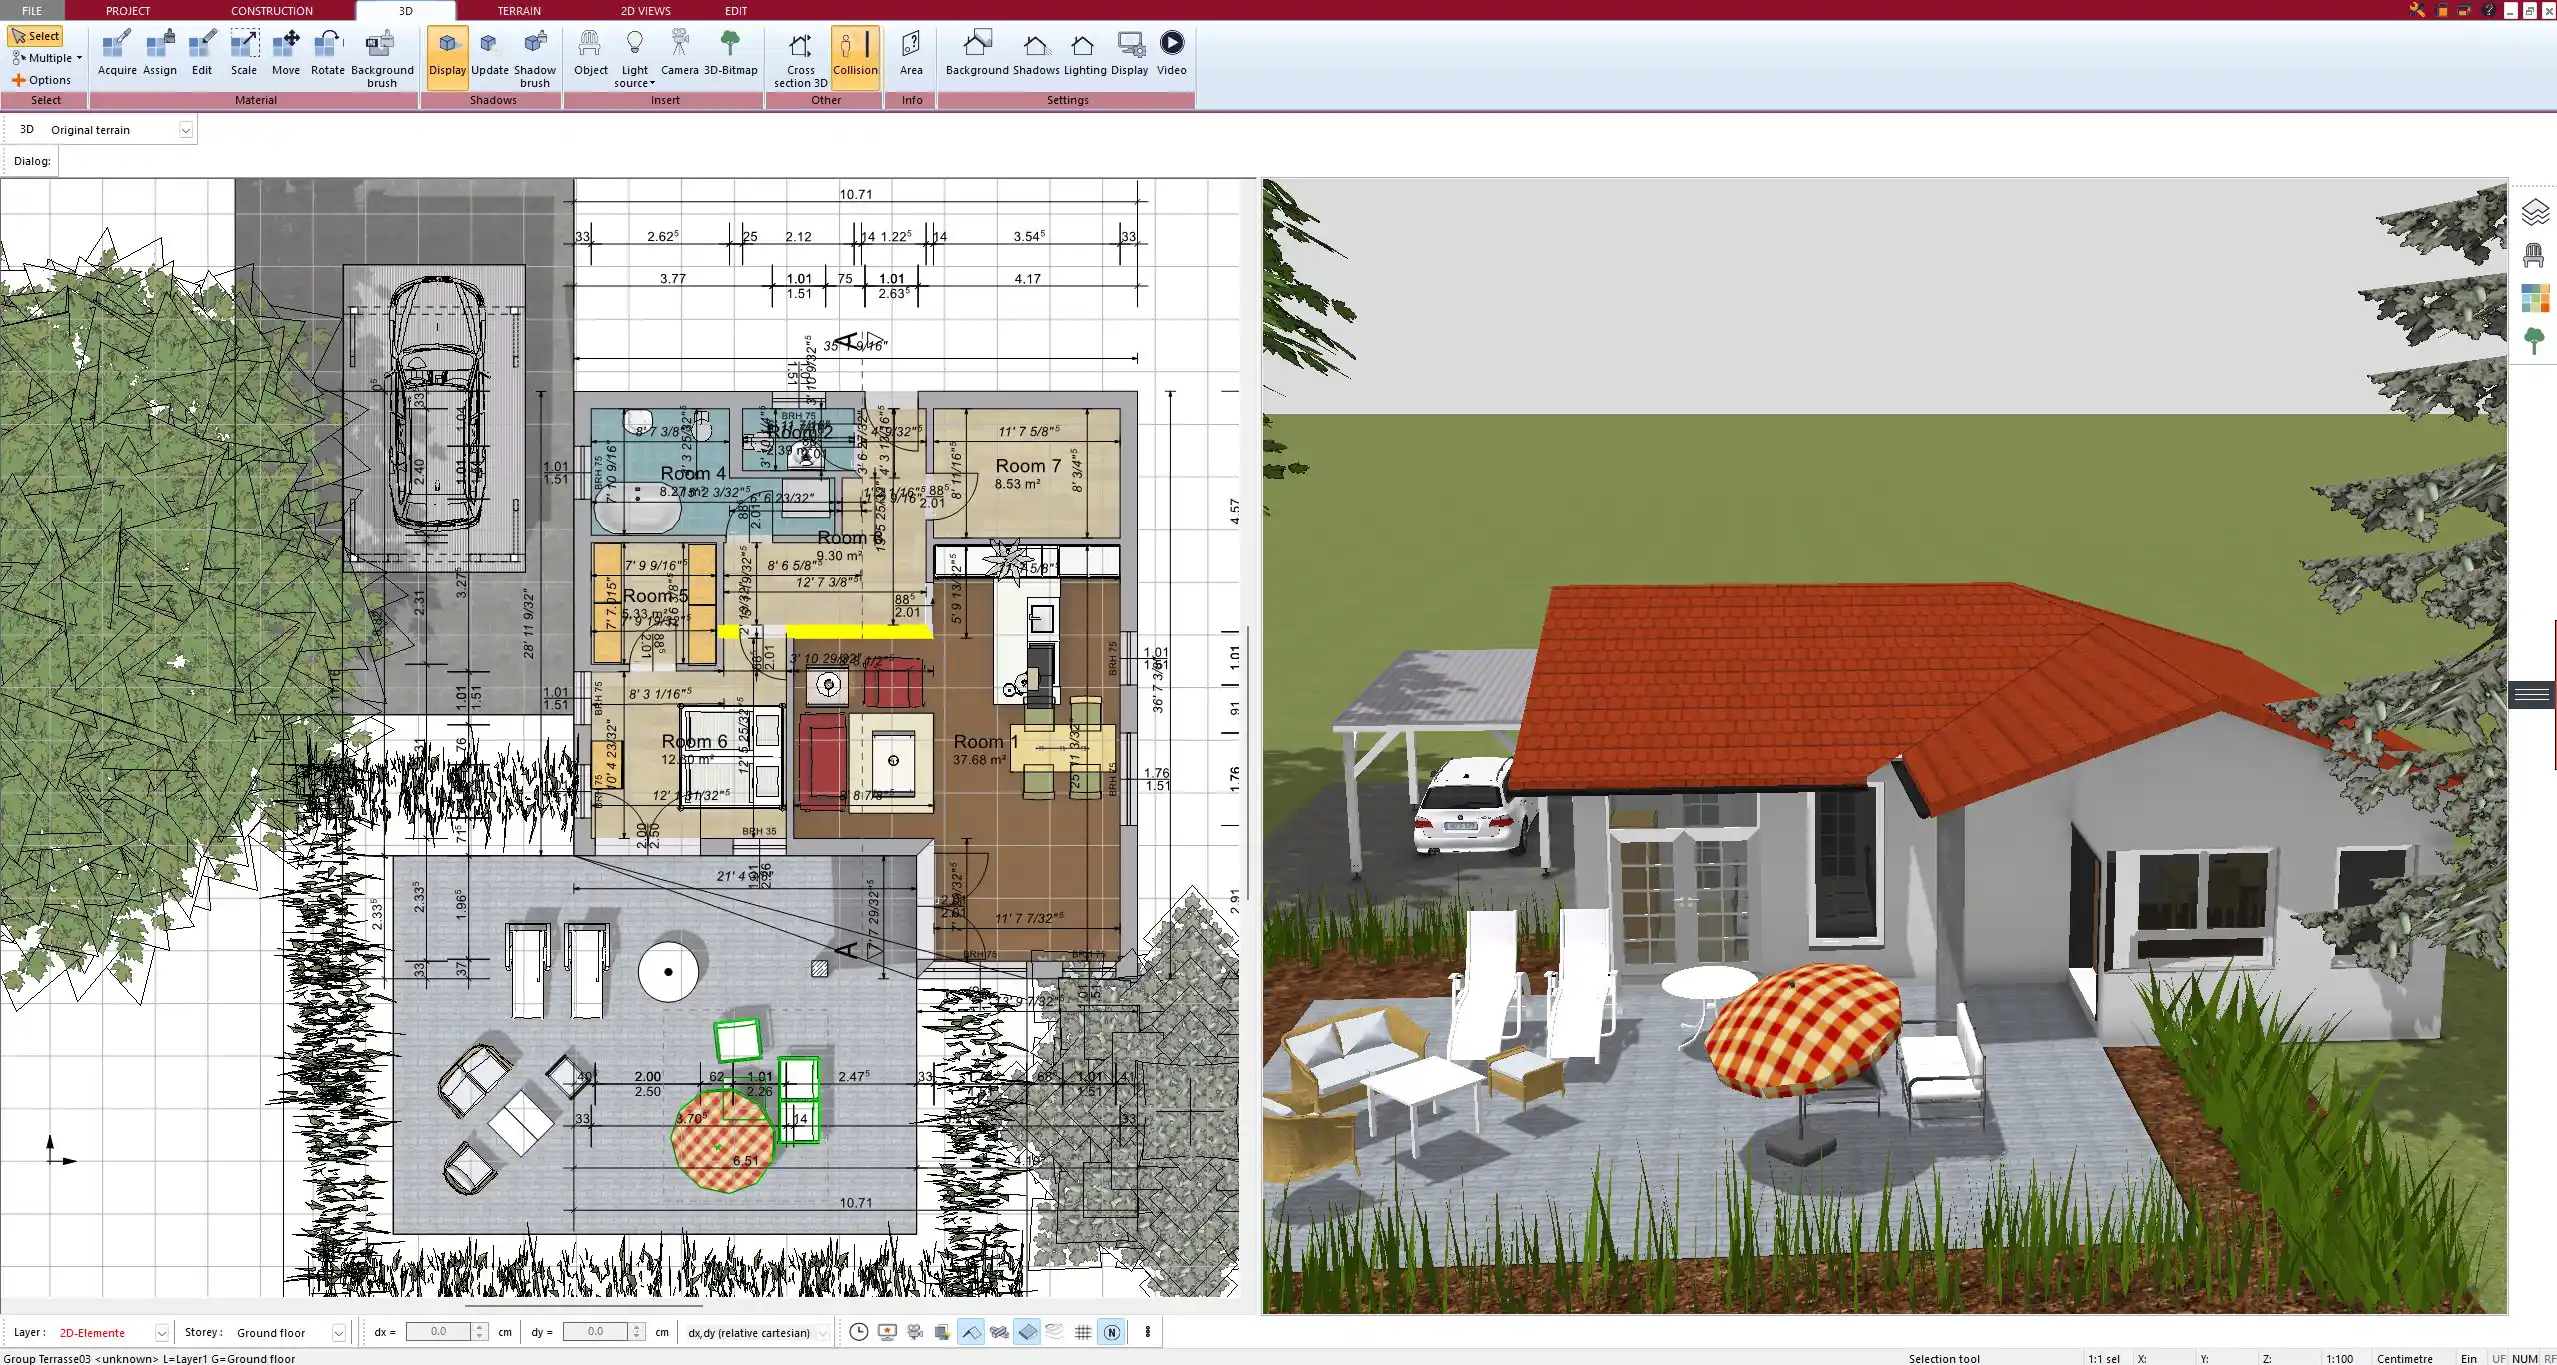
Switch to 3D for Real-Time Visualization
Once your floor plan is ready, you can switch to the 3D view with one click. This is where the real power of Plan7Architect shines. You immediately see your design as a walkable model, including lighting, shadows, materials, and furniture.
You can rotate the model, zoom in, enter rooms virtually, and check dimensions at any point. This helps identify issues early — for example, a ceiling that’s too low or a window that’s too small.
In 3D mode, you can also apply textures and materials to walls, floors, and ceilings. Whether you want concrete walls, wood flooring, or tiled bathrooms, you can apply it and instantly see how it looks.
Tip:
Use the real-time lighting function to simulate daylight and see how much natural light enters the basement — especially important for egress windows.
Plan Technical Elements
Technical planning is essential in any basement, and Plan7Architect makes this surprisingly easy. You can add:
-
Electrical sockets
-
Ceiling or wall-mounted lights
-
Light switches (connected to actual light fixtures)
-
Radiators or HVAC units
-
Water lines and drains (for laundry or bathrooms)
There are drag-and-drop icons for most technical elements. You can position them in 2D and then view them in 3D to ensure everything fits realistically.
If you plan to finish the basement later or expand functionality, you can even place empty conduit paths in the design.
Important Considerations When Planning a Basement
Structural Planning
A basement requires strong attention to structure. In Plan7Architect, you can select wall types like reinforced concrete or insulated masonry to reflect your building method.
You should define:
-
Wall thickness based on insulation and structure
-
Ceiling height according to code (commonly 2.2 m or 7.2 ft minimum)
-
Floor slabs with proper layering (concrete, vapor barrier, insulation)
Also consider the staircase. The software allows you to choose between L-shaped, straight, or spiral staircases — each can be adjusted in height and width.
Natural Light and Ventilation
Basements usually struggle with natural light. You can add light wells, exterior doors with glass panels, or larger-than-standard basement windows.
Plan7Architect includes typical window types for basements that sit above ground level or fit within window wells. You can also simulate daylight to check lighting quality.
Tip:
Ensure every habitable room has an egress window or door that complies with local building codes. You can check size and placement directly in the plan.
Heating, Cooling, and Moisture Control
Include technical planning for:
-
Radiators or underfloor heating
-
Dehumidifiers or mechanical ventilation
-
Moisture protection (e.g., barrier layers, sump pump rooms)
The software allows you to add equipment symbols and zone them properly.
Functional Room Use Ideas
Basements offer a lot of flexibility. Here are ideas for room types you can test and visualize in your plan:
-
Guest room with en-suite bath
-
Home gym with mirrors and floor mats
-
Home theater with blackout walls and raised seating
-
Children’s playroom with storage and soft flooring
-
Wine cellar with controlled temperature zones
-
Hobby or craft room with workbenches
You can place realistic furniture, decor, and lighting from the built-in object library and instantly see how your space would feel.
Regional Differences to Keep in Mind
Plan7Architect is built for international use. You can select metric or imperial units at the beginning and even switch between them during your project. This makes the software ideal whether you’re working on a project in the United States, Canada, Australia, the UK, or Europe.
It also lets you:
-
Set local building standards (e.g., floor height minimums)
-
Adjust insulation and wall specifications based on climate
-
Design code-compliant stairways, egress, and technical installations
Tips for a Successful DIY Basement Plan
-
Experiment with layout ideas before committing to one version
-
Use layers to separate electrical, plumbing, and furniture plans
-
Save backups regularly and name versions clearly
-
Print in high resolution to share plans with contractors or for permits
-
Measure in real-world scale by using on-screen rulers and dimension tools
Tip:
Start with a rough sketch on paper, then recreate it in Plan7Architect to speed up your first draft. Once it’s in the software, you can tweak dimensions, materials, and features with precision.
Exporting & Using Your Plan Professionally
When your basement design is complete, you can export it in several formats:
-
PDF for quick sharing
-
JPG or PNG for use in presentations
-
DXF/DWG for sharing with engineers or builders
-
Print plans to scale for use on-site
Plan7Architect also supports plotting if you need large-format prints for construction. You can include a legend, room names, measurements, and construction details in the output.
Who Is This For?
This software is perfect for:
-
Homeowners finishing or designing a basement
-
DIY builders who want full design control
-
Renovators planning to transform old basements
-
Small contractors who need a flexible, affordable tool
-
Real estate developers and interior designers needing fast 3D visuals
Whether you’re working on a weekend project or a professional renovation, Plan7Architect helps you turn your vision into a plan — efficiently, visually, and with great precision.
Plan your project with Plan7Architect

Plan7Architect Pro 5 for $109.99
You don’t need any prior experience because the software has been specifically designed for beginners. The planning process is carried out in 5 simple steps:
1. Draw Walls

2. Windows & Doors

3. Floors & Roof

4. Textures & 3D Objects

5. Plan for the Building Permit

6. Export the Floor Plan as a 3D Model for Twinmotion

- – Compliant with international construction standards
- – Usable on 3 PCs simultaneously
- – Option for consultation with an architect
- – Comprehensive user manual
- – Regular updates
- – Video tutorials
- – Millions of 3D objects available


