To begin designing a townhouse floor plan with Plan7Architect, open the software and create a new project. You can select whether to work with metric or imperial units—both are supported, so you’re free to plan in meters or in feet and inches, depending on your region or preference.
In the 2D floor plan view, draw the outline of your building using the wall tool, define the number of floors (typically two to four in a townhouse), and set the individual floor heights. Use the room tool to add interior spaces such as kitchens, living areas, bedrooms, and bathrooms. Then place staircases between the levels and add windows and doors.
At any moment, you can switch to the 3D view to explore the layout and make adjustments visually. The design updates in real time as you edit.
If you’re in a hurry or unsure where to begin, you can load a pre-designed townhouse template and customize it as needed.

What Makes a Townhouse Floor Plan Unique
Townhouses have specific characteristics that set them apart from detached or semi-detached homes. Understanding these key features helps create a realistic and functional floor plan:
-
Narrow frontage: Most townhouses are built on narrow plots, typically between 5 to 8 meters (16 to 26 feet) wide.
-
Multi-story construction: To compensate for the narrow layout, townhouses often have two, three, or even four floors.
-
Shared walls: Townhouses usually have party walls on one or both sides, meaning you won’t add windows or external features to those walls.
-
Limited exterior access: There is often no access from the sides, so entrances are located at the front and rear.
-
Vertical living: Living areas are typically on the ground floor, with bedrooms and bathrooms located above.
These constraints make efficient space planning essential—and Plan7Architect is ideally suited to handle this kind of vertical, compact layout.
Step-by-Step: Designing Your Townhouse in Plan7Architect
1. Set Up Your Project
Open Plan7Architect and create a new project. Right from the start, choose your unit of measurement: either metric (meters, centimeters) or imperial (feet, inches). The program lets you switch between the two at any time, depending on your needs or local standards.
Next, define the size of your plot. For example, if you’re planning a classic townhouse, you might set your lot to 6 by 12 meters or 20 by 40 feet.
Decide how many floors your townhouse will have. In most cases, this is between two and four stories, including a potential attic or rooftop terrace. Use the storey manager to define the number of levels, name each floor, and set custom ceiling heights for each one.
2. Draw the Outer Walls
Use the wall tool in 2D view to draw the perimeter of your house. Because townhouses often align with neighboring units, you will usually start by drawing a rectangle representing the overall shape of the house.
Set the wall thickness according to your local construction standards—e.g., 30 cm or 12 inches for external walls.
Make sure the front and back ends of the house are clearly defined, as those are typically the only sides available for windows, doors, or entrances.
Tip: If your townhouse is part of a row, you can draw adjacent units as outlines to better visualize shared walls and plan for privacy.
3. Define Levels and Floor Heights
Use the storey manager to add and configure your floors. A common setup might look like this:
| Floor Name | Function | Height Example |
|---|---|---|
| Ground Floor | Living, dining, kitchen | 2.7 m / 9 ft |
| First Floor | Bedrooms, bathrooms | 2.6 m / 8.5 ft |
| Second Floor | Additional bedrooms or loft | 2.5 m / 8 ft |
| Rooftop Level | Optional terrace or studio | variable |
Each level can be designed individually in 2D, but connected through stairs and visible as a whole in 3D.
4. Add Rooms and Layout Zones
Once the basic shape and floors are in place, divide the space into rooms using inner walls.
A typical layout might include:
Ground Floor:
-
Entrance or hallway
-
Open-concept living/dining/kitchen area
-
Guest bathroom or utility room
Upper Floors:
-
2 to 3 bedrooms
-
One or two bathrooms
-
Storage or closet space
-
Optional home office or child’s room
Use the room tool to define each area and assign a label (e.g., “Living Room,” “Master Bedroom”). You can also set flooring types, wall colors, and other visual details.
Hint: Don’t forget circulation space—hallways, stair landings, and door swing areas are essential in narrow floor plans.
5. Add Stairs and Vertical Circulation
In townhouse design, stair placement is critical. The stairs must be space-efficient and connect all levels without breaking the flow of the layout.
Choose from the stair options in Plan7Architect:
-
Straight stairs (ideal for long, narrow layouts)
-
L-shaped or U-shaped stairs (space-saving, good for central locations)
-
Spiral stairs (used mainly for rooftop or attic access)
Place the stairs near the center or side of the floor plan, depending on your layout. Once placed, you can check the connection between levels in 3D.
Ensure that there is enough headroom and landing space at each transition point.
6. Insert Windows, Doors, and Openings
Because only the front and rear façades are typically accessible, window planning is important.
Use taller, narrow windows at the front for light and street privacy. In the back, consider large sliding doors or panoramic windows to open toward a garden or terrace.
Use the object catalog to drag and drop:
-
Entry doors
-
Interior doors
-
Sliding or French patio doors
-
Window sets (e.g., triple vertical windows for front façade)
Each element can be resized and positioned precisely. You can also set sill height, opening direction, and frame materials.
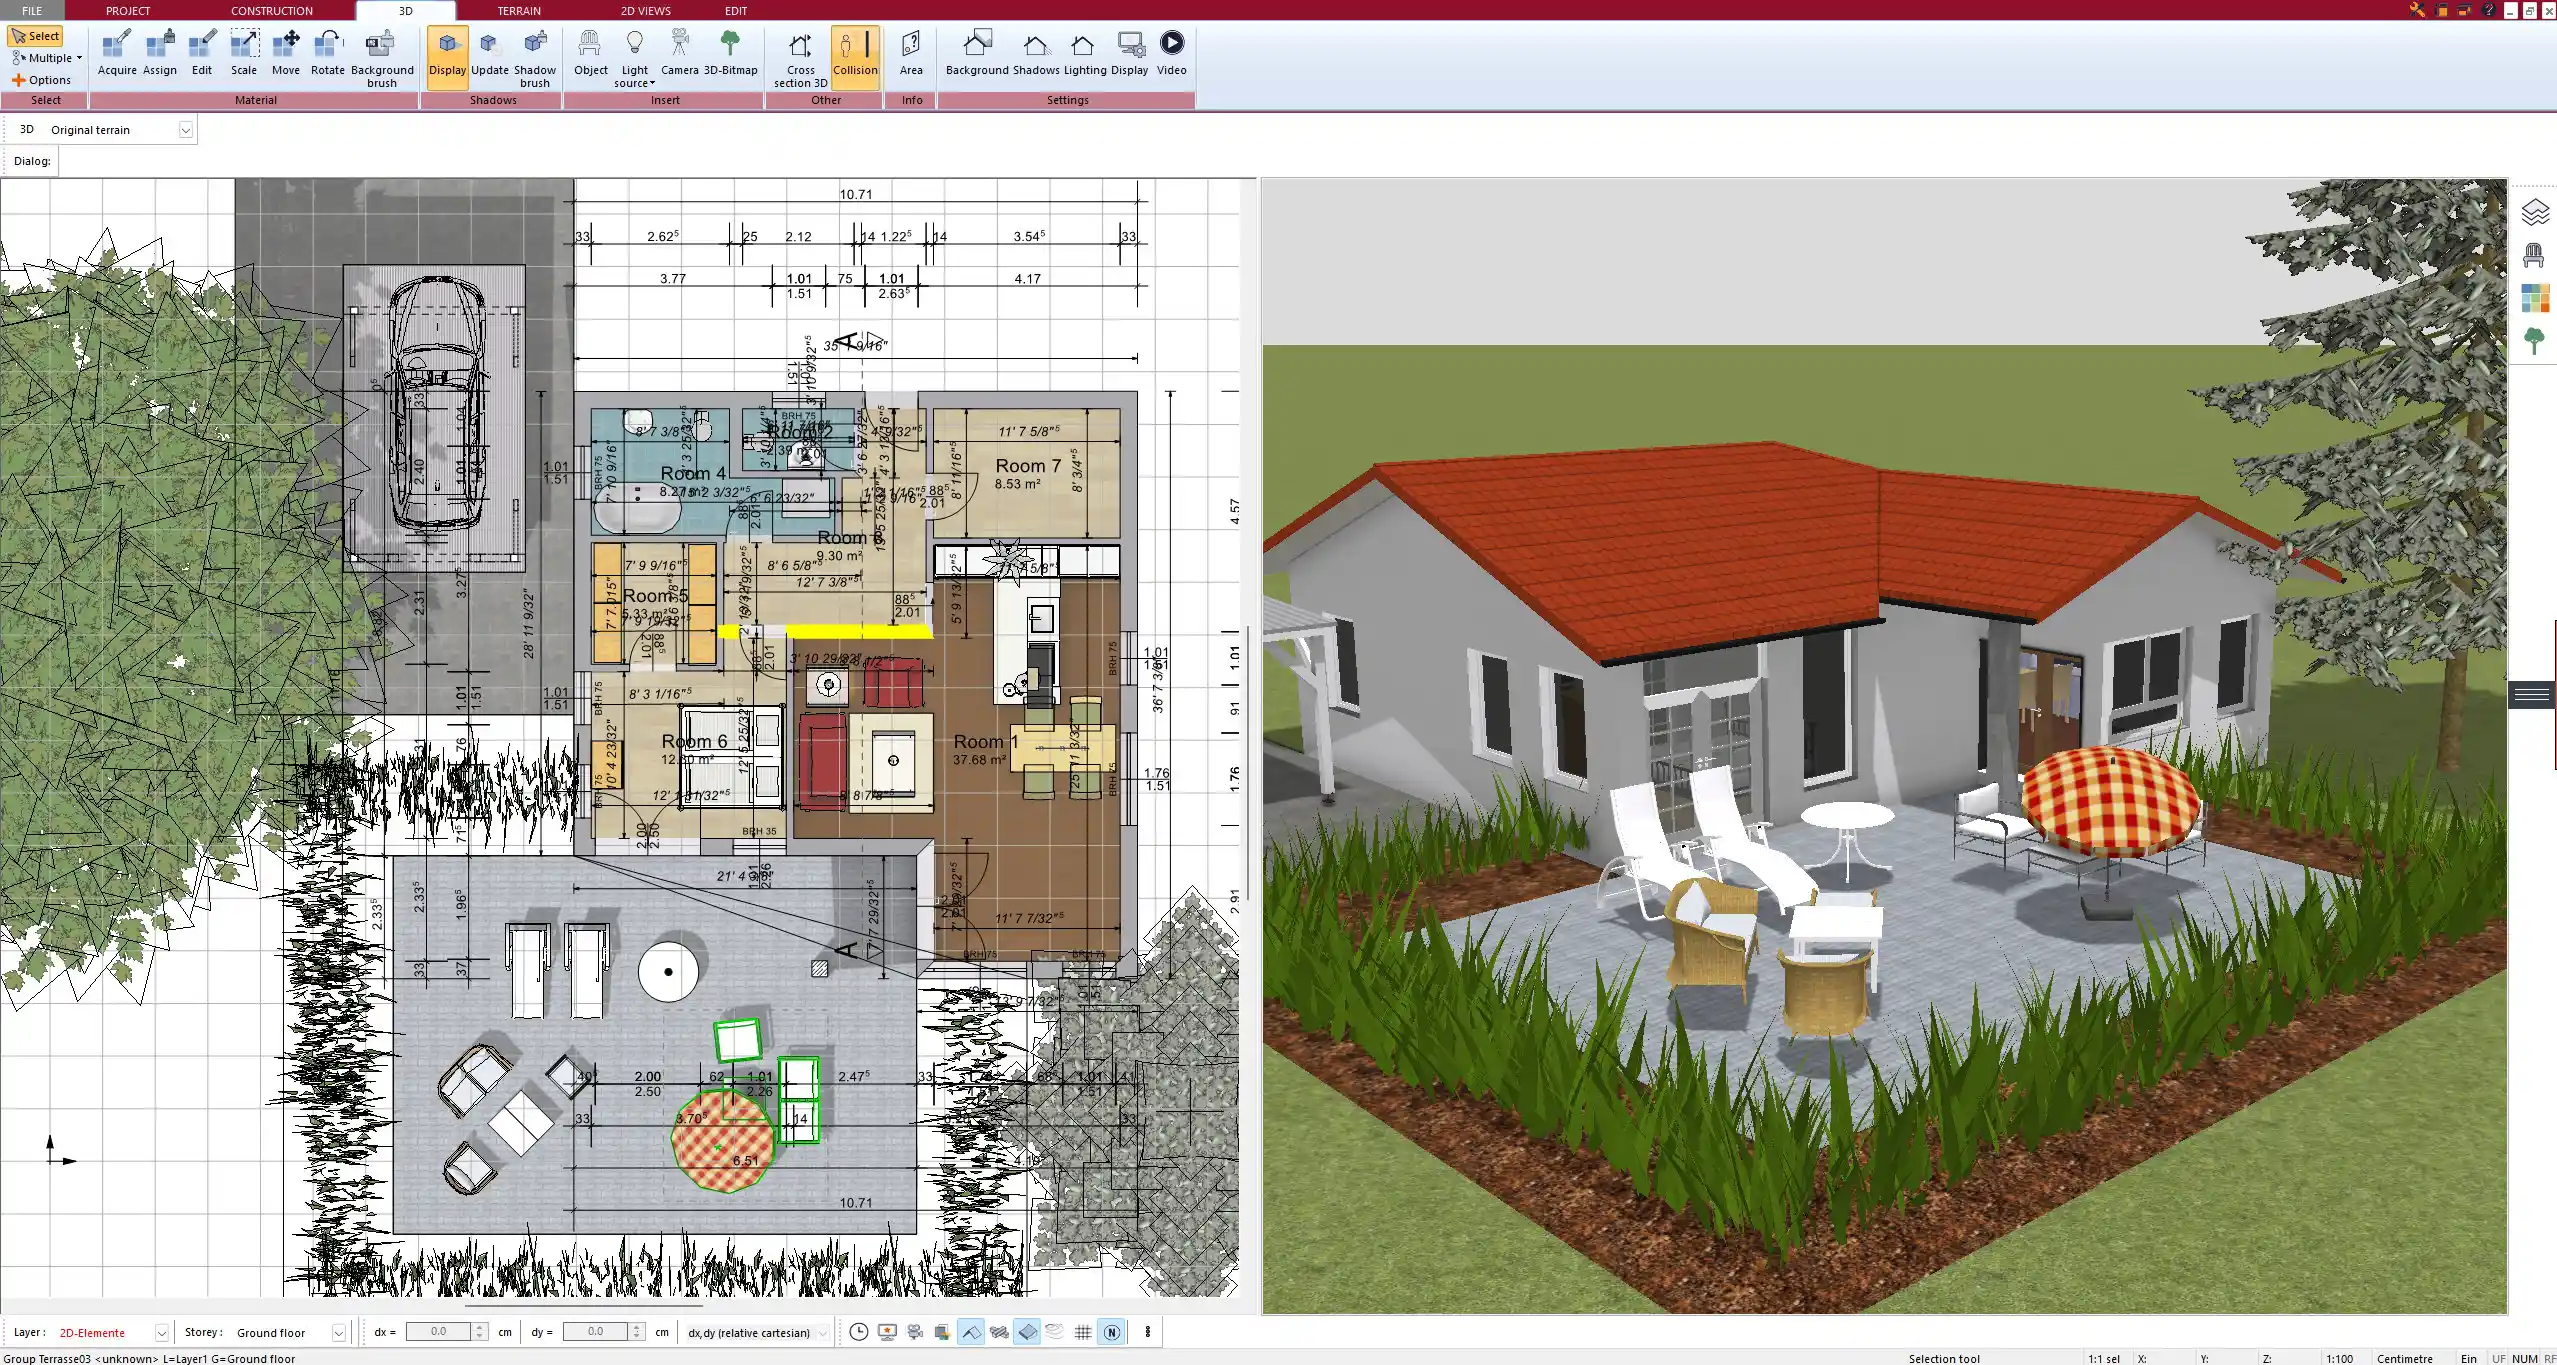
7. Customize the Façade and Roof
Plan7Architect allows you to change external wall materials and add architectural details. You can apply:
-
Brick textures
-
Plaster finishes
-
Wood paneling
-
Decorative moldings
For the roof, you can choose:
-
Flat roofs (common in modern townhouses)
-
Gable roofs (used in traditional designs)
-
Shed or pitched roofs (used for rear extensions or rooftop terraces)
Set the pitch, overhang, and eaves. In 3D mode, you can view how light hits the building and where shadows fall at different times of day.
Pro Tip: Use the “Sunlight Simulation” feature to plan window placement for optimal natural light.
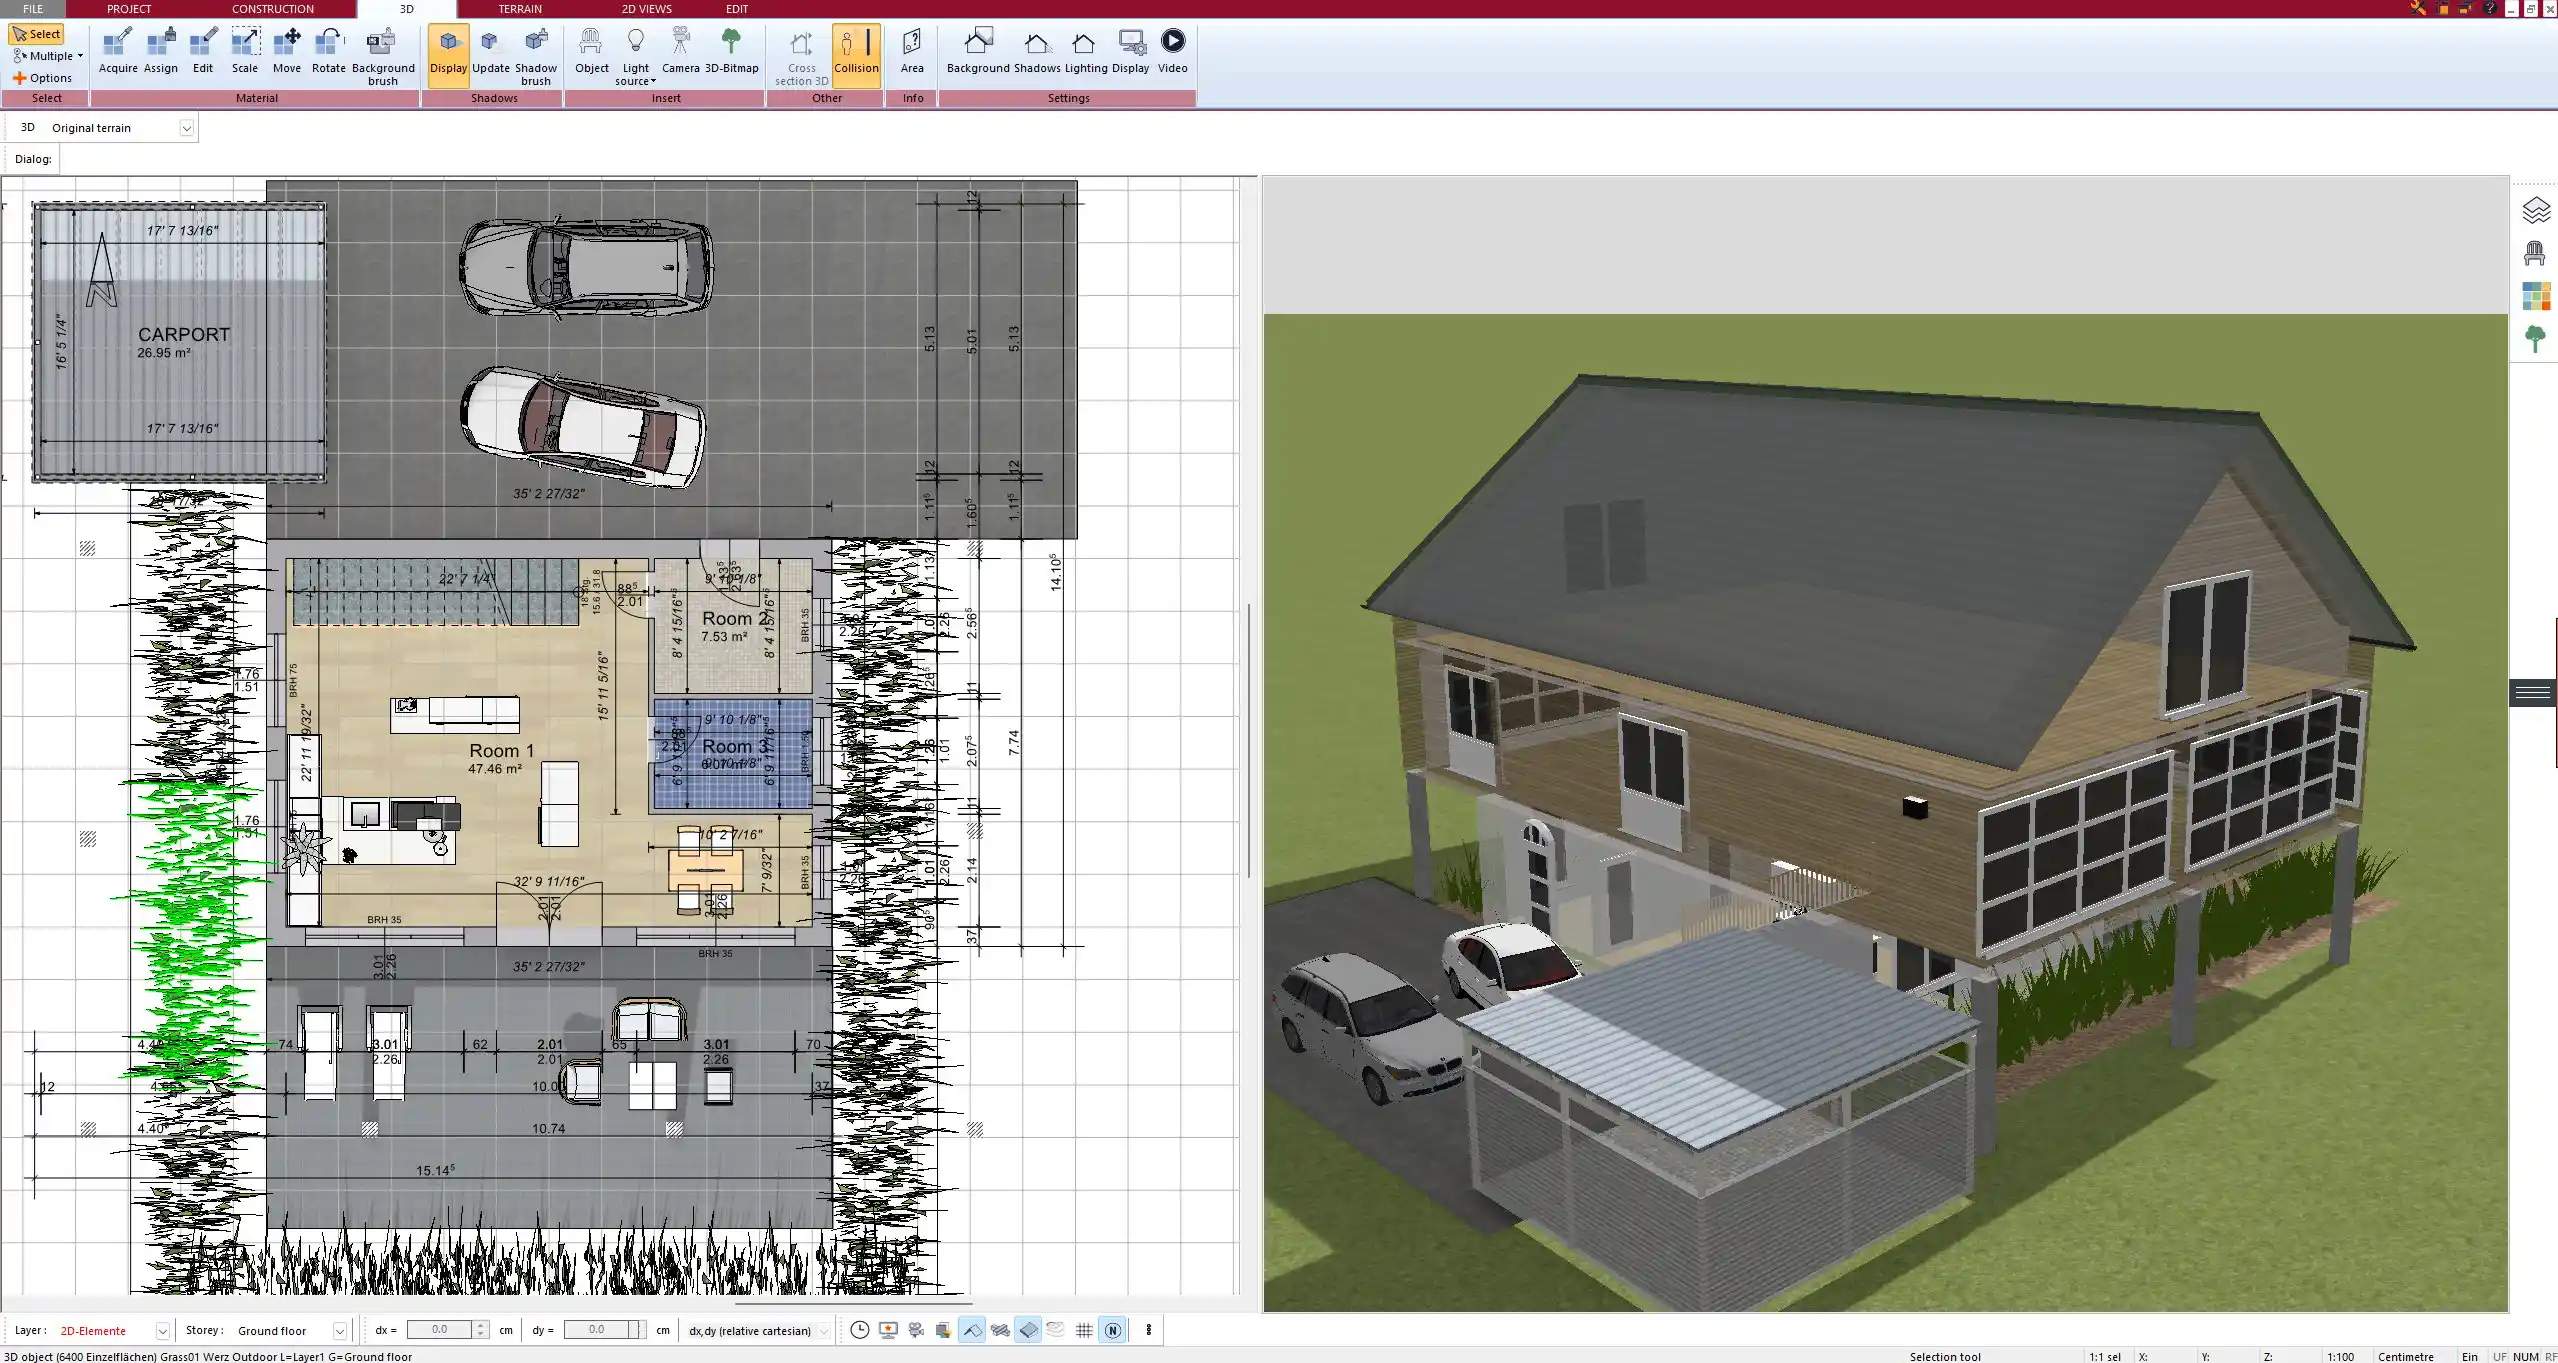
8. Check in 3D and Fine-Tune
Switch between 2D and 3D views anytime. The 3D mode allows you to walk through your layout, zoom in and out, and inspect design elements from every angle.
This is especially useful to verify:
-
Room proportions
-
Door and window placement
-
Furniture fit
-
Stairs and vertical flow
You can adjust all elements on the fly. If something feels cramped or misaligned, drag-and-drop editing makes corrections fast.
Use the rendering tools to create visualizations, including realistic shadows and interior lighting.
Special Considerations for Different Regions
Plan7Architect supports both metric and imperial units, so whether you’re in Europe, North America, or elsewhere, you can design using your local standards.
Depending on where you live, your townhouse layout may also differ:
| Region | Typical Features |
|---|---|
| North America | Garage integration, large basement, HVAC |
| Europe | Bike storage, no garage, utility room |
| Australia | Indoor-outdoor living, open patios |
| UK | Narrower lots, staircases in center |
Adapt your design accordingly using the flexible planning tools.
Import, Export, and Print
Once your plan is finished, you can export it in multiple formats:
-
DWG/DXF for professional collaboration
-
PDF or image for client presentations
-
Full-scale printouts for permits or site work
You can also save your design as a template for future townhouse layouts, or duplicate the structure to create a row of identical homes.
Plan7Architect allows exporting in any scale, and you can include dimensions, section lines, or floor labels depending on your needs.
Bonus Features You’ll Appreciate
Plan7Architect goes beyond basic floor planning by offering tools for furnishing, landscaping, and realistic visualization.
You can:
-
Place kitchen cabinets, islands, and appliances
-
Add bathroom fixtures and adjust plumbing elements
-
Include wardrobes, sofas, desks, and beds
-
Design front yards or backyard gardens
-
Set terrain elevation if needed for sloped plots
The extensive object catalog and adjustable templates save time and provide a near-professional result without requiring CAD experience.
Tip: Save your favorite objects and materials in a personal catalog to speed up future projects.
Plan your project with Plan7Architect

Plan7Architect Pro 5 for $99.99
You don’t need any prior experience because the software has been specifically designed for beginners. The planning process is carried out in 5 simple steps:
1. Draw Walls

2. Windows & Doors

3. Floors & Roof

4. Textures & 3D Objects

5. Plan for the Building Permit

6. Export the Floor Plan as a 3D Model for Twinmotion

- – Compliant with international construction standards
- – Usable on 3 PCs simultaneously
- – Option for consultation with an architect
- – Comprehensive user manual
- – Regular updates
- – Video tutorials
- – Millions of 3D objects available


