If you want to create a floor plan for a single house without hiring an architect, you can do it easily and professionally with Plan7Architect. You start by launching the software and choosing “New Project.” From there, you either select a predefined “Single House” template or start with an empty canvas.
You define the outer walls using the drag-and-drop wall tool. For example, a compact layout of 8 by 10 meters (approximately 26 by 33 feet) is a typical starting point for a single home. You then place the rooms: living area, bedroom, kitchen, and bathroom. Every element is added directly into the floor plan using the software’s intuitive 2D editor.
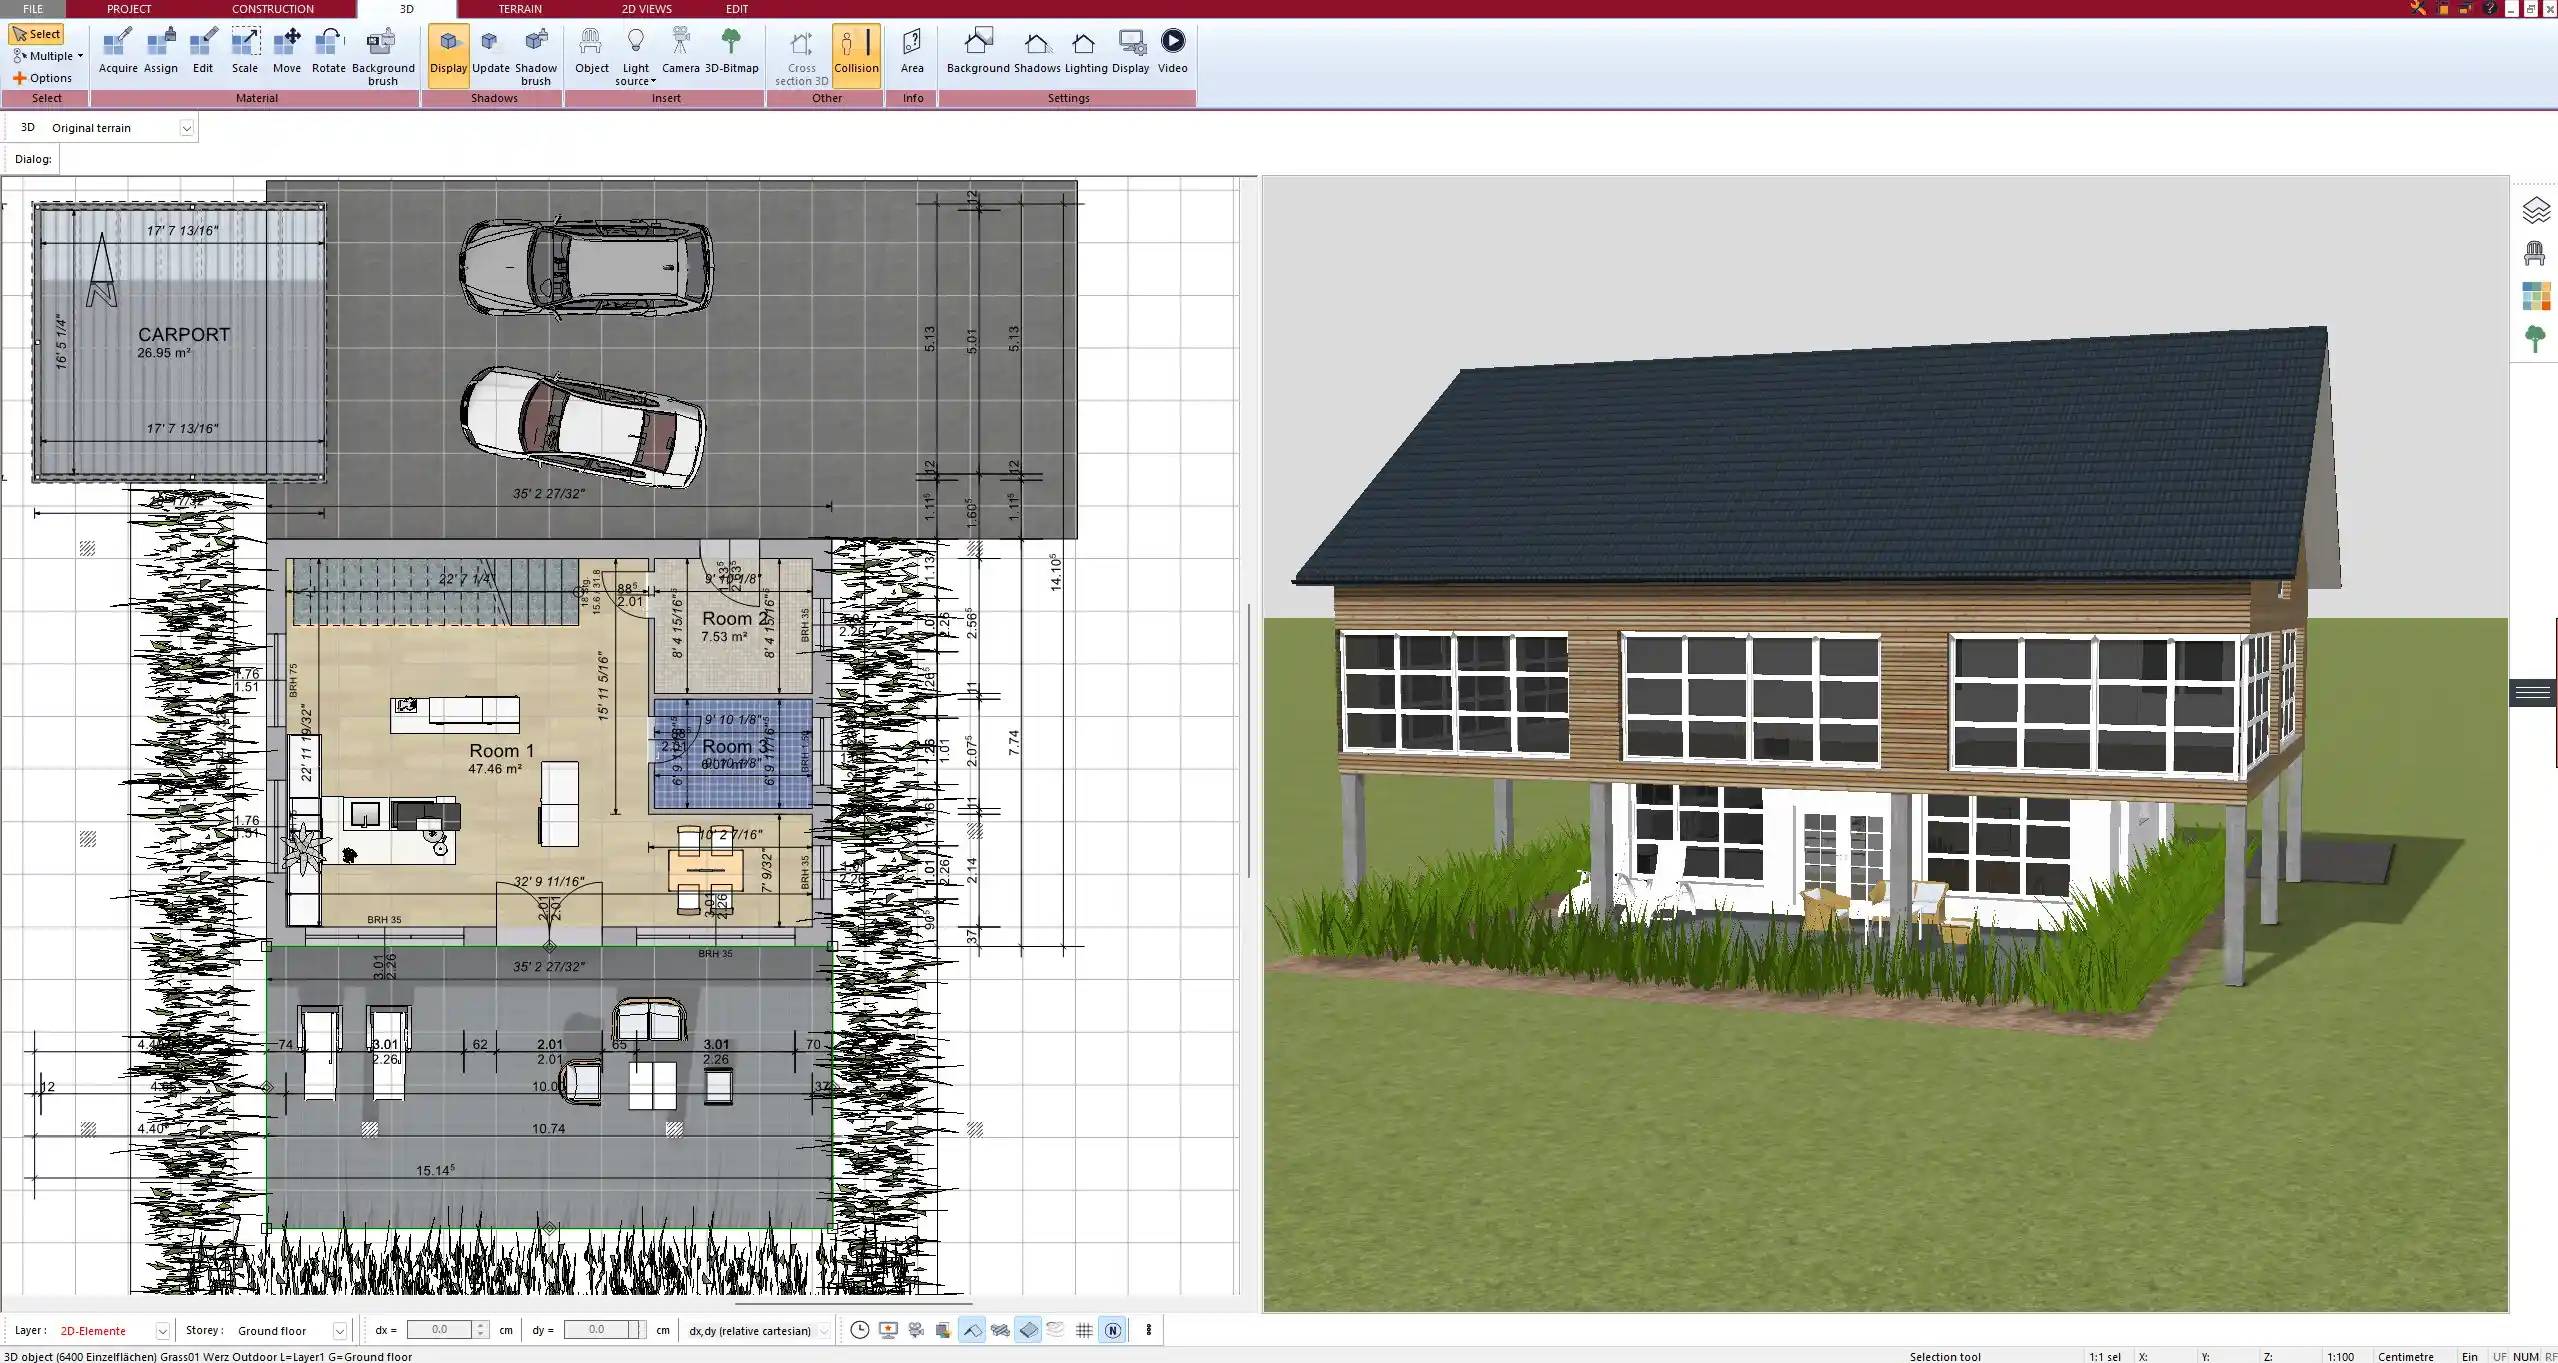
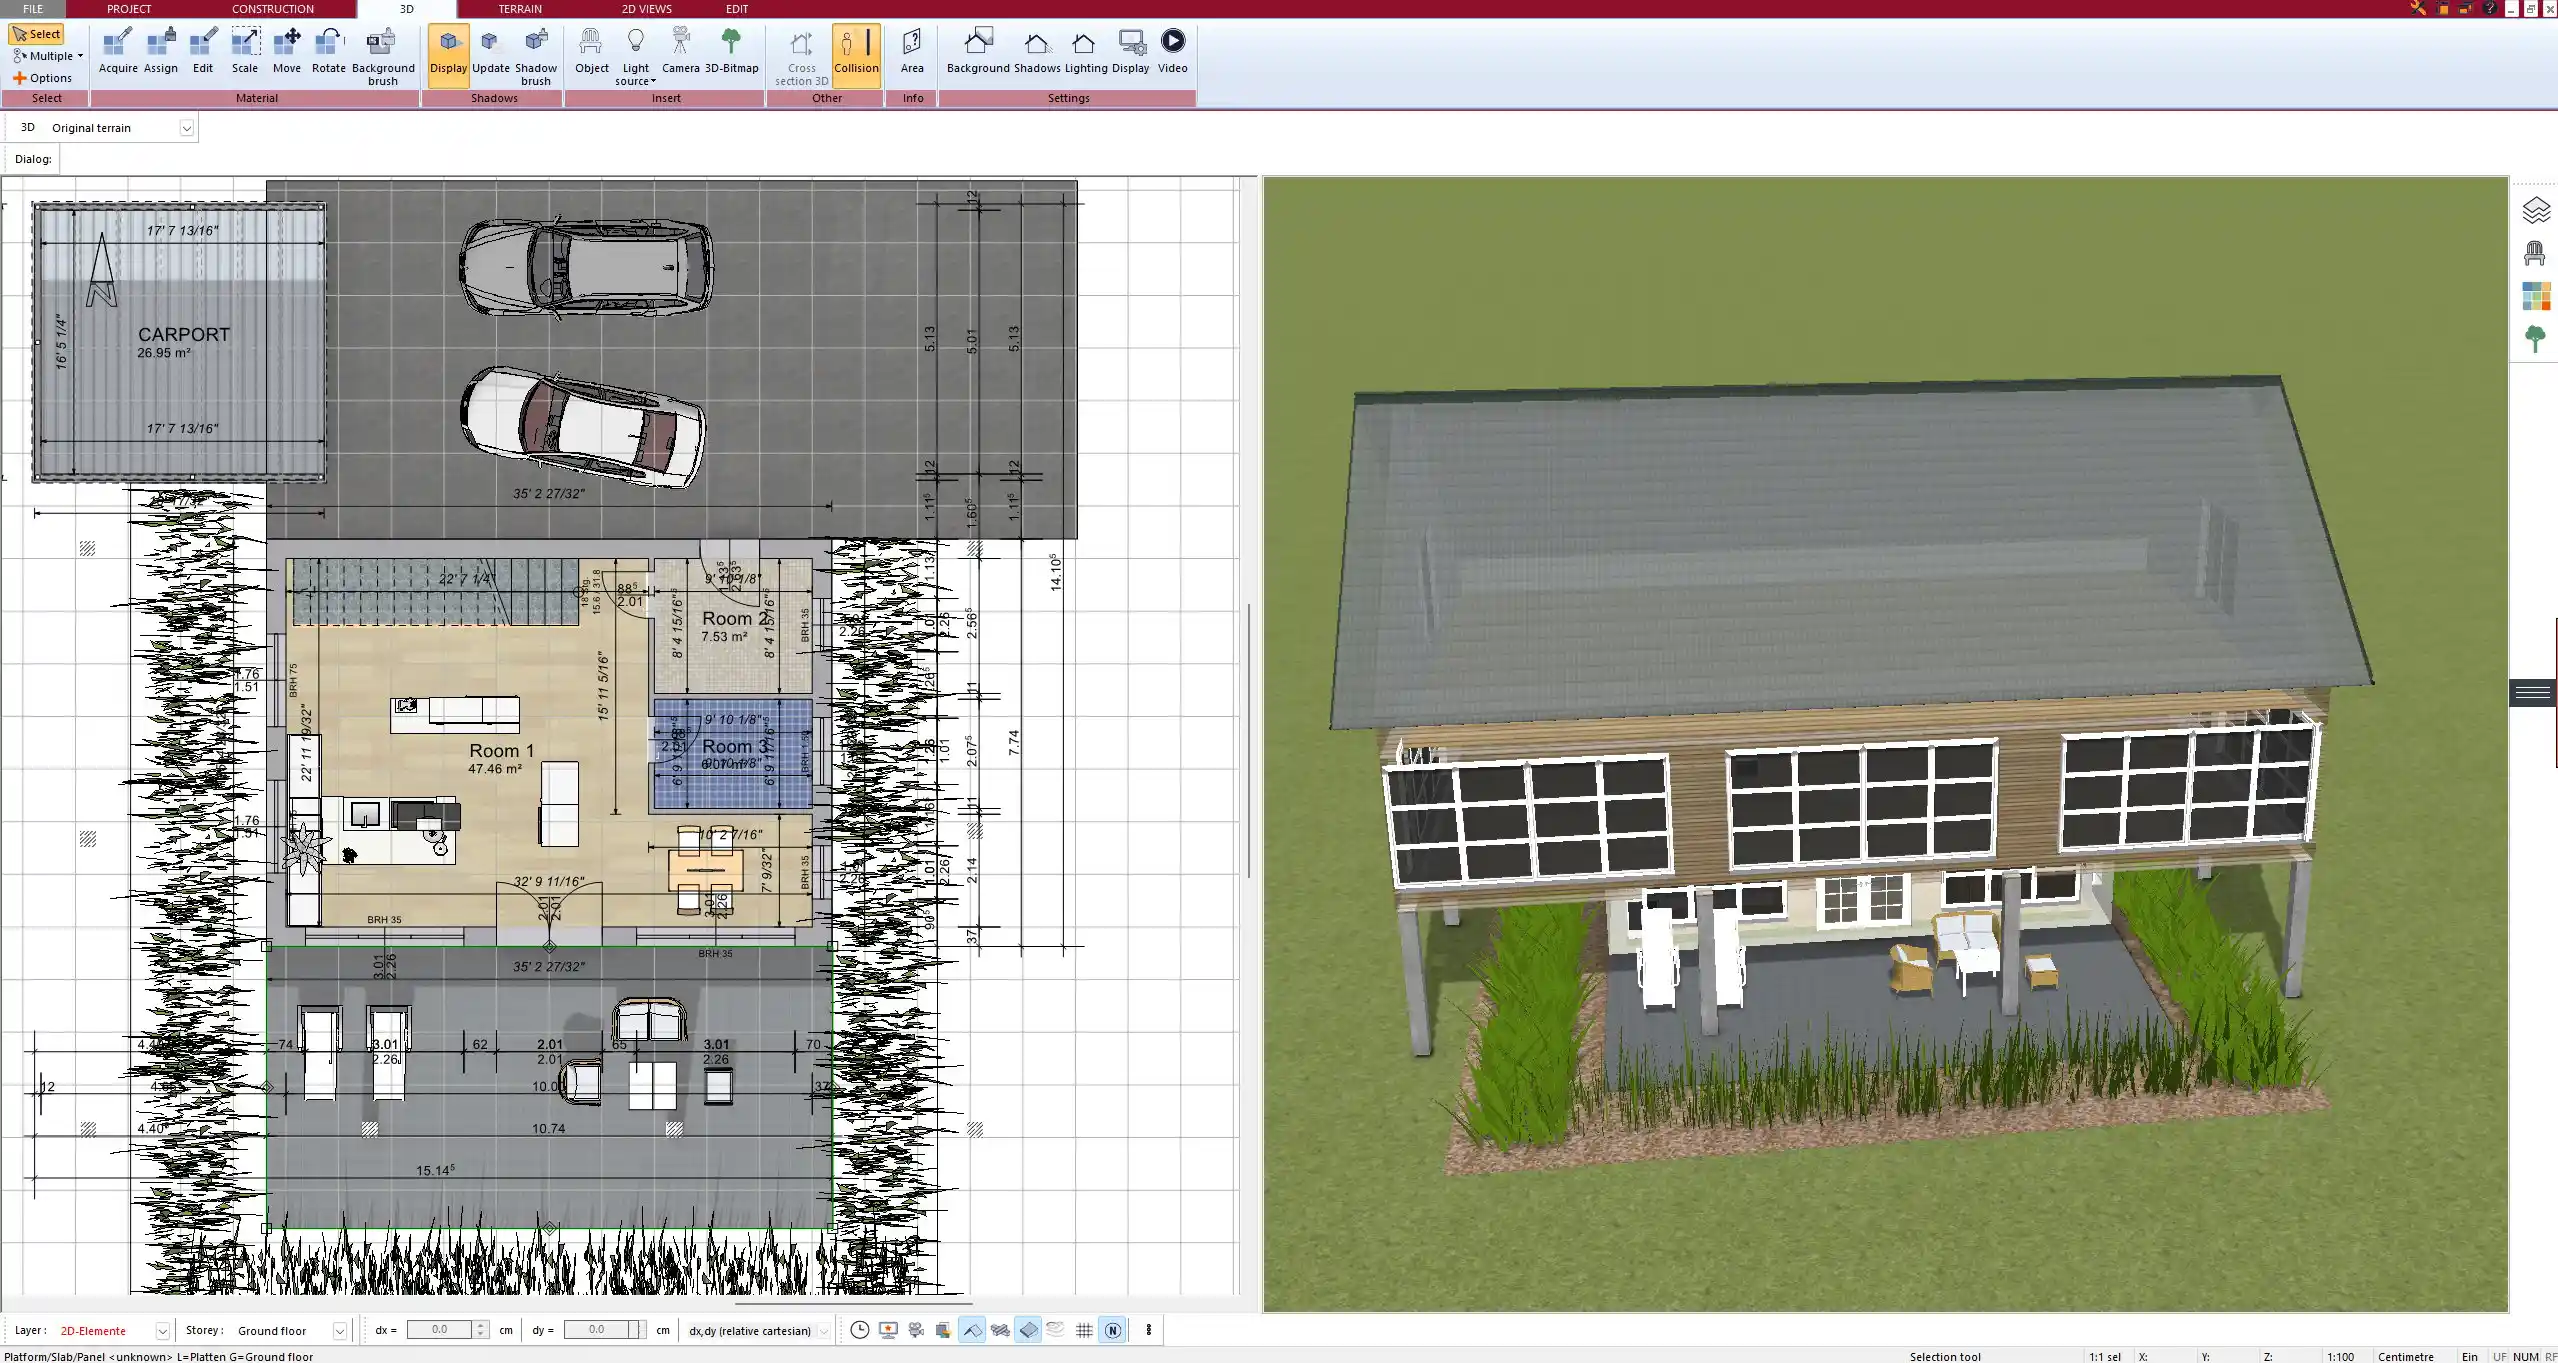
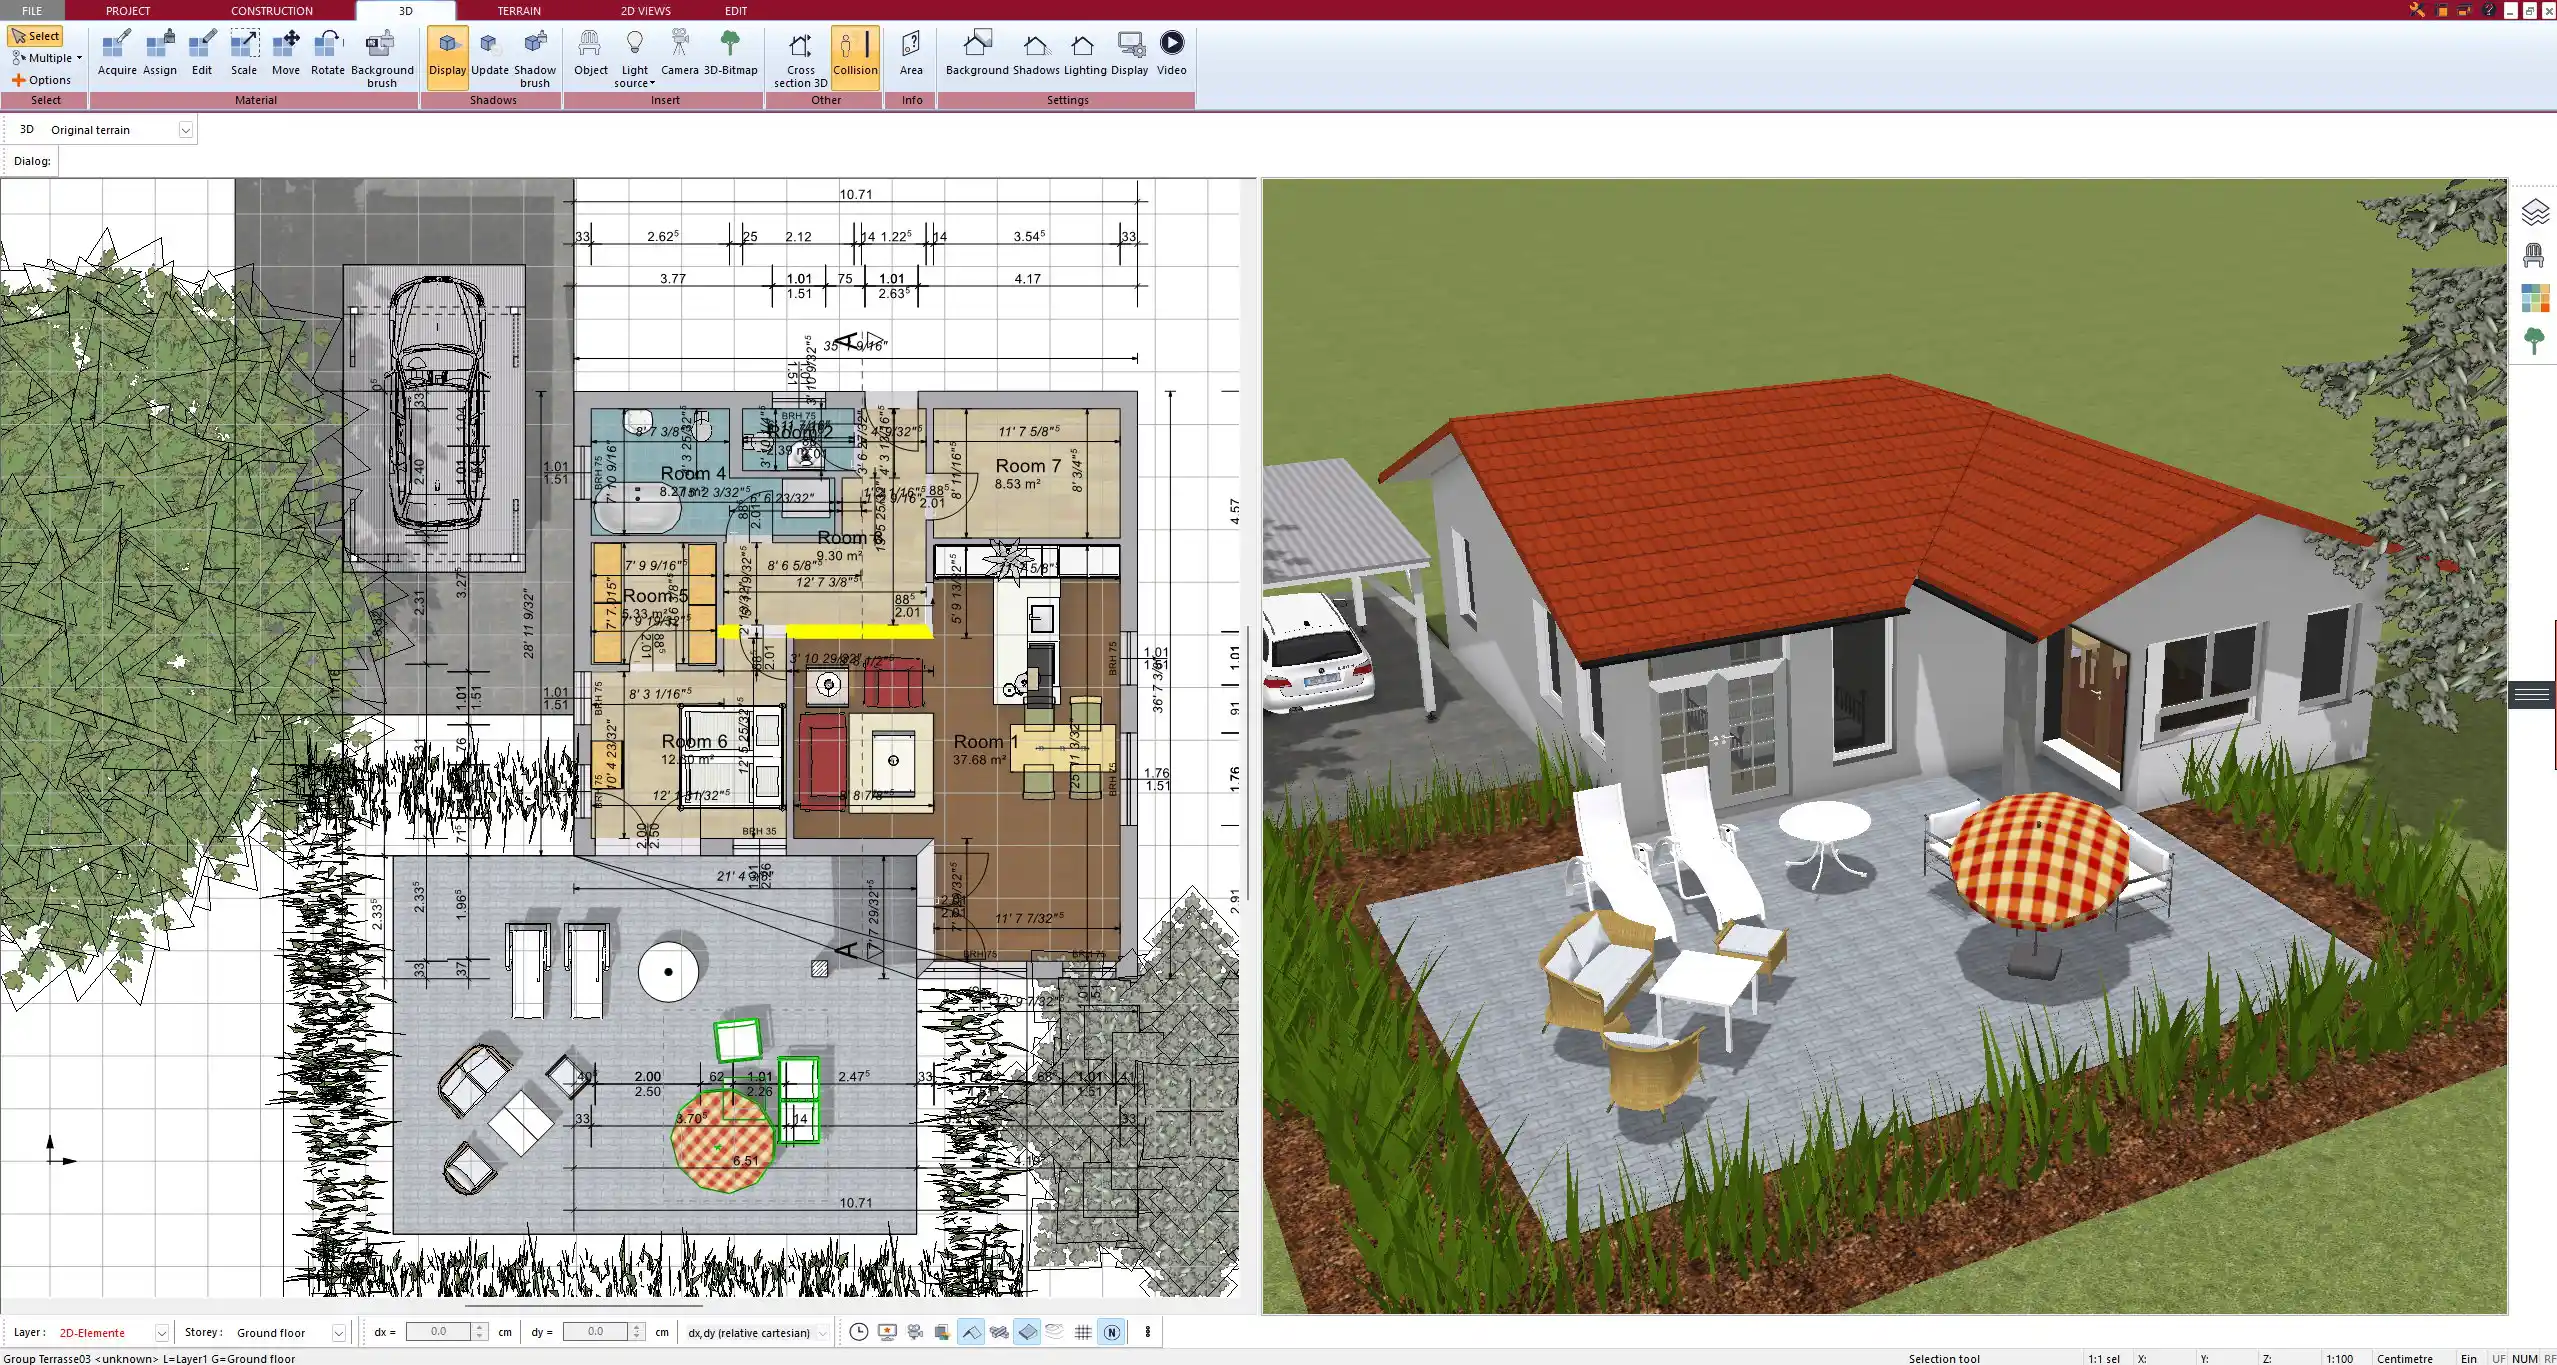
At any time, you can switch to the 3D view to get a realistic impression of the space. This helps you understand proportions, window placements, and walking flow. You can add windows, doors, and furniture from the built-in catalog, or import objects from the integrated SketchUp library.
The software supports both metric and imperial units, so you can work comfortably no matter where you’re located. You can switch units at any time in the settings.
Key Features That Make Plan7Architect Ideal for Single Houses
Optimized for Compact Living Spaces
Single houses typically have limited space. Plan7Architect is ideal for optimizing every square meter or square foot. When designing small homes, every wall placement matters. The software offers:
-
Snap-to-grid and angle snapping for precise positioning
-
Real-time room size display, in square meters or square feet
-
Suggestions for minimum room sizes based on use (e.g., bathroom, kitchen)
You can also set custom floor heights, which helps when adding lofts or raised sleeping areas – common in single-house layouts.
Built-in Furniture and Room Layout Suggestions
The software includes preconfigured furniture sets that are especially useful for compact layouts. You don’t need to model or import individual items one by one. Instead, you can:
-
Select a prebuilt kitchen block and adjust its size
-
Drag in a single bed, compact wardrobe, and side table for the bedroom
-
Use one-click placement for toilets, sinks, and showers in the bathroom
All furniture items automatically adjust their scale based on your floor plan, so everything looks proportionally correct in both 2D and 3D.
Easy Switching Between Metric and Imperial Units
Depending on where you live, you may want to work in meters or in feet. Plan7Architect lets you toggle between measurement systems at any time. All dimensions, floor areas, and room sizes update instantly. This feature is particularly helpful for users in Europe, the United States, Canada, or Australia.
Step-by-Step: Designing a Smart Floor Plan for a Single House
Step 1 – Define Your Building Outline
The first step is defining the outer shell of your house. In most cases, a compact rectangle or L-shape works best. You can draw exterior walls manually using the wall tool. For example, a 7 by 9 meter footprint (about 23 by 30 feet) is common for one-bedroom homes.
You can adjust wall thickness and floor height individually. This allows you to build higher ceilings in living areas or lower ones in storage rooms.
Step 2 – Set Interior Walls and Rooms
Next, place interior walls to separate the space into functional rooms. For a simple single house, this may include:
-
One bedroom
-
Combined kitchen and living area
-
One bathroom
-
Storage or laundry nook
You label rooms directly while drawing, and Plan7Architect automatically calculates room sizes and names them on the plan.
Step 3 – Add Doors, Windows, and Openings
After placing the rooms, you add access points. Choose modern or classic door designs, then drag them into the floor plan. You can adjust width, height, and direction of swing.
For windows, you can:
-
Define sill height (important for furniture placement)
-
Adjust width and height per window
-
Add corner or panoramic windows for more daylight
This step is important for both ventilation and natural light simulation.
Step 4 – Furnish and Optimize the Interior
Once the walls are set, you can furnish the home. Use compact pieces to maximize usable space. For example:
-
A folding dining table
-
Sofa bed or pull-out couch
-
Shower stall instead of a bathtub
-
Tall cabinets for vertical storage
In 3D view, you can check whether doors open properly and whether furniture fits without blocking movement paths.
Tip: Enable “space validation” to ensure there is enough walking clearance around beds, sinks, and stoves.
Step 5 – Finalize the Roof and Exterior Design
You can now add a roof. The software offers different roof types: flat, gable, or monopitch. For small homes, a gable or flat roof is common.
You can define:
-
Roof pitch and direction
-
Overhang length
-
Roofing materials and textures
Additionally, add exterior cladding, wall textures, or even planters and steps to match your design style.
Step 6 – Generate Construction-Ready Documents
Once your floor plan is finished, you can generate printable plans. Plan7Architect automatically creates:
-
Floor plans with labeled rooms and dimensions
-
Elevation views (front, side, rear)
-
Section drawings
-
3D visualizations for presentation
You can export these in various formats: PDF, DWG, DXF, or as image files for presentations.
Examples of Common Single House Layouts
| Layout Type | Description | Size (m / ft) | Special Features |
|---|---|---|---|
| Open Studio | Living, dining, and sleeping in one open room | 6 x 8 m / 20 x 26 ft | Sliding doors, foldable furniture |
| One-Bedroom Plan | Bedroom + open living/kitchen area | 7 x 10 m / 23 x 33 ft | Ideal for singles or couples |
| Loft with Mezzanine | Bedroom raised above main living area | 6 x 9 m / 20 x 30 ft | Stair access, storage underneath |
| Split Plan | Bedroom and bathroom on one side, living on the other | 8 x 10 m / 26 x 33 ft | Efficient zoning, good noise insulation |
Practical Tips When Planning a Single House
Use the Sunlight Simulation
Activate the sunlight simulation in 3D mode. You can see how much daylight enters the home at different times of the day and year. This helps you decide where to place living areas and which rooms may need extra windows.
Plan Vertical Storage
In smaller homes, vertical space is often underutilized. Plan7Architect allows you to:
-
Stack cabinets to the ceiling
-
Plan storage under stairs
-
Create mezzanine levels if you increase the floor height
Tip: In the “Story Manager,” you can add a new level above or below your current one. Use this for a loft or a storage basement.
Don’t Forget Outdoor Flow
Even a single house benefits from good outdoor access. Use glass doors or folding doors to connect your living space with a terrace or small garden.
The 3D transparent mode helps you visualize indoor–outdoor transitions and make changes easily.
Why Plan7Architect Is Ideal for Single House Planning
Plan7Architect is a one-time purchase software that combines powerful professional tools with a user-friendly interface. It includes all essential features for planning a single house:
-
Drag-and-drop tools for walls, rooms, windows, and roofs
-
Support for both European and American measurement systems
-
Project export in multiple formats (PDF, DWG, DXF, image)
-
3D visualization and sunlight simulation
-
Twinmotion export for high-quality presentation
-
License for installation on up to 3 PCs
-
No subscription fees – all features are included
With Plan7Architect, you can experiment, plan, visualize, and even generate professional building plans entirely on your own.
Would you like a visual to go along with this article, such as labeled screenshots from the software?
Plan your project with Plan7Architect

Plan7Architect Pro 5 for $109.99
You don’t need any prior experience because the software has been specifically designed for beginners. The planning process is carried out in 5 simple steps:
1. Draw Walls

2. Windows & Doors

3. Floors & Roof

4. Textures & 3D Objects

5. Plan for the Building Permit

6. Export the Floor Plan as a 3D Model for Twinmotion

- – Compliant with international construction standards
- – Usable on 3 PCs simultaneously
- – Option for consultation with an architect
- – Comprehensive user manual
- – Regular updates
- – Video tutorials
- – Millions of 3D objects available


