Create Your Restaurant Floor Plan – Quick Guide
Start Immediately with CAD Software
If you want to create a restaurant floor plan yourself, you can get started right away using professional CAD software like Plan7Architect. You don’t need prior architectural experience. The interface is user-friendly, and you can simply drag and drop elements like walls, windows, furniture, and technical equipment into your layout.
Plan7Architect allows you to work with both metric (meters, centimeters) and imperial (feet, inches) units, which is particularly helpful if you’re working with international teams or location-specific regulations. You can switch between unit systems in the software settings with just a few clicks.
You begin by selecting your total available space and defining its shape. Whether you’re planning an open hall, a series of connected rooms, or a corner space, you can input the exact dimensions and start building.
Step-by-Step Basics to Get Started
Here’s how I typically begin when designing a restaurant layout from scratch:
-
Define the boundaries
Input the total area of your restaurant. For example, a medium-sized restaurant might be 150 m² or 1600 sq ft. Use the wall tool to draw the perimeter. -
Insert structural elements
Add exterior and interior walls, columns, and partitions. Be sure to place doors and windows in logical spots to guide foot traffic and ensure ventilation. -
Create zones
Divide the space into zones:-
Guest seating
-
Kitchen and food prep area
-
Storage rooms
-
Staff and utility areas
-
Restrooms
-
-
Use built-in symbols and furniture
Plan7Architect includes libraries with ready-made symbols for restaurant tables, chairs, counters, stoves, sinks, fridges, and more. You can rotate, resize, or duplicate them as needed. -
Save versions
Save different layout versions and test various seating and kitchen arrangements before deciding.
What to Consider in a Restaurant Floor Plan
Efficient Layout Planning
An efficient floor plan saves time, increases staff productivity, and enhances customer satisfaction. When laying out your space, focus on the flow from the moment guests enter until they leave.
Recommended guest flow path:
| Step | Example |
|---|---|
| Entrance | Wide and accessible, often with a waiting or reception area |
| Seating | Tables arranged logically, no dead corners |
| Service Area | Bar or server stations placed centrally |
| Restrooms | Easy to find, but not immediately visible from dining tables |
Staff should be able to move between the kitchen, dining area, and service zones without interrupting guests. Avoid tight corridors and blind corners.
Seating Arrangement Tips
The right seating layout can make or break your capacity planning. It’s not just about squeezing in as many chairs as possible.
-
Use a mix of table sizes:
2-person, 4-person, and larger communal tables. -
Booths along walls help maximize space and offer privacy.
-
Walkways between tables should be at least 90 cm (36 inches) wide.
-
Leave space for servers to pass and clean comfortably.
Example Layout Ratio for a 150 m² / 1600 sq ft restaurant:
| Zone | Percentage of Total Area |
|---|---|
| Dining Area | 55–60% |
| Kitchen & Prep | 30–35% |
| Restrooms & Storage | 5–10% |
Tip:
Don’t forget local fire codes or health regulations. In some regions, you’re required to maintain a minimum distance between exits and tables, or limit the number of people per square meter/square foot.
Kitchen and Service Area Design
In my experience, the kitchen is where most restaurant layouts fail due to underestimated space requirements. A good rule of thumb is to allocate about one-third of your space to the kitchen and prep zones, especially if you’re planning a full-service restaurant.
Functional kitchen zones you’ll likely need:
-
Cooking line (grill, oven, stove)
-
Cold prep area (fridge, prep counters)
-
Washing zone (sinks, dishwasher)
-
Dry storage
-
Waste and recycling area
Ensure there’s a clear separation between clean and dirty workflows. Cross-contamination can not only cause health violations but also slow down your staff significantly.
Use commercial kitchen symbols in Plan7Architect to simulate realistic workflows and spacing between stations.
Technical and Utility Zones
Utility and support areas are easy to overlook but essential for smooth operation.
Checklist of key utility considerations:
-
Plumbing for restrooms, bar, and kitchen sinks
-
Electrical lines for heavy kitchen equipment
-
HVAC systems (heating, ventilation, air conditioning)
-
Staff lockers or changing rooms
-
Storage for cleaning supplies
Plan7Architect lets you lay out these elements in technical layers so they don’t clutter the main design but remain accessible for installers and contractors.
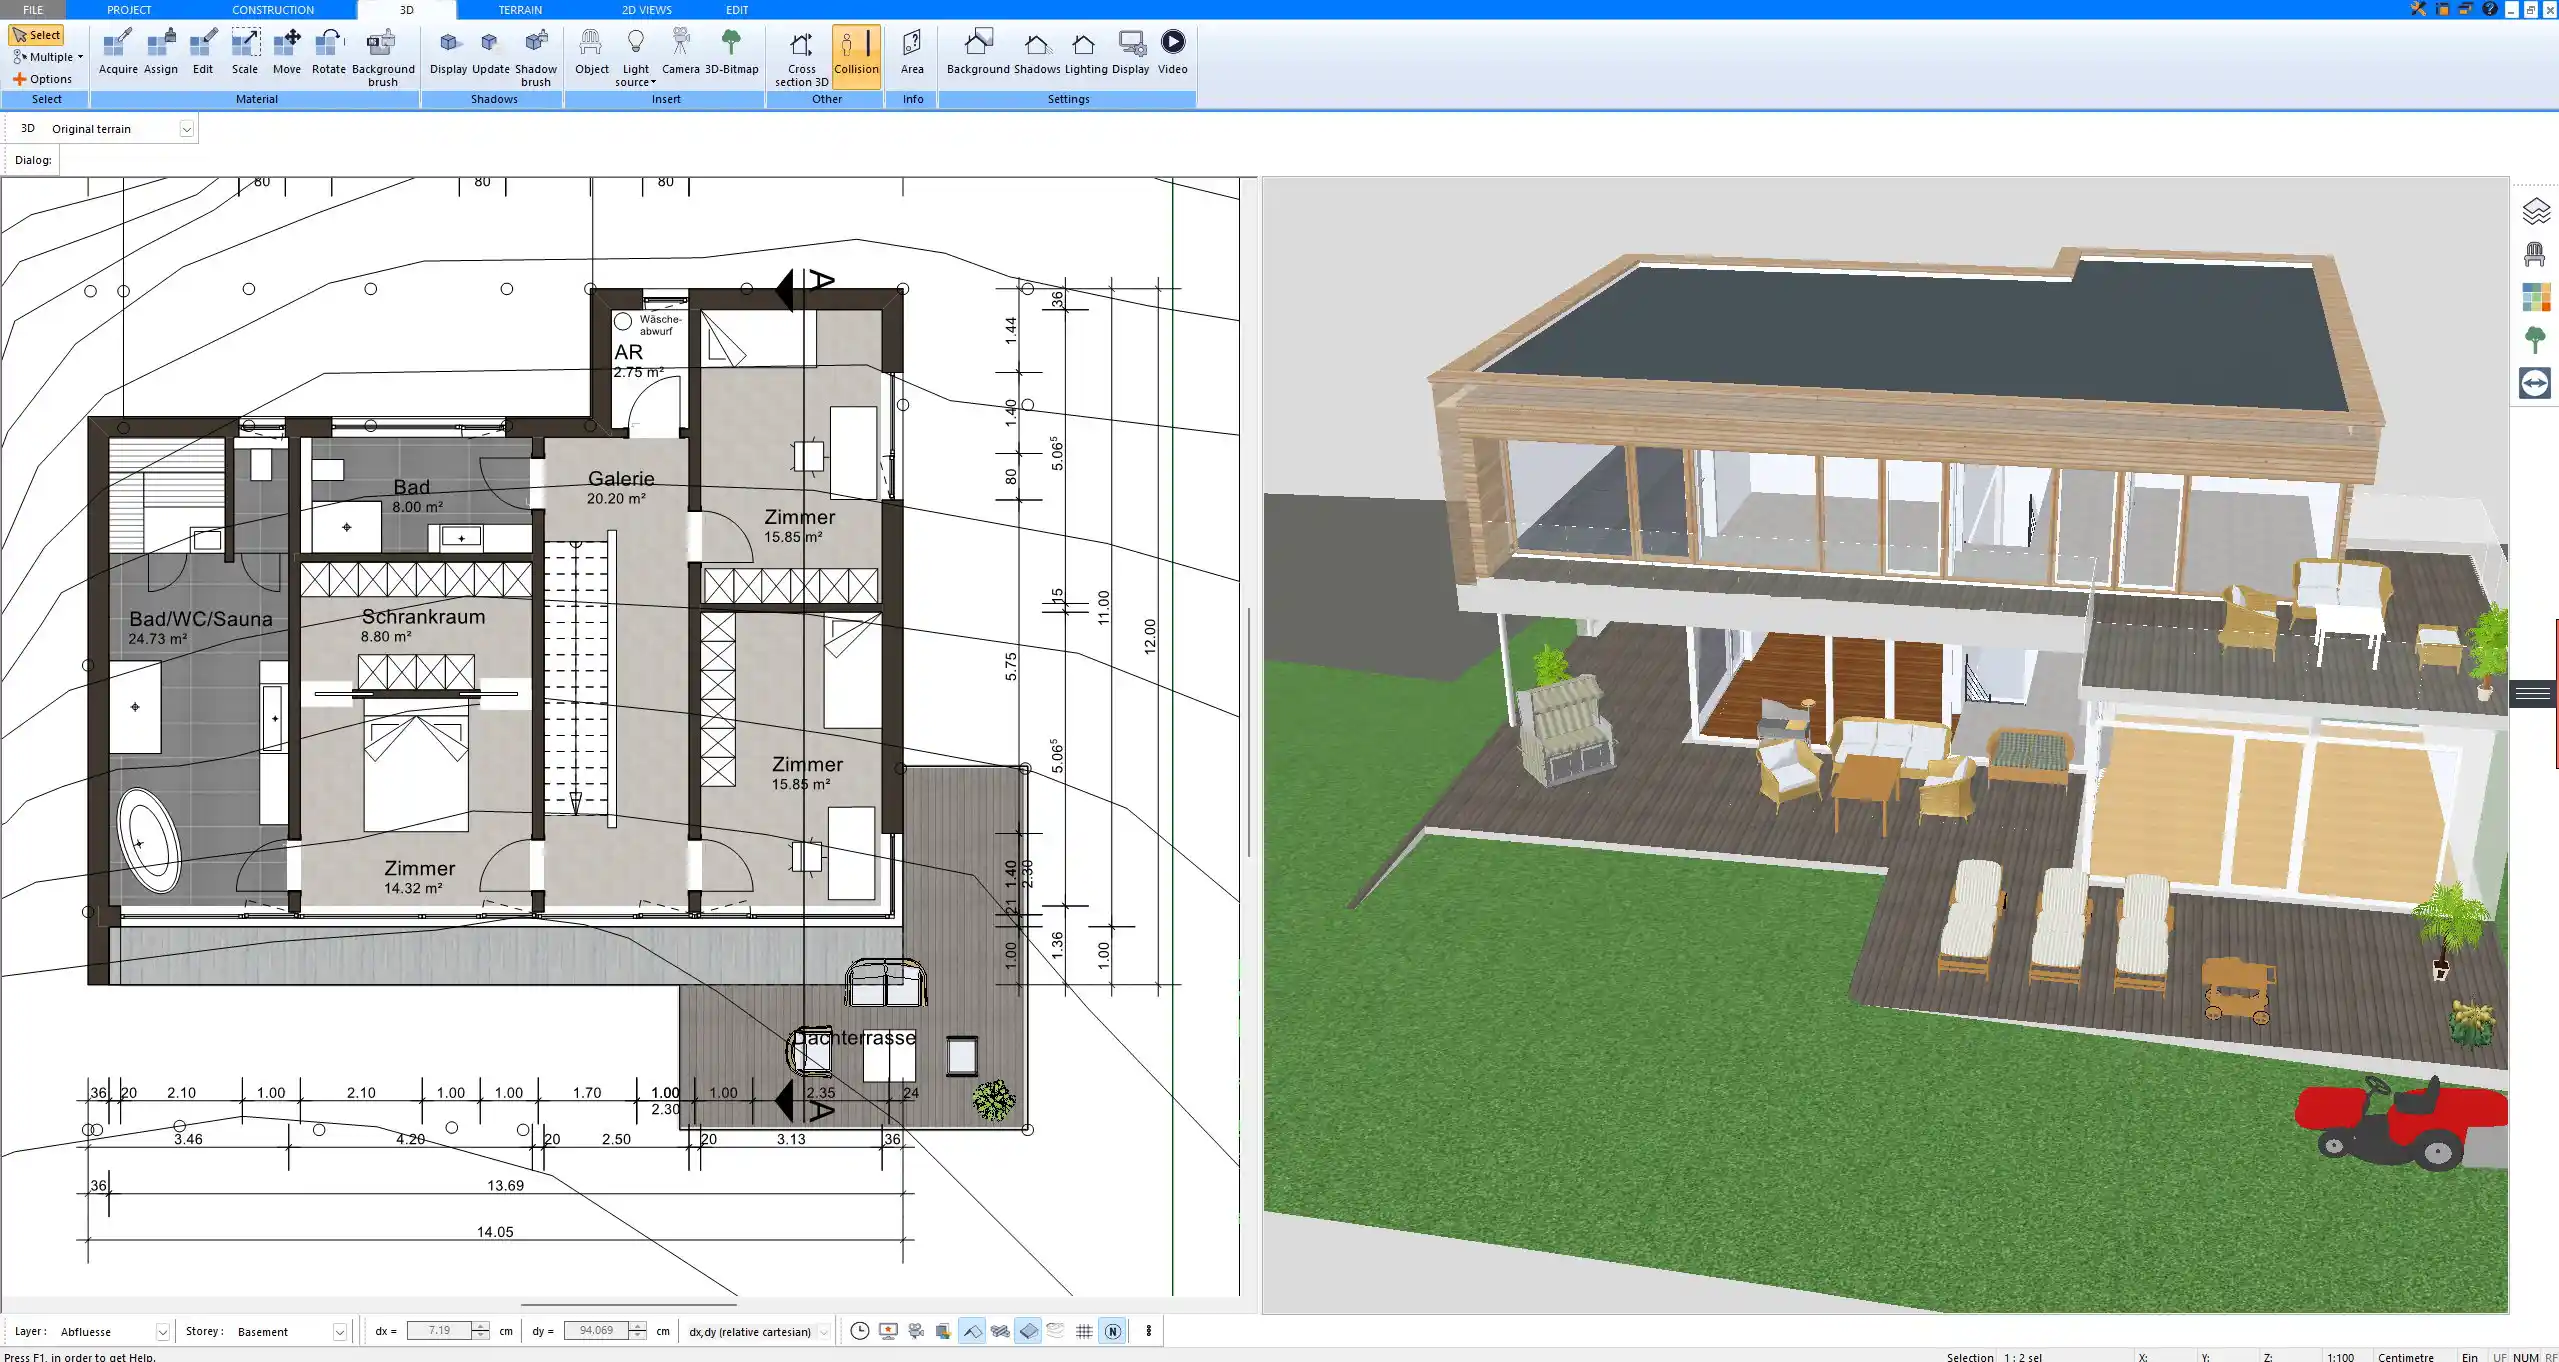
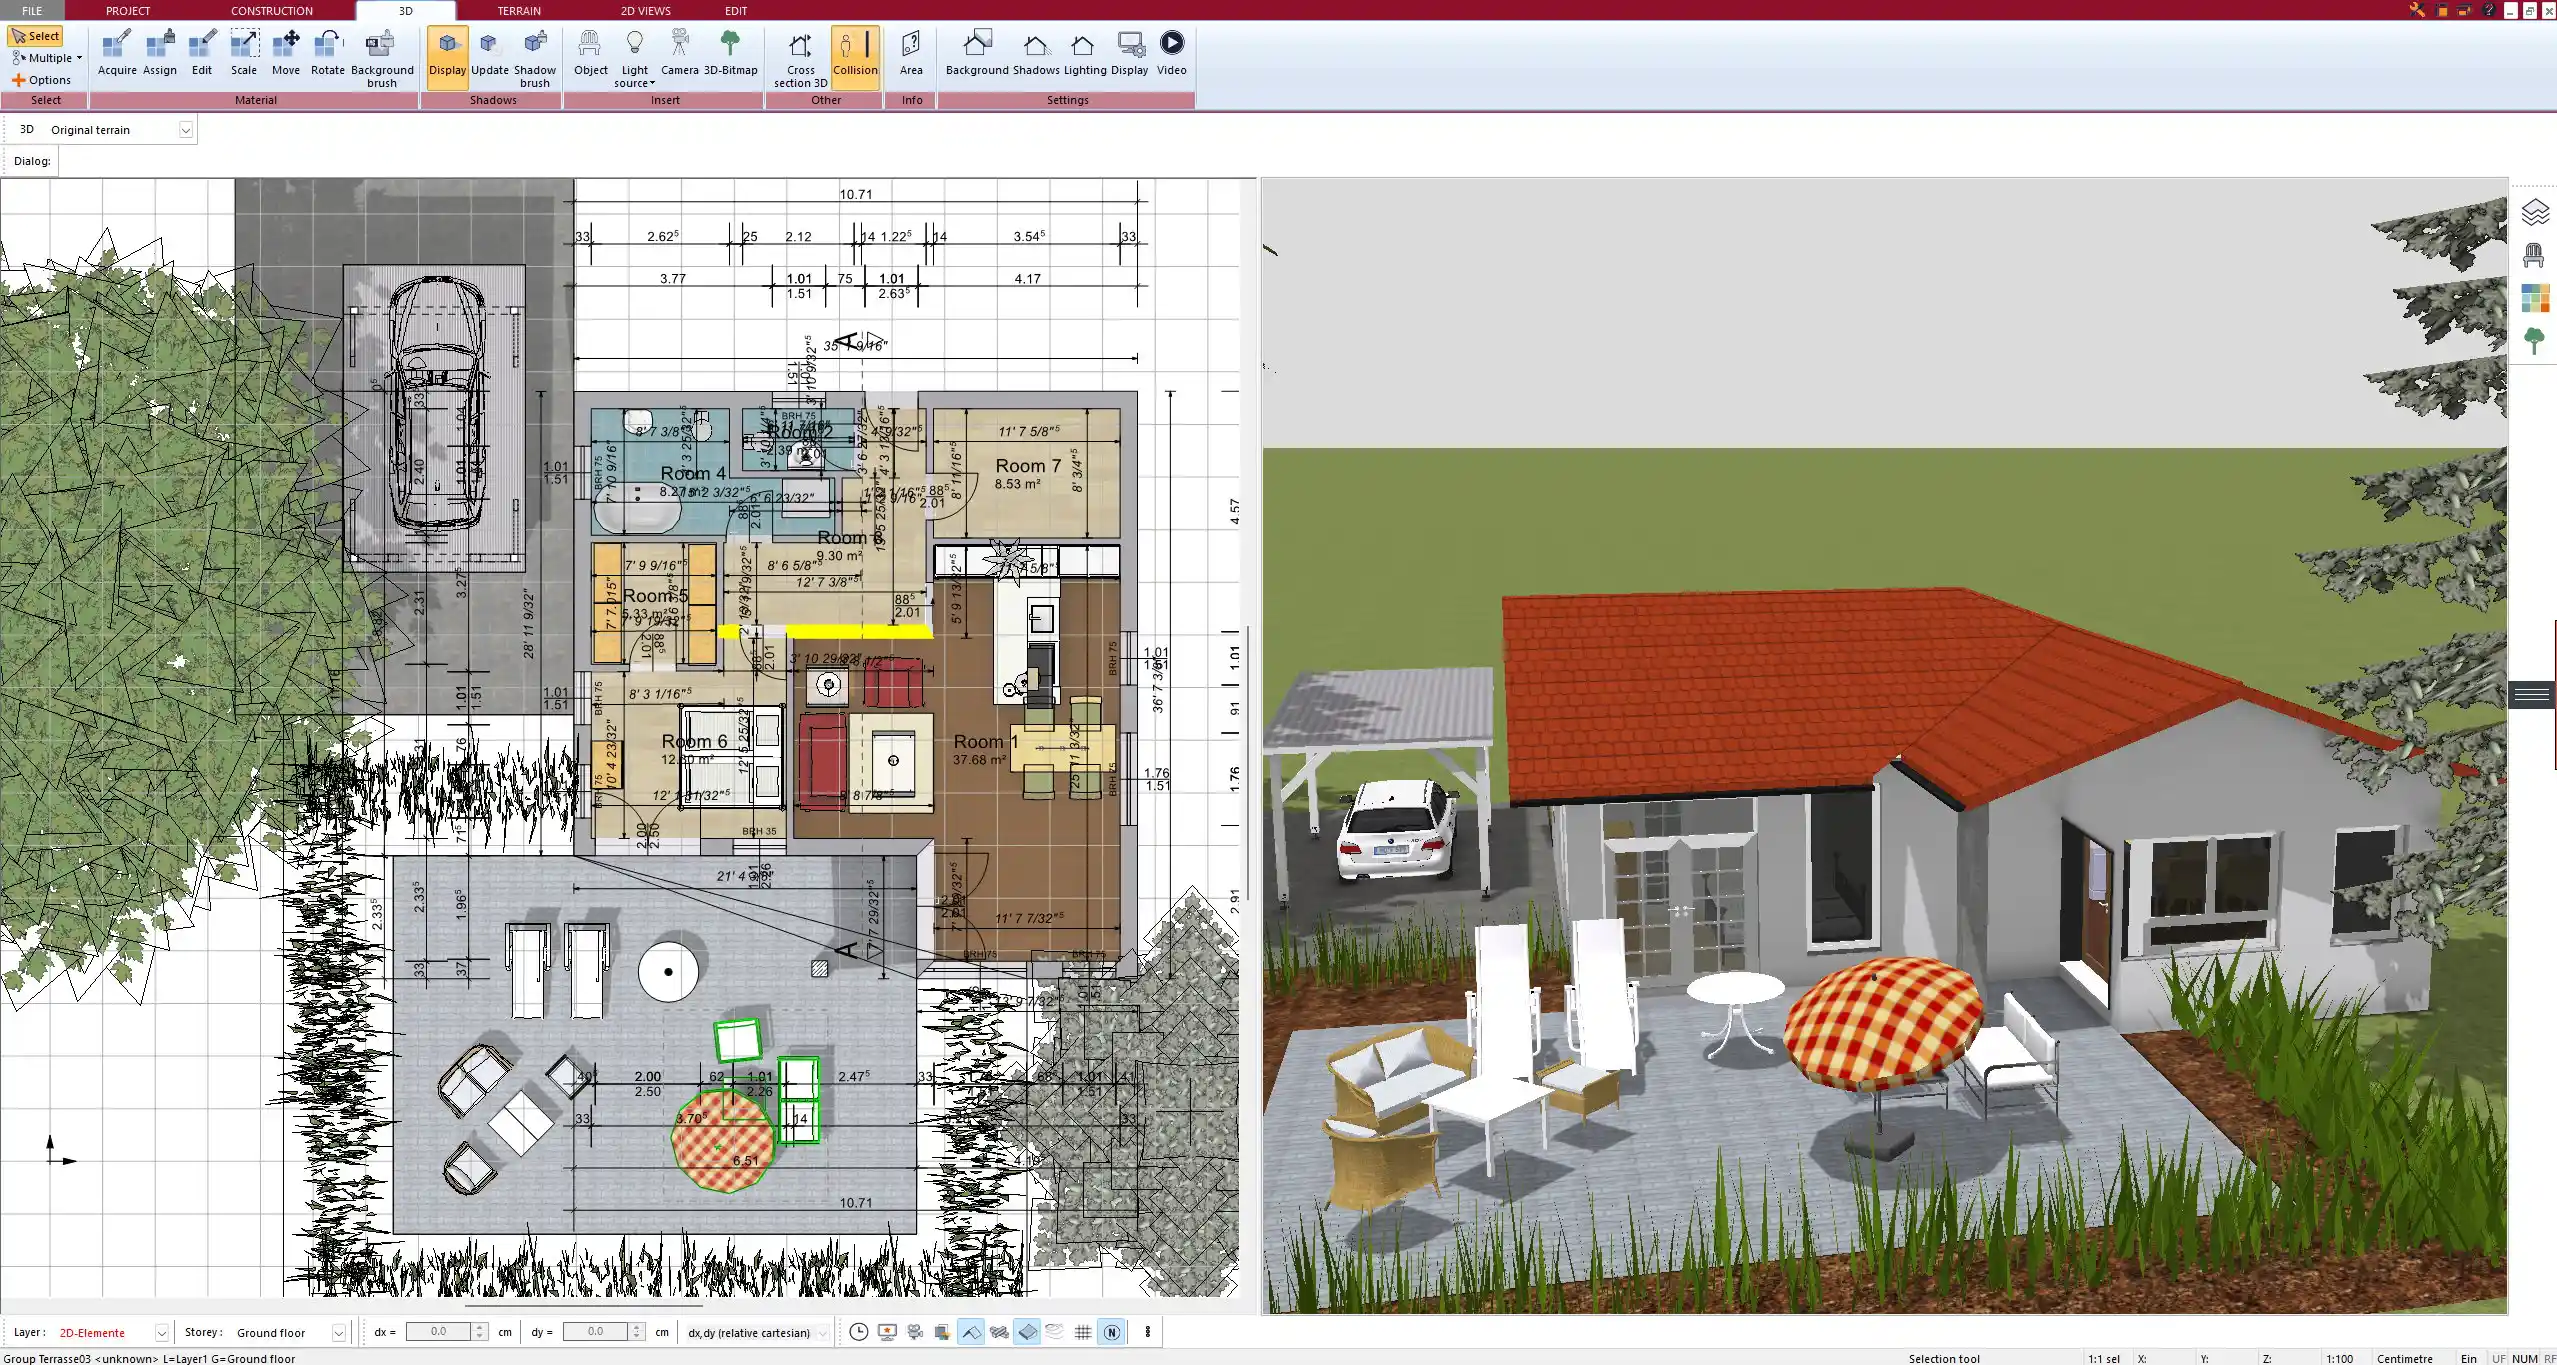
Design in 2D and Visualize in 3D
Use 2D for Precision, 3D for Realism
Start with a 2D layout for precise measurements and technical accuracy. You can align elements down to the centimeter or inch. You’ll need 2D especially for submitting plans to authorities or engineers.
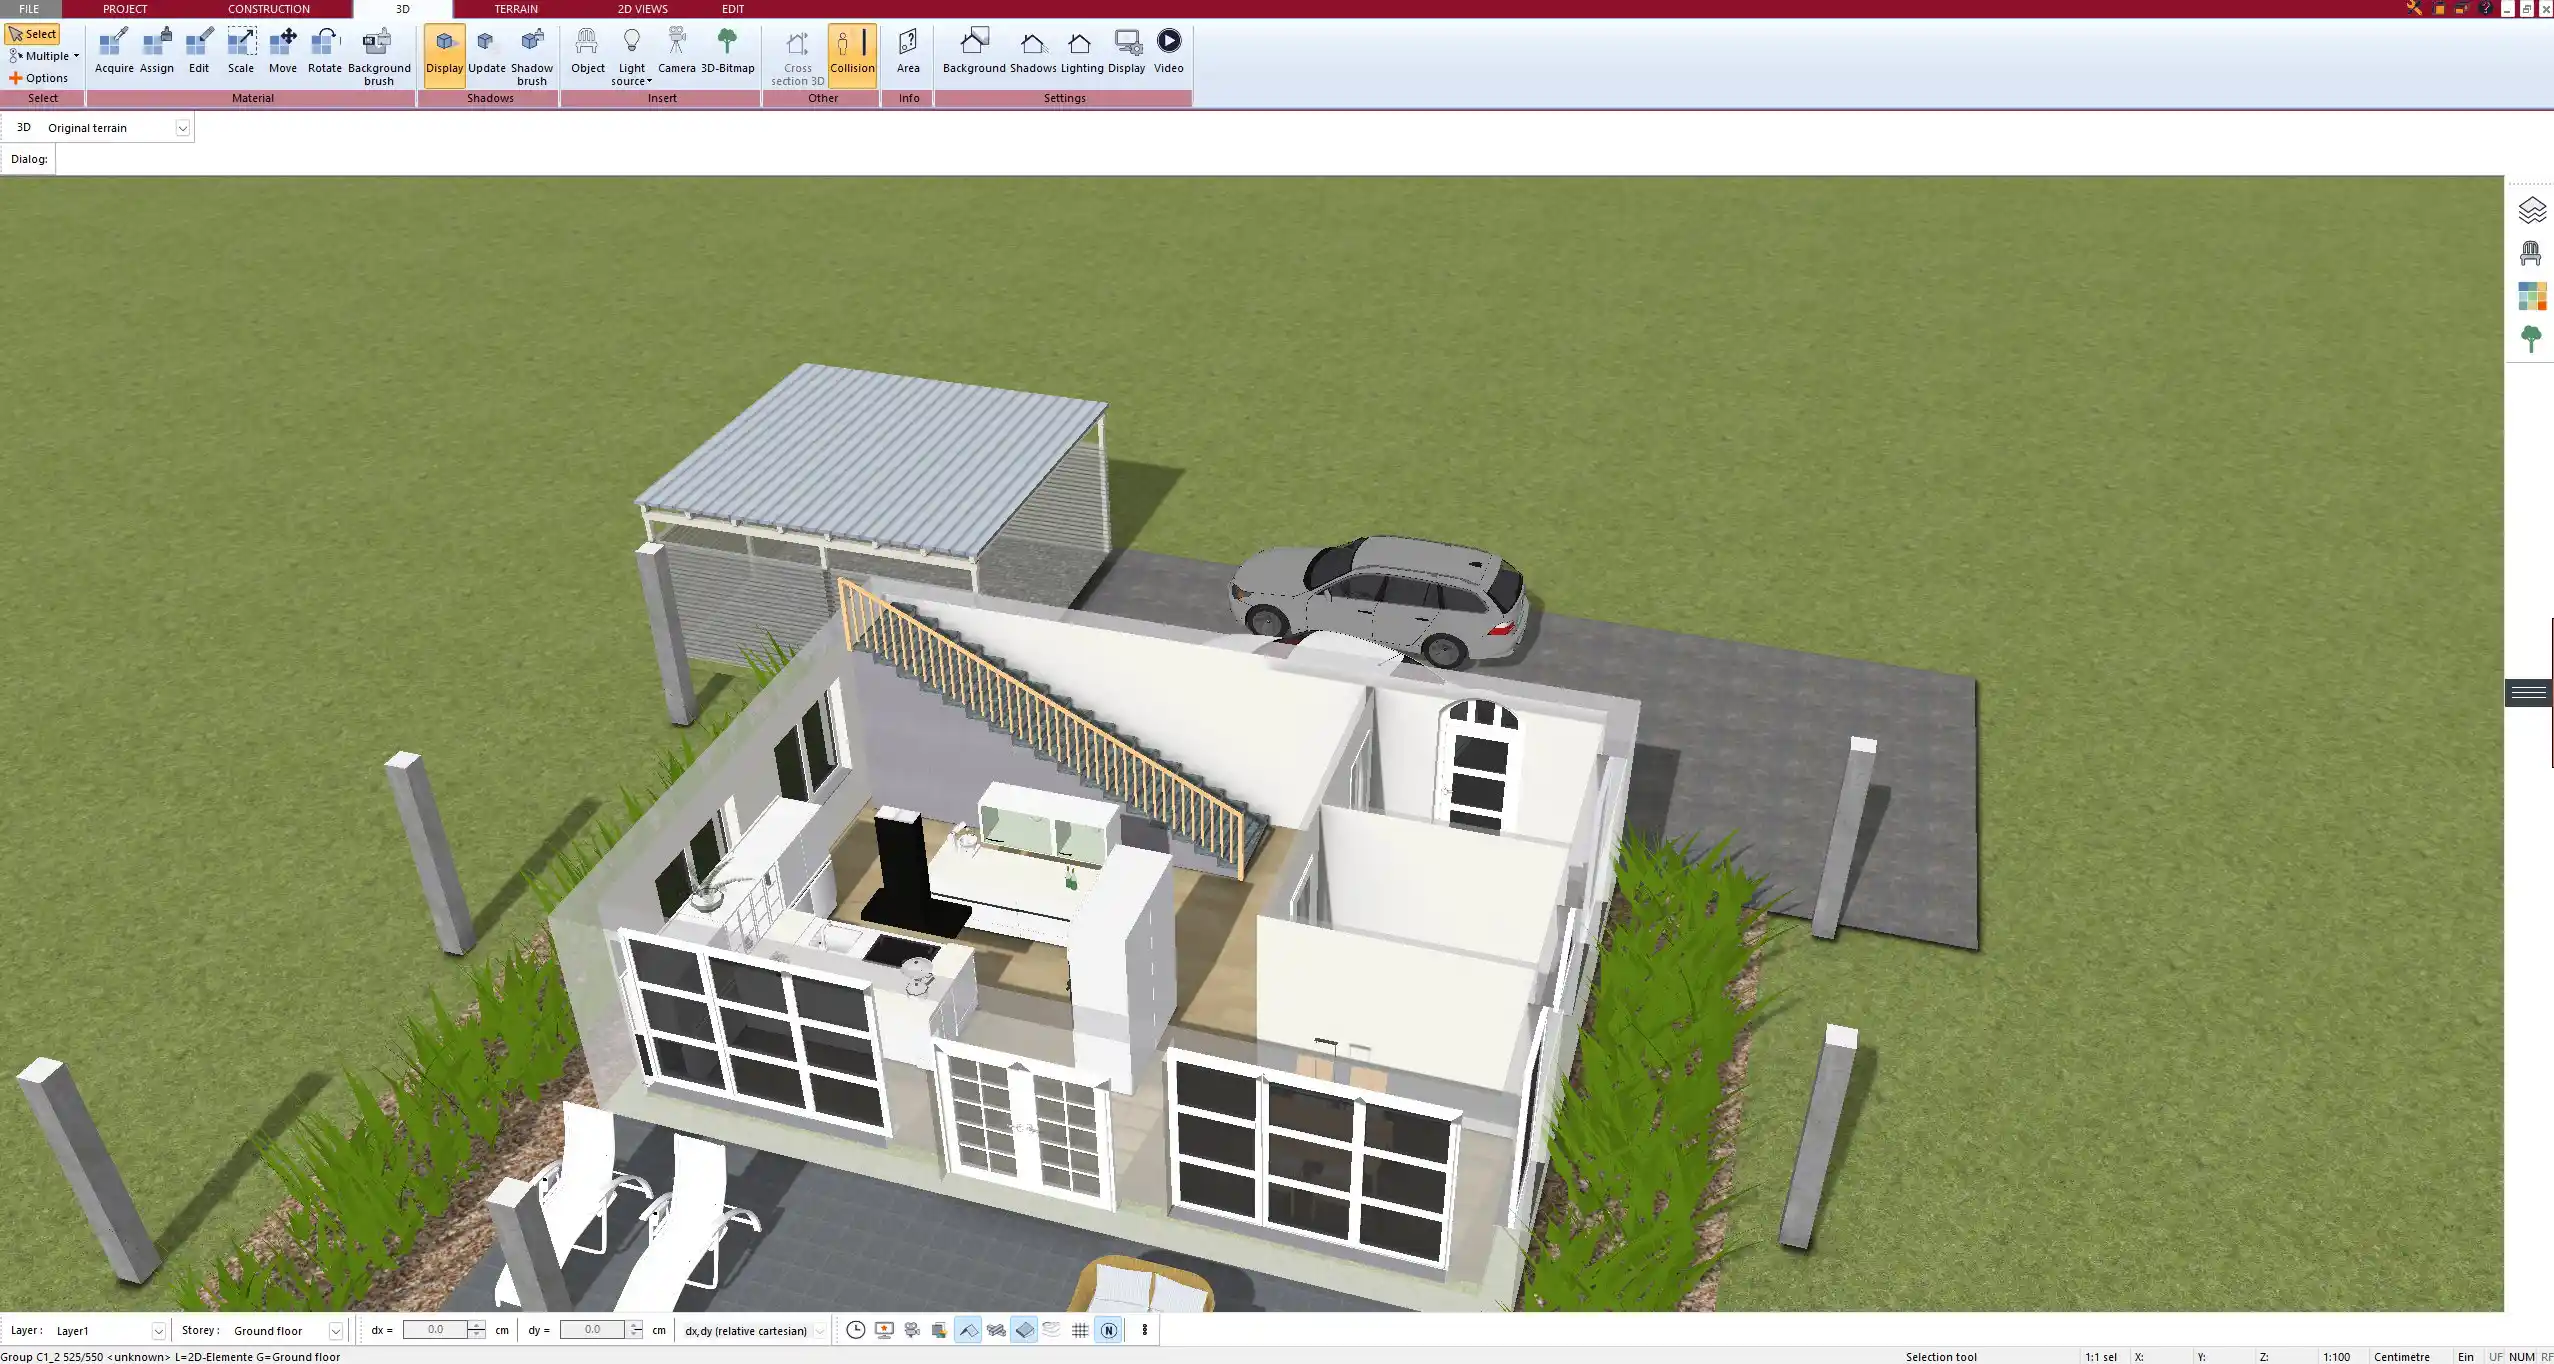
Once that’s set, switch to the 3D view. This is where you get a feel for the guest experience.
-
Check if tables feel cramped or comfortable.
-
Experiment with ceiling height, lighting fixtures, and window placements.
-
Use virtual walkthrough mode to simulate how guests and staff will move through the space.
This combination of 2D and 3D drastically reduces design errors and helps you present your concept clearly to investors or your team.
Additional Tips for Restaurant Planners
Consider Local Building Codes
In every project I’ve done, one of the first tasks was reviewing the local building and health regulations. These differ significantly between countries and even regions.
-
In the US, ADA compliance is mandatory for accessibility.
-
In Europe, hygiene zones in kitchens are strictly regulated.
-
Many cities impose minimum restroom-to-seat ratios.
Make sure your plan includes all required emergency exits, signs, and ventilation systems. If unsure, consult your local authority before finalizing.
Lighting, Acoustics, and Atmosphere
The ambiance of a restaurant goes far beyond tables and chairs. Good lighting and sound design make a huge difference.
Checklist for interior comfort:
-
Use warm lighting for dining areas, cooler lighting in kitchens.
-
Avoid placing spotlights directly above seats.
-
Include acoustic panels or sound-absorbing elements to reduce echo.
-
Design window placement with sunlight and glare in mind.
These elements can also be simulated in Plan7Architect’s 3D environment using texture and lighting tools.
Future Growth and Flexibility
Your first layout doesn’t have to be final forever. I always recommend leaving some flexible zones in the design.
Ideas for adaptable design:
-
Mobile dividers for private events
-
Foldable tables for quick reconfiguration
-
Removable outdoor seating layouts
-
Modular bar elements
By saving multiple layout versions in your CAD software, you can adapt quickly to new trends or operational changes.
Why Use Plan7Architect for Restaurant Planning
Tailored for Hospitality Projects
Plan7Architect includes features that are ideal for restaurant floor plans:
-
Ready-made restaurant furniture and kitchen elements
-
Drag-and-drop design with editable measurements
-
Support for both metric and imperial systems
-
2D and 3D views for technical precision and visual presentation
-
Printable plans for permits or contractor use
You can use the software for both new builds and renovations, and easily duplicate a layout to plan additional locations or franchise branches.
No Trial, But Full Refund Within 14 Days
There is no trial version, but you can try the full software risk-free. If it doesn’t meet your expectations, simply cancel your purchase by email within 14 days for a full refund. This makes it easy to test whether the program fits your workflow without long-term commitment.
Plan your project with Plan7Architect

Plan7Architect Pro 5 for $109.99
You don’t need any prior experience because the software has been specifically designed for beginners. The planning process is carried out in 5 simple steps:
1. Draw Walls

2. Windows & Doors

3. Floors & Roof

4. Textures & 3D Objects

5. Plan for the Building Permit

6. Export the Floor Plan as a 3D Model for Twinmotion

- – Compliant with international construction standards
- – Usable on 3 PCs simultaneously
- – Option for consultation with an architect
- – Comprehensive user manual
- – Regular updates
- – Video tutorials
- – Millions of 3D objects available


