Designing a Mansard roof with Plan7Architect is straightforward and visual. You start by drawing your basic floor plan in the 2D view. Once the walls are in place, you simply switch to the roof tool and select “Mansard roof” from the list of available roof types.
The software allows you to individually define the lower and upper roof slopes, their respective angles, ridge height, overhang, and dormer placement. All changes appear instantly in the live 3D view, giving you immediate feedback.
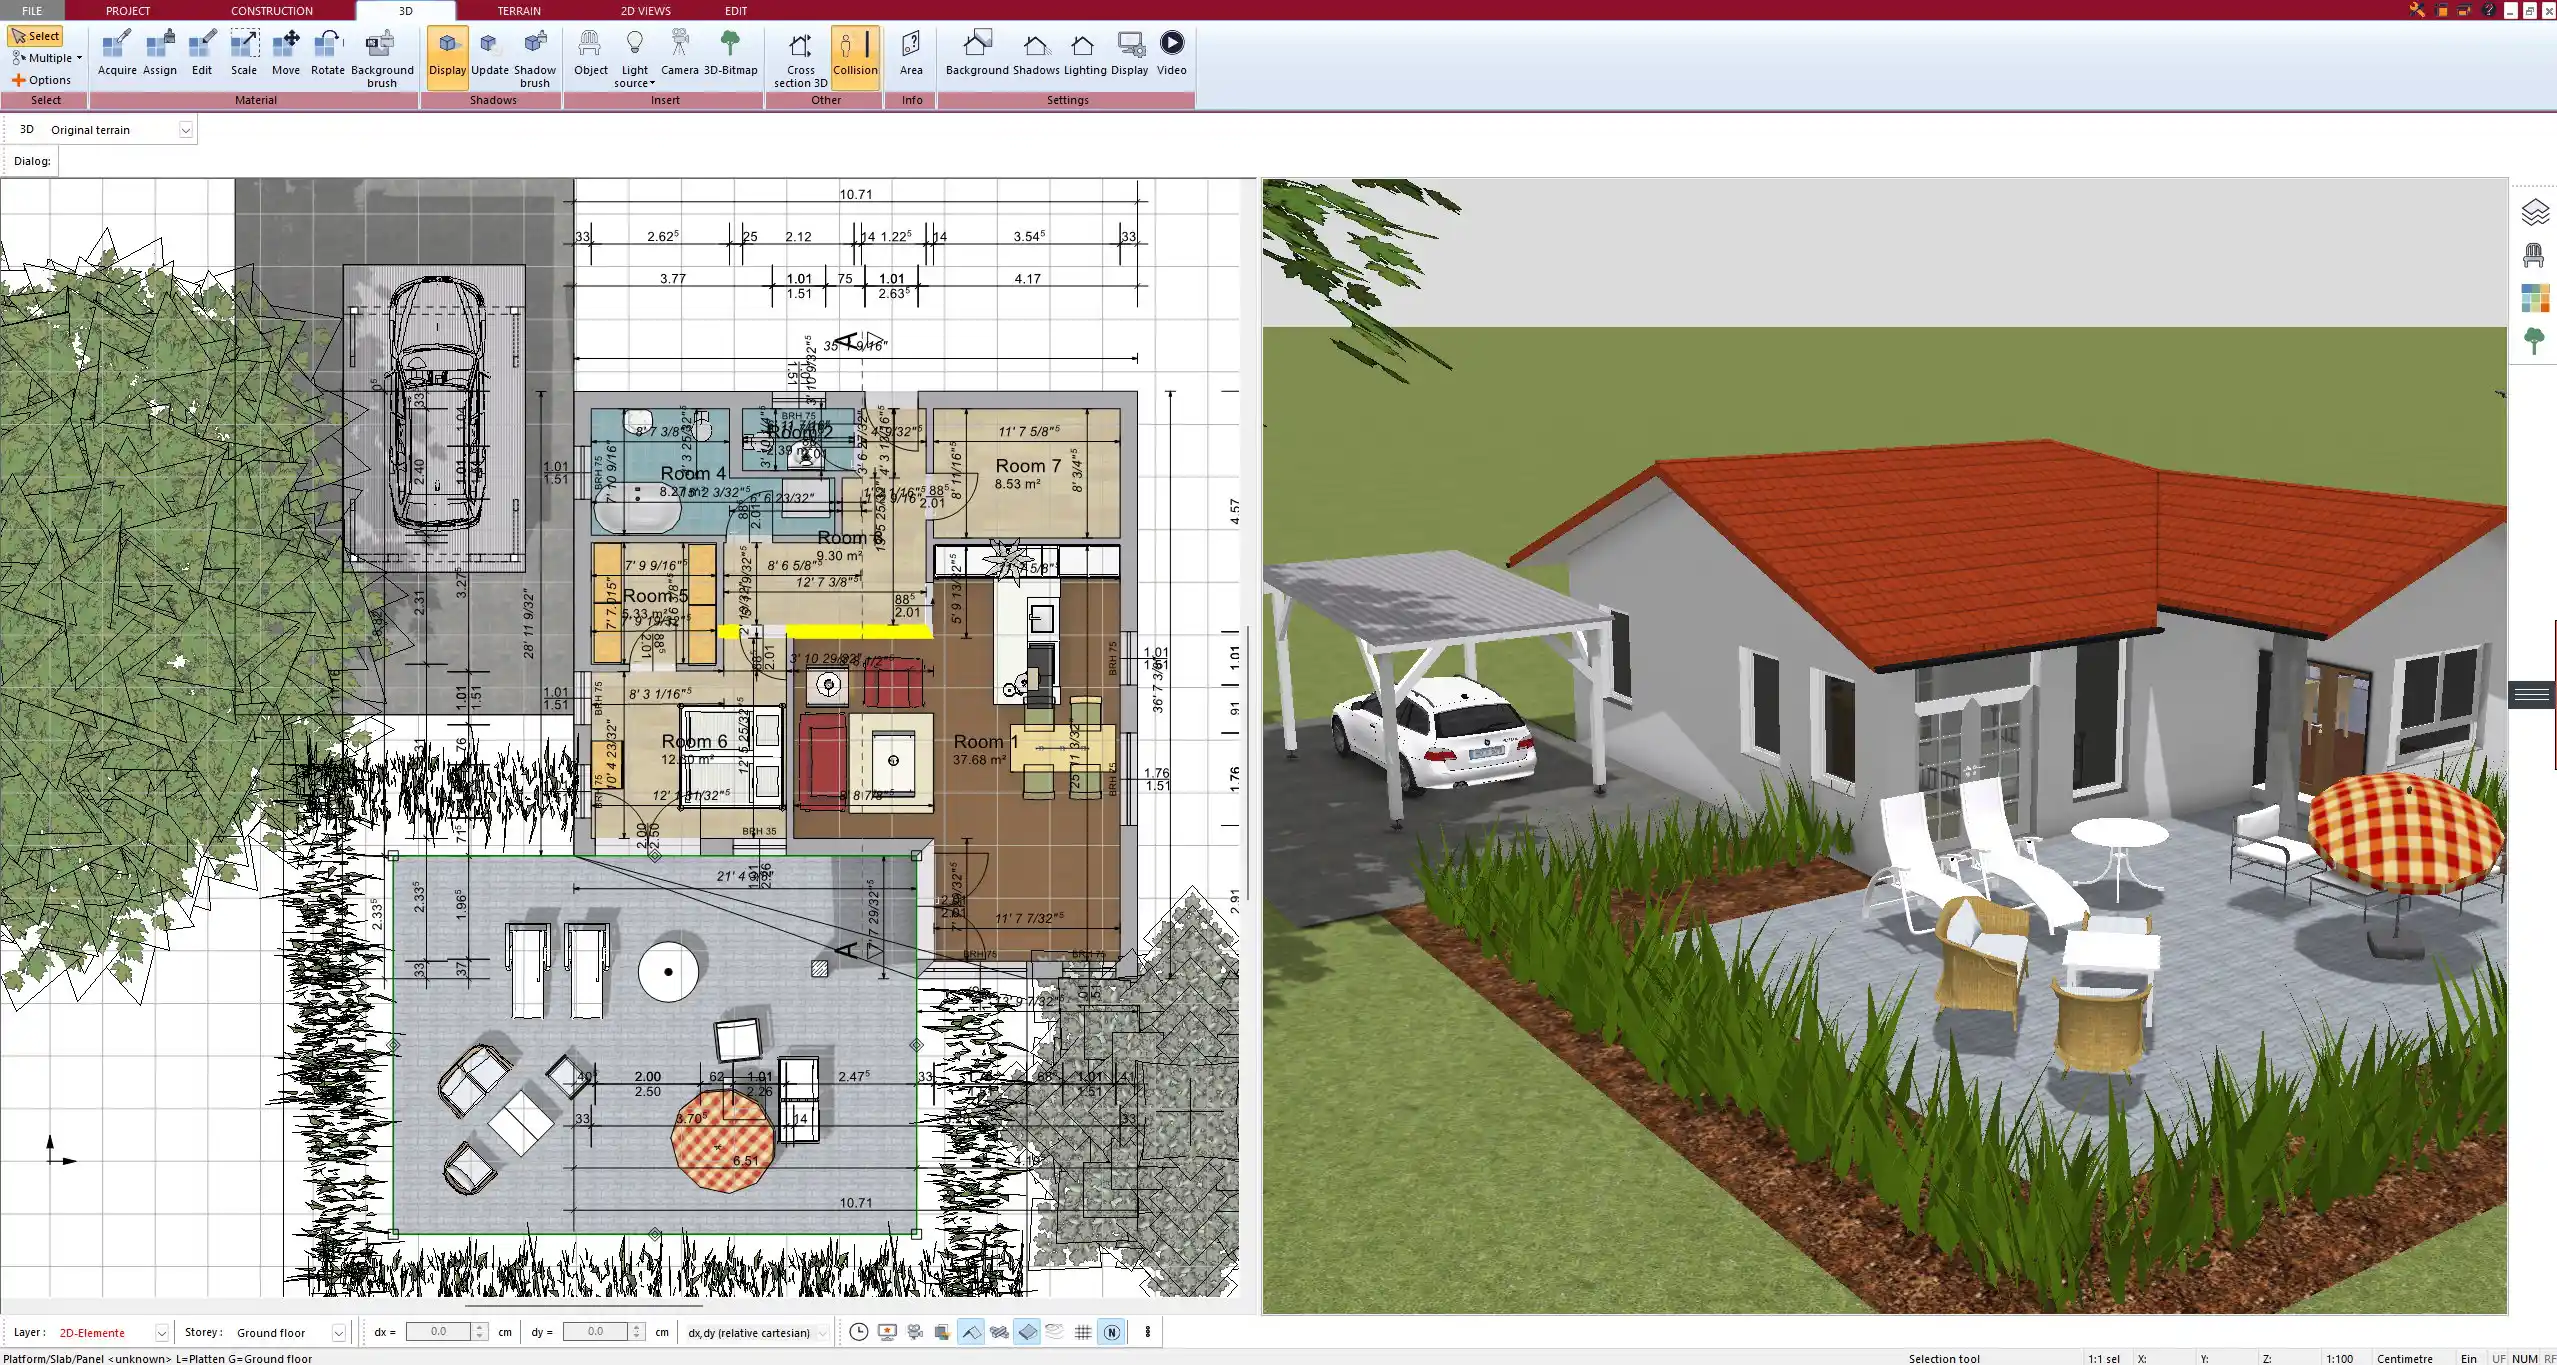
You can work in either metric or imperial units – depending on your region or preference – and switch between them at any time in the settings. Whether you are planning in meters or feet, square meters or square feet, Plan7Architect adapts accordingly.
No prior architectural knowledge is required. Everything is drag-and-drop or form-based, and fully visual. This makes it especially ideal for private builders and renovators who want to create their own roof plan.
Quick Start Steps:
-
Open or draw your floor plan in 2D mode.
-
Select the “Roof” tool and choose “Mansard roof.”
-
Define the pitch angle for the lower and upper slopes.
-
Set the overall height, overhang, and add dormers if needed.
-
Preview and refine everything instantly in 3D.
What Is a Mansard Roof? – A Quick Refresher
A Mansard roof is a four-sided roof with two slopes on each side. The lower slope is steep and prominent, while the upper slope is much shallower. This classic roof style, also known as a “French roof,” creates a full upper story under the roof, often used for living space, studios, or attic apartments.
It’s especially common in traditional European architecture but is also popular in urban developments, loft conversions, or where vertical space optimization is desired.
Key Characteristics of a Mansard Roof:
| Feature | Description |
|---|---|
| Number of Slopes | Two per side (total of 8) |
| Lower Slope | Steep, visually dominant |
| Upper Slope | Shallow, often barely visible from the street |
| Usable Roof Space | High – allows for full upper floors |
| Style Association | Historic, French, city townhouses |
Why Plan a Mansard Roof Digitally?
When you’re dealing with complex roof shapes like the Mansard, precision matters. Planning digitally allows you to control slope angles, symmetry, roof heights, and integrate roof windows or dormers without trial-and-error. With Plan7Architect, the roof appears in full 3D while you design it, so you always know exactly how it will look.
This is not only helpful for construction but also for planning interiors under the roof: bedrooms, bathrooms, home offices, or even open loft spaces.
Benefits of Digital Roof Planning:
-
Avoid angle miscalculations or design mismatches
-
Plan visual harmony between façade and roof
-
Test multiple material options (tiles, shingles, slate)
-
Position dormers or roof windows precisely
-
Evaluate natural light and ventilation through 3D visualization
Mansard Roof Planning Features in Plan7Architect
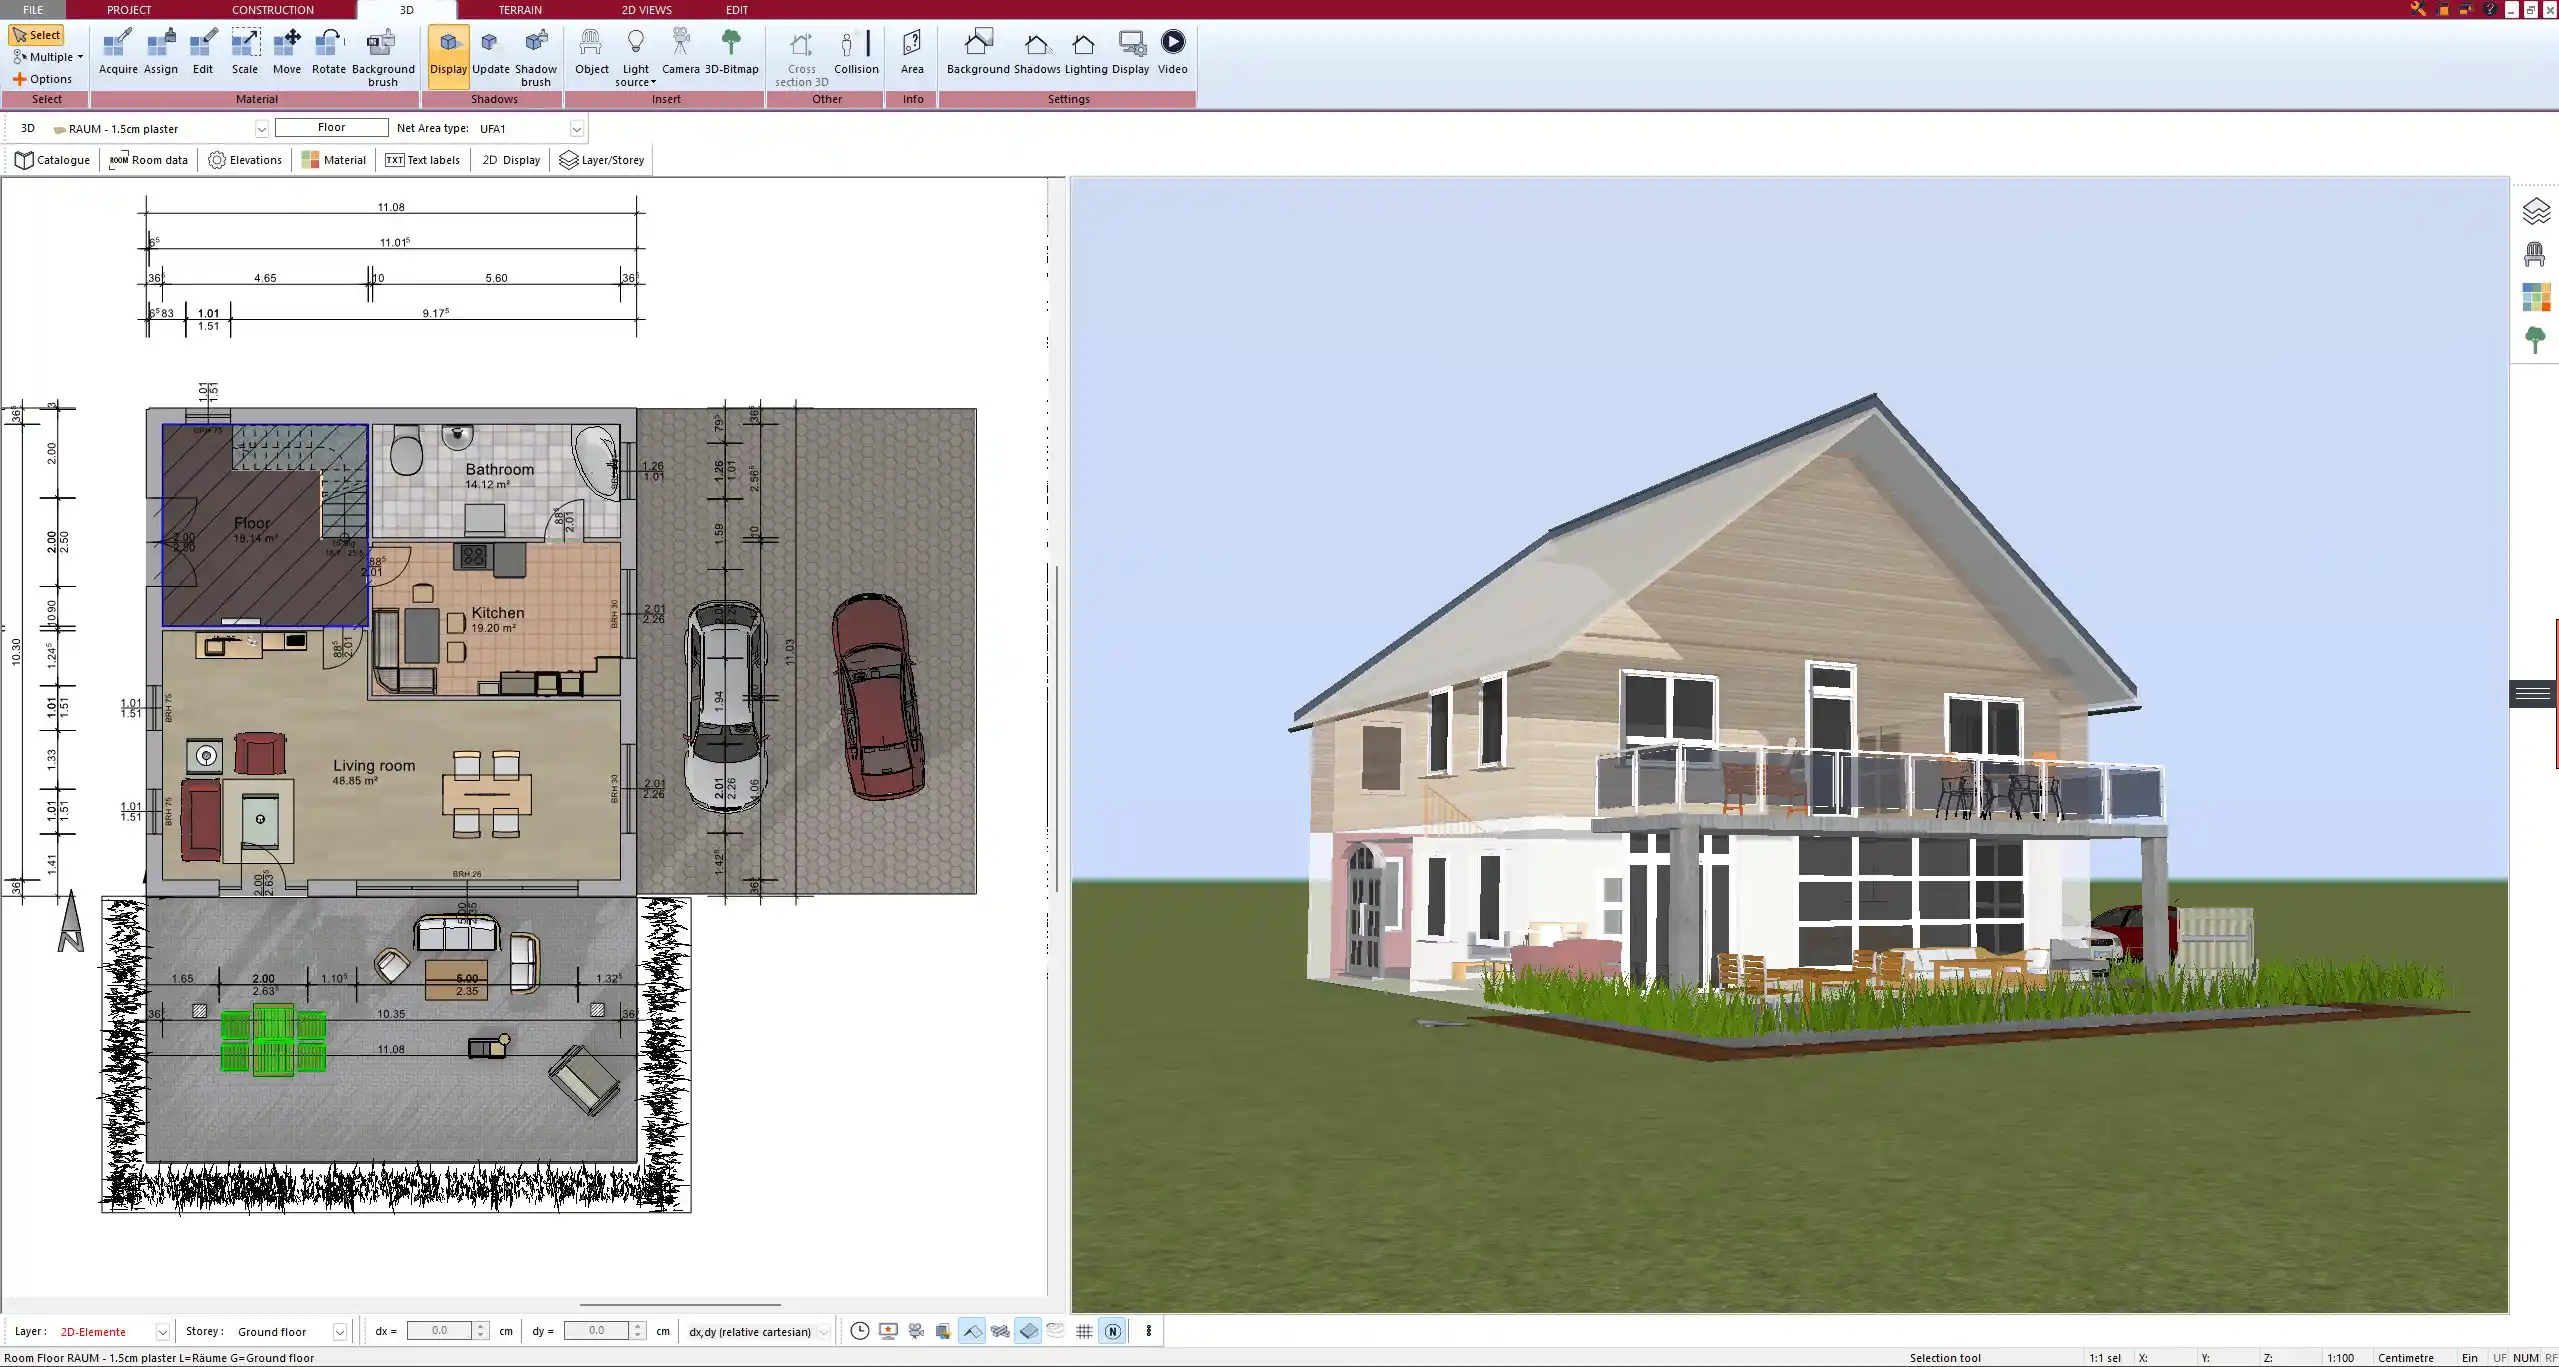
2D Floor Plan Mode
The first step is always the 2D floor plan. In Plan7Architect, this is done either by drawing manually or by importing an existing floor plan (e.g., as a PDF or image). You define wall dimensions, thickness, and layout.
Once you complete the basic structure, you switch to the roof tool. The software detects the external walls and allows you to apply a Mansard roof with just a few clicks.
Tip: Use the snapping tools and dimension aids for exact measurements when drawing in 2D.
Mansard Roof Configuration
Once the roof is in place, you can adjust all relevant parameters:
-
Lower slope angle: Define how steep the prominent part of the roof should be
-
Upper slope angle: Adjust the flatter top section for subtle variation
-
Ridge height: Set the total height of the roof from the top of the wall
-
Overhangs: Control how far the roof extends beyond the walls
-
Eaves and gables: Shape and stylize the sides individually
-
Dormers: Place dormers along the Mansard slopes as needed
All values can be entered in metric (e.g., meters, centimeters) or imperial (e.g., feet, inches), and Plan7Architect will apply them accordingly in both 2D and 3D views.
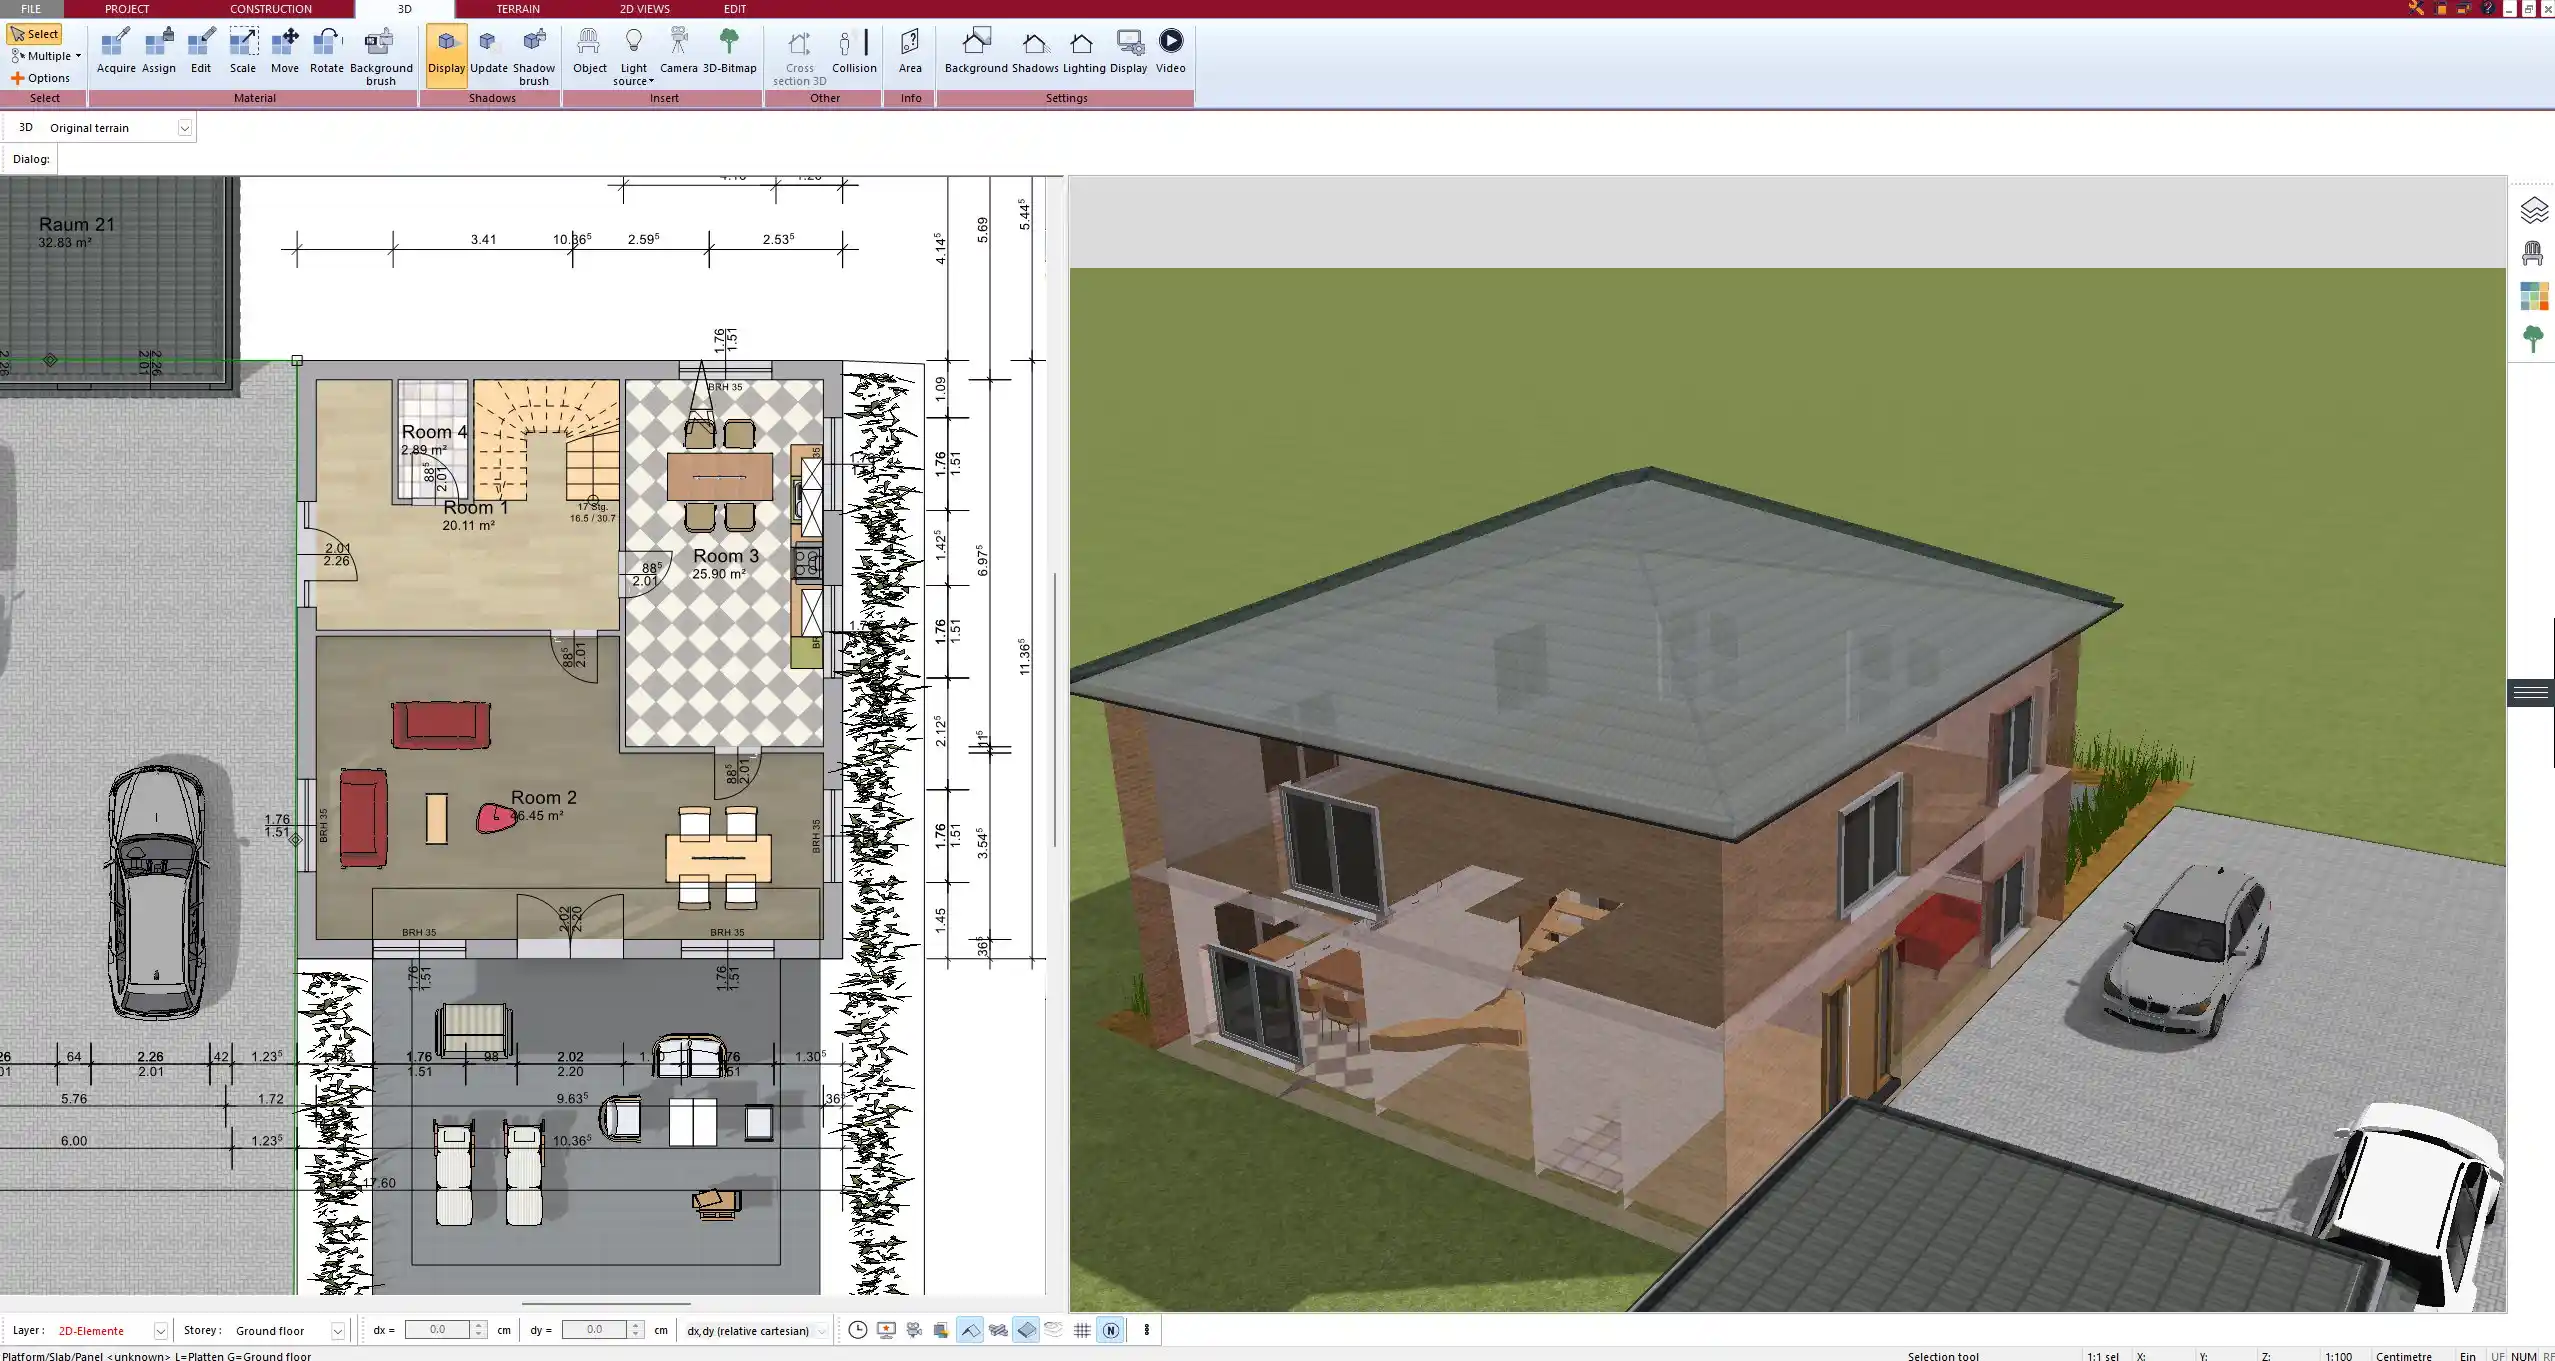
3D Live View + Walkthrough
Every change made in 2D is instantly visible in 3D. You can rotate the view, zoom in and out, and walk through the space as if you were standing in the future building.
This makes it easy to understand how the roof works together with the entire structure and how it affects light, volume, and usability inside the top floor.
You can also activate sunlight simulation and test how shadows and lighting change throughout the day and year – perfect for planning roof windows or dormers.
Measurement Systems
Plan7Architect supports both metric and imperial systems. You can switch between them at any time in the project settings. This makes the software ideal whether you are building in Europe, the United States, Canada, or elsewhere.
Adding Details: Dormers, Roof Windows & Materials
Dormers are a defining feature of most Mansard roofs. In Plan7Architect, adding dormers is as simple as dragging them onto the slope. You can choose from several styles:
-
Flat roof dormers
-
Gable roof dormers
-
Arched dormers
-
Custom dormers (adjustable dimensions and shapes)
After placement, you can adjust their size, depth, roof angle, and window type. You can also add classic roof windows directly to the Mansard surface.
Roof Material Options Include:
-
Clay tiles
-
Slate
-
Asphalt shingles
-
Metal roof panels
-
Custom textures and colors
Tip: You can assign different materials to different roof sections. For example, use slate for the steep lower slope and metal or flat tiles for the upper one.
Modify or Reconfigure Anytime
One of the best parts of working with Plan7Architect is that nothing is final until you say so. You can go back to the roof tool anytime and:
-
Change the slope angles
-
Increase or decrease roof height
-
Add or remove dormers
-
Try alternative roofing materials
All adjustments are instantly applied to both 2D and 3D views. This is ideal when you’re still exploring options, working with a partner, or preparing visualizations for clients or contractors.
Use Cases: Private Builders, Renovators, Professionals
Designing a Mansard roof is not just for architects. I’ve used Plan7Architect in various real-life situations where the Mansard design was key:
Common Use Cases:
-
Private homeowners: Planning an attic apartment or extra bedroom under the roof
-
Renovators: Upgrading older buildings with more usable space and better insulation
-
Townhouse developers: Adding charm and height to narrow city buildings
-
Real estate agents: Creating high-quality visualizations for listings
-
Builders: Sending printable roof plans to structural engineers or contractors
Plan7Architect provides all the tools needed for anyone in these situations to build confidently.
Tips for First-Time Users
If you’ve never planned a roof digitally before, the following tips will make your first steps easier:
-
Start with a sample project: Load one of the pre-made demo houses and just change the roof type to “Mansard.”
-
Use the measurement assistant: You can activate helpers that show live wall and roof dimensions.
-
Save different versions: Try different angles or dormer positions and save each version separately to compare.
-
Watch the built-in video tutorials: They explain exactly how to model a Mansard roof step by step.
-
Check local regulations: Especially in Europe and the US, slope angle, ridge height, or dormer size may be subject to municipal building codes.
Tip: In the Plan7Architect settings, enable the “roof details” panel to see every editable parameter in one place, which helps avoid missing important details during planning.
Plan your project with Plan7Architect

Plan7Architect Pro 5 for $109.99
You don’t need any prior experience because the software has been specifically designed for beginners. The planning process is carried out in 5 simple steps:
1. Draw Walls

2. Windows & Doors

3. Floors & Roof

4. Textures & 3D Objects

5. Plan for the Building Permit

6. Export the Floor Plan as a 3D Model for Twinmotion

- – Compliant with international construction standards
- – Usable on 3 PCs simultaneously
- – Option for consultation with an architect
- – Comprehensive user manual
- – Regular updates
- – Video tutorials
- – Millions of 3D objects available


