If you want to design a house with an integrated secondary unit—also known as an in-law suite, accessory dwelling unit (ADU), granny flat, or guest apartment—Plan7Architect offers all the tools you need to make it happen, even without previous architectural experience. You can easily plan private entrances, independent kitchens, bathrooms, and all the key features needed to create a functional second living space inside your home.
With Plan7Architect, you can:
-
Work in both 2D and 3D modes simultaneously
-
Switch between metric (meters, centimeters) and imperial (feet, inches) units at any time
-
Define multiple floors, garages, and separate outdoor access areas
-
Export your designs as scaled PDF files, images, or DWG/DXF files for architects or building authorities
-
Follow regional building standards in the US, UK, Canada, Australia, or Europe
Whether your goal is to rent out the secondary unit, host family members, or build a private office, you can plan and visualize everything step by step in a fully editable, professional floor plan.
What Defines a Floor Plan with a Secondary Unit?
Key Characteristics
A secondary unit is a fully self-contained living space within or attached to a single-family house. It includes everything required for independent living, typically:
-
A separate entrance (side door, back door, or private stairway)
-
A full or partial kitchen
-
A private bathroom
-
At least one sleeping/living area
-
Optional: Separate heating or electricity meters depending on local codes
You can build the unit on the ground floor, in the basement, upstairs, or as an extension. The Plan7Architect software allows all these variations with flexible wall, room, and story management tools.
Common Uses
Designing a house with a secondary unit gives you extra space and financial flexibility. Based on your personal situation, here are typical use cases:
-
Renting it out for additional income
-
Accommodating elderly parents or adult children
-
Creating a guest suite with privacy
-
Designing a live-in caregiver’s quarters
-
Setting up a private office or studio with a bathroom and kitchenette
Step-by-Step: Planning a Secondary Unit in Plan7Architect
Step 1 – Base Floor Plan Creation
Start by laying out the primary residence using the standard tools in Plan7Architect. Choose wall thickness, place exterior and interior doors, and mark key rooms like the living area, kitchen, and bedrooms.
The software includes drag-and-drop elements for:
-
Structural walls and partitions
-
Room labels (editable at any time)
-
Doors, windows, and staircases
Set the correct dimensions based on your local standards. You can work in either metric or imperial units, and switch between them anytime.
Step 2 – Add the Secondary Unit
Once your main layout is in place, begin designing the secondary unit:
-
Define its location: basement, ground floor, extension, or upper level
-
Draw separating walls to ensure clear division between the main house and the unit
-
Insert a separate entrance, such as a side door or exterior staircase
-
Add a compact kitchen or kitchenette, and a full bathroom
-
Place bedroom or combined living-sleeping areas
Use clear labeling, such as “Bedroom (ADU)” or “Living Room (In-Law Suite)” to avoid confusion.
Step 3 – Define Access and Utilities
Access is a critical part of any secondary unit. Depending on your design, you can:
-
Provide a private entryway to the unit
-
Use a shared hallway with interior lockable doors
-
Plan a second staircase or an external walkway
For utilities, indicate where plumbing, electric, and HVAC zones split. While Plan7Architect does not simulate plumbing or electrical loads, it lets you mark zones visually in 2D and 3D using symbols and annotation tools.
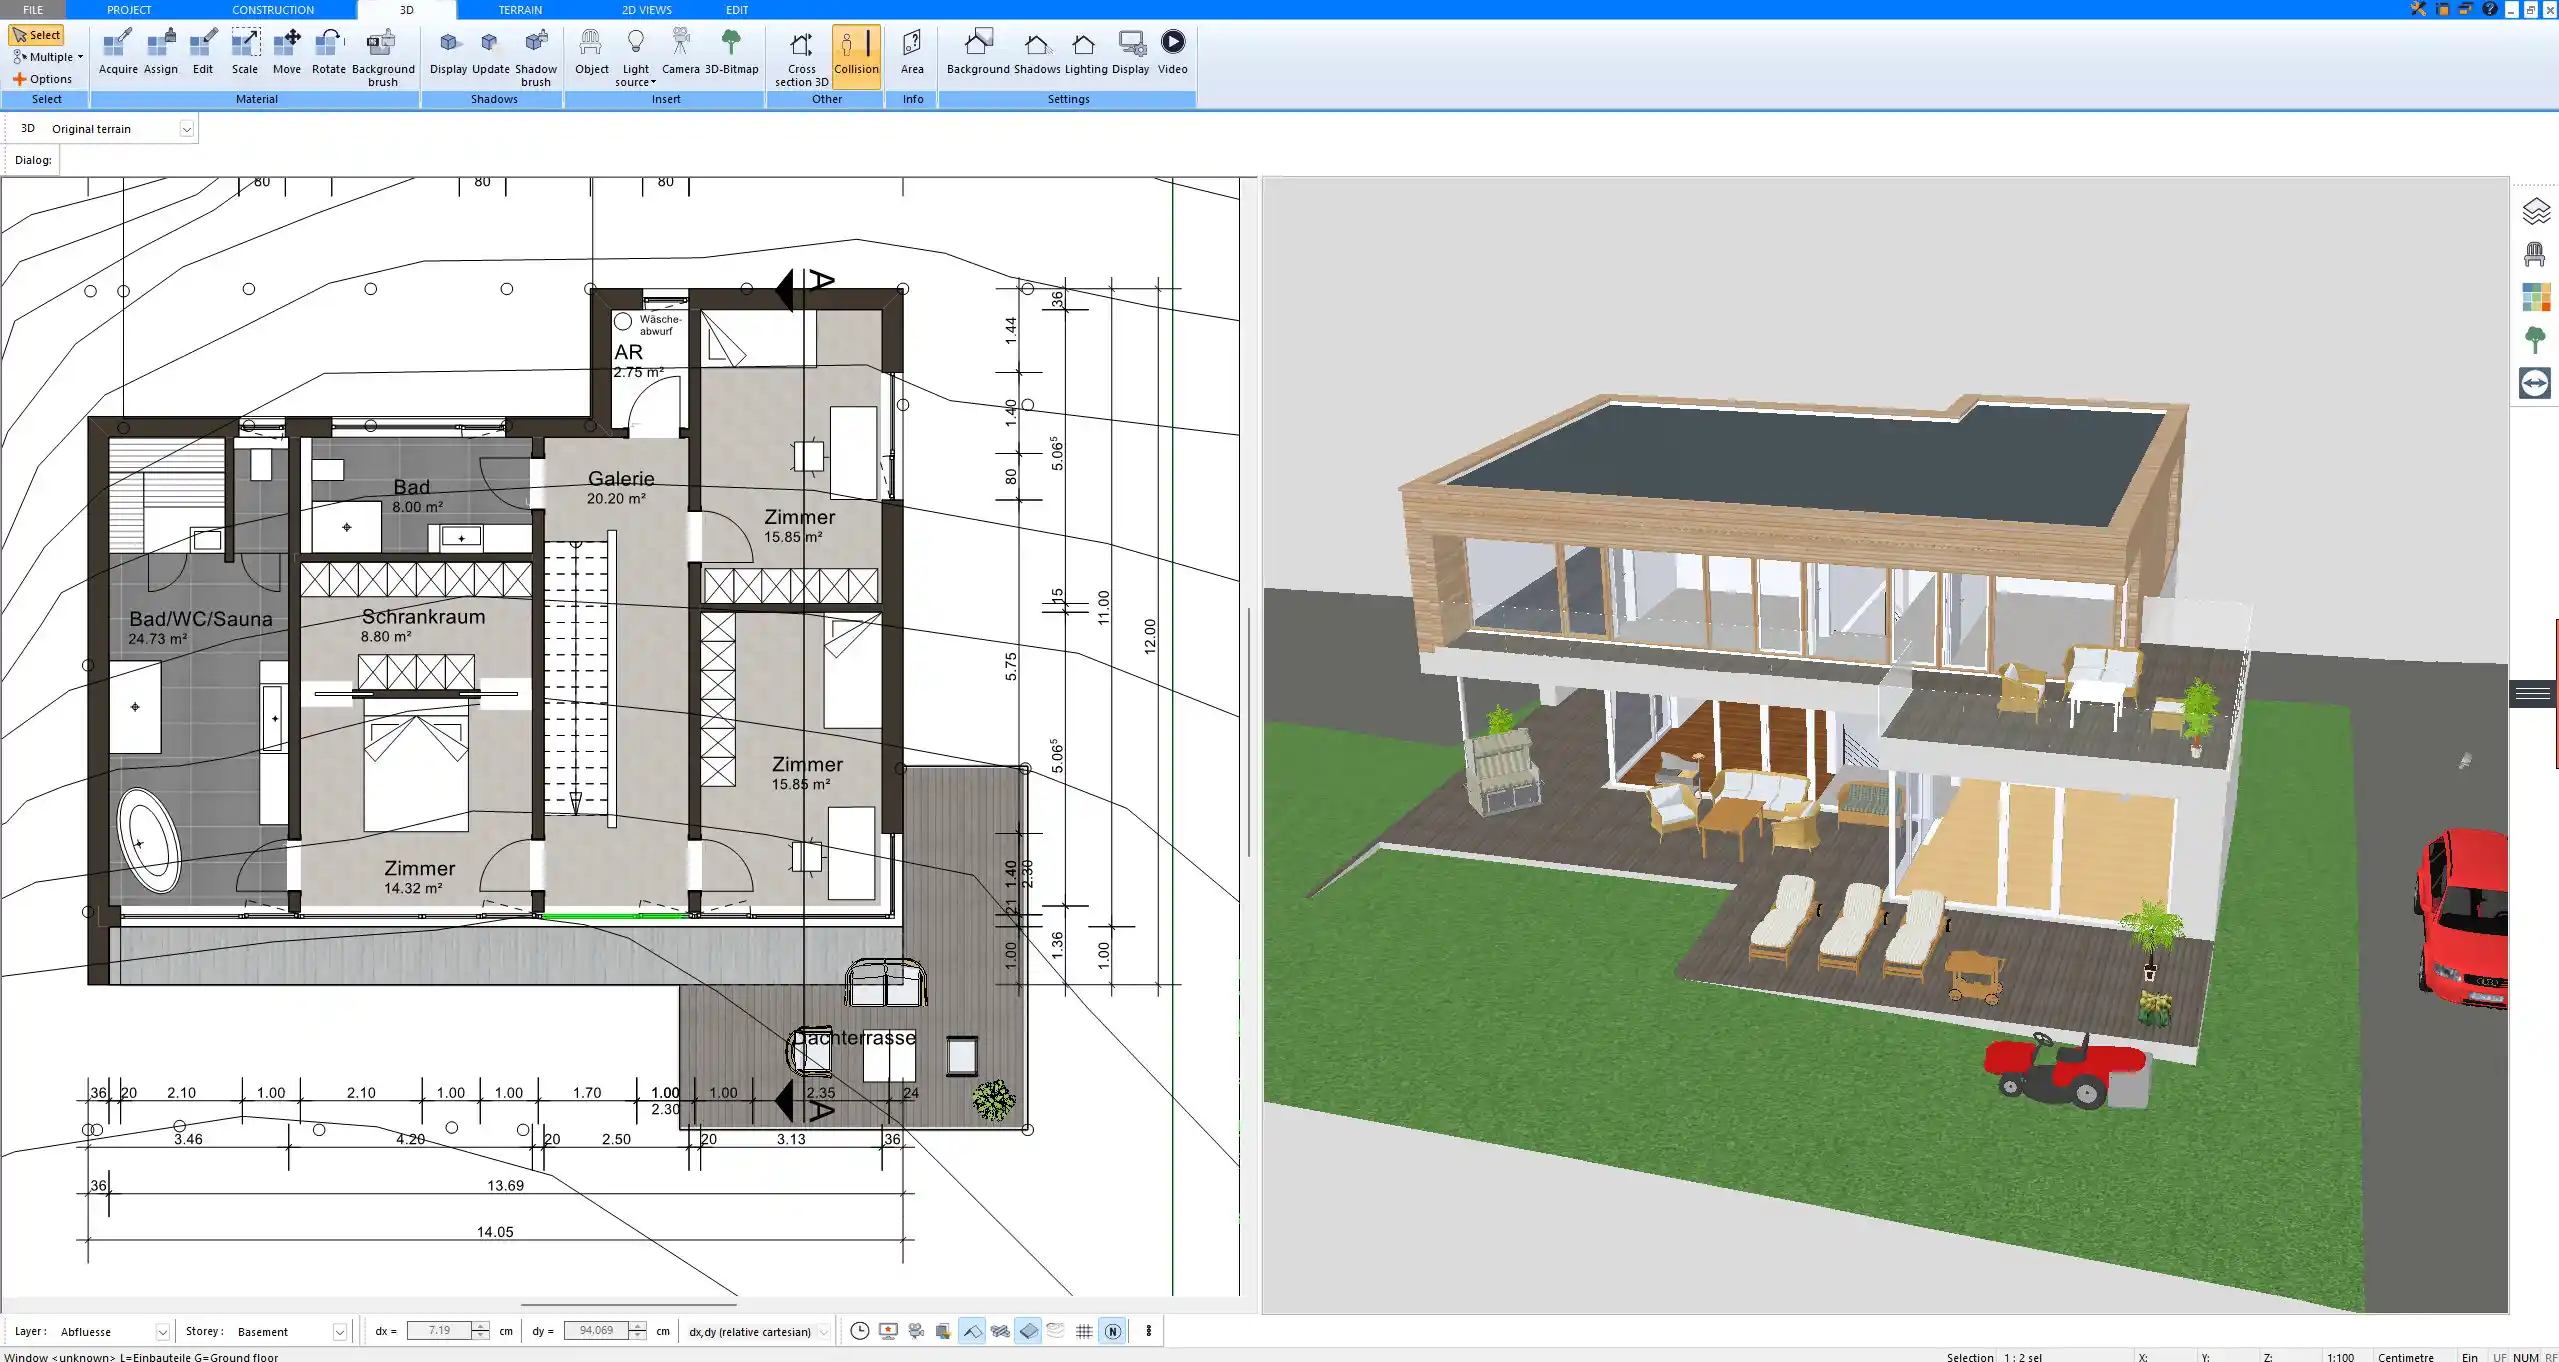
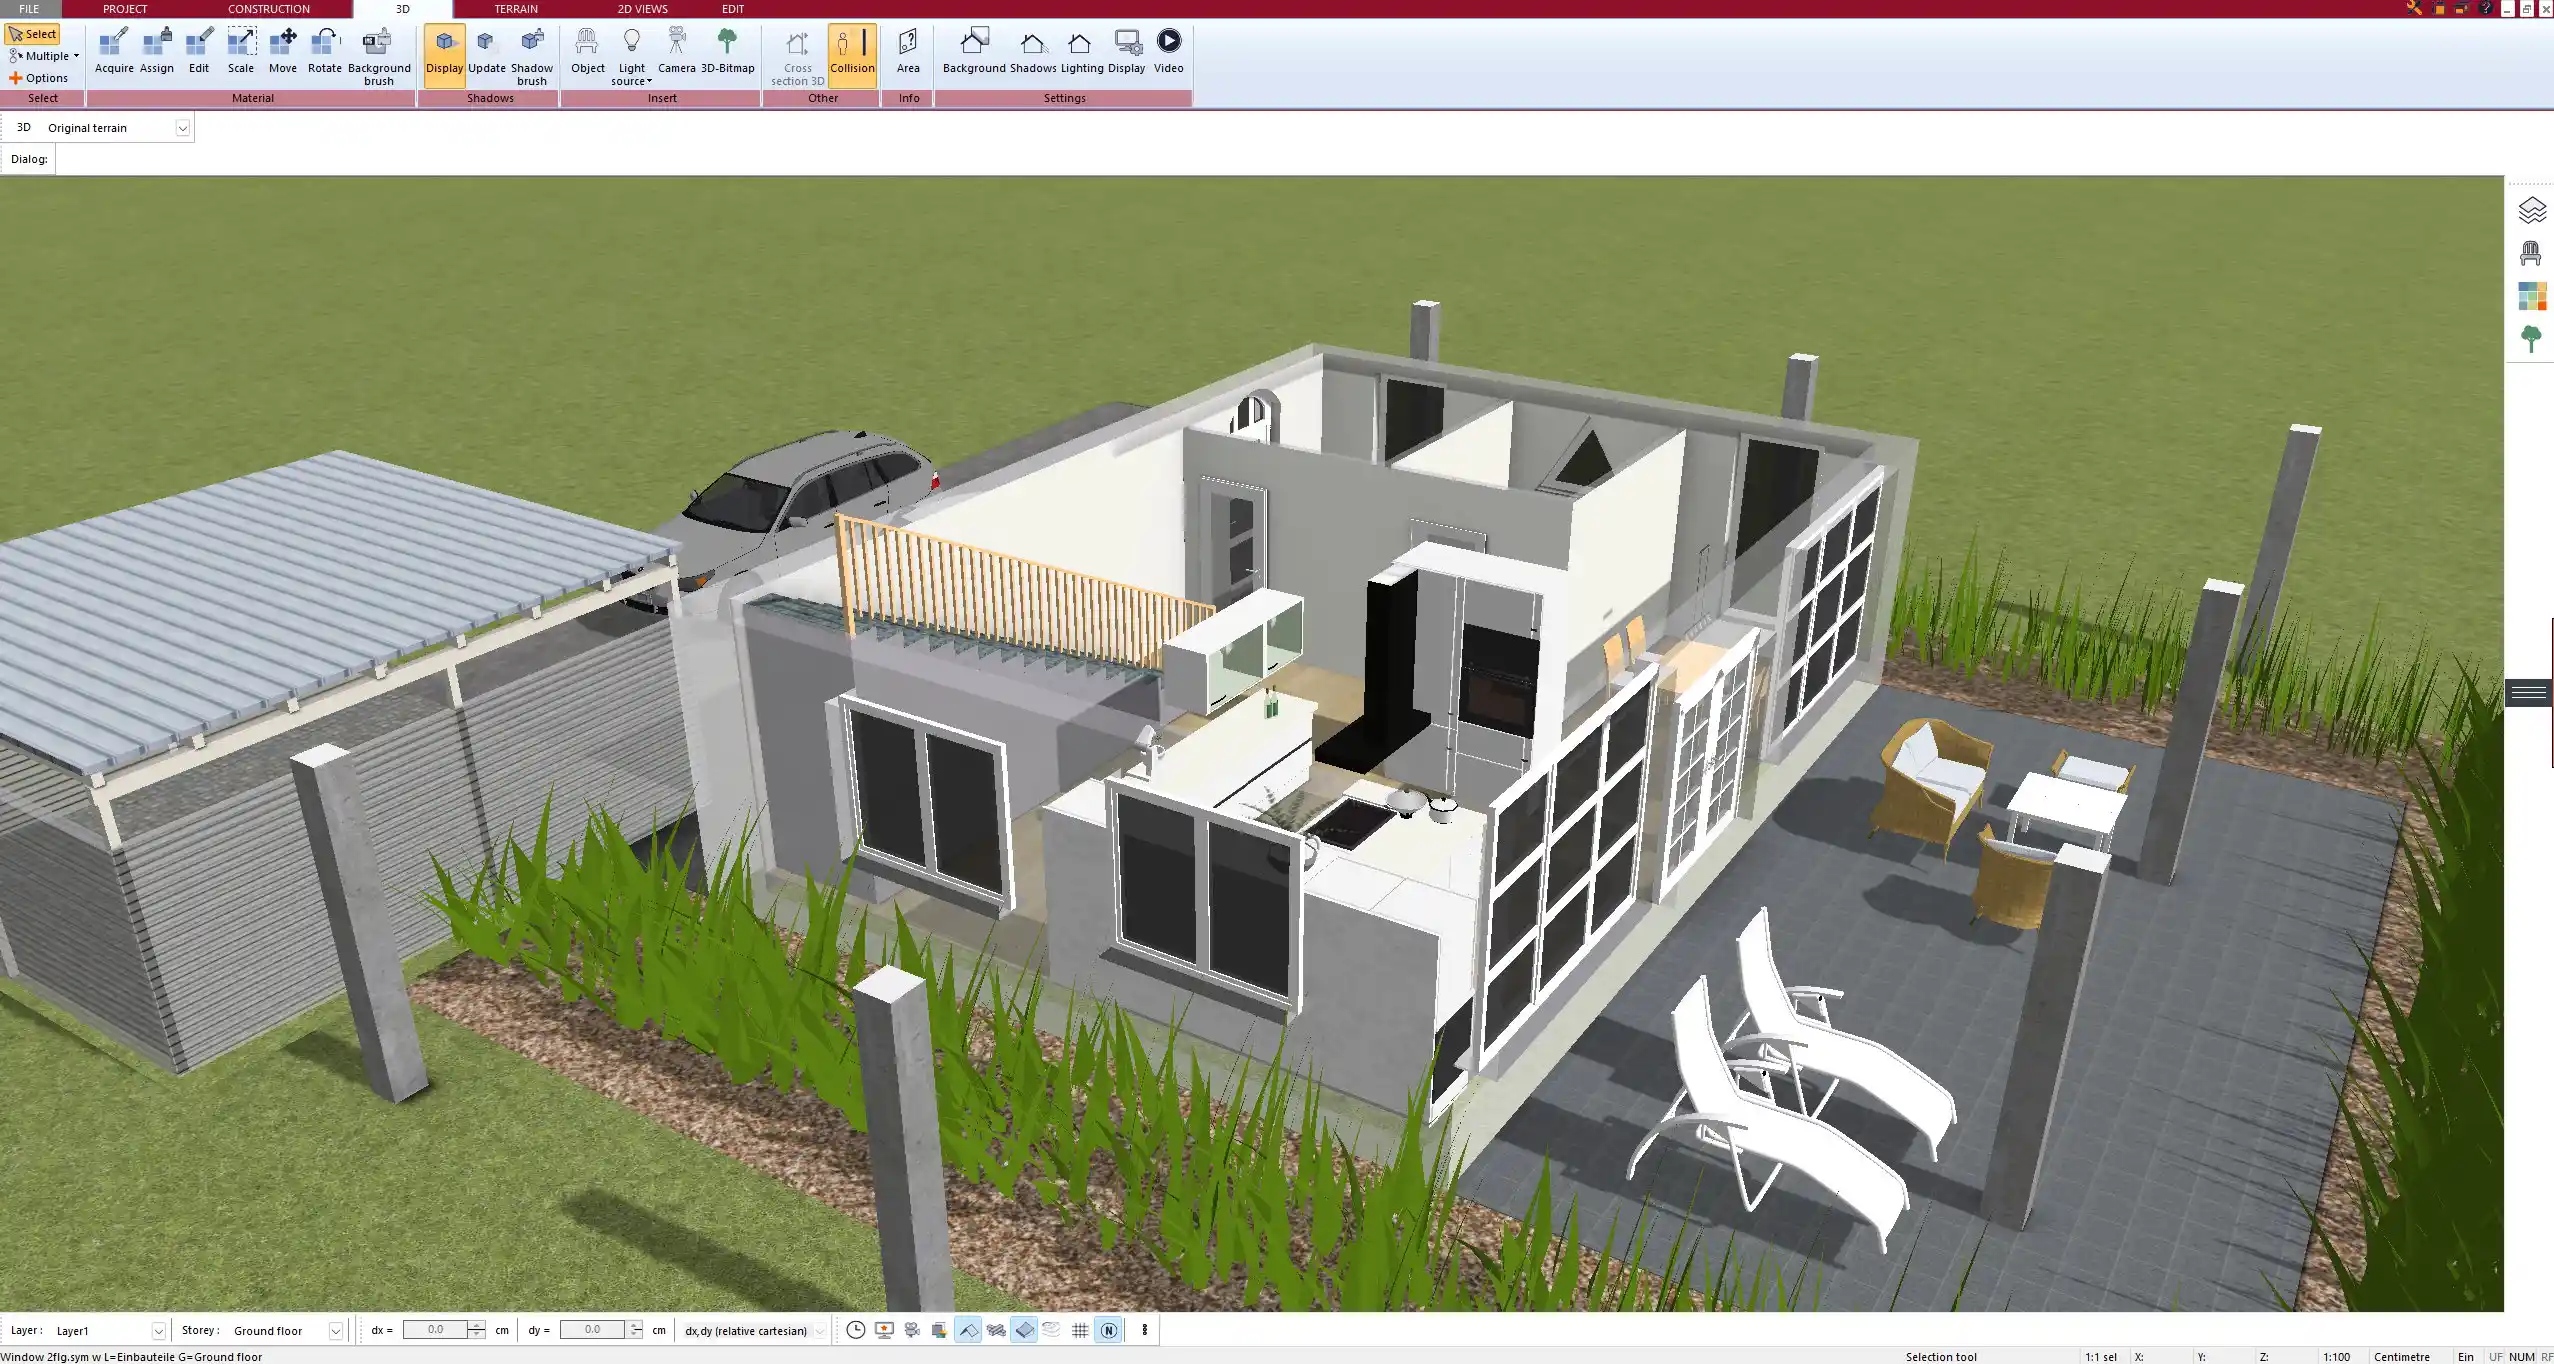
Step 4 – Switch Between 2D and 3D Views
At any time, you can view the entire layout in 3D. This is especially helpful to:
-
Verify proportions and clearances
-
Visualize window placements and natural lighting
-
Adjust ceiling heights or wall colors
By working in 2D for precision and checking in 3D for spatial logic, you ensure a design that not only works on paper but also feels right in real life.
Design Tips for a Functional Secondary Unit
Designing two units within one structure requires attention to detail and space efficiency. Here are some field-tested tips:
-
Use space-saving sliding doors or pocket doors
-
Plan enough daylight: secondary units often sit in corners or basements
-
Include at least one full-size window per habitable room
-
Stick to local code requirements for minimum room sizes and fire safety
-
If the unit is for elderly or mobility-impaired residents, avoid stairs and include wider doors
Tip: In Plan7Architect, you can adjust door width and room height settings manually to reflect accessibility standards or custom construction requirements.
Exporting and Using Your Floor Plan
Once the design is complete, export the plan in your desired format:
-
PDF or image: perfect for viewing, sharing, and print-outs
-
DWG or DXF: used by architects and engineers
-
3D view screenshots: useful for presenting your concept visually
Your exported floor plans include scale settings, dimensions, and full annotations—ideal for use in permit applications, contractor briefings, or marketing materials.

Units, Standards & Compatibility
Plan7Architect is fully compatible with:
-
Metric and imperial unit systems (switch anytime during planning)
-
Local building codes in the US, Canada, UK, Australia, and Europe
-
DWG and DXF file formats for professional collaboration
-
Multi-floor building structures with up to ten customizable stories
You can freely label rooms in your own language, adjust ceiling heights, and scale your project to meet local regulations—no need for conversions or external tools.
Example Layout Ideas for a House with a Secondary Unit
| Main Residence Features | Secondary Unit (ADU) Features |
|---|---|
| 3 bedrooms | 1 bedroom or studio layout |
| 2 full bathrooms | 1 full bathroom |
| Open-plan kitchen & dining | Compact kitchenette |
| Large living area | Private sitting area |
| Shared or private laundry | Optional stacked washer/dryer |
| Central HVAC | Separate mini-split system |
| Garage or carport | Street-level entrance |
These configurations can be combined flexibly, depending on the total footprint and legal zoning regulations in your area.
Bonus: Use Templates or Start from Scratch
If you prefer a head start, Plan7Architect includes several templates for single-family homes and multi-unit buildings. You can:
-
Load a template and customize walls, doors, and rooms
-
Save your version as a custom template for future use
-
Duplicate layouts across floors (e.g. mirrored ADUs on upper and lower floors)
All tools are accessible via a user-friendly interface designed for private builders and renovators.
Plan your project with Plan7Architect

Plan7Architect Pro 5 for $109.99
You don’t need any prior experience because the software has been specifically designed for beginners. The planning process is carried out in 5 simple steps:
1. Draw Walls

2. Windows & Doors

3. Floors & Roof

4. Textures & 3D Objects

5. Plan for the Building Permit

6. Export the Floor Plan as a 3D Model for Twinmotion

- – Compliant with international construction standards
- – Usable on 3 PCs simultaneously
- – Option for consultation with an architect
- – Comprehensive user manual
- – Regular updates
- – Video tutorials
- – Millions of 3D objects available


