With Plan7Architect, you can create a professional floor plan for your turnkey house entirely by yourself—even without architectural experience. The software allows you to draw the complete layout of a move-in-ready home, including structure, technical features, and interior planning, using intuitive tools in both 2D and 3D. You can work in either metric (meters, centimeters) or imperial (feet, inches) units, depending on your region.
Whether you’re building from scratch or adapting a layout from a developer, the Plan7Architect software lets you handle everything: defining exterior walls, setting up rooms, placing utilities, and furnishing the interior. The result is a plan you can submit to contractors or authorities and use to visualize the finished home before construction starts.
Step 1: Start with a Predefined Template or Design from Scratch
When starting a new project in Plan7Architect, you have the option to choose from existing layout templates or begin with a blank canvas. If you’re working with a plot you already own or a fixed building shape from a developer, starting from scratch may be the best choice.
The software lets you define the exact property boundaries and adjust building dimensions accordingly. Whether your project is based on European lot sizes or US standards, you can easily adjust all unit settings and work in your preferred measurement system. Switching between metric and imperial units is done in a few clicks.
Step 2: Define the Core Structure
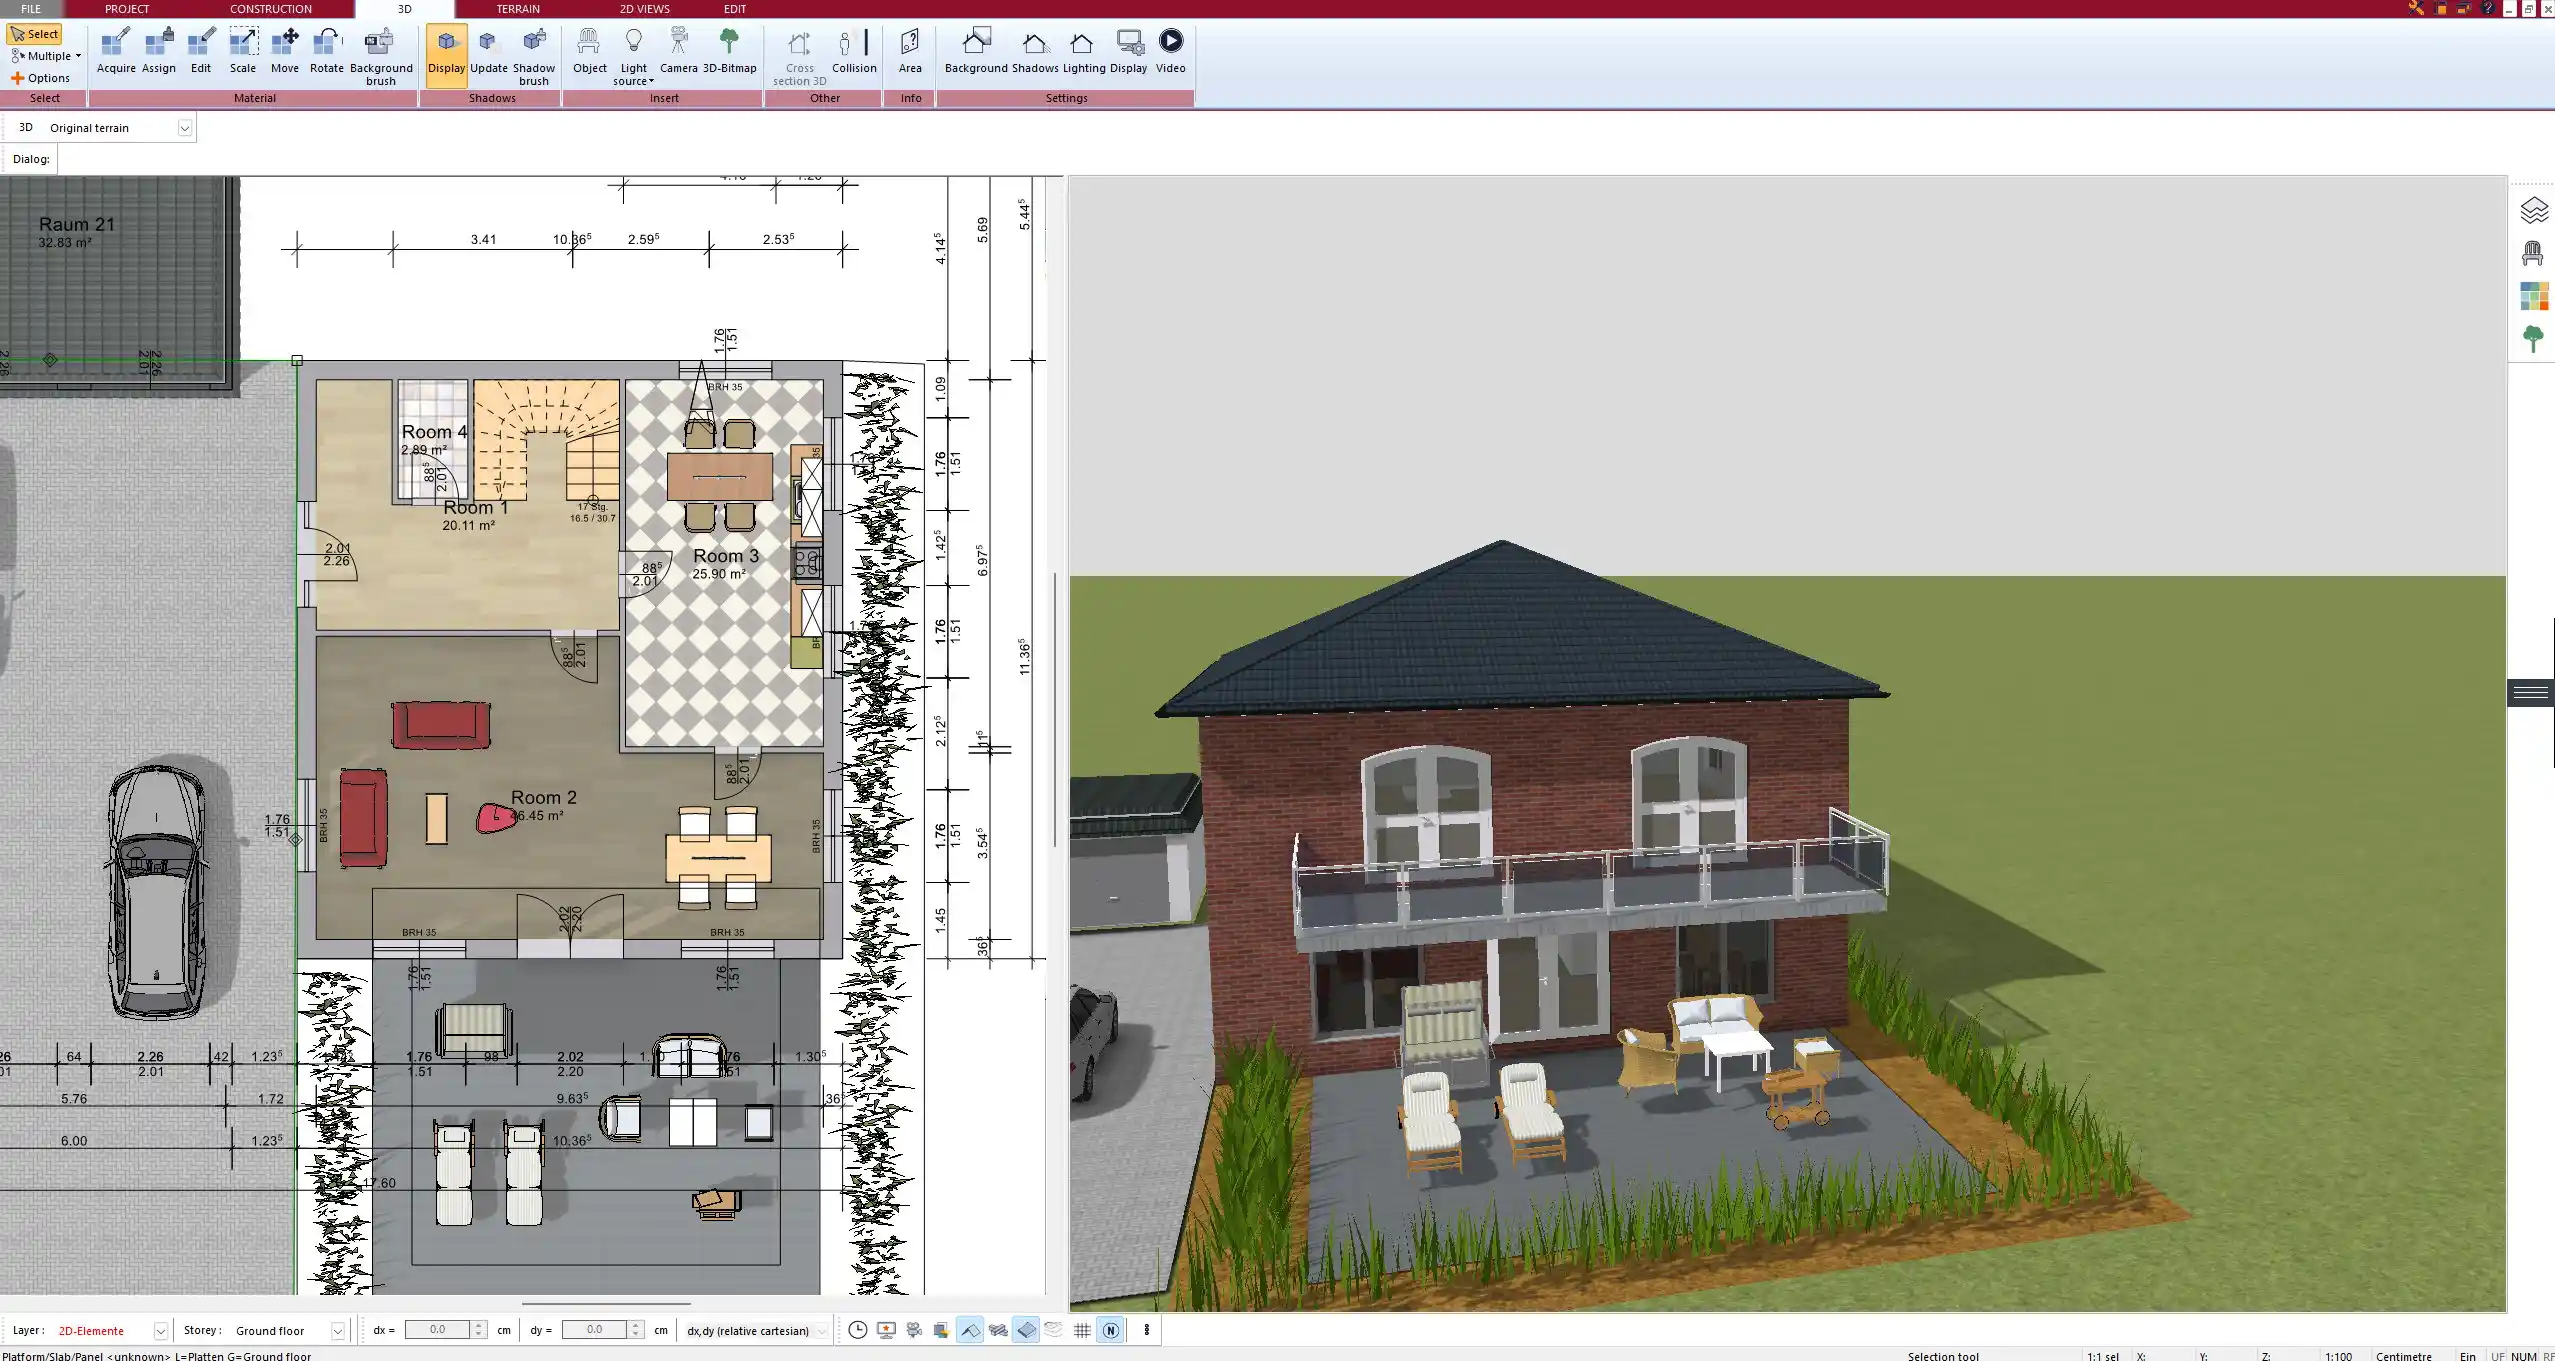
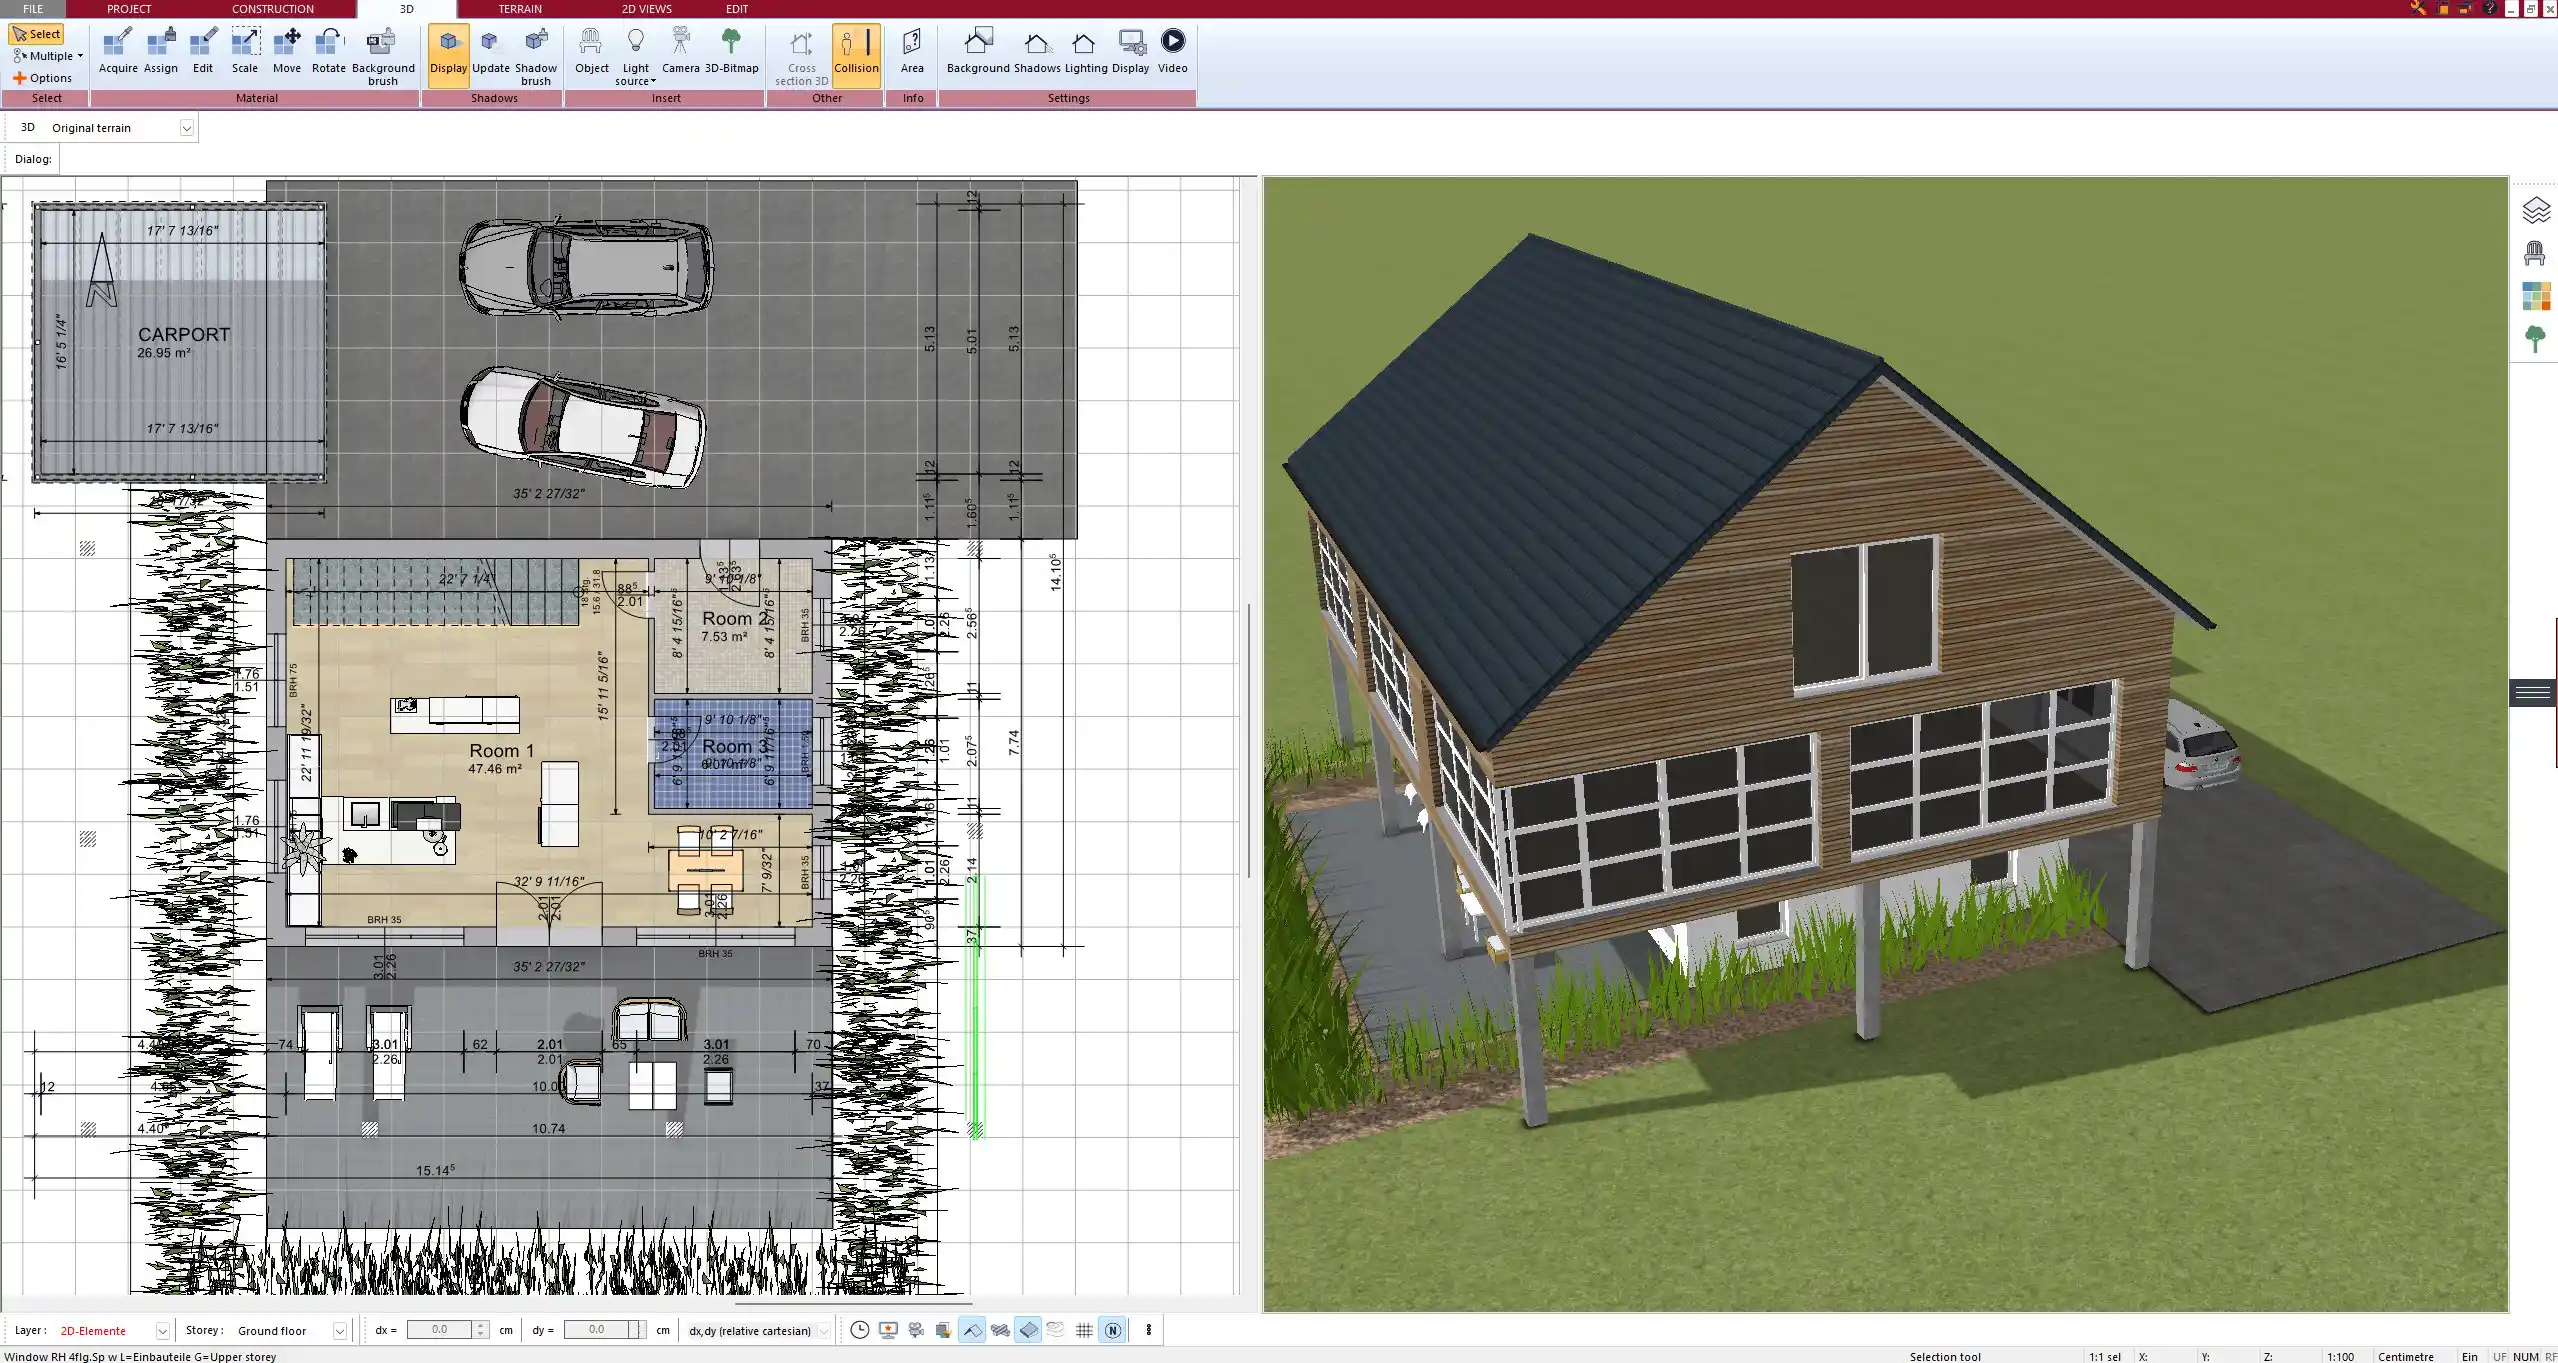
The first major step in modeling your turnkey house is drawing the structural shell. You begin by defining floor levels—such as the ground floor, additional stories, or basement levels. In Plan7Architect, each floor can be managed separately and displayed together in 3D.
Once the levels are created, you use the wall tool to define exterior walls. These can be drawn freely or entered using precise coordinates. After that, interior partitions can be added to divide the space into functional zones like bedrooms, bathrooms, kitchen, and living areas.
Door and window placements are easily handled via drag-and-drop from the catalog, with full control over size, position, and style. The software also allows for the simulation of complex wall connections and corner angles, so you’re not limited to standard rectangular layouts.
Structural Elements Checklist
| Element | Required for Turnkey Design |
|---|---|
| Ground floor level | Yes |
| Additional stories | Optional |
| Exterior walls | Yes |
| Interior walls | Yes |
| Doors and windows | Yes |
| Roof structure | Optional |
Step 3: Plan Interior Layout for Move-In Readiness
In a turnkey house, the interior must be fully planned and ready for immediate occupancy. That means your layout should include optimized room placement, built-in storage, and thoughtful connections between spaces. With Plan7Architect, you can drag rooms into position, shape them freely, and resize with precision.
You can plan common zones such as:
-
Master bedroom with en-suite bathroom
-
Secondary bedrooms
-
Kitchen connected to dining or living area
-
Guest bathroom
-
Utility room
-
Office or hobby space
You can also use the built-in furniture catalog to place objects like beds, kitchen cabinets, sofas, and wardrobes. This helps you test the real-world usability of each room before finalizing the layout.
Tip: When placing furniture, switch to 3D view regularly to ensure there’s enough clearance between pieces. This helps avoid cramped corners and improves room flow.
Step 4: Add Utilities and Technical Infrastructure
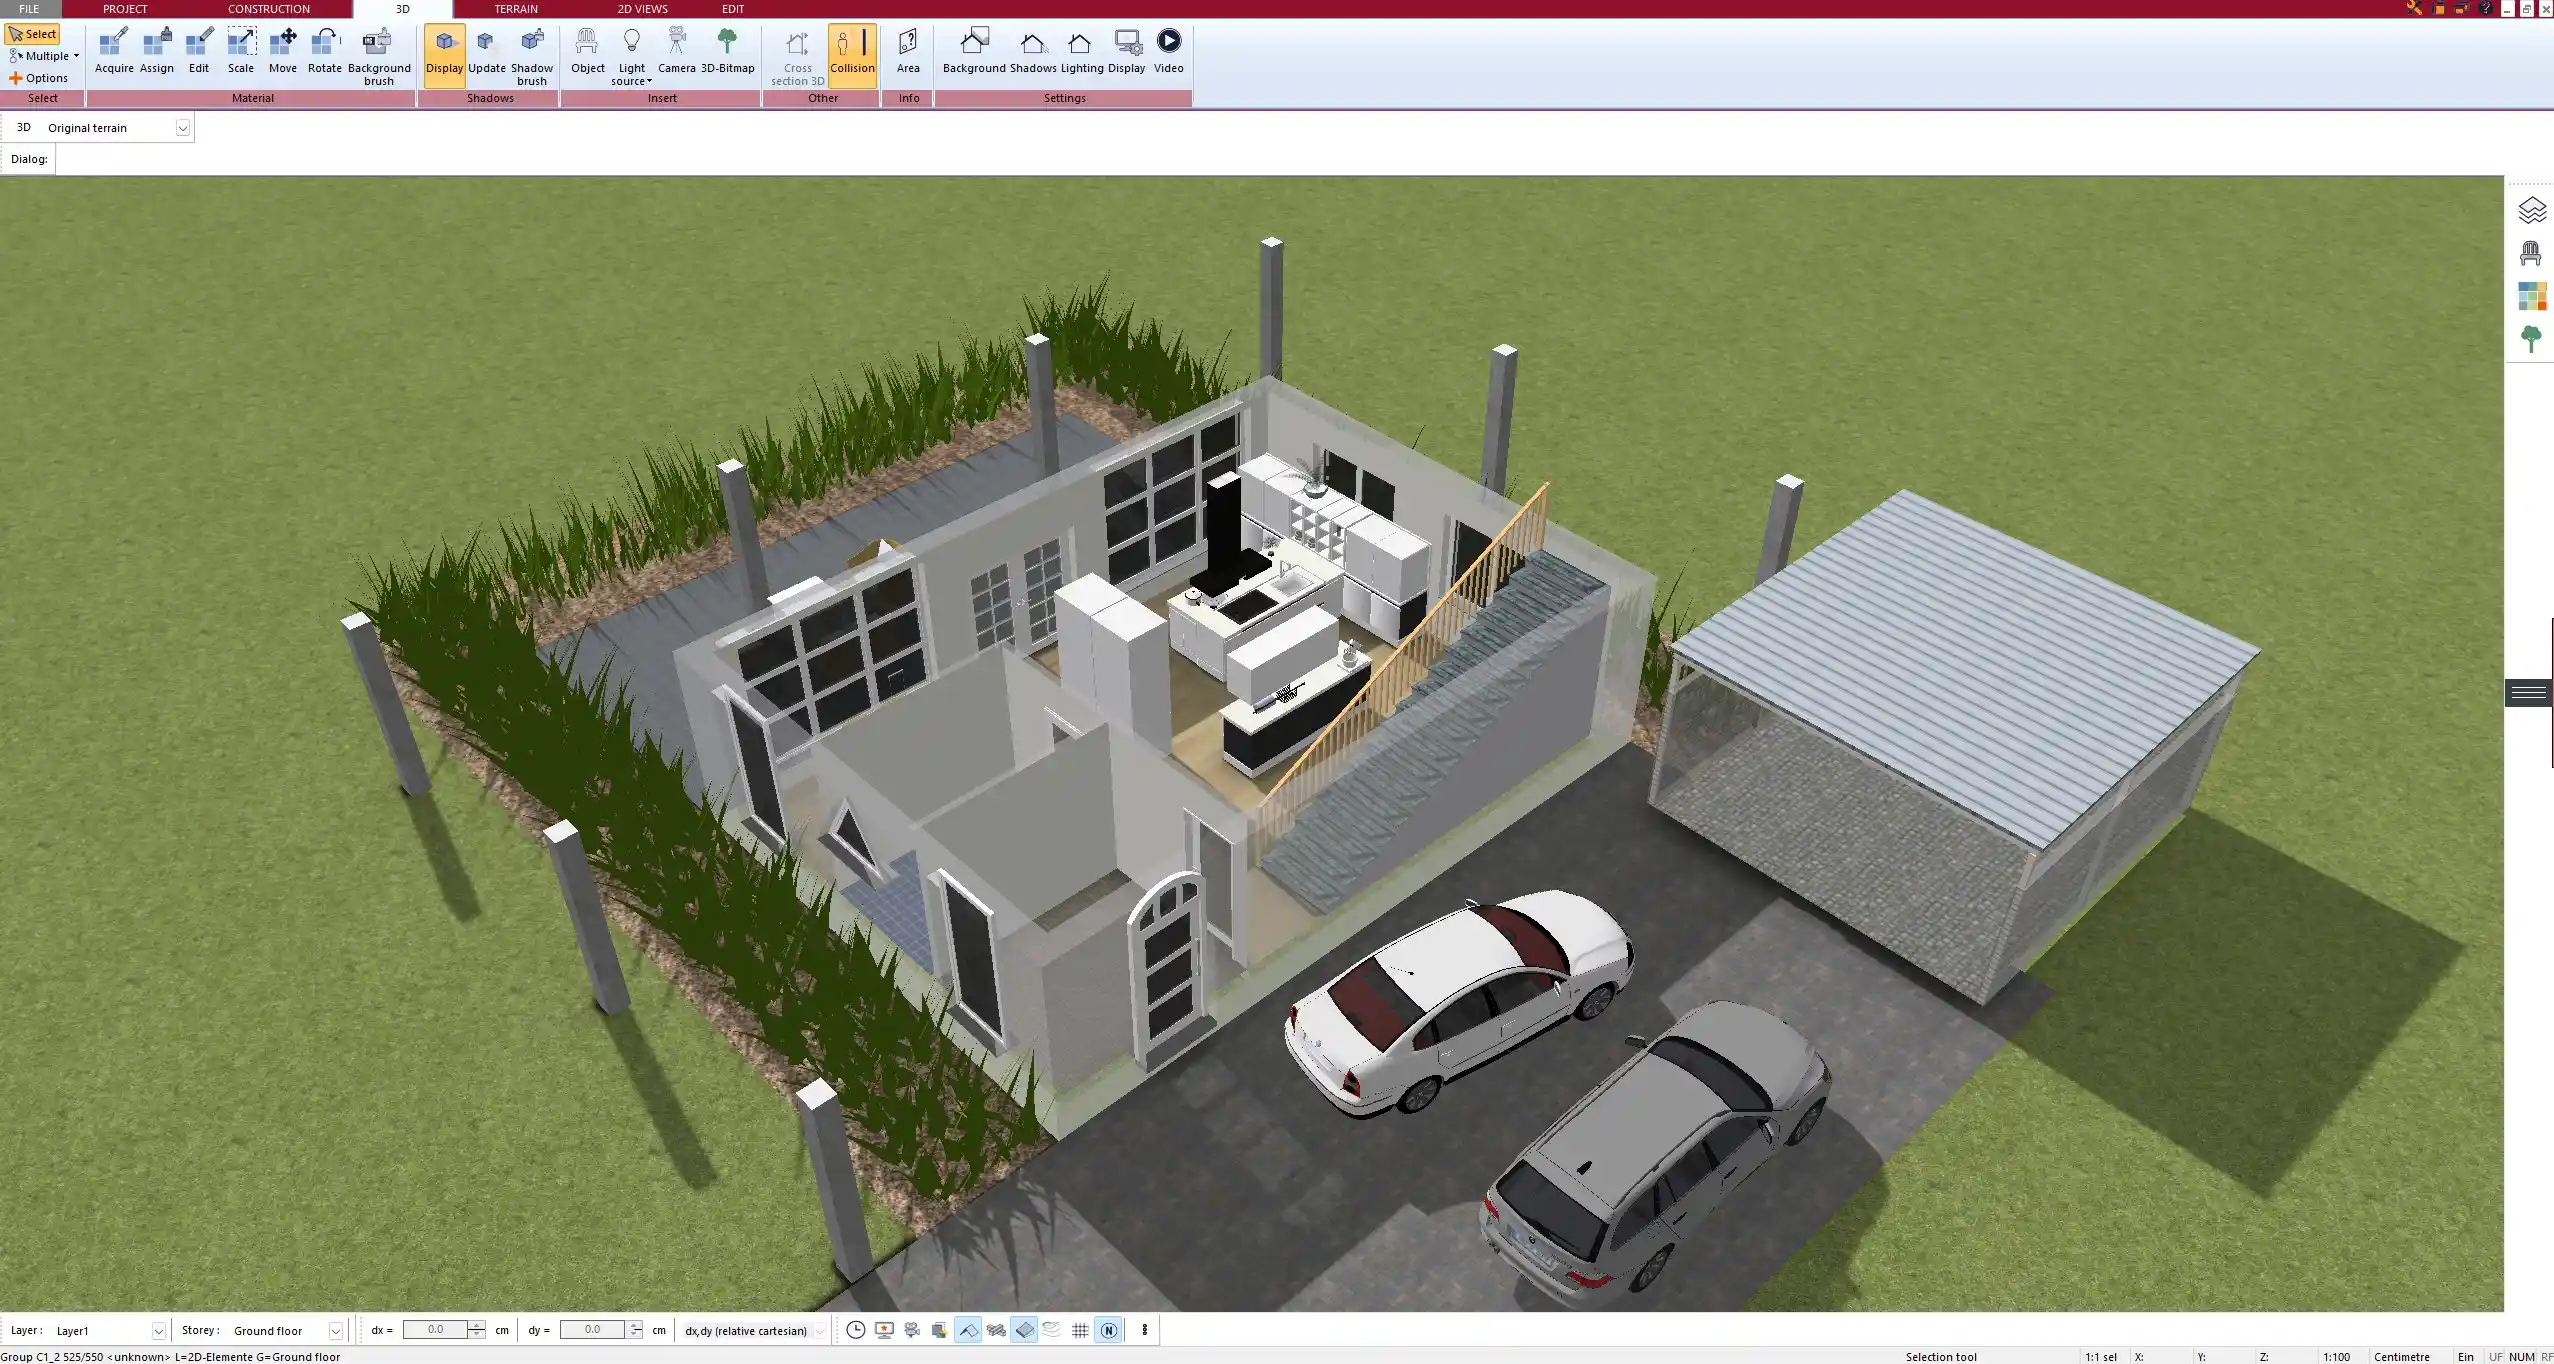
A turnkey house isn’t just a shell—it needs complete technical installations. Plan7Architect allows you to add and plan technical systems using 2D and 3D symbols. You can insert sockets, switches, lights, plumbing connections, and more directly into the floor plan.
While the software does not automatically generate technical diagrams or calculate load capacities, it gives you enough freedom to:
-
Place power outlets, light switches, and ceiling lights
-
Design kitchen appliance zones (oven, fridge, sink)
-
Position bathroom fixtures with plumbing connections
-
Mark locations for heating or HVAC elements
Tip: Use layers to separate your electrical and plumbing layouts from the architectural layout. This keeps the plan clear and manageable.
Step 5: Visualize and Adjust in 3D
Once your layout and technical details are set, you can switch into 3D view and walk through the house virtually. Plan7Architect offers a real-time 3D mode where you can explore each room and see how sunlight enters at different times of the day.
You can change wall colors, floor finishes, and furniture materials to visualize design options. This is particularly useful if you want to show clients or partners how the completed home will look.
You can also render perspectives and take screenshots for presentations, brochures, or consultations with construction professionals.
Step 6: Export Construction-Ready Plans
After completing your floor plan, you can export professional documents from within the software. Plan7Architect allows you to generate:
-
Floor plans
-
Sections
-
Elevations
-
Roof views
You can export these as PDF, image, DXF, or DWG files. The plans can be printed to scale and used for permit applications, contractor quotes, or construction guides. You can customize the scale, font sizes, and layer visibility.
Tip: Double-check local building code requirements before submitting the plans. Plan7Architect gives you the tools to meet both European and North American standards.
Features That Make Plan7Architect Ideal for Turnkey Projects
-
Suitable for private individuals without architectural experience
-
No subscription required; one-time purchase
-
Works in both metric and imperial units
-
Includes a wide library of construction elements, furniture, and symbols
-
Real-time 3D walkthrough mode for visual inspection
-
Output formats compatible with architects and contractors (DWG, DXF, PDF)
Common Use Cases: Who Is This for?
Plan7Architect is used by a wide range of customers working on turnkey house projects, including:
-
Private homebuilders wanting to draw and plan their future home
-
Developers and real estate companies planning ready-to-move-in homes
-
Construction companies needing design templates for repeated builds
-
Architects looking for a fast way to present visual layouts to clients
Checklist: What to Include in Your Turnkey House Floor Plan
| Element | Must-Have | Optional |
|---|---|---|
| Exterior walls & dimensions | Yes | |
| Interior room layout | Yes | |
| Kitchen & bathroom fixtures | Yes | |
| Electricity & plumbing layout | Yes | |
| Furniture visualization | Yes | |
| 3D walkthrough | Yes | |
| Garage or carport | Yes | |
| Outdoor areas (terrace etc.) | Yes |
Tip: Use layers in your project to keep structure, furniture, and technical systems organized and easy to manage.
Let me know if you’d also like six caption suggestions for images created with the software to match this article.
Plan your project with Plan7Architect

Plan7Architect Pro 5 for $109.99
You don’t need any prior experience because the software has been specifically designed for beginners. The planning process is carried out in 5 simple steps:
1. Draw Walls

2. Windows & Doors

3. Floors & Roof

4. Textures & 3D Objects

5. Plan for the Building Permit

6. Export the Floor Plan as a 3D Model for Twinmotion

- – Compliant with international construction standards
- – Usable on 3 PCs simultaneously
- – Option for consultation with an architect
- – Comprehensive user manual
- – Regular updates
- – Video tutorials
- – Millions of 3D objects available


