If you’re looking for a quick and effective way to turn a 2D floor plan into a 3D model, software like Plan7Architect makes the process straightforward—even without any prior experience in architecture or CAD. Here’s exactly how to do it:
Step 1: Choose the Right 3D Floor Plan Software
Select a tool that supports both 2D drafting and real-time 3D visualization. I personally recommend Plan7Architect because it’s user-friendly, powerful, and ideal for both private and professional users. It works with both European (metric) and American (imperial) measurement systems, which is especially useful if you’re planning a project for international use.
Step 2: Import or Create Your 2D Floor Plan
You can either upload an existing plan or draw one from scratch:
-
Import Options
-
Image files (JPG, PNG, etc.)
-
PDF files
-
DXF or DWG (AutoCAD) files
-
-
Draw from Scratch
Use drag-and-drop tools to draw walls, define rooms, and set dimensions. You can work with either meters or feet—in Plan7Architect, you can switch between unit systems at any time.
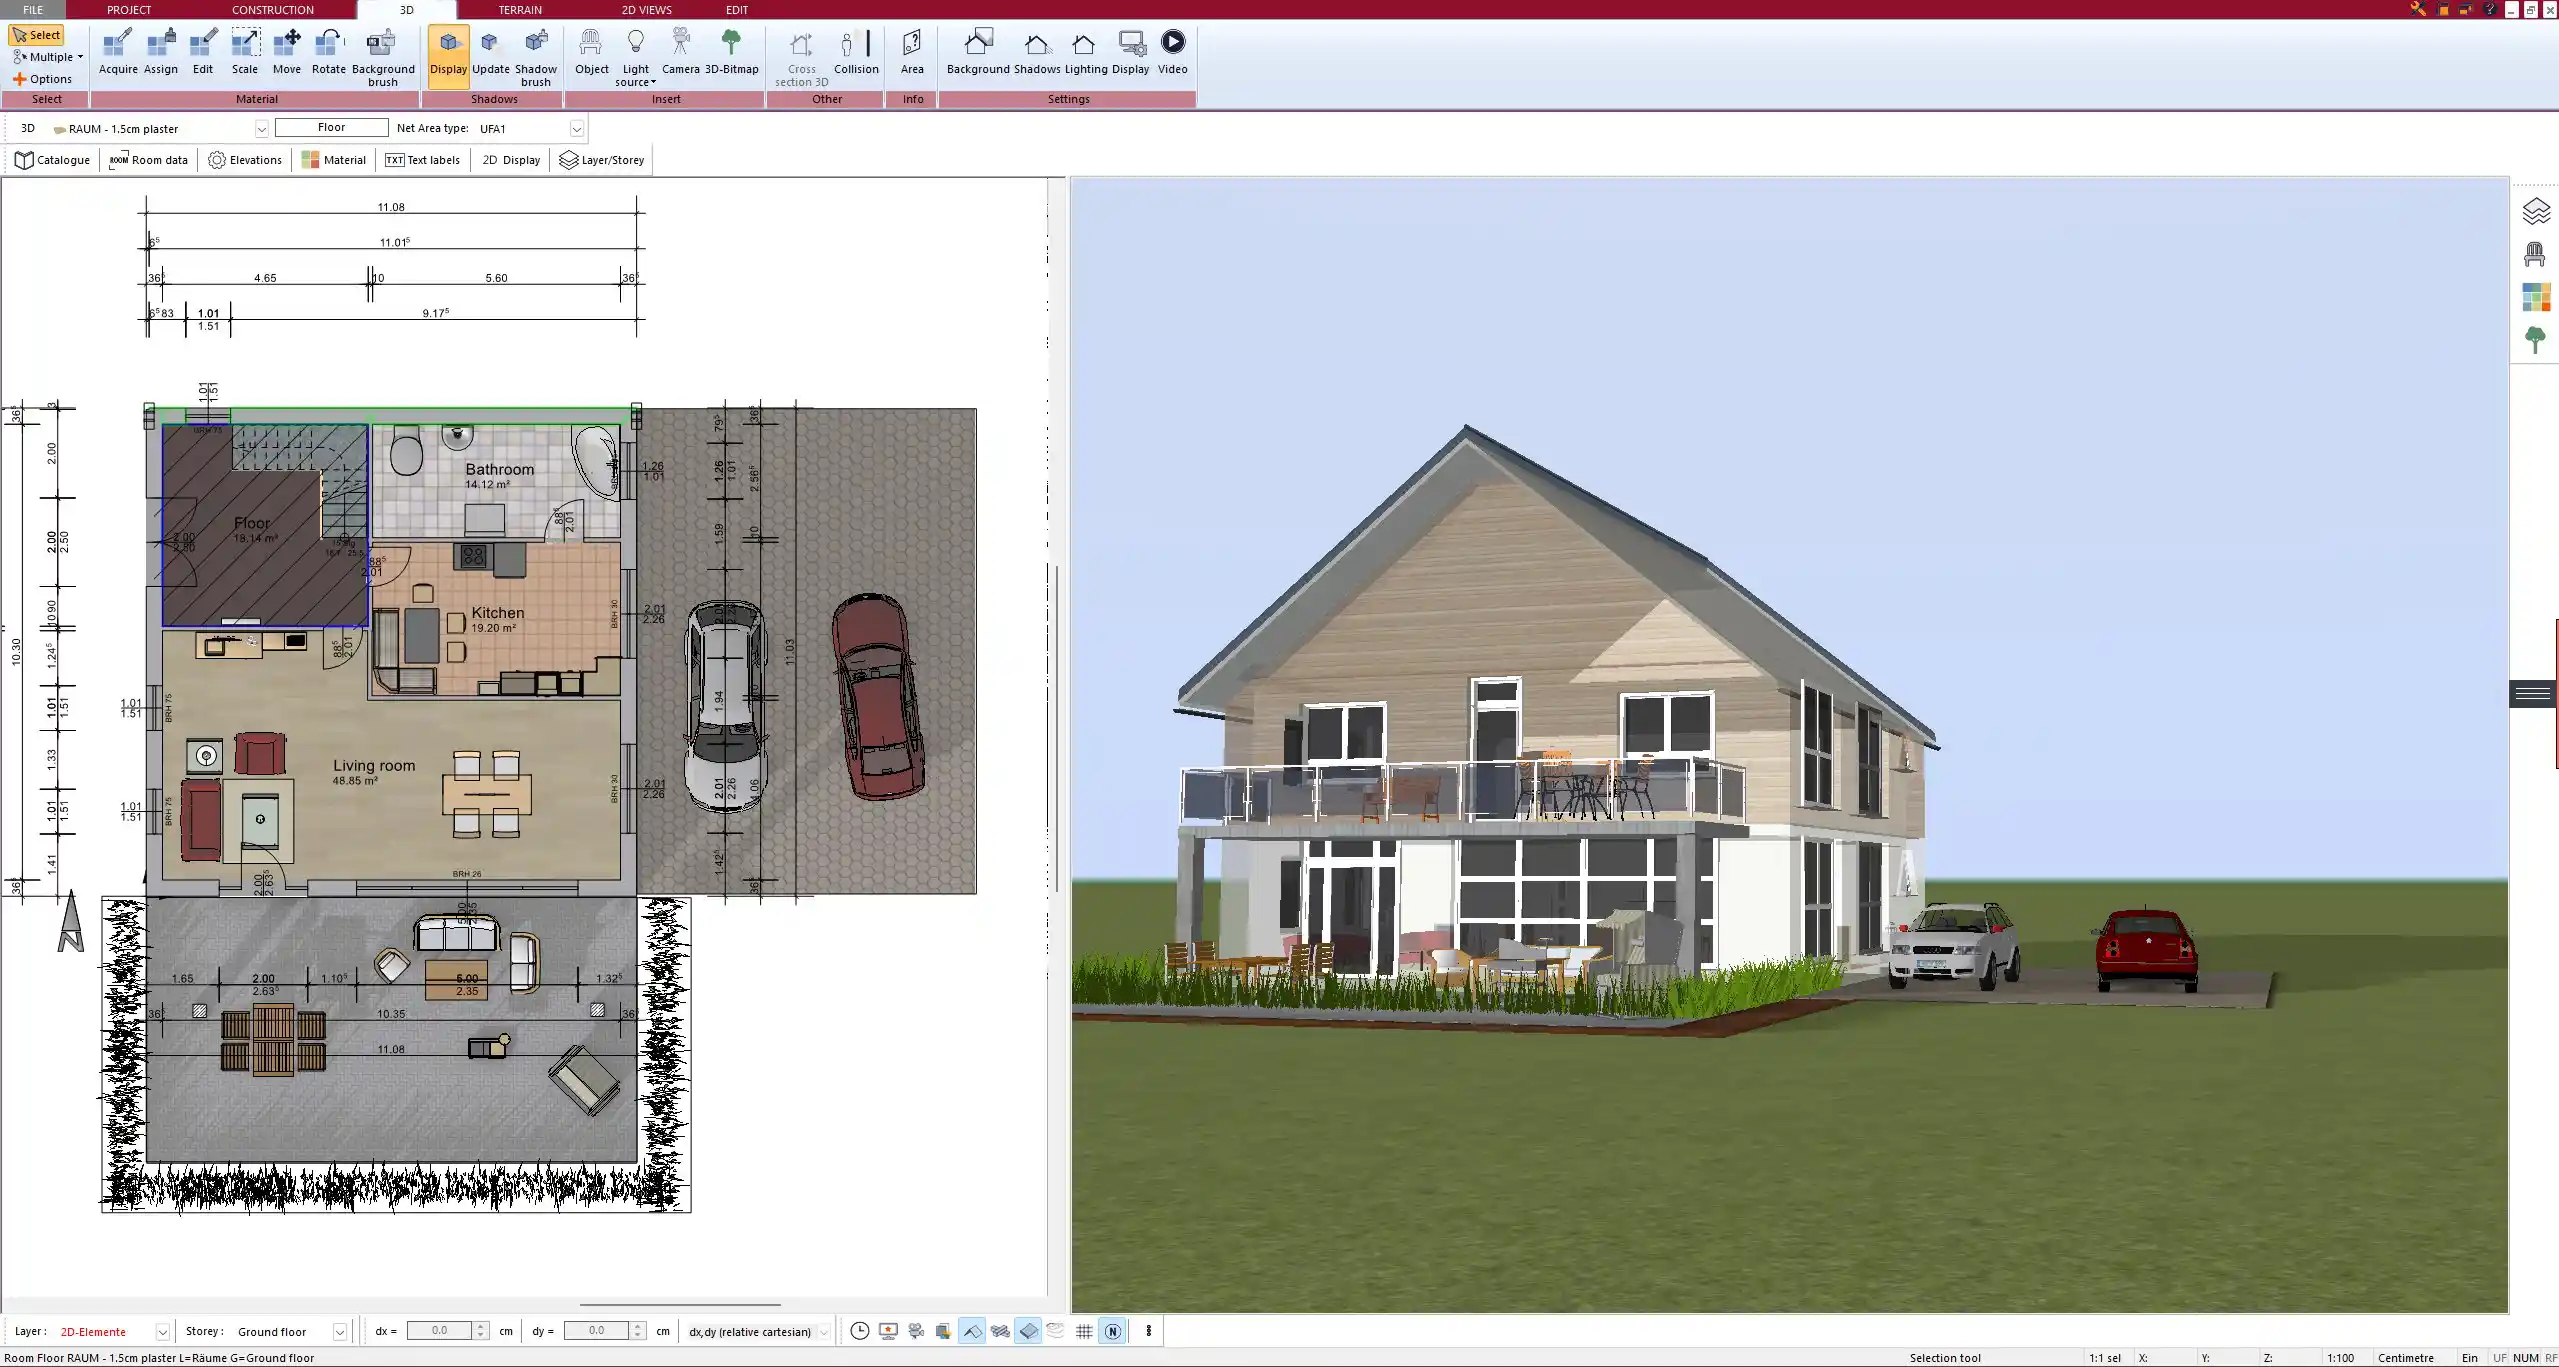
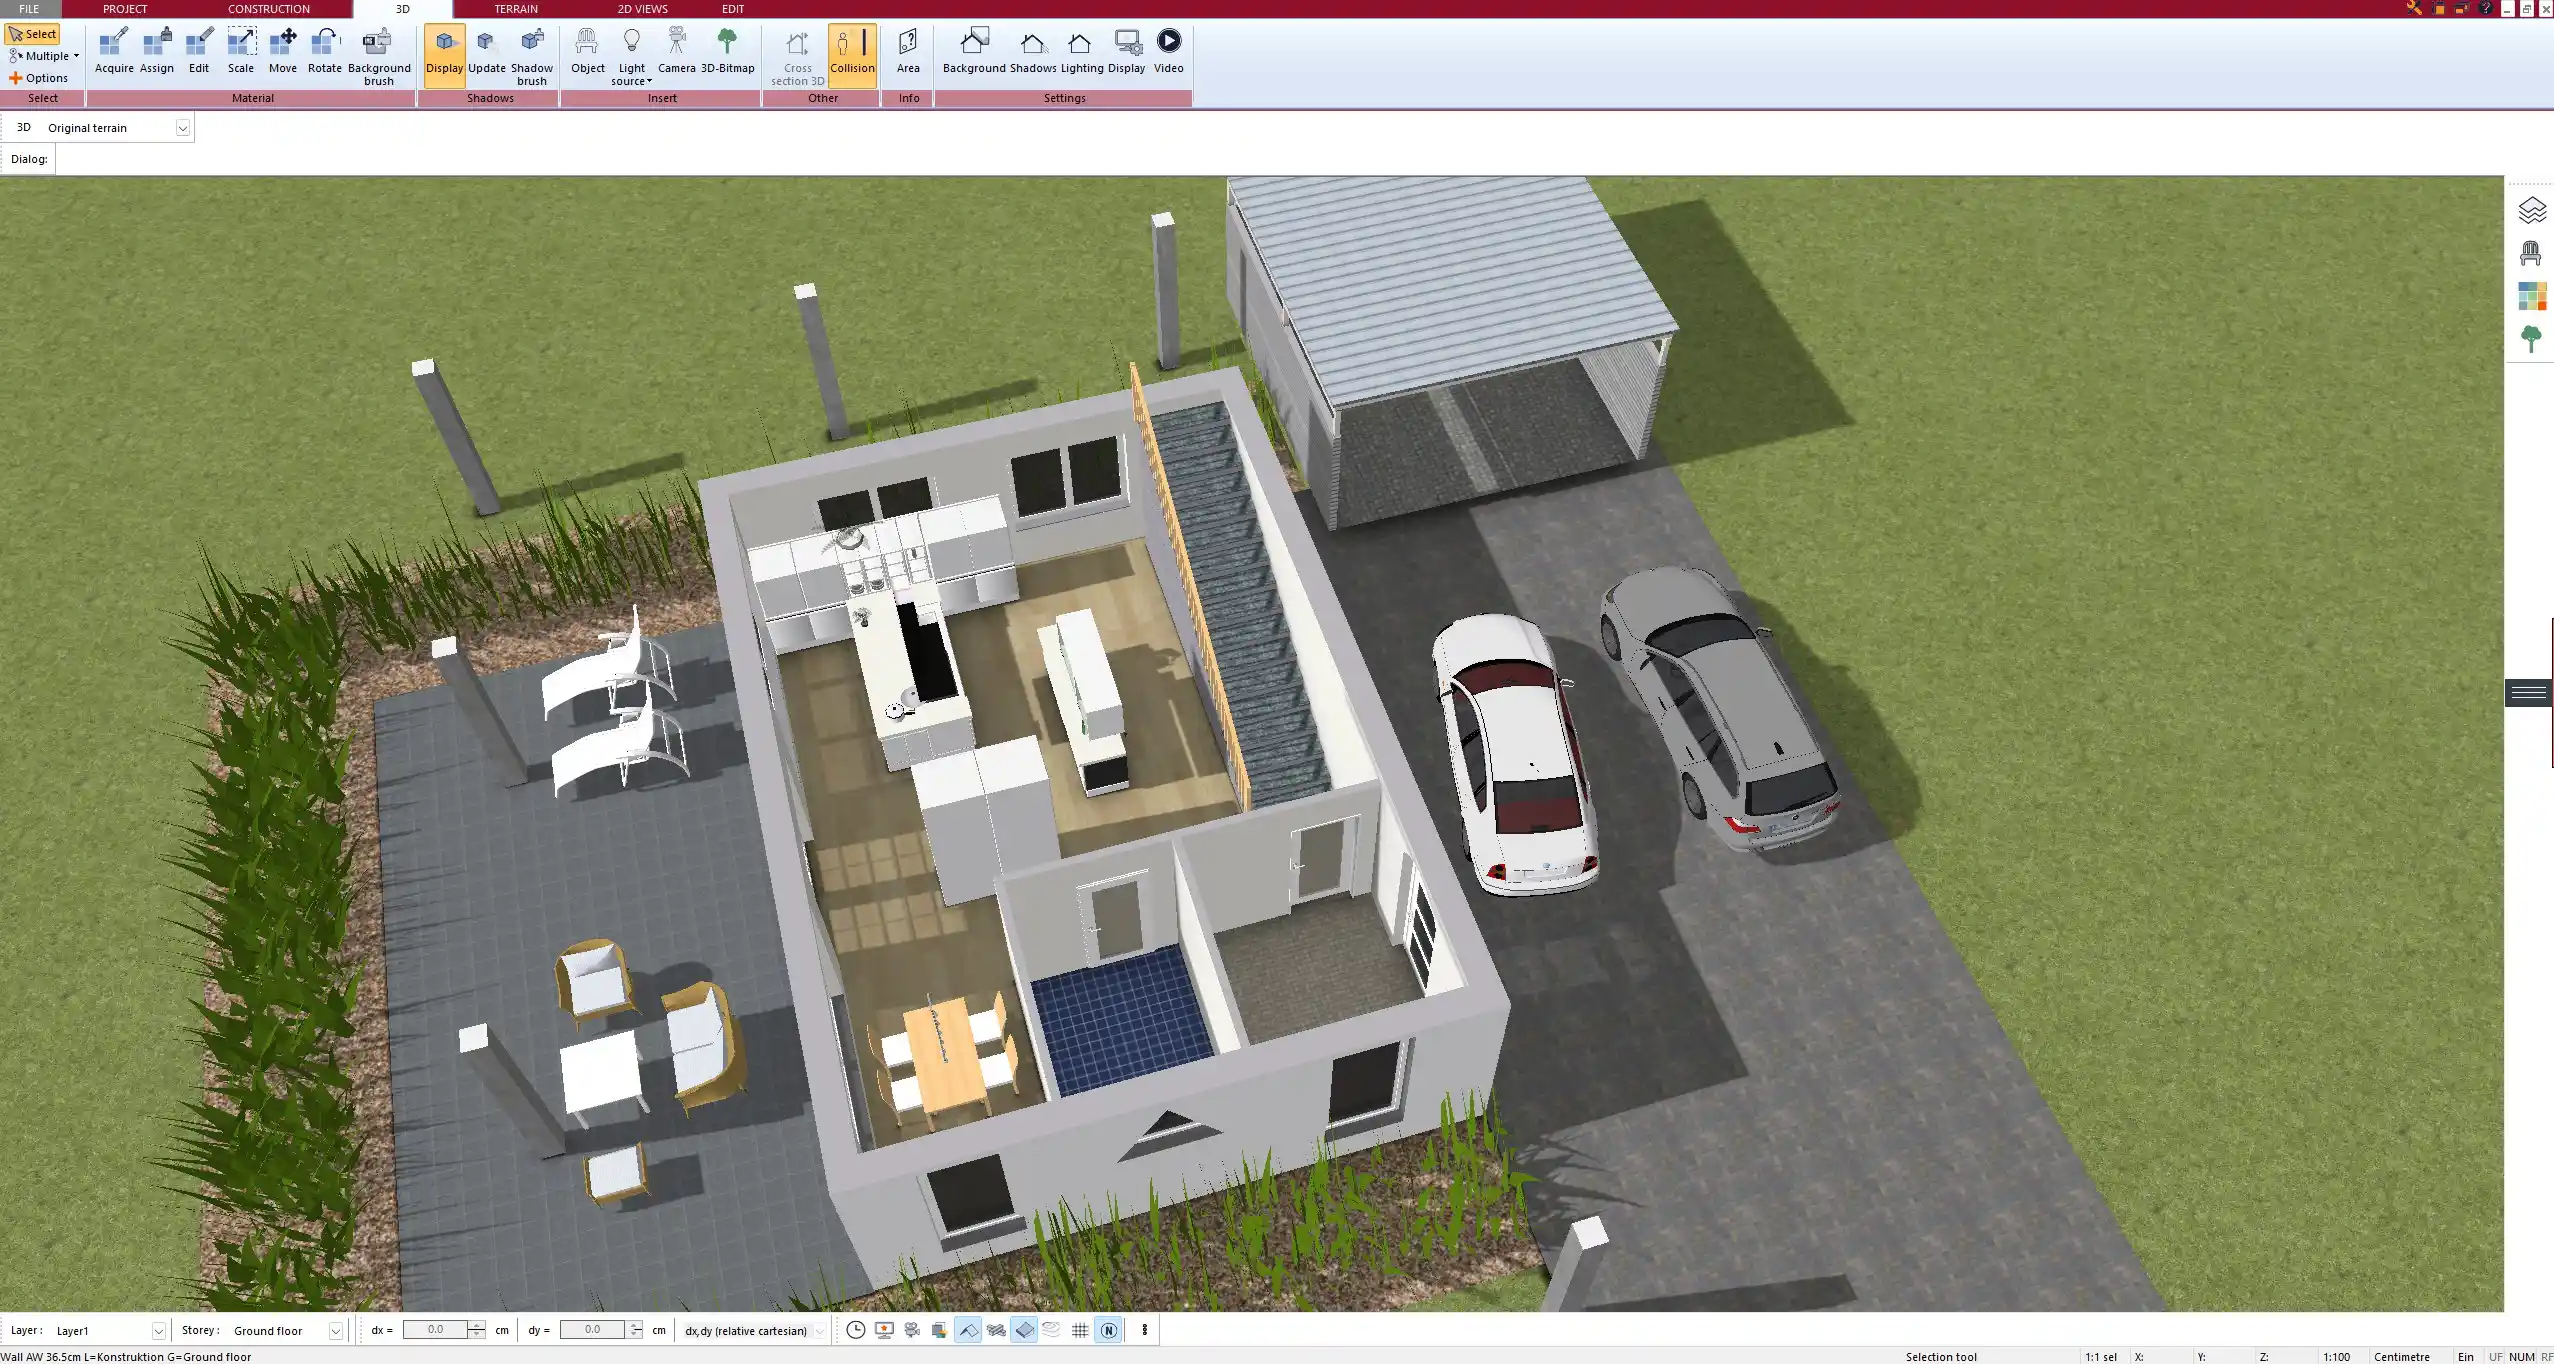
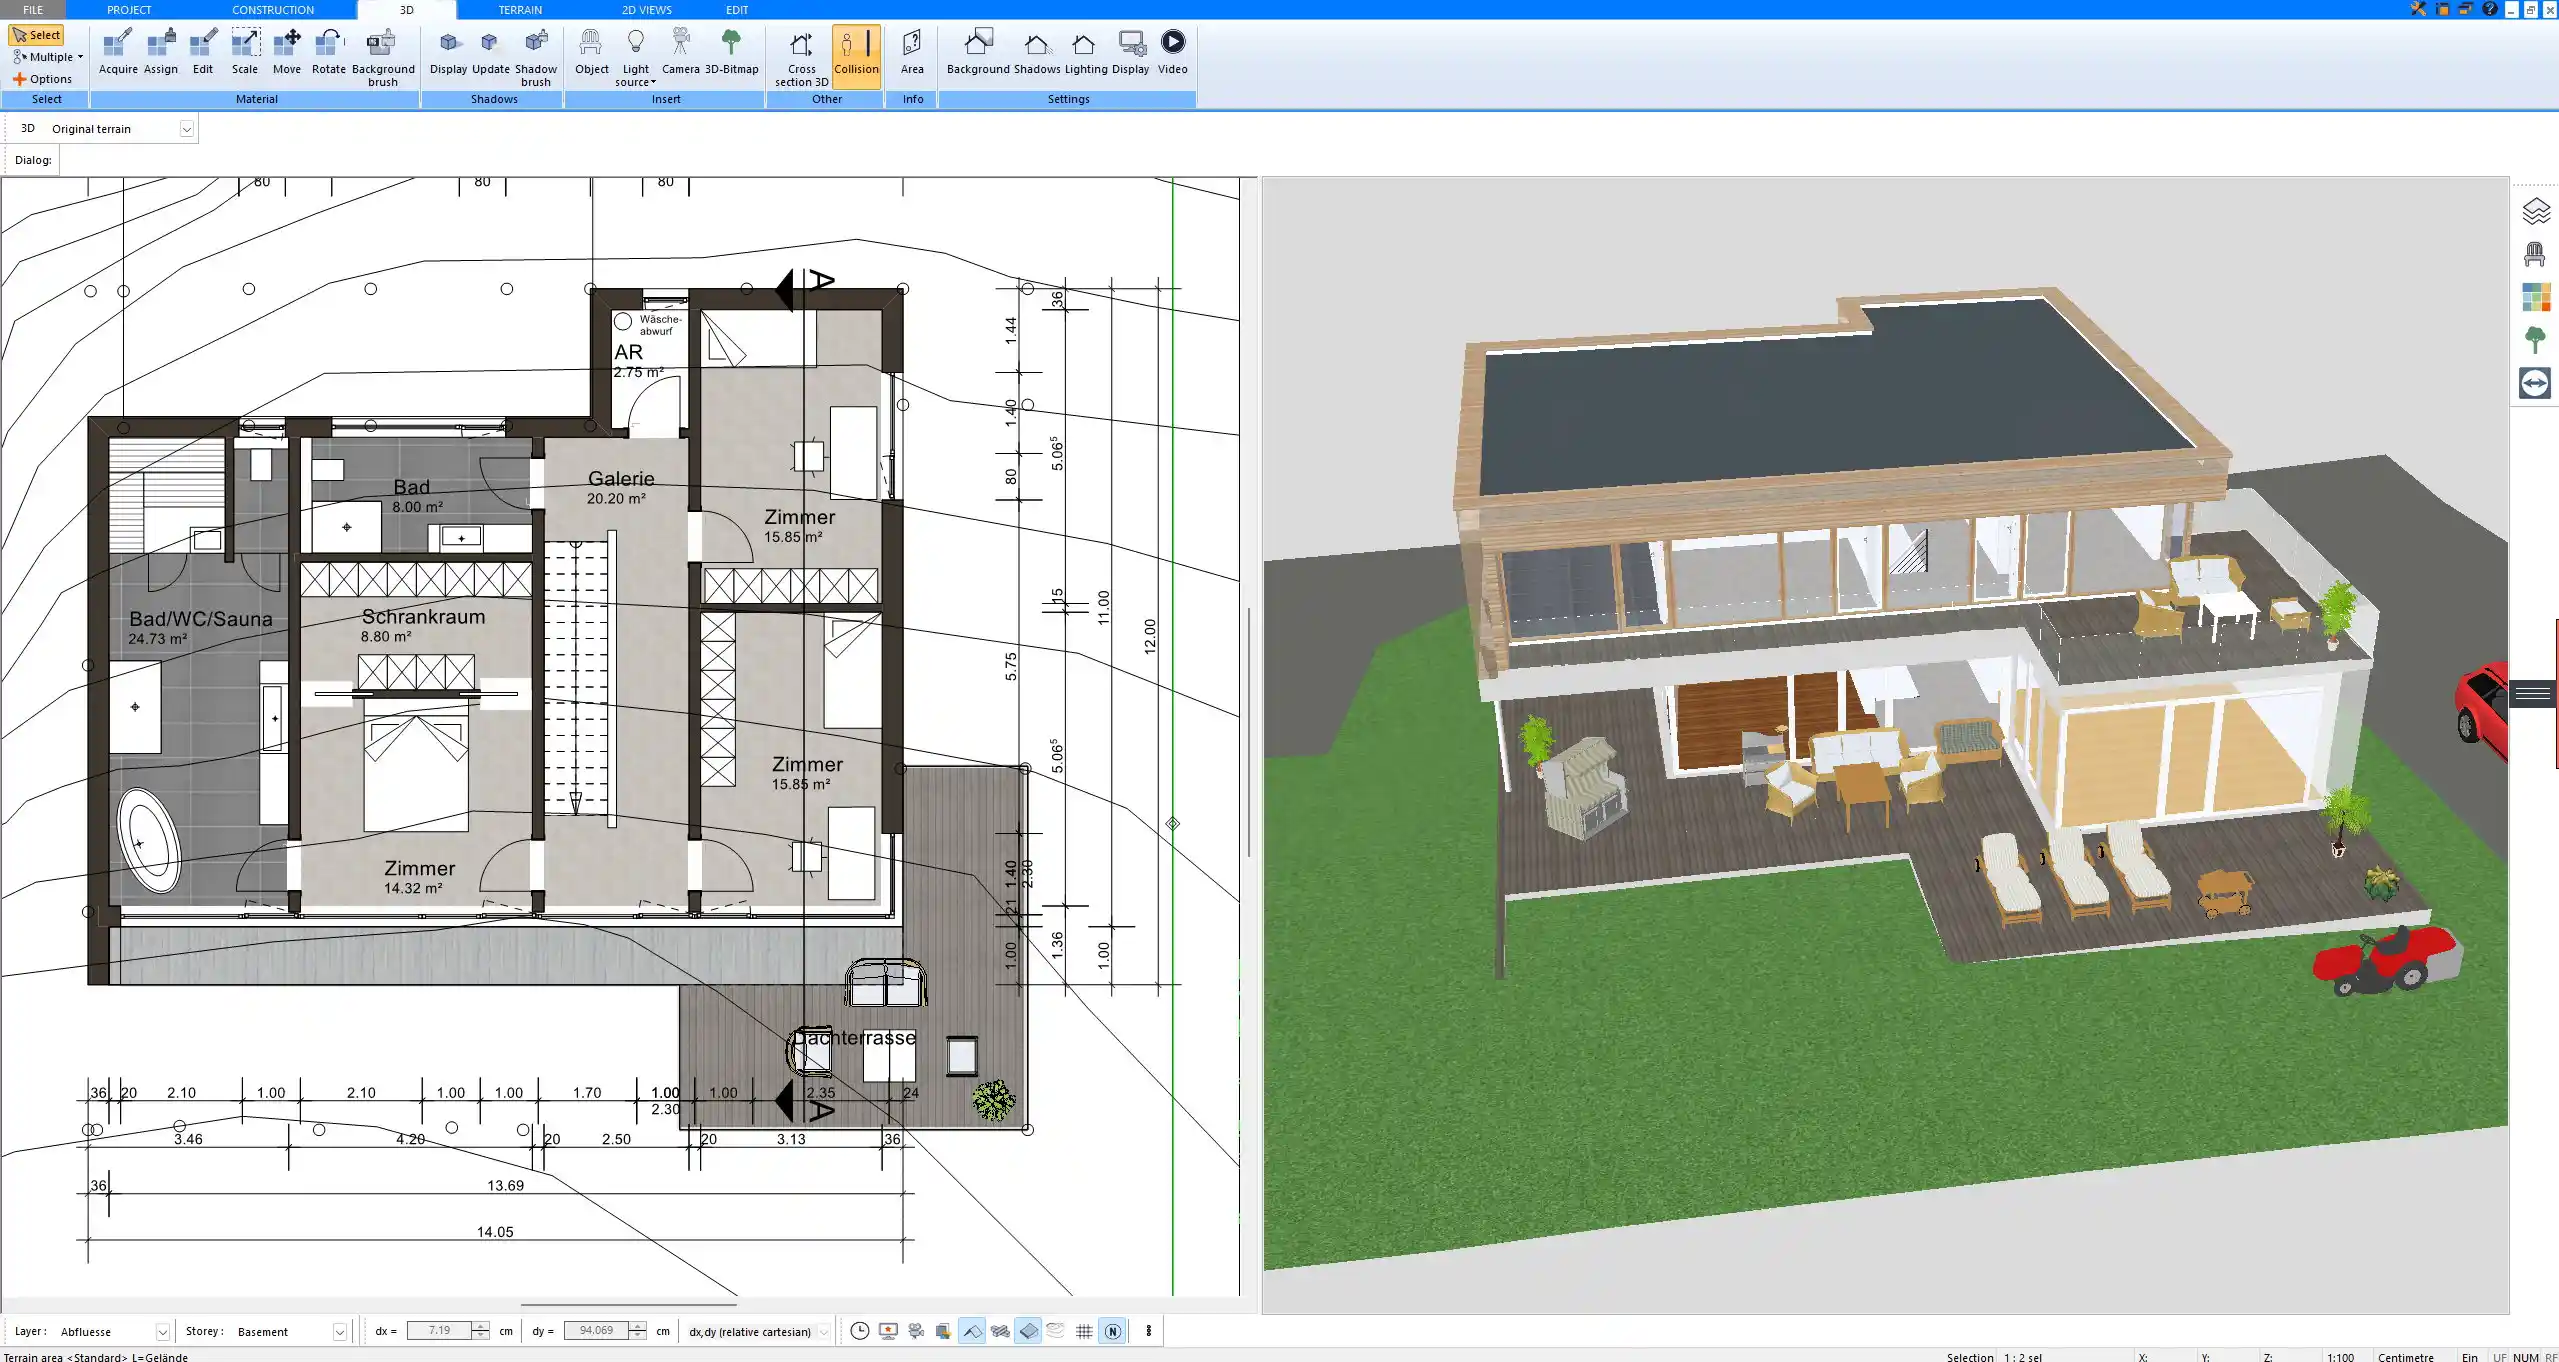
Step 3: Switch to 3D View
After your 2D layout is in place, simply switch to 3D view. In Plan7Architect, this happens instantly, and any changes made in 2D are reflected live in the 3D view. This lets you assess room proportions and structure visually in real-time.
Step 4: Refine the 3D Structure
Once you’re in 3D mode, you can adjust and complete the structure by adding:
-
Interior and exterior walls
-
Windows and doors
-
Ceilings and floors
-
Roof elements
-
Staircases or split-level features
This stage allows for precise dimensioning, whether you’re working with centimeters and meters or inches and feet.
Step 5: Add Interior and Exterior Details
This is where the design really comes alive. Add and position:
-
Furniture (kitchens, beds, desks, etc.)
-
Bathroom elements
-
Textures and materials (flooring, wall colors, tiles)
-
Landscaping (trees, fences, paths)
Use drag-and-drop elements or import your own models.
Step 6: Export or Present Your 3D Plan
You can export high-resolution renders, create 3D walkthroughs, or generate printable PDFs for sharing with contractors or clients. Plan7Architect also supports realistic lighting and shadow simulation, making your plan presentation-ready.
Tip: Use natural lighting settings in 3D mode to simulate how the house will look at different times of day.
What Kind of Floor Plans Can Be Converted to 3D?
Not every 2D plan starts as a polished CAD file. You can start with:
-
Blueprint scans or photos
-
PDF documents with layout sketches
-
AutoCAD files (DWG/DXF) from architects or planners
-
Hand-drawn sketches, which can be traced digitally
-
Completely new plans, drawn within the software
If your plan isn’t perfectly straight or scaled, Plan7Architect allows you to calibrate dimensions by referencing one known measurement, which helps you adjust everything to accurate proportions.
Key Features to Look for in 3D Floor Plan Software
Not every program will suit your needs. From personal experience, these features make a major difference:
| Feature | Why It Matters |
|---|---|
| Real-time 2D & 3D View | Instant visual feedback for faster, better decisions |
| Drag-and-Drop Elements | No technical knowledge needed |
| Import & Tracing Tools | Use existing floor plans efficiently |
| Unit Flexibility | Works with meters, feet, inches – switch anytime |
| Custom Textures & Materials | Personalize your design |
| Roof & Terrain Modeling | Good for exterior and landscaping planning |
| Export Options | Share your designs professionally |
Note: Plan7Architect includes all these features in a single software without requiring plugins or extra purchases.
Recommended Software: Plan7Architect
After testing several tools, Plan7Architect stands out for its ease of use and flexibility. Here’s why I continue to use it:
-
Designed for private users, remodelers, and builders
-
Supports both imperial and metric units
-
Works on Windows, no internet connection required during use
-
Includes thousands of objects for realistic furnishing
-
Offers accurate wall thickness, roof shapes, and room height settings
-
Easily handles multi-story buildings and split levels
Unlike many browser-based tools, it doesn’t slow down or limit functionality. Even large, complex projects stay responsive.
Common Use Cases for 3D Floor Plan Conversion
You don’t need to be an architect to benefit from 3D visualization. Here’s when it really helps:
-
Planning home renovations
Preview new walls, bathrooms, kitchens, or room layouts before committing. -
Designing new constructions
Plan from scratch with exact room sizes, wall placements, and elevations. -
Real estate presentations
Show clients what a space will look like, not just floor measurements. -
Interior design & furniture planning
Arrange furniture virtually before ordering it. -
Architectural communication
Share visual designs with contractors or clients who struggle with 2D plans.
Tips for a Better 3D Floor Plan Result
Here are some lessons I’ve learned through hands-on use:
1. Start with Precise Measurements
Accurate walls and room dimensions save hours of corrections later.
2. Use Layers and Groups
Group floors, zones, or design stages to keep things organized—especially in larger homes.
3. Don’t Overfurnish
Too much detail can clutter the plan. Focus on function and flow.
4. Simulate Light Conditions
Use the sun simulation tool to check how light falls in each room throughout the day.
5. Double-Check in Both 2D and 3D
Sometimes a door placement that looks fine in 2D may block something in 3D. Review both regularly.
Tip: Save versions of your design at major milestones so you can compare layouts or return to previous ideas quickly.
Final Thoughts: Why 3D Planning Is Worth It
Converting a floor plan to 3D takes your project from abstract to tangible. It allows you to:
-
Visualize the space before spending money
-
Spot mistakes before building starts
-
Communicate clearly with everyone involved
-
Plan renovations or new builds with more confidence
-
Design a space that actually works for your needs
Plan 3D Floor Plans Professionally with Plan7Architect
If you want to convert 2D floor plans to 3D without complexity, Plan7Architect is the perfect tool. Whether you’re planning in feet or meters, the software adapts to your needs. You can easily visualize layouts, add furniture, and create stunning walkthroughs—all without any CAD knowledge. Thanks to a 14-day cancellation policy, you can try it risk-free. Just send a quick email if you change your mind.
Get started today and bring your design ideas to life.
Plan your project with Plan7Architect

Plan7Architect Pro 5 for $109.99
You don’t need any prior experience because the software has been specifically designed for beginners. The planning process is carried out in 5 simple steps:
1. Draw Walls

2. Windows & Doors

3. Floors & Roof

4. Textures & 3D Objects

5. Plan for the Building Permit

6. Export the Floor Plan as a 3D Model for Twinmotion

- – Compliant with international construction standards
- – Usable on 3 PCs simultaneously
- – Option for consultation with an architect
- – Comprehensive user manual
- – Regular updates
- – Video tutorials
- – Millions of 3D objects available


