With Plan7Architect, you can draw a complete and professional digital floor plan in just a few steps. Open a new project, select your preferred measurement unit (either metric or imperial), and start placing walls, rooms, and structural elements directly onto a 2D grid. The 3D model is created automatically in real time as you draw. This allows you to plan everything from room layout to furniture placement without needing architectural experience.
All measurements can be entered and displayed in either European (meters and centimeters) or American (feet and inches) units, depending on your preference or location.

Step-by-Step: Drawing a Floor Plan Digitally with Plan7Architect
1. Start a New Project and Select Your Unit System
When you open Plan7Architect, the first thing you do is start a new project. Before you begin drawing, you can choose your preferred measurement system: metric (for example, meters and centimeters) or imperial (feet and inches). This setting can be changed at any time while working on your project.
Choosing the correct unit system from the start helps ensure that all measurements and object sizes match your building requirements, especially if you’re planning based on regional construction standards.
2. Define External Walls and Building Shape
To draw the outline of the building, use the wall tool. You simply click to place corner points, and the software automatically connects them with wall segments. Each wall can be individually adjusted in terms of length, height, and thickness.
You can also create angled walls, curves, or even unusual layouts. This is especially useful if you’re working with an irregular floor plan or want to plan a house with architectural features such as bay windows, alcoves, or rounded corners.
The software allows for precise positioning and snap-to-grid placement, which makes the drawing process smooth and accurate.
3. Add Internal Walls and Room Divisions
After completing the external structure, you can add internal walls to divide the space into separate rooms. The internal walls can be drawn just as easily by clicking and placing them in the layout.
You can adjust:
-
Wall types (load-bearing or non-load-bearing)
-
Wall thickness and height
-
Exact positioning in the floor plan
Each enclosed space is automatically recognized as a room and labeled accordingly. You can name rooms yourself, such as “Living Room,” “Bedroom,” “Kitchen,” etc.
4. Insert Windows, Doors, and Openings
Next, you can place windows, doors, and other openings. This is done by selecting the object from the object library and dragging it into the desired wall section. Once placed, you can resize and reposition it freely.
Available options include:
-
Single and double doors
-
Sliding and folding doors
-
Floor-to-ceiling windows
-
Standard, bay, and round windows
The software automatically adjusts the wall to fit the opening, ensuring no manual cut-outs are needed.
5. Customize Room Types and Names
Each room can be customized by naming it, adjusting its shape, and adding interior details. This is helpful for clear communication, especially when sharing your plan with builders or clients.
Plan7Architect also calculates the area of each room automatically in square meters or square feet, depending on your selected unit system.
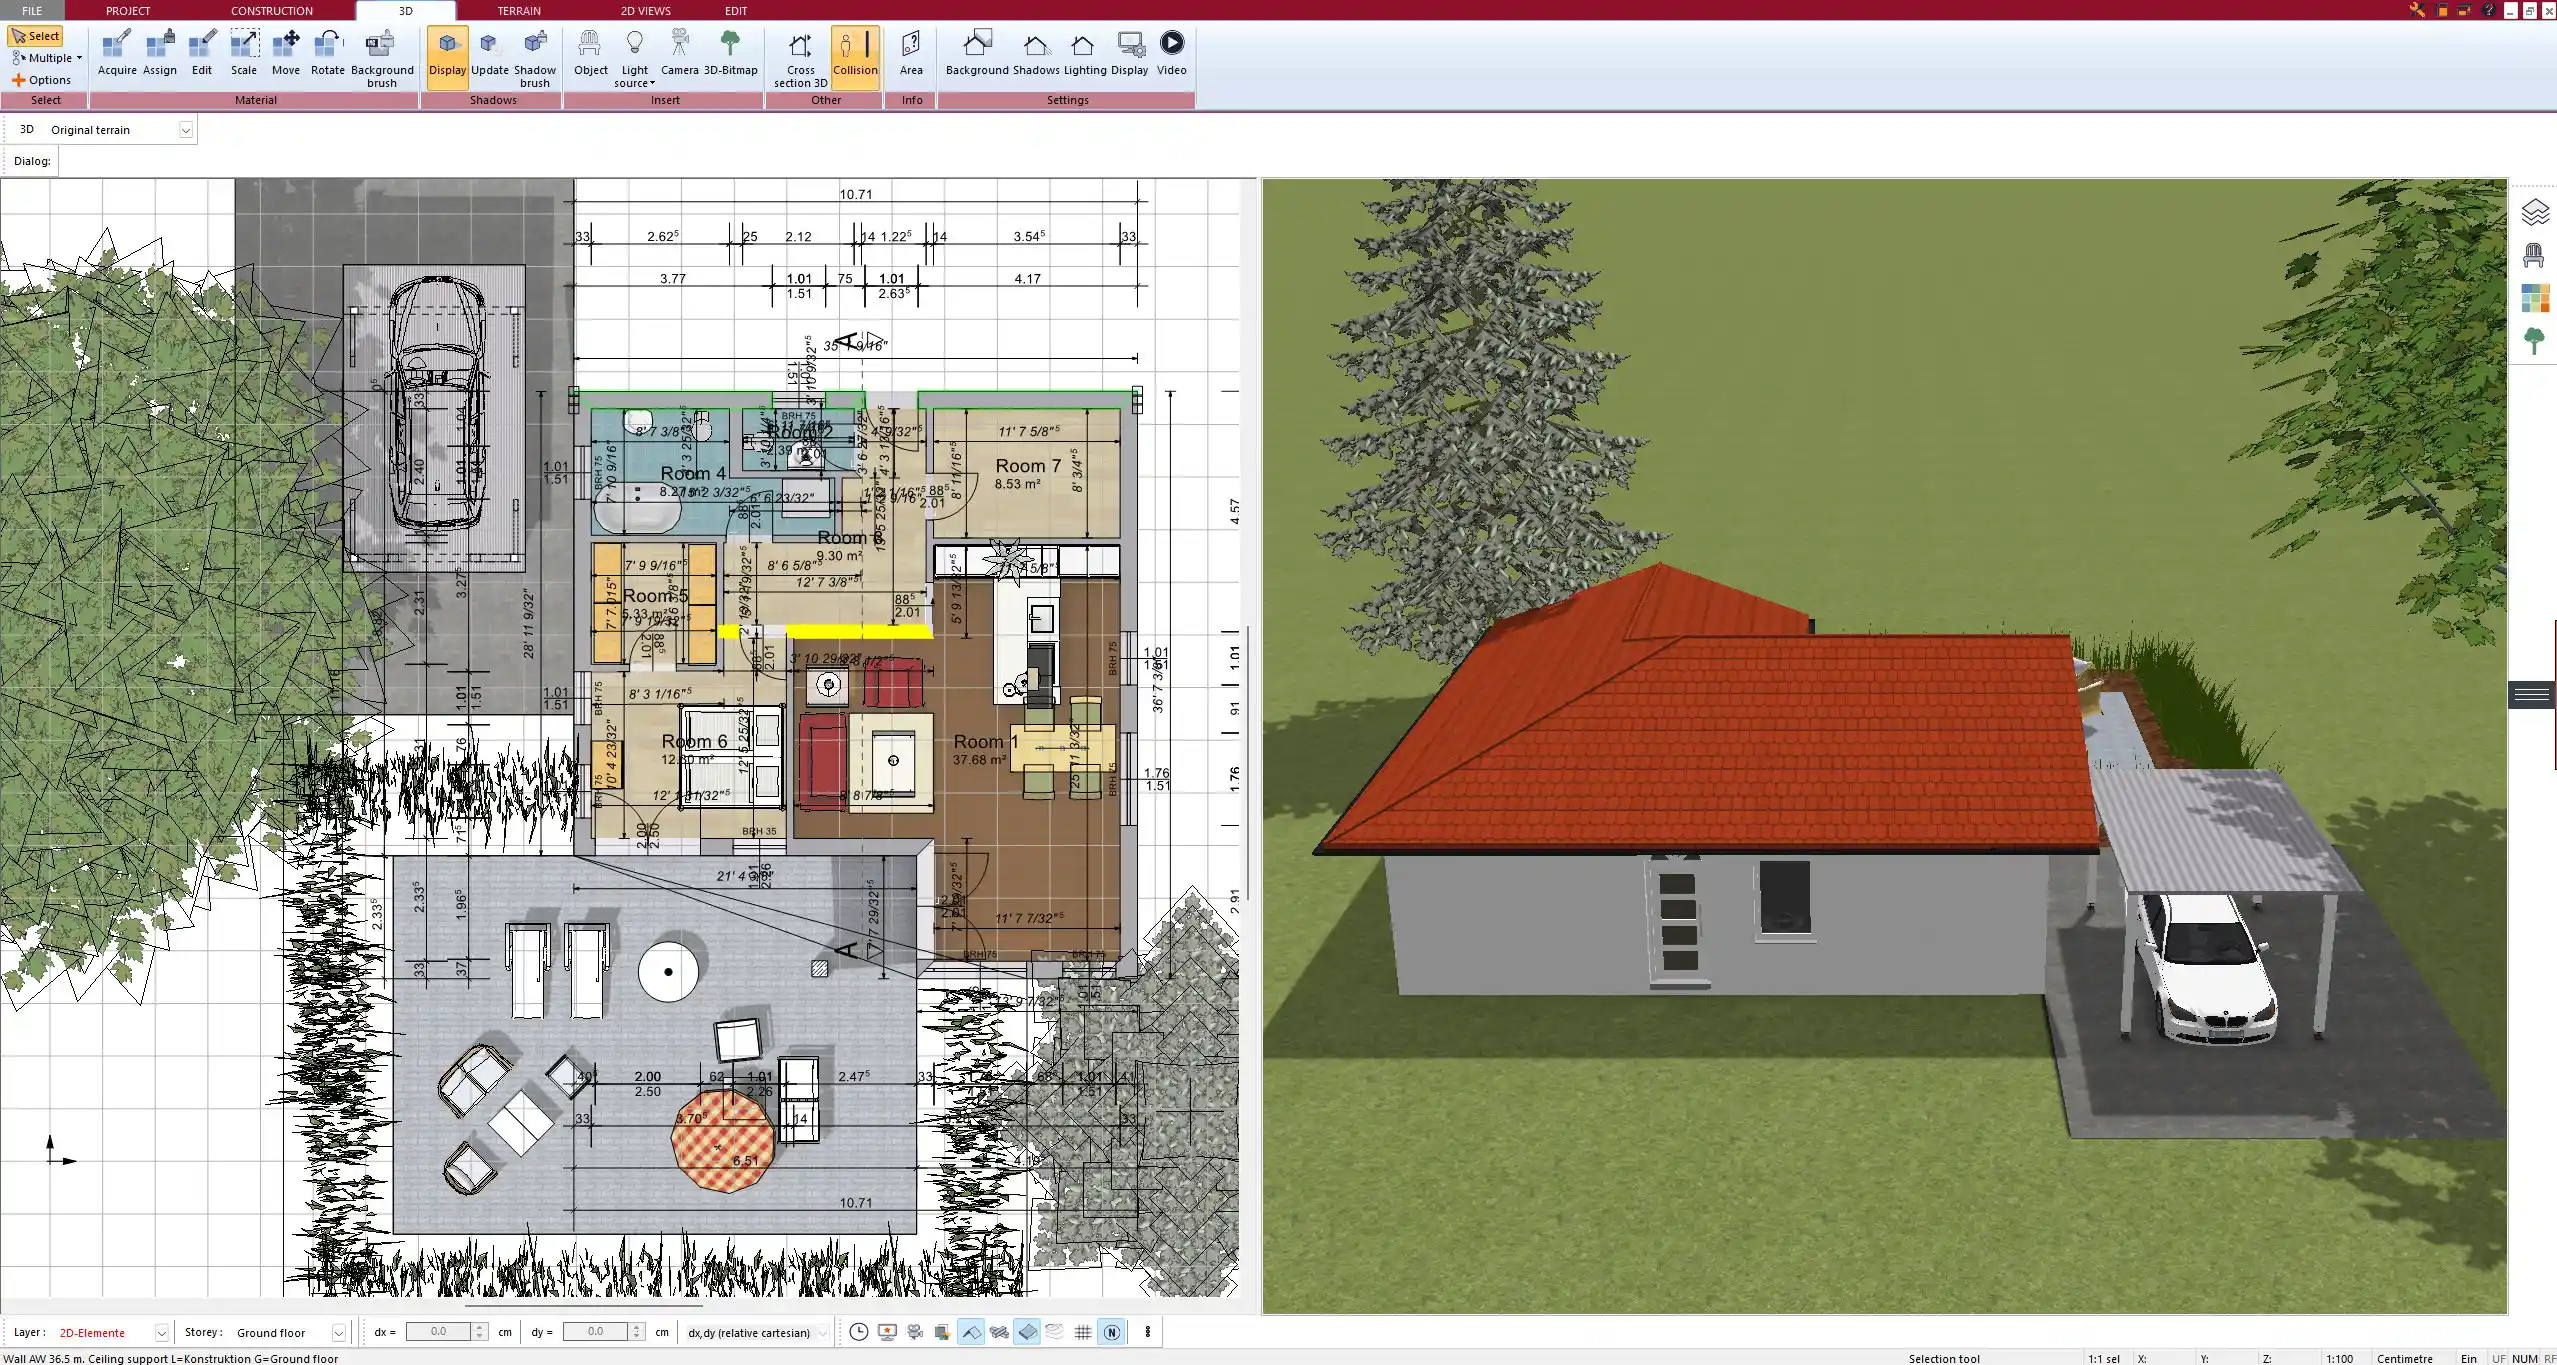
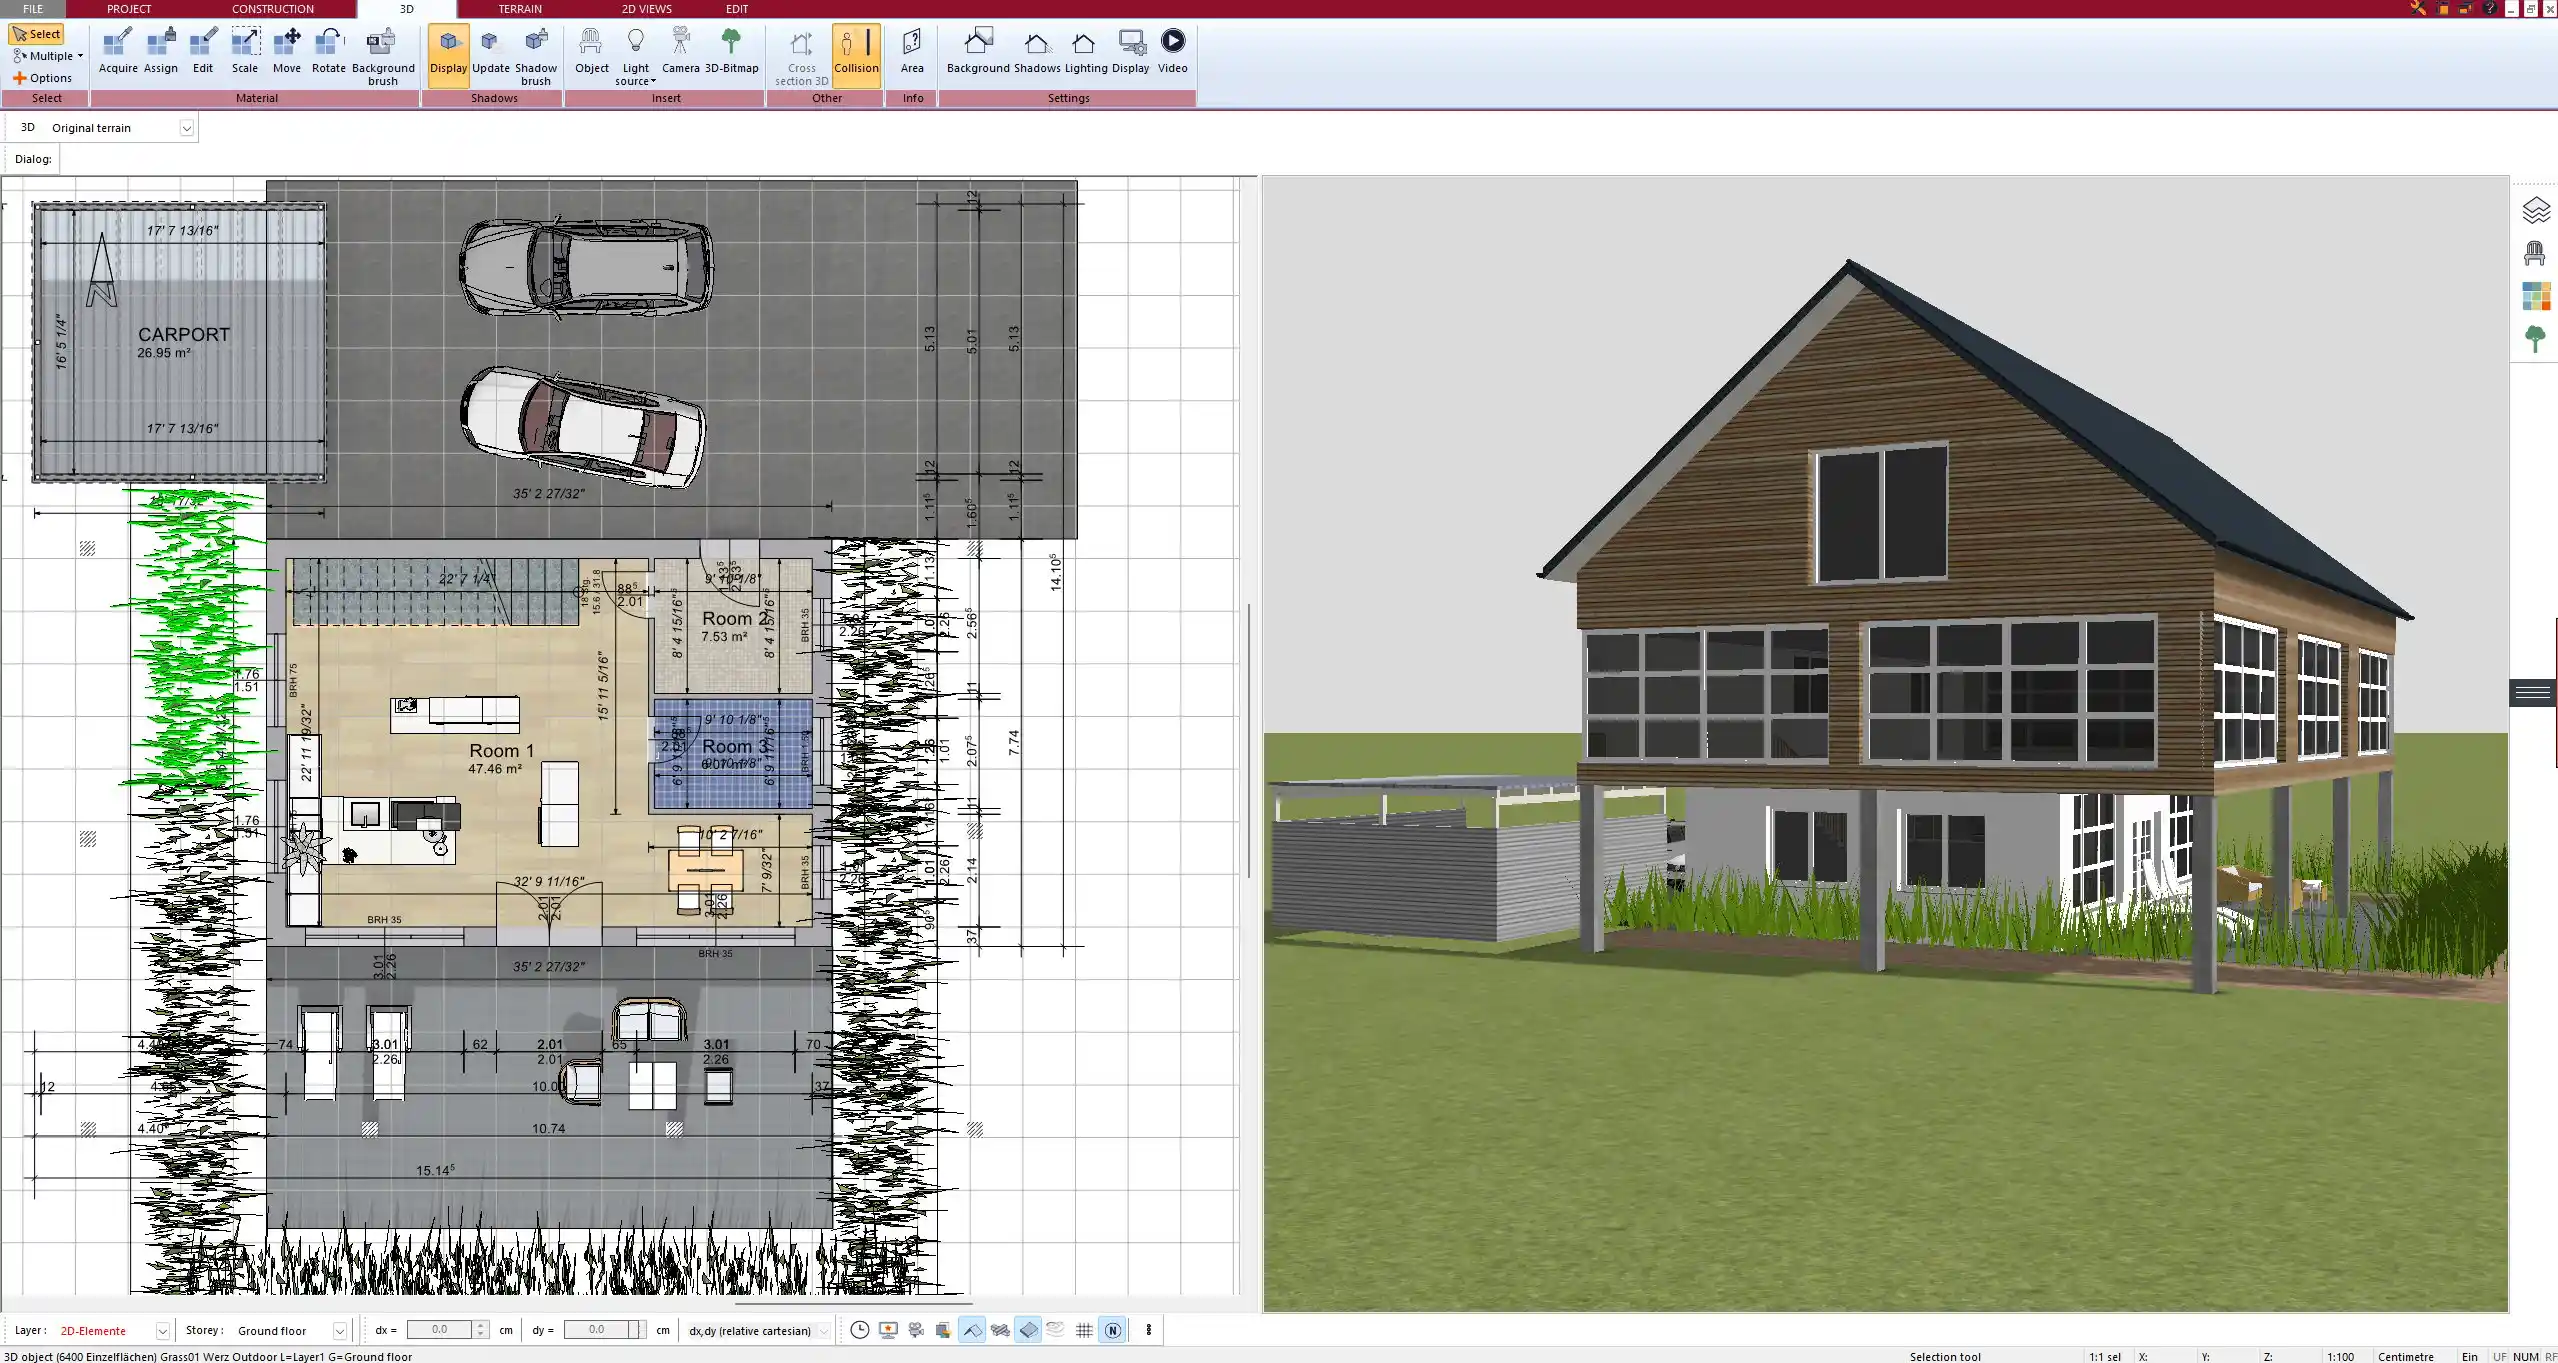
2D Drafting Meets Instant 3D Visualization
Work in 2D and View in 3D
One of the most powerful features in Plan7Architect is the real-time 3D visualization. As you draw in 2D, your floor plan is instantly reflected in 3D. This allows you to immediately see how your design would look in reality and spot any issues early in the process.
You can switch between 2D and 3D views at any time or keep both open in split view mode for simultaneous editing and previewing.
Virtual Walkthroughs and Camera Views
You can place interior and exterior cameras to explore your digital floor plan as if walking through the building. This is ideal for evaluating room proportions, window placement, and lighting.
You can also render photorealistic images or navigate freely through the model for presentations or design reviews.
Useful Tools While Drawing Digitally
Drag-and-Drop Object Library
Plan7Architect includes an extensive library of objects you can place in your floor plan. These objects are available in both 2D and 3D views.
Categories include:
-
Furniture (beds, sofas, wardrobes)
-
Kitchen and bathroom fixtures
-
Plants and decorative items
-
Electrical and plumbing symbols
All items are customizable in size, material, and orientation.
Layer Management
You can assign walls, elements, and symbols to different layers such as:
-
Existing structure
-
Planned demolition
-
New construction
-
Electrical layout
-
Furnishing plan
Layers can be shown or hidden with one click, which is especially helpful when working on renovations, extensions, or planning permits.
Area Measurement and Space Calculation
Each room’s area is calculated automatically. You can also measure custom areas using the surface measurement tool.
The software distinguishes between:
-
Living space
-
Usable space
-
Gross and net areas
-
Outdoor areas (e.g., terraces, balconies)
The measurement results can be shown in both square meters and square feet.
Exporting, Printing and Sharing Your Floor Plan
Export Formats
Once your digital floor plan is complete, you can export it in various formats including:
-
PDF for printable plans
-
JPG or PNG for images
-
DWG for CAD compatibility
This makes it easy to submit plans to contractors, authorities, or collaborators.
High-Resolution Print Plans
You can generate professional print layouts with:
-
Full dimensions and annotations
-
Room names and areas
-
Title block with project data
-
North arrow and scale bars
You can also define custom paper sizes and include legends and symbols as needed.
Who Is This Software for?
Ideal for Homeowners and Self-Builders
Plan7Architect is perfect for anyone who wants to take control of their planning process. Whether you’re designing a new house, planning a remodel, or preparing an extension, the software helps you create accurate plans without needing a background in architecture.
You can experiment with layouts, visualize your ideas, and generate a printable plan that’s ready for submission or presentation.
Also Suitable for Professionals
Many professionals use Plan7Architect to streamline their work, including:
-
Interior designers presenting concepts
-
Contractors creating initial plans
-
Architects creating drafts for discussions with clients
Bonus Features for Easier Planning
Adjustable Ceiling Heights and Roof Shapes
Each floor level can be assigned a custom ceiling height. You can then define a roof for the entire building using automatic or manual tools.
Supported roof types:
-
Gable roof
-
Hip roof
-
Flat roof
-
Shed roof
-
Combination roofs
The roof can be edited in 3D with intuitive tools that allow for exact pitch, overhang, and material settings.
Terrain and Plot Planning
You can also plan the outdoor space around your home by defining a terrain or building plot.
Add elements like:
-
Driveways and walkways
-
Hedges and fences
-
Pools and patios
-
Parking areas
This helps you visualize the full scope of your project beyond the house itself.
Tip: Save Time with Templates and Room Presets
Tip: Plan7Architect includes predefined room setups for kitchens, bathrooms, and other spaces. You can insert a complete layout with one click and then modify it to match your preferences. This is especially useful if you want to explore different layout options quickly without starting from scratch each time.
Final Thoughts – Try It Yourself
Plan7Architect allows you to create detailed, accurate digital floor plans with ease. The software gives you full control over every detail of your project and helps you bring your ideas to life in both 2D and 3D. You can use it for planning new builds, remodeling, or interior design — all without needing professional CAD experience.
You can test the full functionality risk-free thanks to the 14-day money-back guarantee. Simply choose your version, start drawing, and explore all the possibilities Plan7Architect has to offer.
Plan your project with Plan7Architect

Plan7Architect Pro 5 for $109.99
You don’t need any prior experience because the software has been specifically designed for beginners. The planning process is carried out in 5 simple steps:
1. Draw Walls

2. Windows & Doors

3. Floors & Roof

4. Textures & 3D Objects

5. Plan for the Building Permit

6. Export the Floor Plan as a 3D Model for Twinmotion

- – Compliant with international construction standards
- – Usable on 3 PCs simultaneously
- – Option for consultation with an architect
- – Comprehensive user manual
- – Regular updates
- – Video tutorials
- – Millions of 3D objects available


