Designing a house from scratch requires precision, creativity, and the right tools. With Plan7Architect, you can create detailed 2D floor plans and transform them into realistic 3D models with just a few clicks. The software provides an intuitive interface, making it accessible for both beginners and professionals. One of its biggest advantages is the ability to switch between metric and imperial units, ensuring that measurements are accurate regardless of location.
Getting Started: Setting Up Your House Design in Plan7Architect
Installation and System Requirements
Before starting, ensure that your system meets the minimum requirements:
| Component | Minimum Requirement | Recommended Requirement |
|---|---|---|
| Operating System | Windows 10/11, macOS | Windows 11, macOS latest |
| RAM | 4GB | 8GB or more |
| Storage | 10GB free space | SSD for better performance |
| Graphics Card | Integrated GPU | Dedicated GPU for faster rendering |
Choosing the Correct Measurement Units
Plan7Architect allows you to work with both metric (meters, centimeters) and imperial (feet, inches) units. You can select your preferred unit system in the project settings before beginning the design. This flexibility ensures that designs meet the standard regulations of different countries.
Creating a New Project and Setting Up Dimensions
- Open Plan7Architect and select New Project.
- Choose House Design Template or start from scratch.
- Set the unit system (metric or imperial) under project settings.
- Define the total building dimensions, considering lot size and regulations.
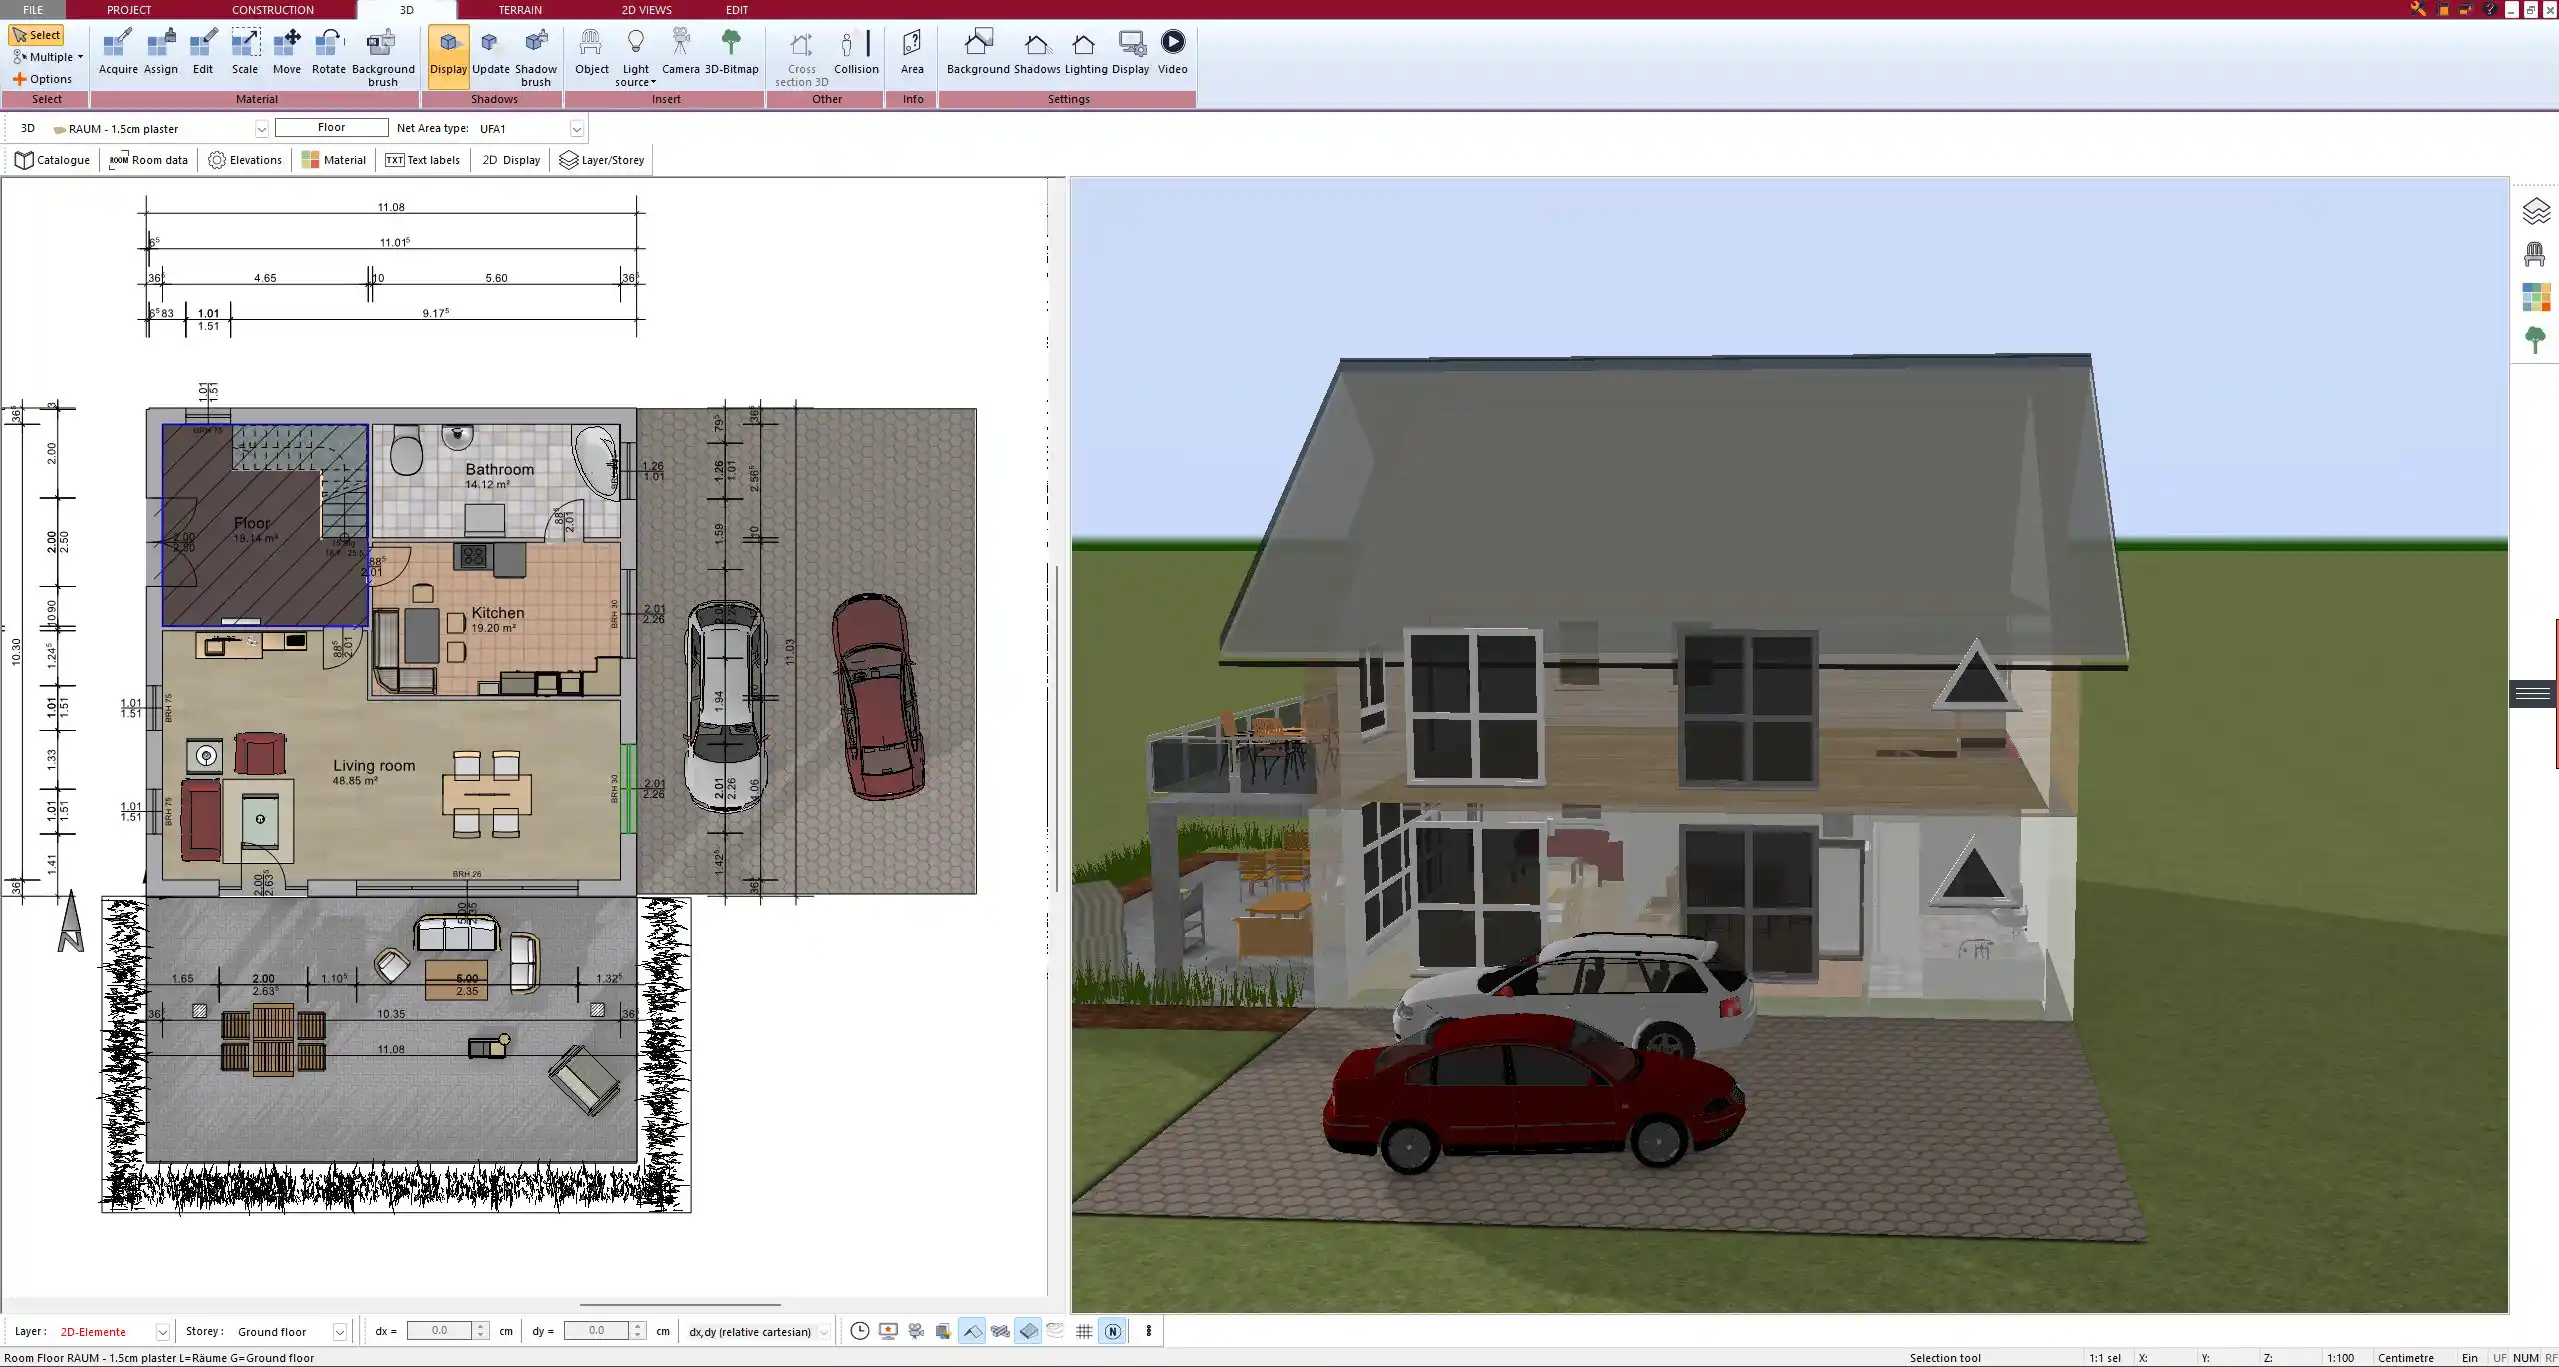
2D House Drawing: Step-by-Step Guide
Creating a Basic Floor Plan
The foundation of any house design starts with a detailed 2D floor plan. In Plan7Architect, this can be done with precise tools:
- Drawing Walls: Use the wall tool to define the structure’s outer and inner walls. Set wall thickness based on material and insulation needs.
- Placing Windows and Doors: Choose from a variety of predefined window and door types, or customize your own.
- Defining Rooms: Label each space (e.g., living room, kitchen) for better organization.
Tip: Use the grid and snap function to ensure walls align perfectly.
Adding Structural Elements
Once the basic layout is set, additional structural elements can be included:
- Staircases: Choose between straight, L-shaped, or spiral staircases.
- Columns and Beams: Essential for multi-story houses or open-plan designs.
- Roof Planning: Set the pitch, overhang, and shape in the 2D view before refining in 3D.
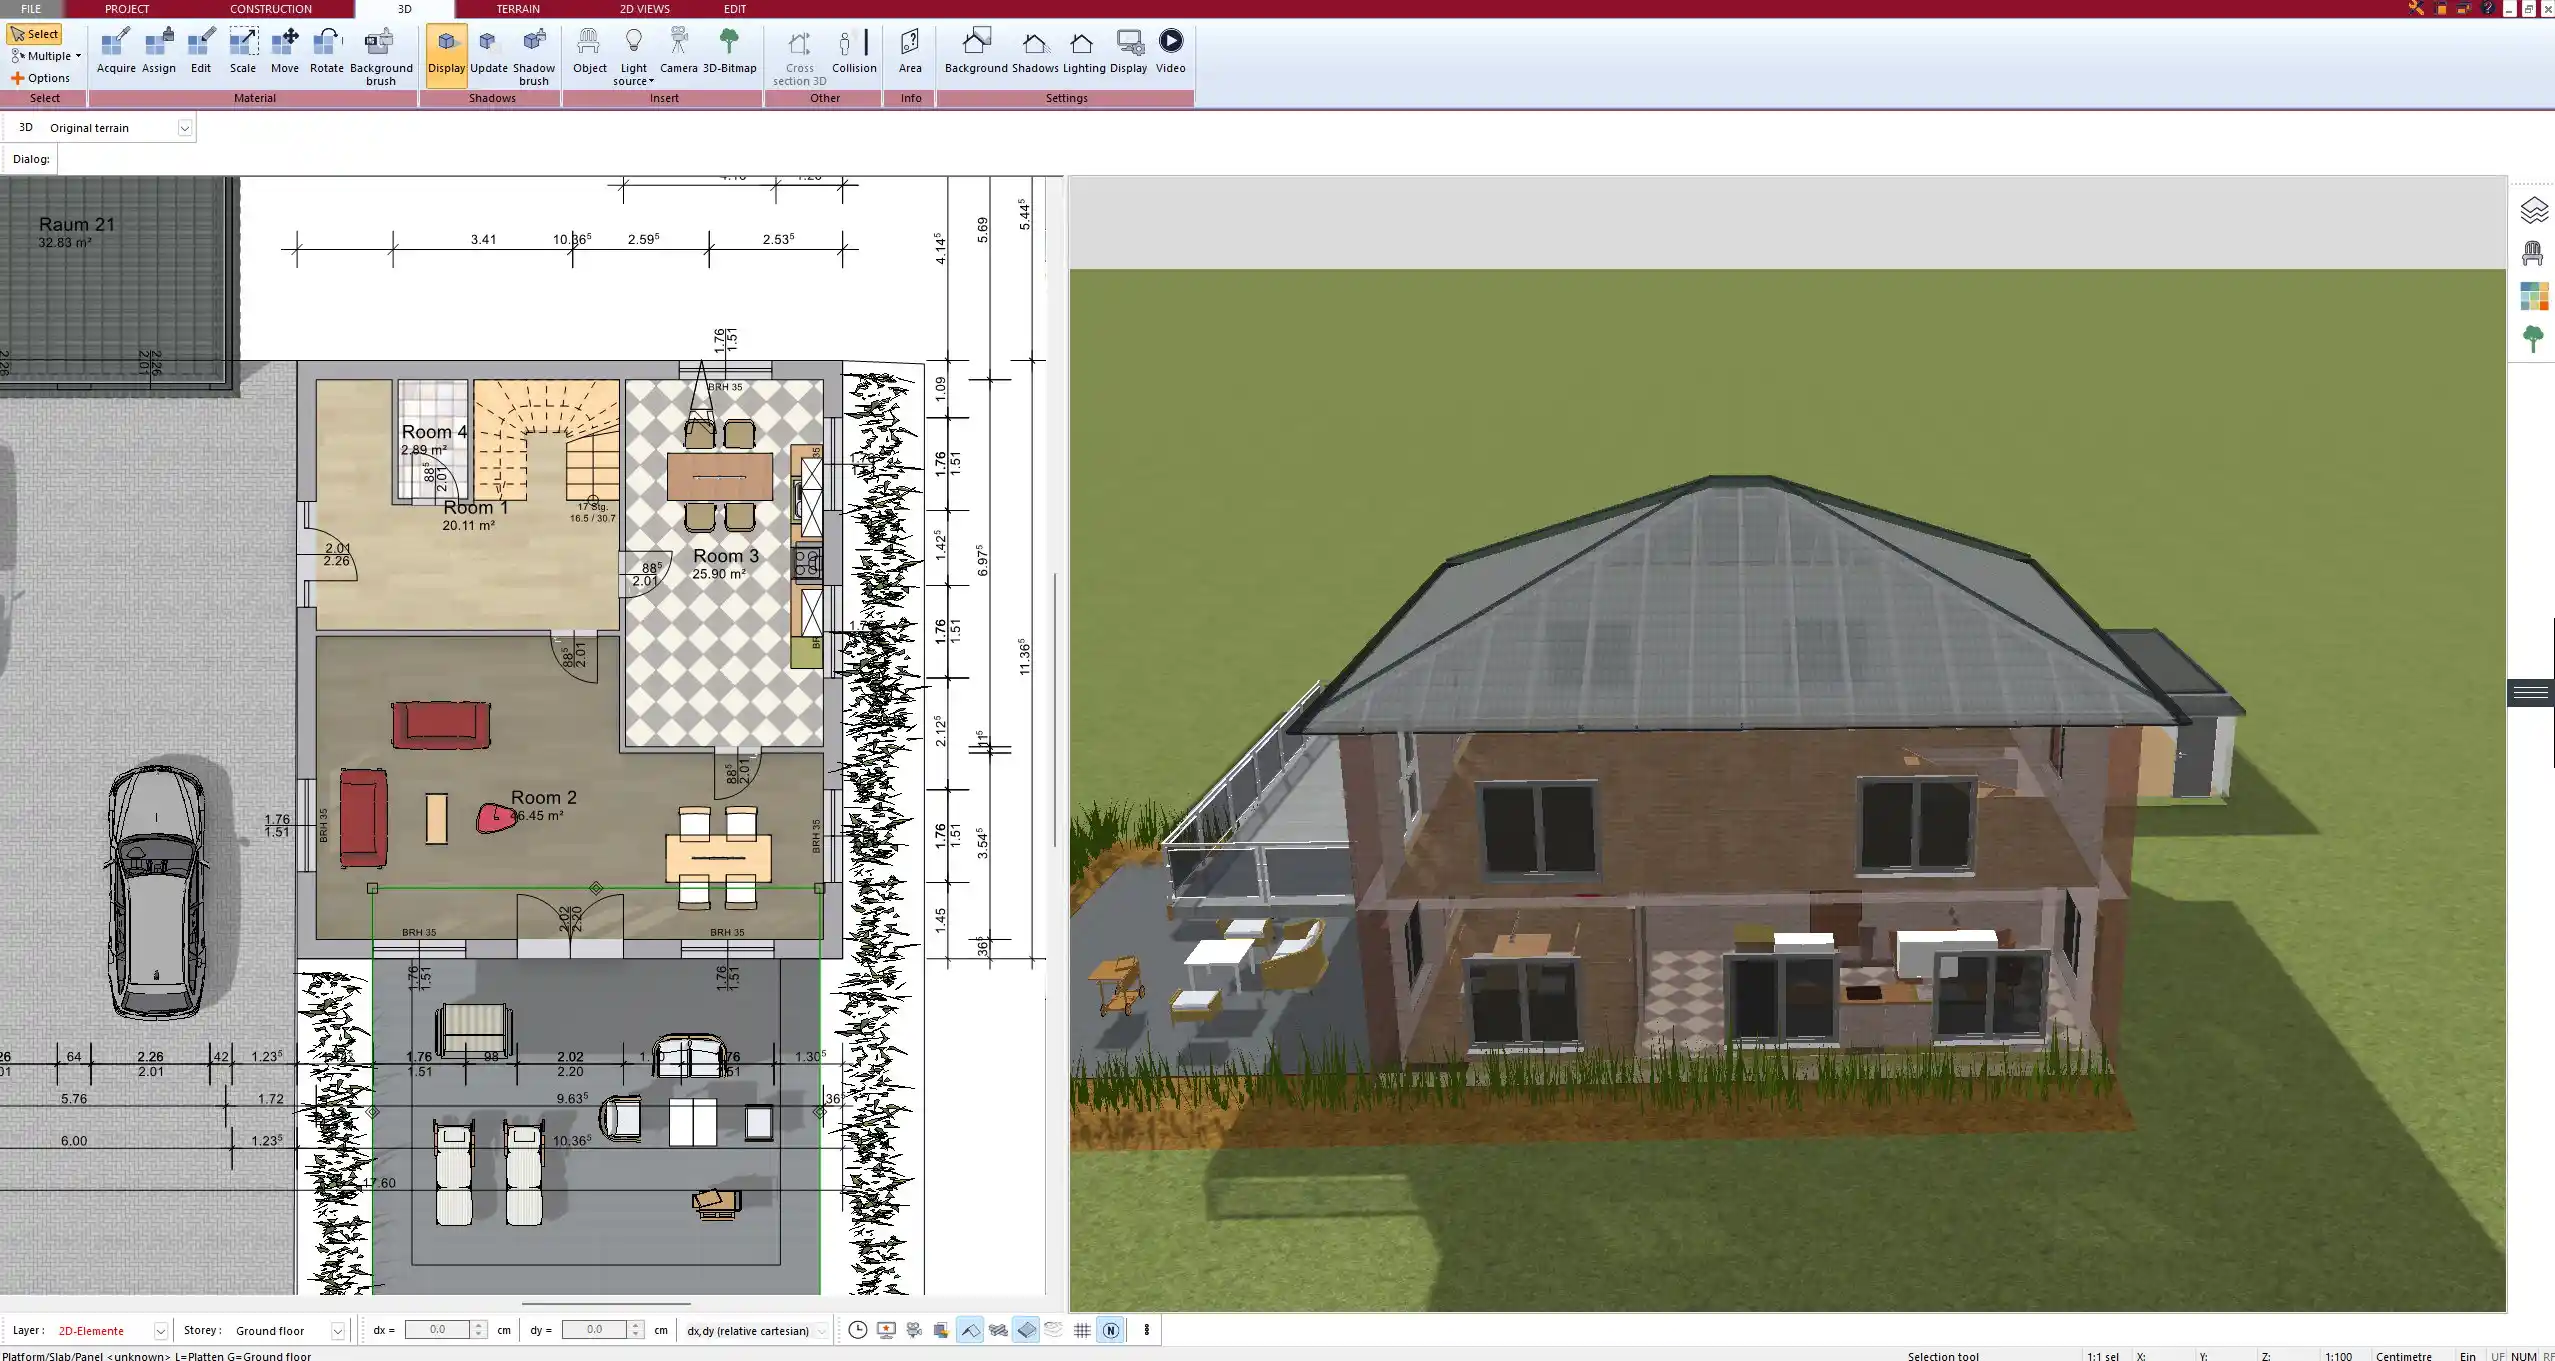
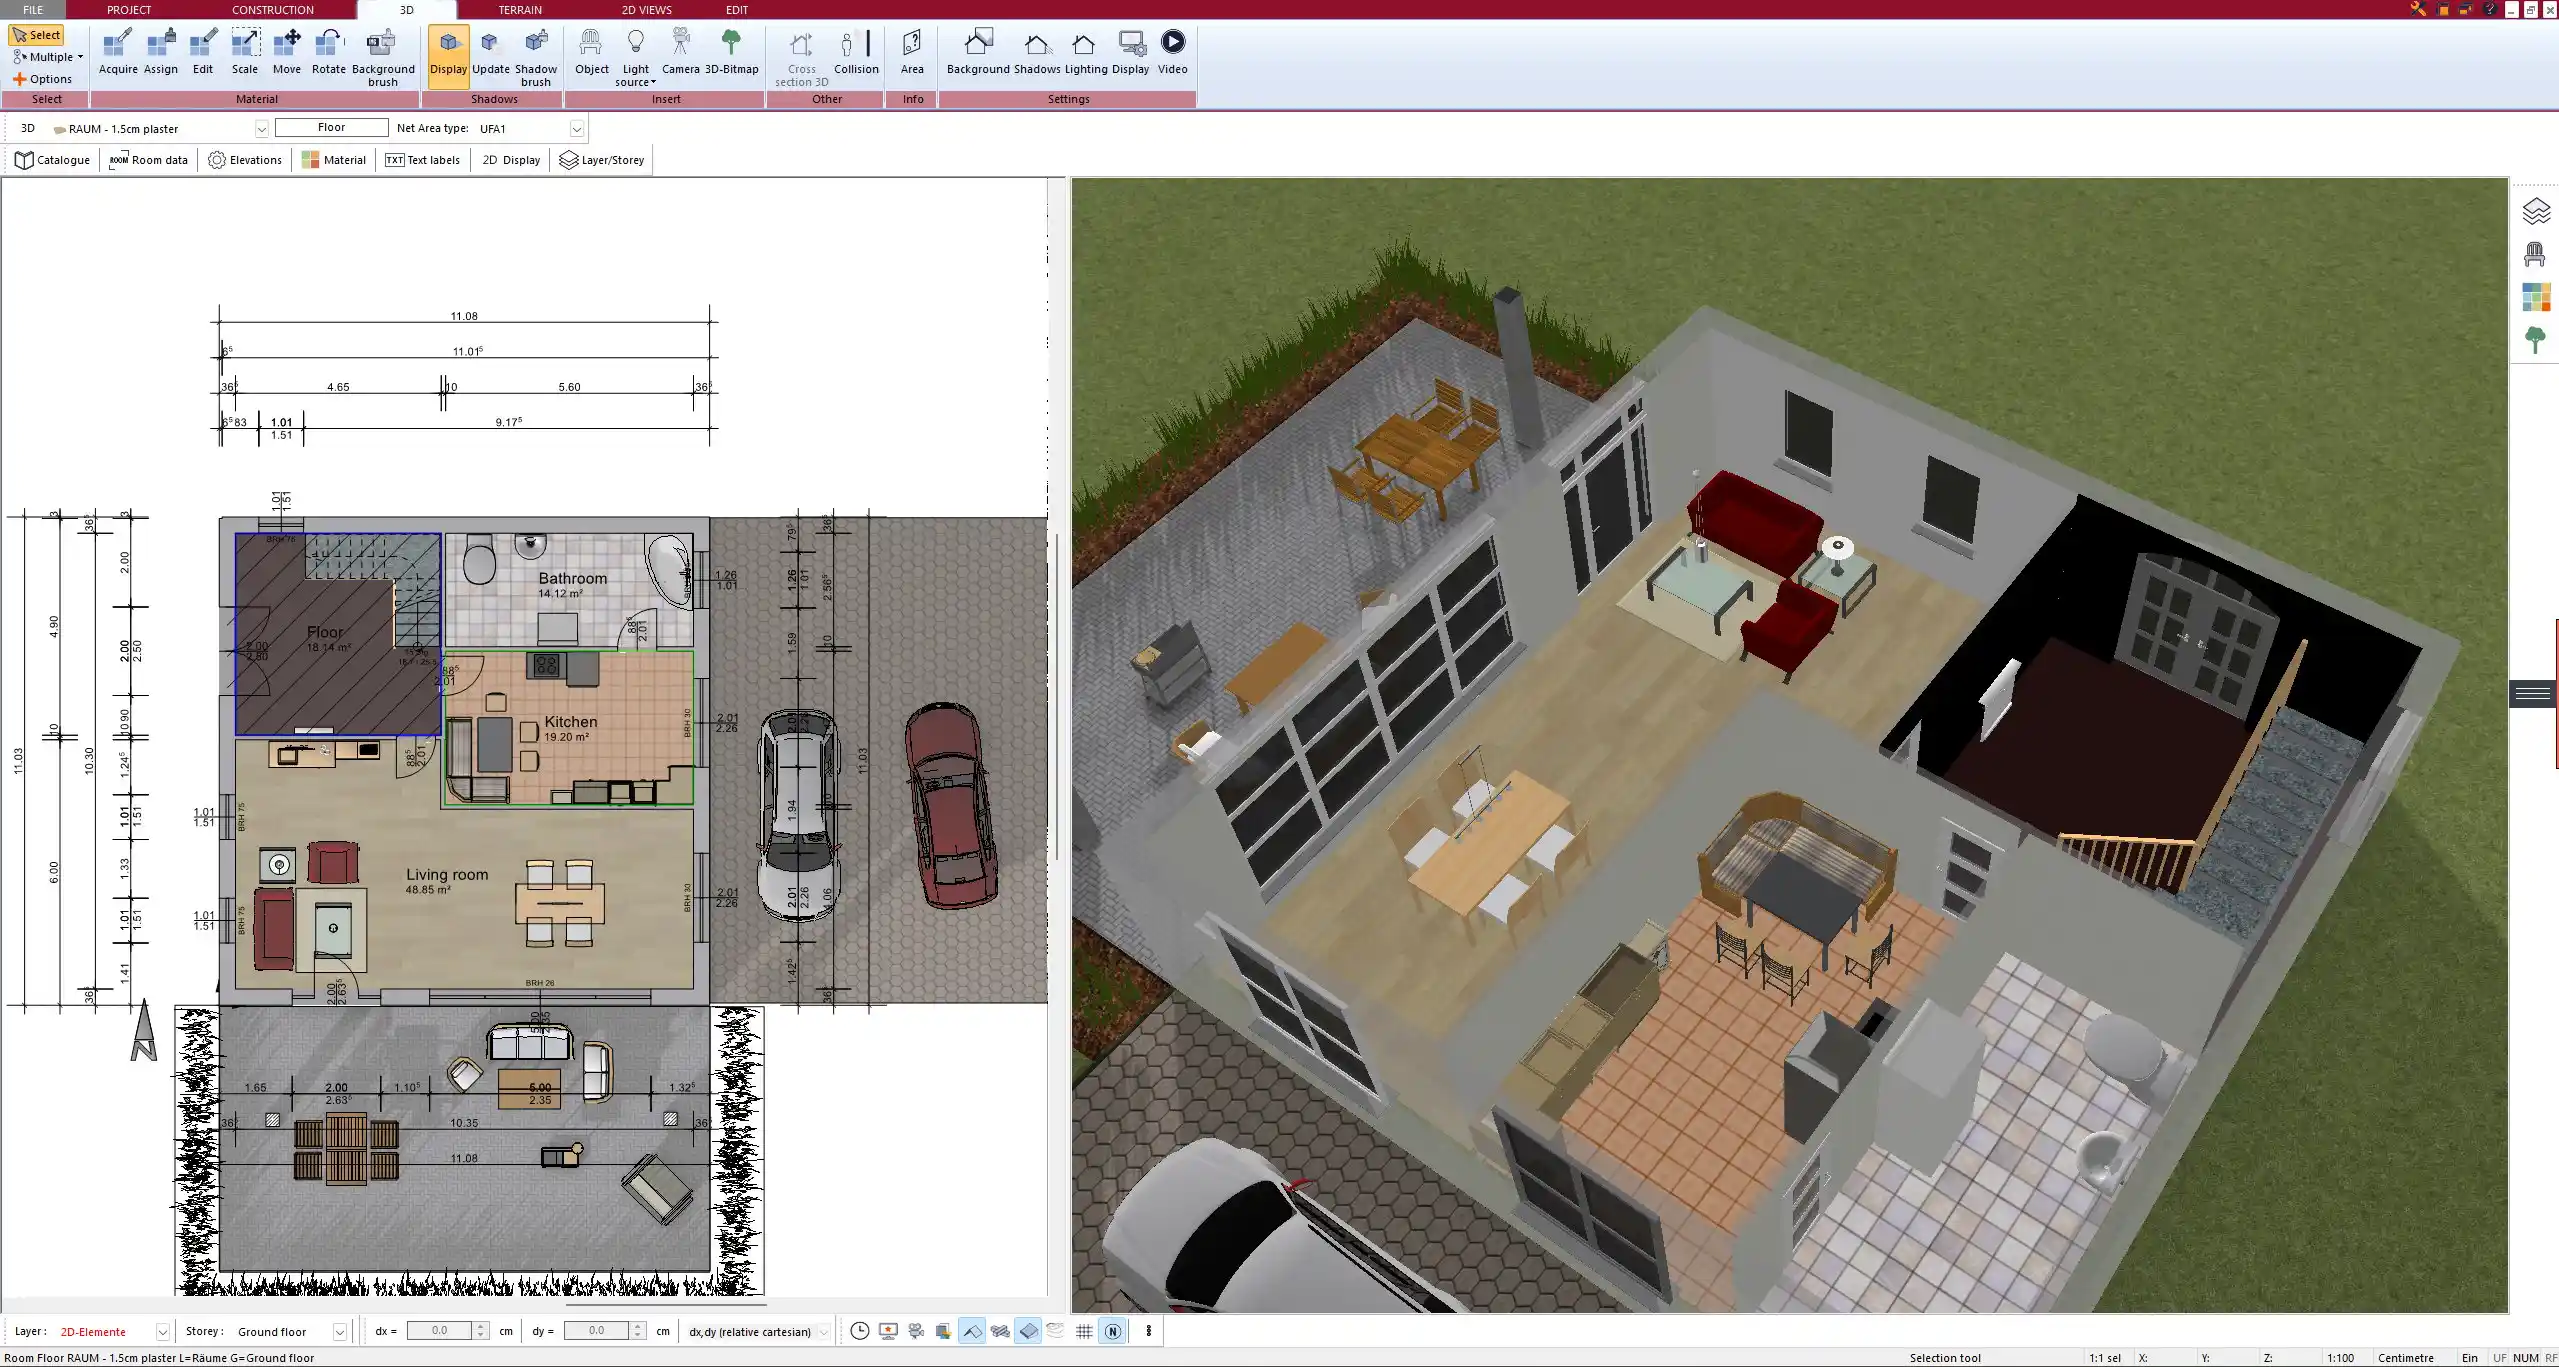
3D House Visualization: Turning 2D into 3D
After completing the 2D plan, switch to 3D mode to visualize the house in real-time.
- Activating 3D Mode: One-click transformation from 2D to 3D.
- Adjusting Perspectives: Move the camera to explore different angles.
- Customizing Heights: Set floor and ceiling heights to match real-world construction.
- Applying Textures: Use realistic materials like wood, concrete, brick, or custom textures.
Tip: Use real-time rendering to see how sunlight affects different areas at various times of the day.
Customizing the House Design
Interior Design and Furniture Placement
Plan7Architect includes a large library of furniture and fixtures that can be added with a simple drag-and-drop function:
- Living Spaces: Sofas, tables, bookshelves, and decor.
- Kitchens & Bathrooms: Cabinets, sinks, bathtubs, and appliances.
- Lighting: Ceiling lights, floor lamps, and recessed lighting options.
Exterior Design and Landscaping
The house’s exterior is just as important as the interior. You can enhance the design with:
- Driveways and Walkways: Paved paths, gravel driveways, and stepping stones.
- Gardens and Green Spaces: Trees, shrubs, and flower beds.
- Outdoor Living Areas: Patios, terraces, and decks.
Tip: Use the terrain editor to simulate slopes, hills, or flat land conditions.
Exporting and Finalizing Your House Design
Printing 2D Plans for Contractors
Once the design is complete, you can export and print professional-quality 2D blueprints with detailed annotations and measurements. This ensures that contractors have accurate guidelines for construction.
Exporting 3D Models for Visualization
For presentation purposes, the 3D model can be exported in various file formats, allowing it to be viewed in VR, rendered in third-party software, or shared digitally.
Sharing Designs with Clients or Collaborators
With Plan7Architect, users can share projects online, making it easy to collaborate with architects, builders, or family members before finalizing the plan.
Plan your project with Plan7Architect

Plan7Architect Pro 5 for $109.99
You don’t need any prior experience because the software has been specifically designed for beginners. The planning process is carried out in 5 simple steps:
1. Draw Walls

2. Windows & Doors

3. Floors & Roof

4. Textures & 3D Objects

5. Plan for the Building Permit

6. Export the Floor Plan as a 3D Model for Twinmotion

- – Compliant with international construction standards
- – Usable on 3 PCs simultaneously
- – Option for consultation with an architect
- – Comprehensive user manual
- – Regular updates
- – Video tutorials
- – Millions of 3D objects available


