Creating a Stone House Floor Plan with Plan7Architect
To begin designing a stone house floor plan with Plan7Architect, you simply start a new project or choose from available templates within the software. Once your workspace is ready, use the wall tool to draw the perimeter and interior walls of your stone house. You can assign stone material to your walls either during the drawing process or afterward using the wall properties menu. This ensures that both the appearance and the wall thickness match realistic stone constructions.
If you are working in metric units (meters, centimeters) or imperial units (feet, inches), you can easily switch between them at any time. Plan7Architect supports both systems natively, so you can work comfortably no matter where you are.
Next, insert windows and doors by choosing from the extensive built-in catalog. For a stone house, I usually recommend choosing frames that visually contrast with the stone material – such as wood or black steel – for a more authentic look.
After the floor plan is drawn, switch to the 3D view. This lets you immediately see the structure with realistic stone textures and correct wall thickness. You can walk through the design virtually, rotate views, and zoom in to check corners, transitions, and overall proportions.
When you’re finished, export the plan as a printable PDF, image file, or professional permit-ready document with floor plans, sections, and elevations – depending on your region’s requirements.
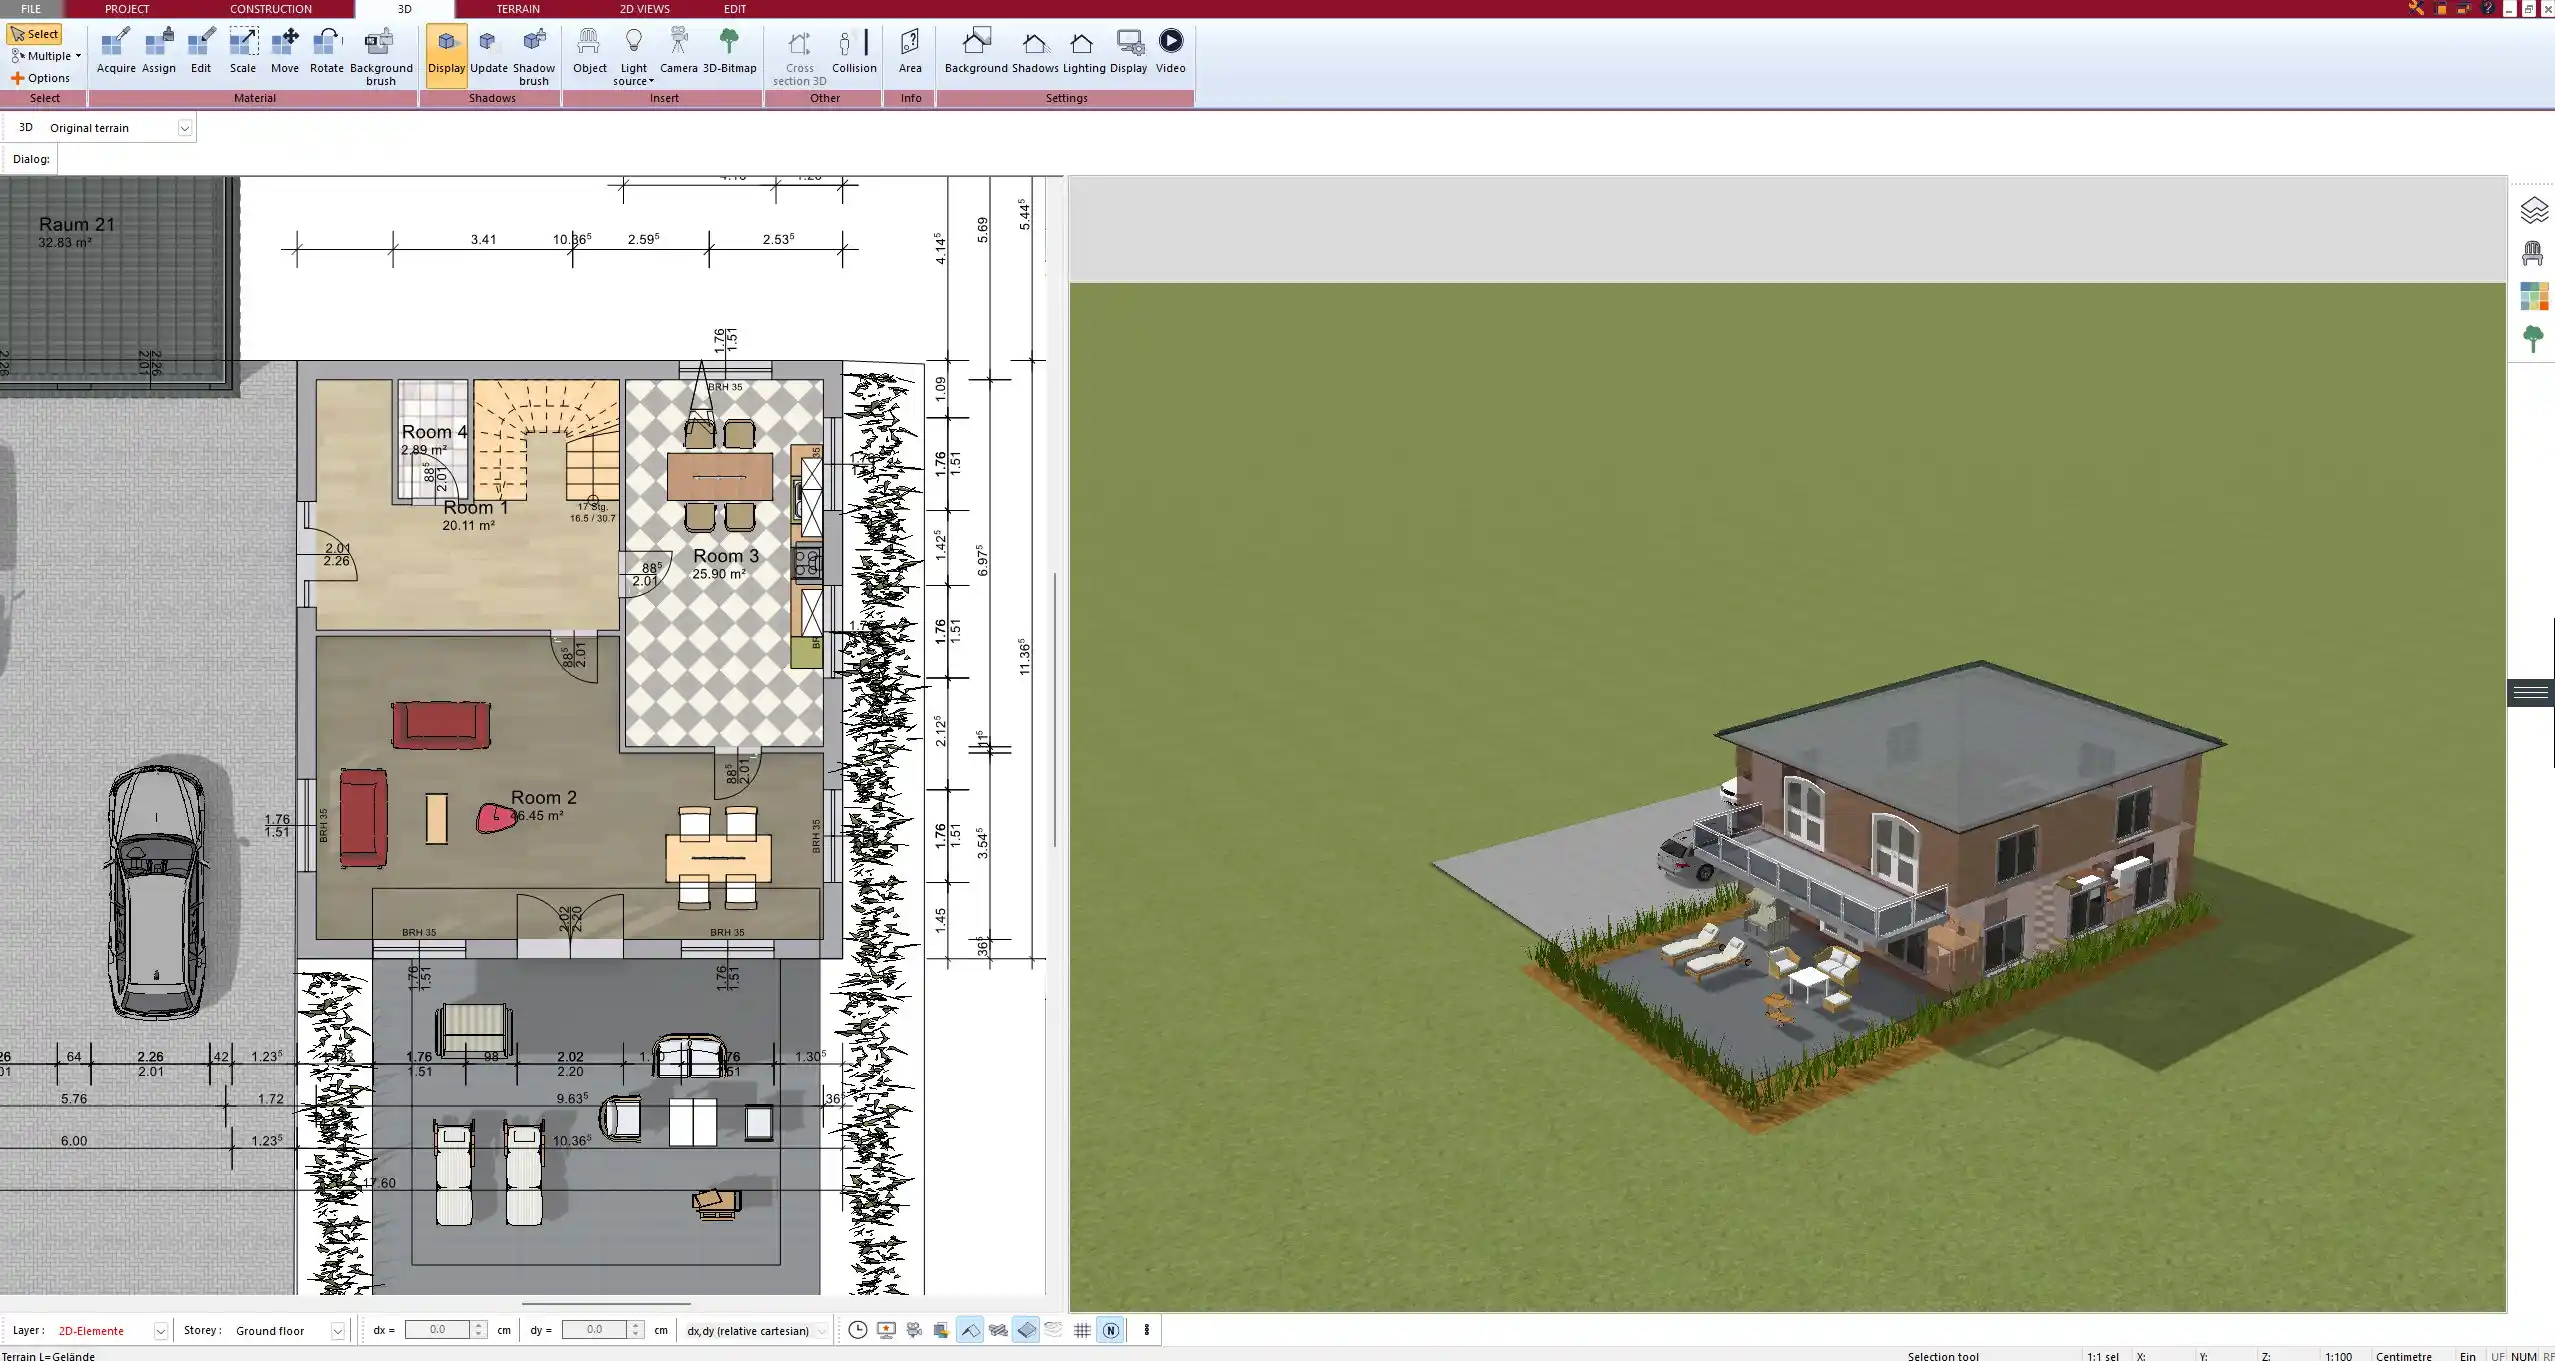
Floor plan of a stone house created in Plan7Architect – 2D view with precise wall thickness settings
Tip: You can switch between 2D and 3D mode at any time while designing, allowing you to make quick adjustments and immediately see how they affect the structure visually.
Why Stone Houses Require Specific Planning Features
Thicker Walls and Structural Load
Stone houses are characterized by much thicker walls than timber or drywall constructions. These thick walls are essential for structural integrity, thermal mass, and durability. In Plan7Architect, you can manually define the wall thickness. I often set exterior stone walls to 40 to 60 centimeters (approximately 16 to 24 inches), depending on the type of stone I’m working with. Interior walls may be thinner but still need to align structurally with roof loads and floor layouts.
Because stone is much heavier than modern wall systems, structural balance is important. Plan7Architect helps simulate visual impact and lets you layer walls precisely, but it’s still wise to consult a local structural engineer if the plan will be submitted for approval.
Moisture and Insulation Considerations
Stone walls can be susceptible to moisture unless properly insulated or treated. When designing in Plan7Architect, you can define multi-layered wall compositions. I usually add a vapor barrier, an insulation layer, and an internal wall surface behind the stone material. This ensures the house is energy-efficient and protects the interior from condensation or heat loss.
For colder regions, I recommend placing insulation on the inside to preserve the exterior stone appearance. In warmer regions, exterior insulation covered with render may be a better choice. The software lets you simulate both and visually check how they affect wall thickness and internal space.
Customizing Stone Elements in Your Plan
Assigning Materials
After drawing the basic structure, assigning the right materials is crucial for realism. In the wall properties menu, you can apply high-resolution stone textures to interior or exterior surfaces. Plan7Architect offers several stone finishes: natural stone, quarry stone, fieldstone, and various decorative block styles.
The texture mapping works in real time – so once applied, you’ll immediately see the results in the 3D view. This makes it easier to test different color tones, joint spacing, and surface effects.
Designing Unique Stone Features
One of the benefits of designing a stone house is the ability to incorporate features like arched entryways, exposed beams, and stone columns. These can be added using custom 3D elements or imported from the SketchUp 3D Warehouse, which is integrated into the software.
If you want to create a stone terrace or outdoor fireplace, you can simply use the object placement tool and assign stone surfaces to those items. I’ve often designed rustic outdoor kitchens or Mediterranean-style courtyards with just a few clicks and the right textures.
Tip: Save frequently used custom stone objects (like columns or arches) in your personal object library inside Plan7Architect. That way, you can reuse them across future projects without recreating them.
Roof and Foundation Planning for Stone Homes
Stone homes often use heavier roofing materials, such as clay tiles, slate, or concrete shingles. In the roofing tool, you can choose between gable, hipped, or custom roof shapes and assign heavy materials. The software simulates roof weight visually, so you can get a sense of structural proportion.
For the foundation, Plan7Architect includes tools for planning slab-on-grade, crawlspaces, or full basements. Since stone houses are heavy, it’s important to define a robust base. I usually set the concrete slab or foundation walls thicker than in lightweight construction – around 40 to 50 cm (16 to 20 inches), depending on soil conditions and house size.
Use the section view to inspect how the walls sit on the foundation and make sure the alignment is correct before finalizing your plan.
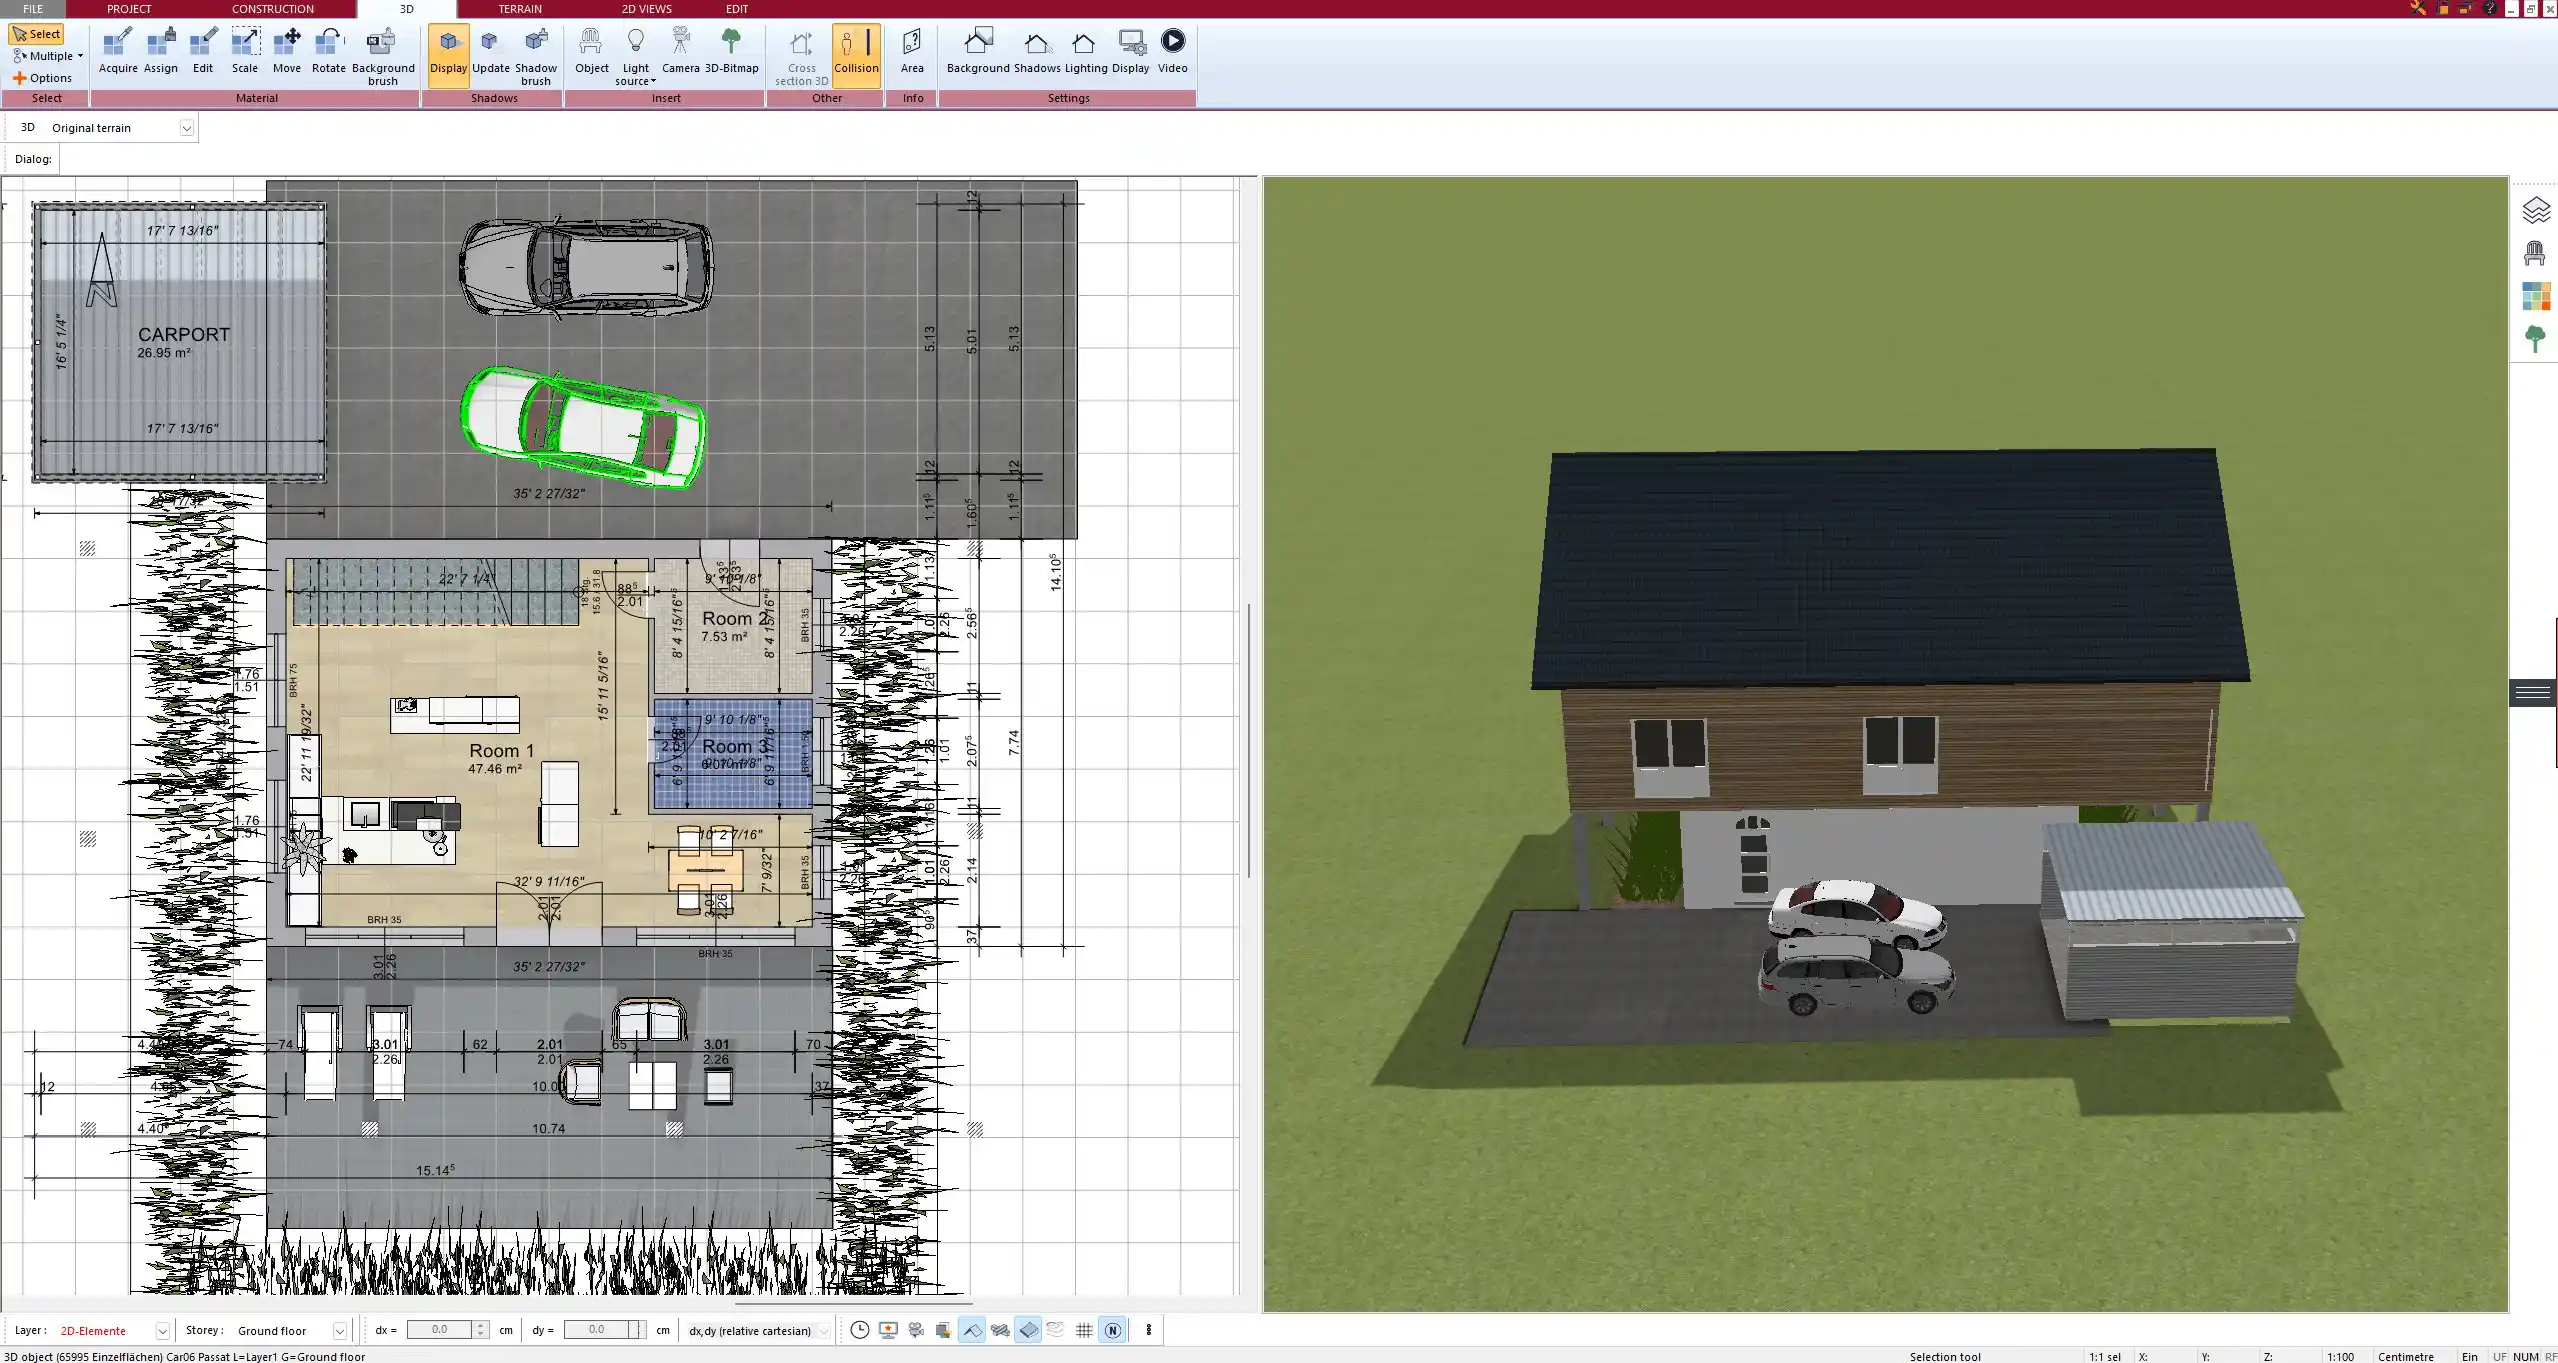
Foundation and exterior walls of a stone home shown during the early design phase in Plan7Architect
Exporting and Using Your Floor Plan
After you’ve completed the layout, Plan7Architect lets you export the entire project in multiple formats:
PDF for printing or emailing floor plans
Image files for presentation or web uploads
DWG/DXF files for sharing with architects or authorities
If you need to submit plans for building permits, you can also generate scaled construction drawings including:
These files meet the technical requirements in most regions, and the software allows you to adjust settings for local standards.
Compatibility with International Standards
Whether you work with metric or imperial units, Plan7Architect has you covered. You can set your preferred unit system before you start or change it at any time during the project. This means users in the United States, Canada, Europe, Australia, and beyond can all work without needing to convert measurements manually.
The wall composition system and export options are flexible enough to meet regional building norms, and additional details like insulation layers or wall materials can be customized per local climate and regulation.
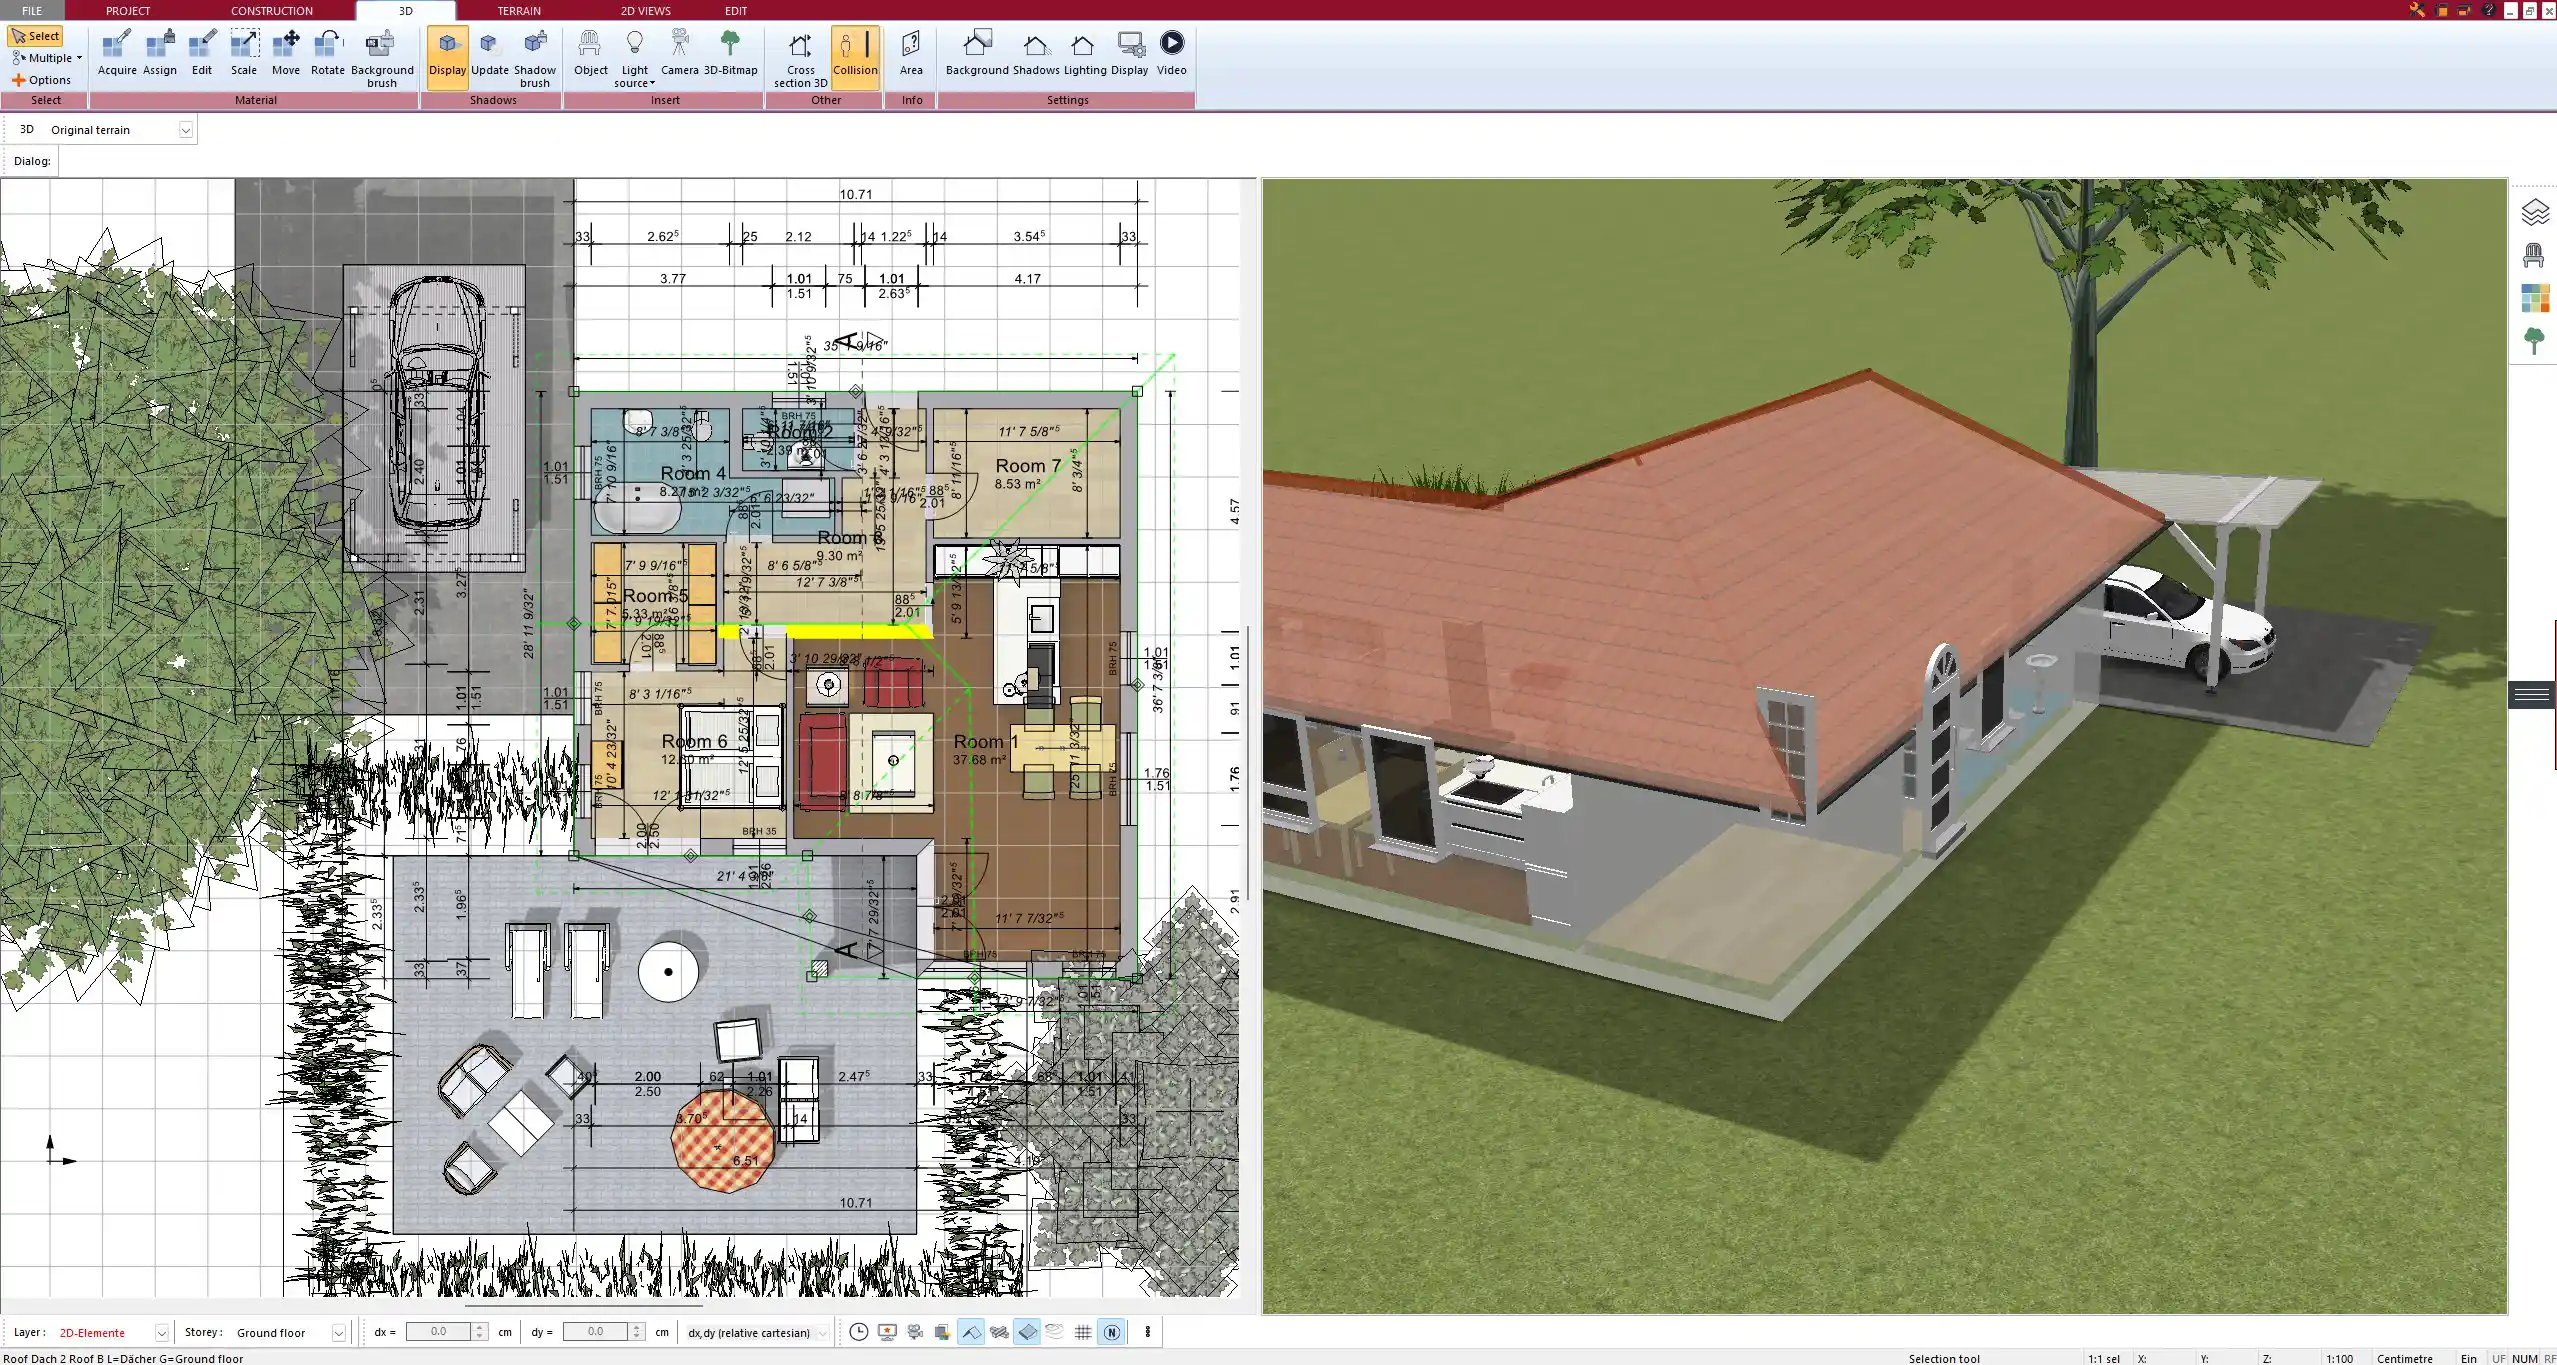
Permit-ready export view Floor plan and elevation of a stone house project designed in Plan7Architect.
Frequently Asked Questions
Can I plan a stone house extension or renovation?
Yes. Plan7Architect supports multiple layers, allowing you to mark existing structures, new additions, and demolition zones. I often use a dedicated layer to draw demolition walls in a separate color or line style. This is ideal for renovation or extension planning.
Can I start from a scanned sketch or blueprint?
Yes. You can import an image file (such as a scanned blueprint) and use it as a tracing background in the 2D floor plan view. Then, draw over it with Plan7Architect tools to recreate the layout in digital form. This is particularly useful for converting hand-drawn stone house layouts into editable floor plans.
Does the software simulate realistic stone textures?
Yes. The 3D view displays stone surfaces with light, depth, and shadow for an authentic look. You can also control joint size, surface gloss, and texture scaling. If needed, you can even import custom stone textures.
Can I measure the area of stone walls?
Yes. You can click on any wall and view surface area, wall length, and thickness. If you want a full list of room areas, that’s also available in the Pro version. For more specific measurements like façade area or stone surface, you can use the manual measurement tool.
Tip: If you’re ordering stone cladding or blocks, use the surface area measurement tool to calculate how much material you’ll need. This saves both time and budget during the construction phase.
You don’t need any prior experience because the software has been specifically designed for beginners. The planning process is carried out in 5 simple steps:
1. Draw Walls
Create your 2D floor plan by accurately drawing and adjusting rooms and walls for your home design.
2. Windows & Doors
Optimize your space layout with perfectly fitting door and window elements.
3. Floors & Roof
Visualize different levels and roof types for your home design.
4. Textures & 3D Objects
Choose materials and textures to customize floors, walls, and 3D objects individually for a realistic representation of your design.
5. Plan for the Building Permit
Create professional construction drawings with elevations, sections, and complete plan compilations.
6. Export the Floor Plan as a 3D Model for Twinmotion
Visualize your project with cutting-edge 3D technology and create high-quality image renderings and videos using Twinmotion by Epic Games.
– Compliant with international construction standards