To draw a bathroom floor plan with Plan7Architect, you don’t need to be a professional architect or interior designer. The software is designed to make the process intuitive and accessible, even for private users with no CAD experience.
Start by opening the Plan7Architect software and choosing either a blank project or importing an existing floor plan if your bathroom is part of a larger remodeling or building project. You can draw walls freely using the room-shape tools or select from predefined bathroom templates.
You’ll be working in 2D initially, placing walls, defining the shape of the room, and adjusting measurements. All dimensions can be entered manually using either European (cm, meters) or American (inches, feet) units—Plan7Architect allows you to switch units at any time, which is extremely helpful if you’re working with international construction teams or sourcing materials from different regions.
Add walls and place doors and windows using the drag-and-drop interface. Each element snaps into place, and you can easily move or rotate components. Once your structure is defined, you can start furnishing it with bathroom elements from the built-in catalog—these include toilets, sinks, bathtubs, walk-in showers, towel racks, and more.
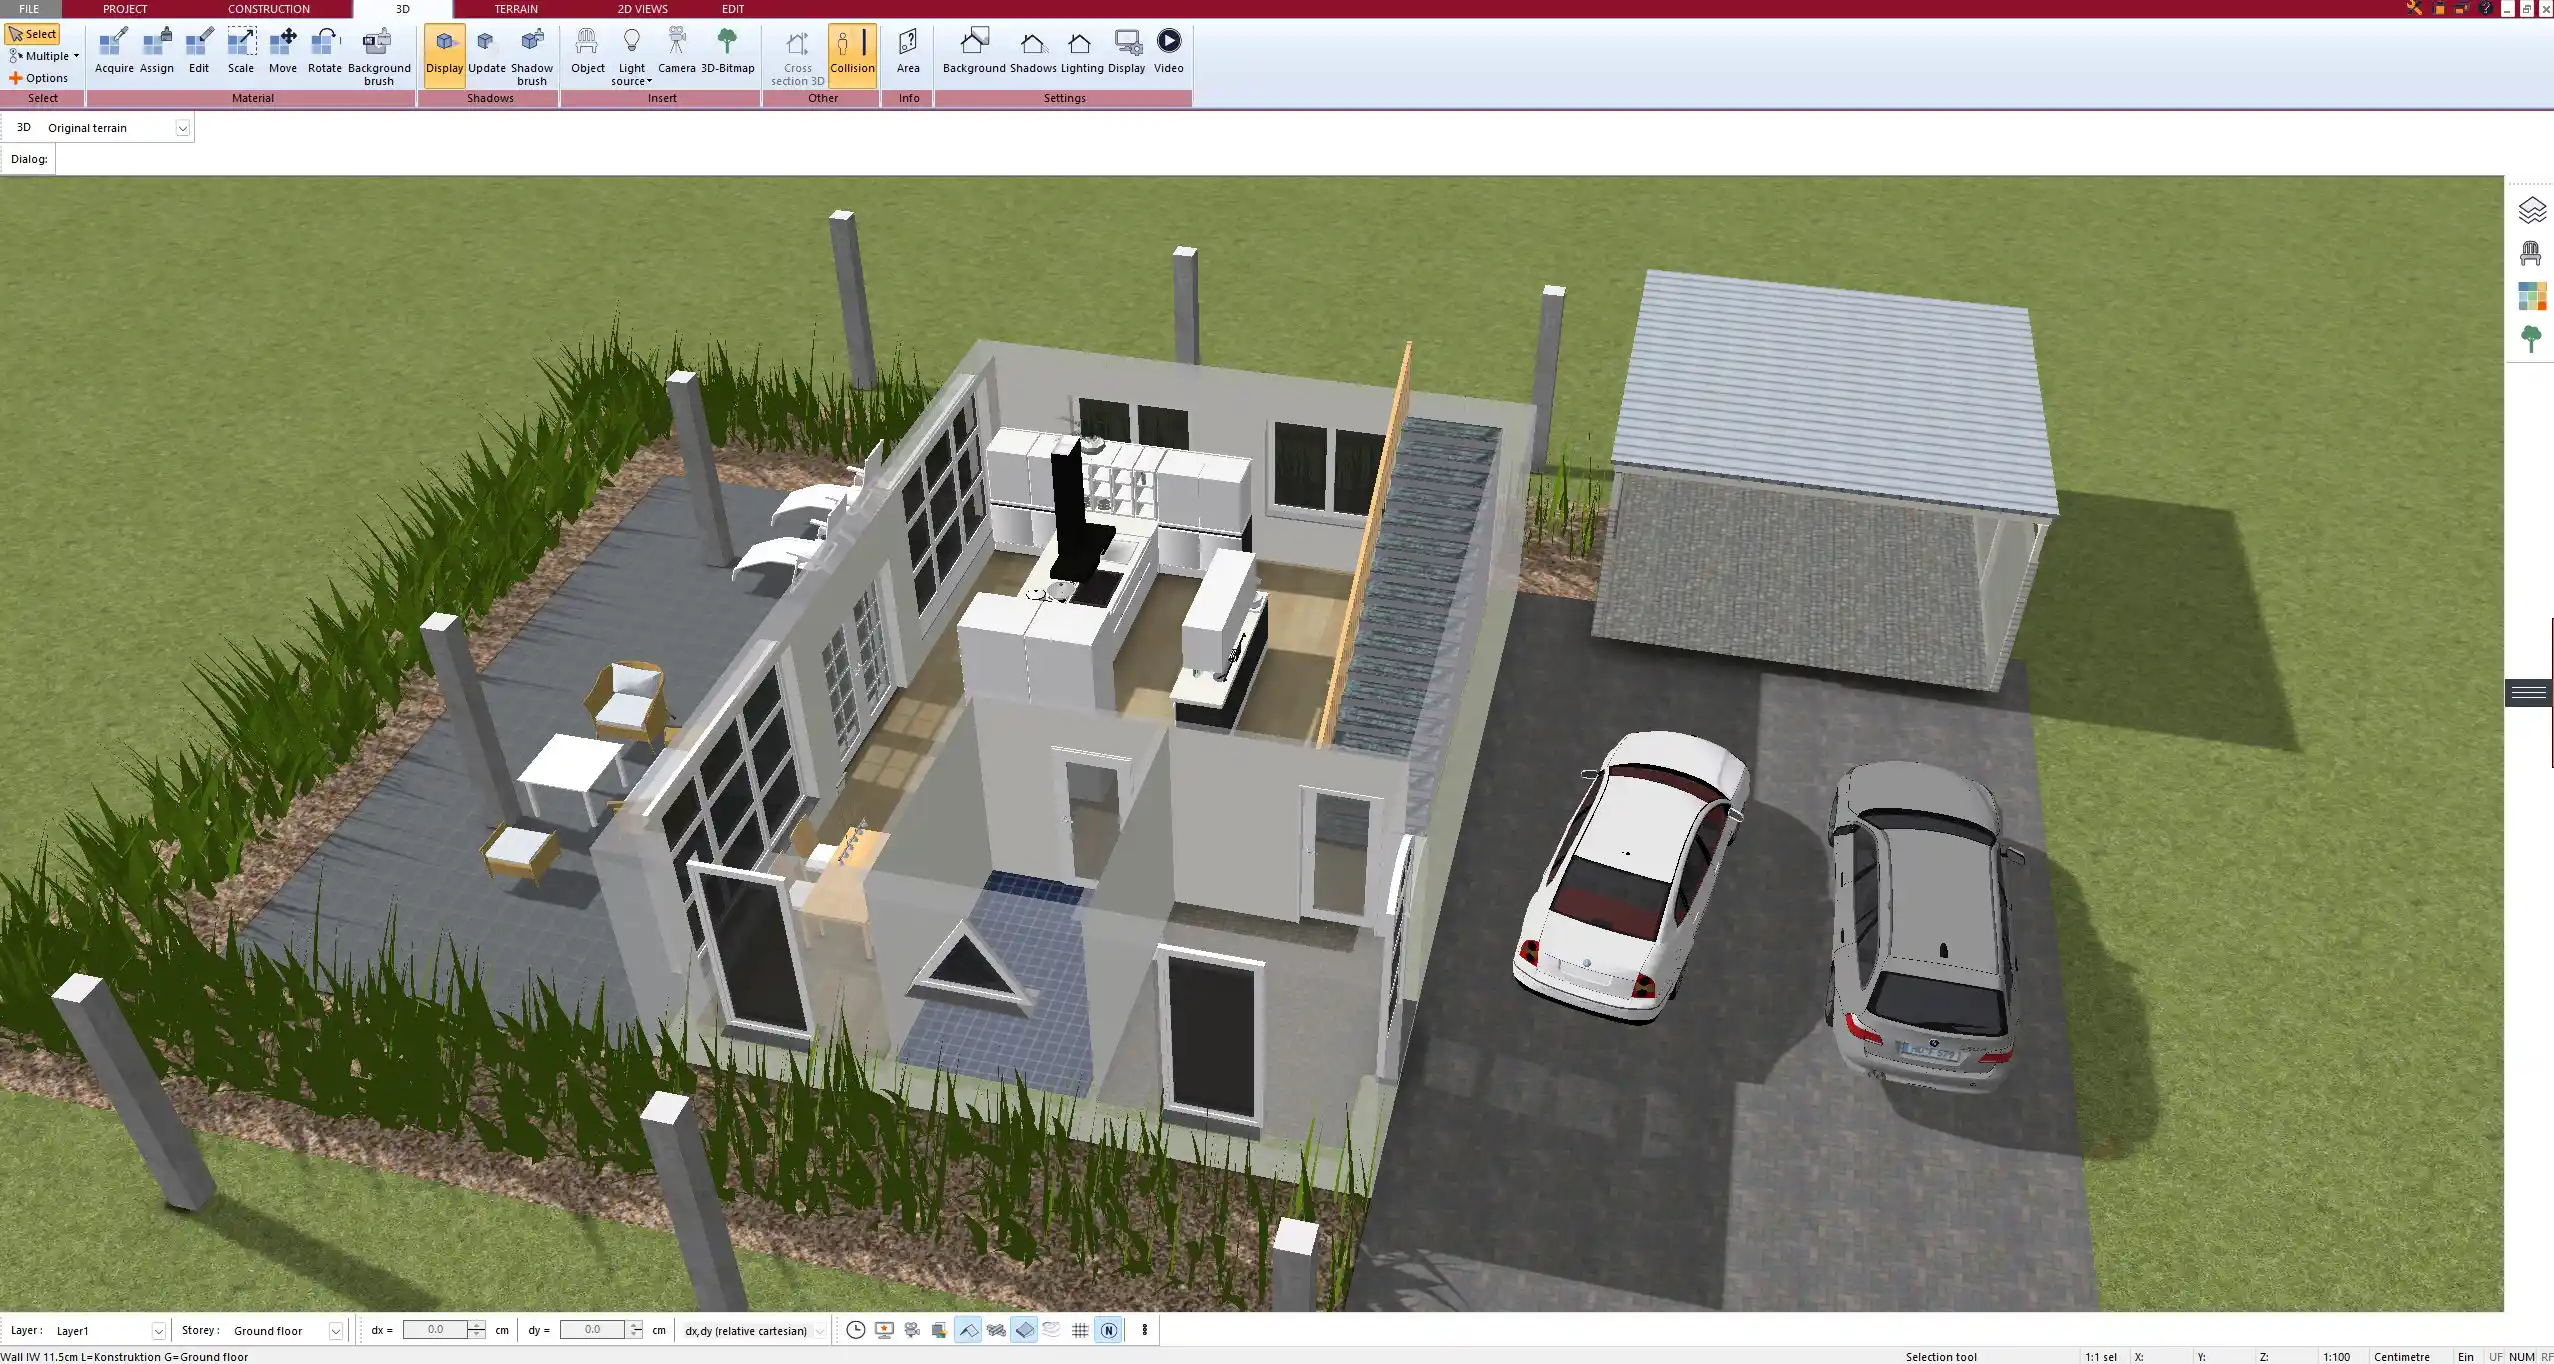
Switching to 3D view allows you to instantly visualize the layout, check for proper spacing and flow, and ensure everything is functional and visually appealing.
Why It’s Important to Plan Your Bathroom Layout Carefully
Bathroom planning combines aesthetics, usability, safety, and functionality in a relatively small space. Every square centimeter or inch matters. A poorly designed bathroom layout can quickly become a daily frustration.
Here are a few critical reasons why careful planning matters:
-
Plumbing placement: Fixtures should align with water and waste pipes whenever possible to avoid expensive rerouting.
-
Space optimization: Ensures free movement even in small bathrooms.
-
Safety and accessibility: Essential for families, elderly users, or inclusive design.
-
Resale value: A well-planned bathroom increases property value and buyer appeal.
-
Ventilation and lighting: Poor air circulation leads to mold; natural light improves user comfort.
Step-by-Step Guide to Bathroom Planning with Plan7Architect
Define Room Size and Walls
Start by drawing the room shape and defining the bathroom’s overall dimensions. You can enter exact values manually or use your mouse to sketch walls. Plan7Architect allows input in both centimeters/meters and inches/feet, depending on what you’re used to.
Common bathroom sizes:
| Bathroom Type | Approx. Size (Metric) | Approx. Size (Imperial) |
|---|---|---|
| Small WC | 1.5 x 1.2 m | 5 x 4 ft |
| Standard bathroom | 2.5 x 2 m | 8 x 6.5 ft |
| Master bathroom | 3.5 x 3 m | 11.5 x 10 ft |
If your bathroom is part of a renovation, measure wall lengths, ceiling height, and existing plumbing carefully before recreating the space in Plan7Architect.
Position Doors and Windows
Doors should open without blocking key areas like the toilet or sink. Plan7Architect allows you to choose between standard doors, sliding doors, or even pocket doors. Windows should be placed to allow natural light and ventilation—especially important in bathrooms without mechanical ventilation systems.
Tip:
Use sliding or pocket doors in tight spaces to free up wall clearance and improve movement.
Add Fixtures and Fittings
In the object catalog, you’ll find all essential bathroom elements. Drag and drop them into the room, then rotate, resize, or reposition them as needed.
Typical fixtures to include:
-
Toilet
-
Sink or double vanity
-
Shower (walk-in or enclosed)
-
Bathtub (freestanding or built-in)
-
Mirror, lighting, towel rack
Every object comes with customizable dimensions. This allows you to match the exact sizes of the fixtures you plan to buy or already have.
Use Zones for Functionality
Plan7Architect helps you define wet and dry zones visually. Wet zones include showers and bathtubs, while dry zones include vanities and storage. Separating these areas improves durability and cleaning ease.
Wet zone planning checklist:
-
Floor drain positioning
-
Non-slip tiles
-
Splash protection for adjacent dry areas
Zoning is especially useful for barrier-free bathrooms or those designed for elderly or limited-mobility users.
Optimize for Plumbing and Electrical
Place major fixtures like toilets and showers close to existing plumbing stacks. This simplifies installation and minimizes renovation costs.
Plan7Architect lets you mark plumbing and electrical installations directly on the floor plan for clarity. Don’t forget to reserve space for:
-
Wall sockets near vanities (for hairdryers or electric razors)
-
Light fixtures and mirror lighting
-
Floor heating or heated towel rails
Tip:
Mark water pipe and electrical line routes clearly on your plan to avoid surprises during construction.
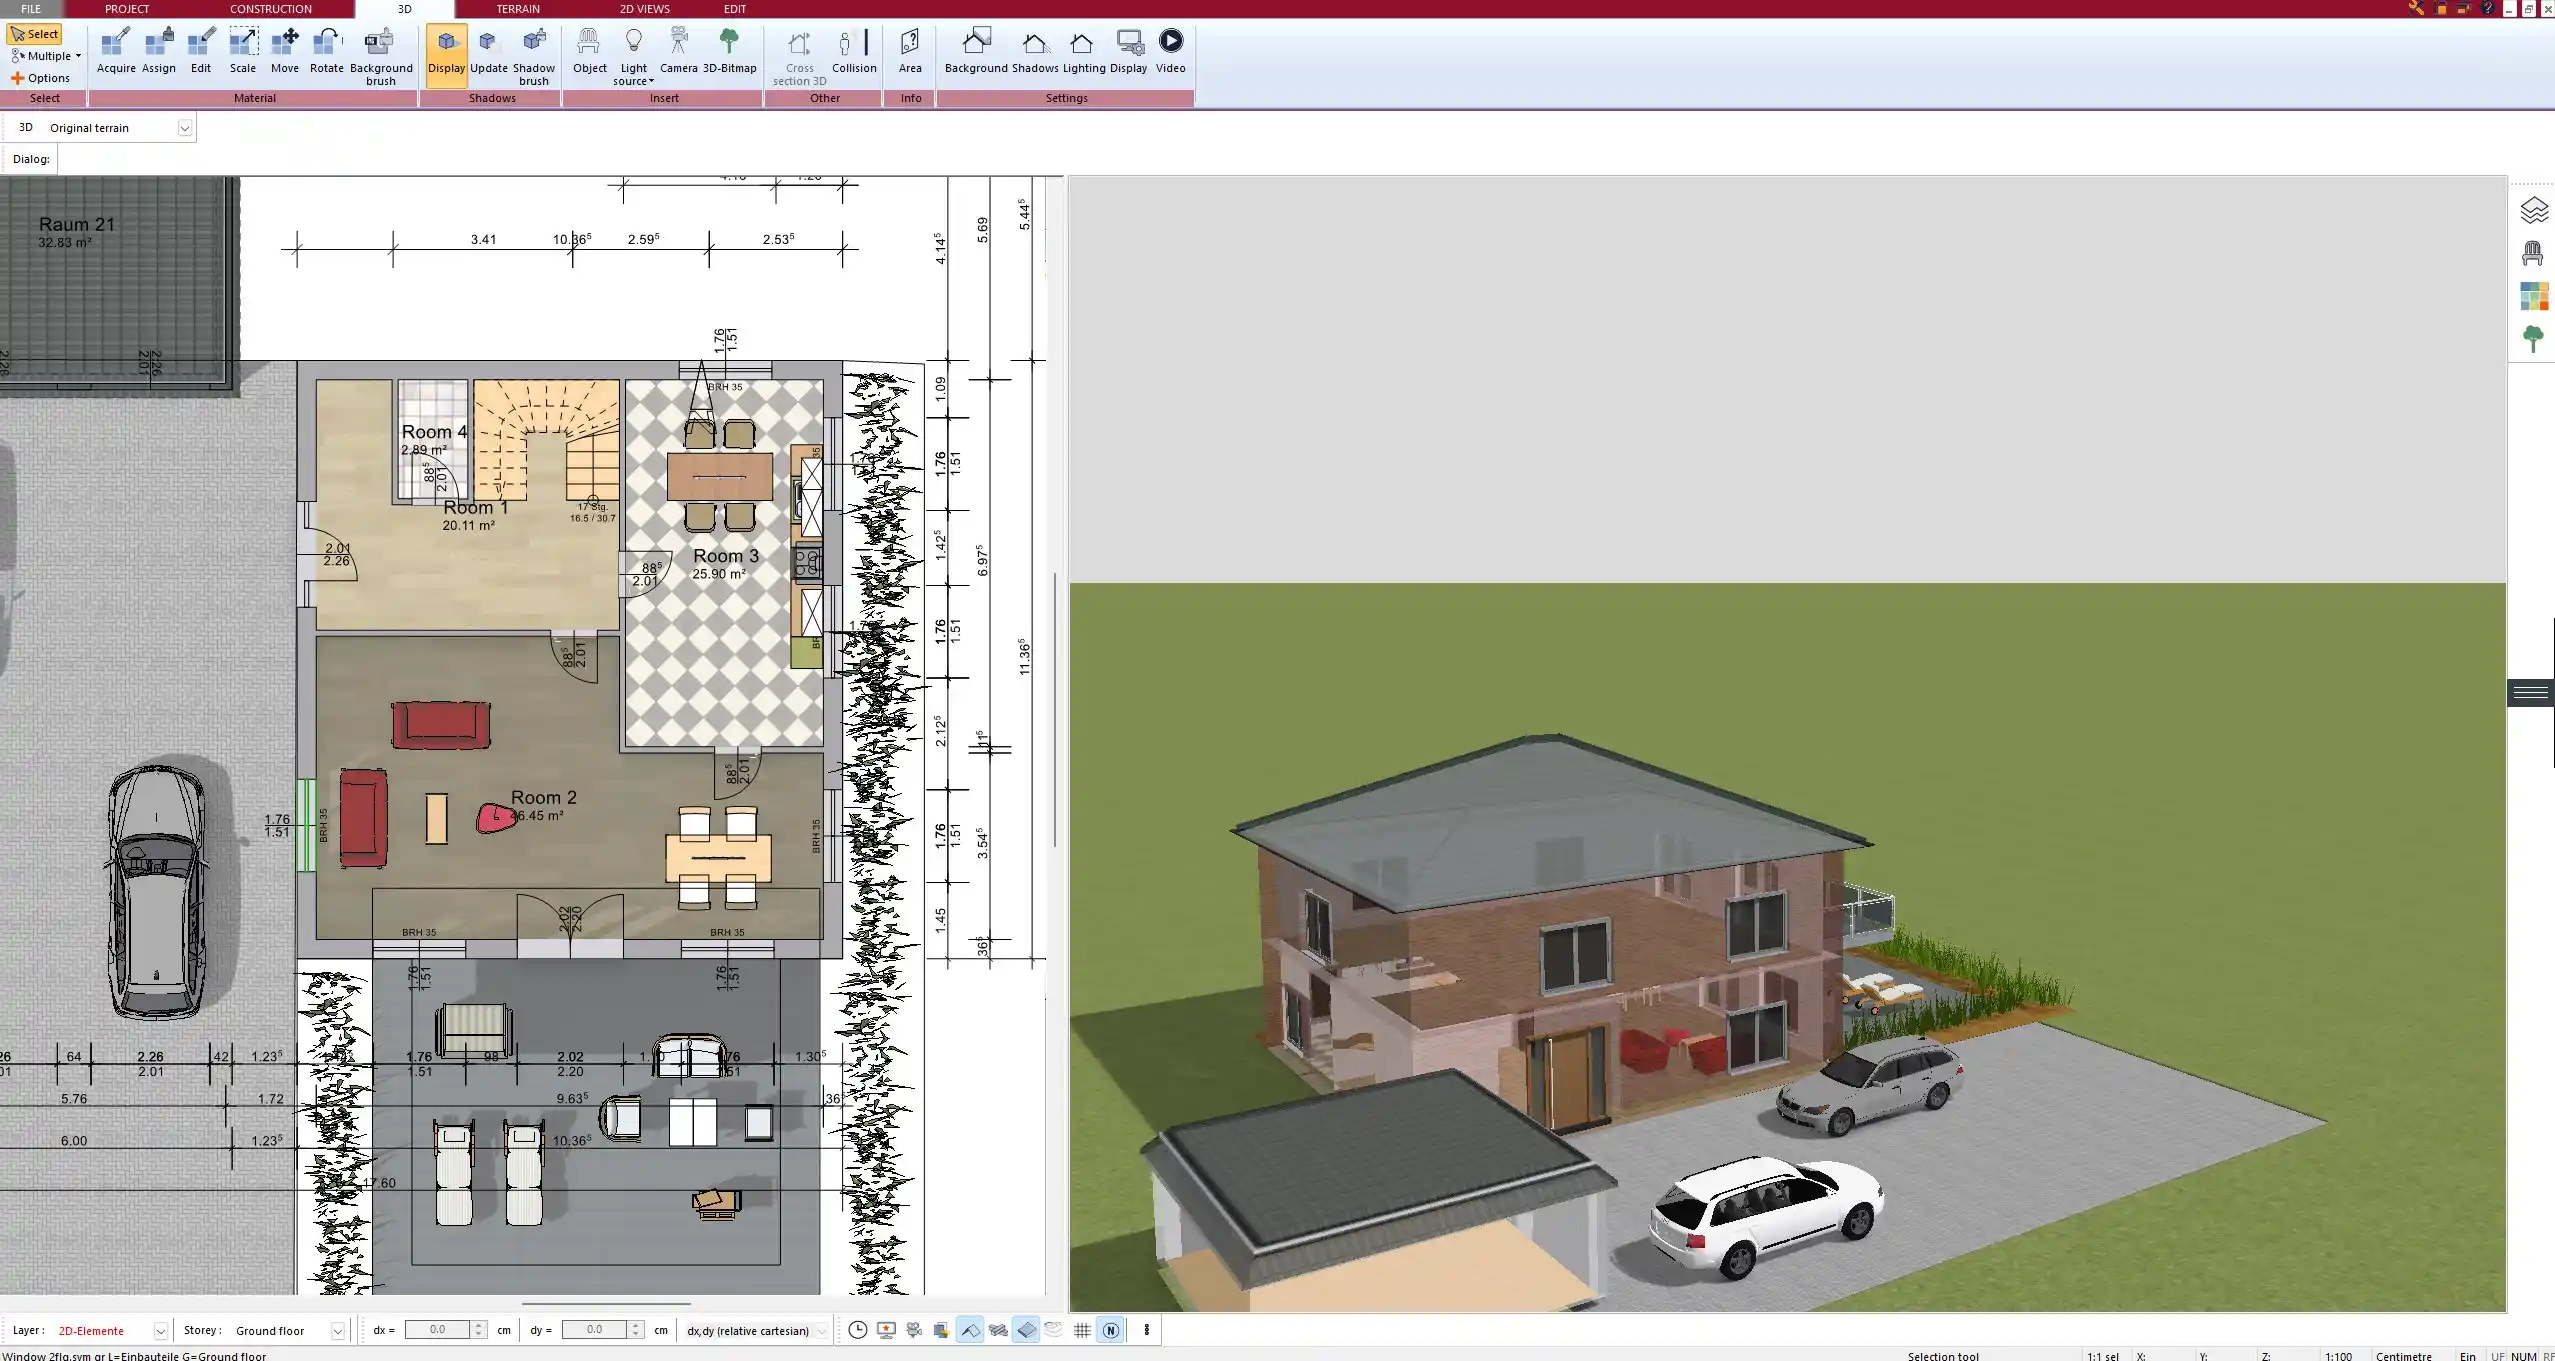
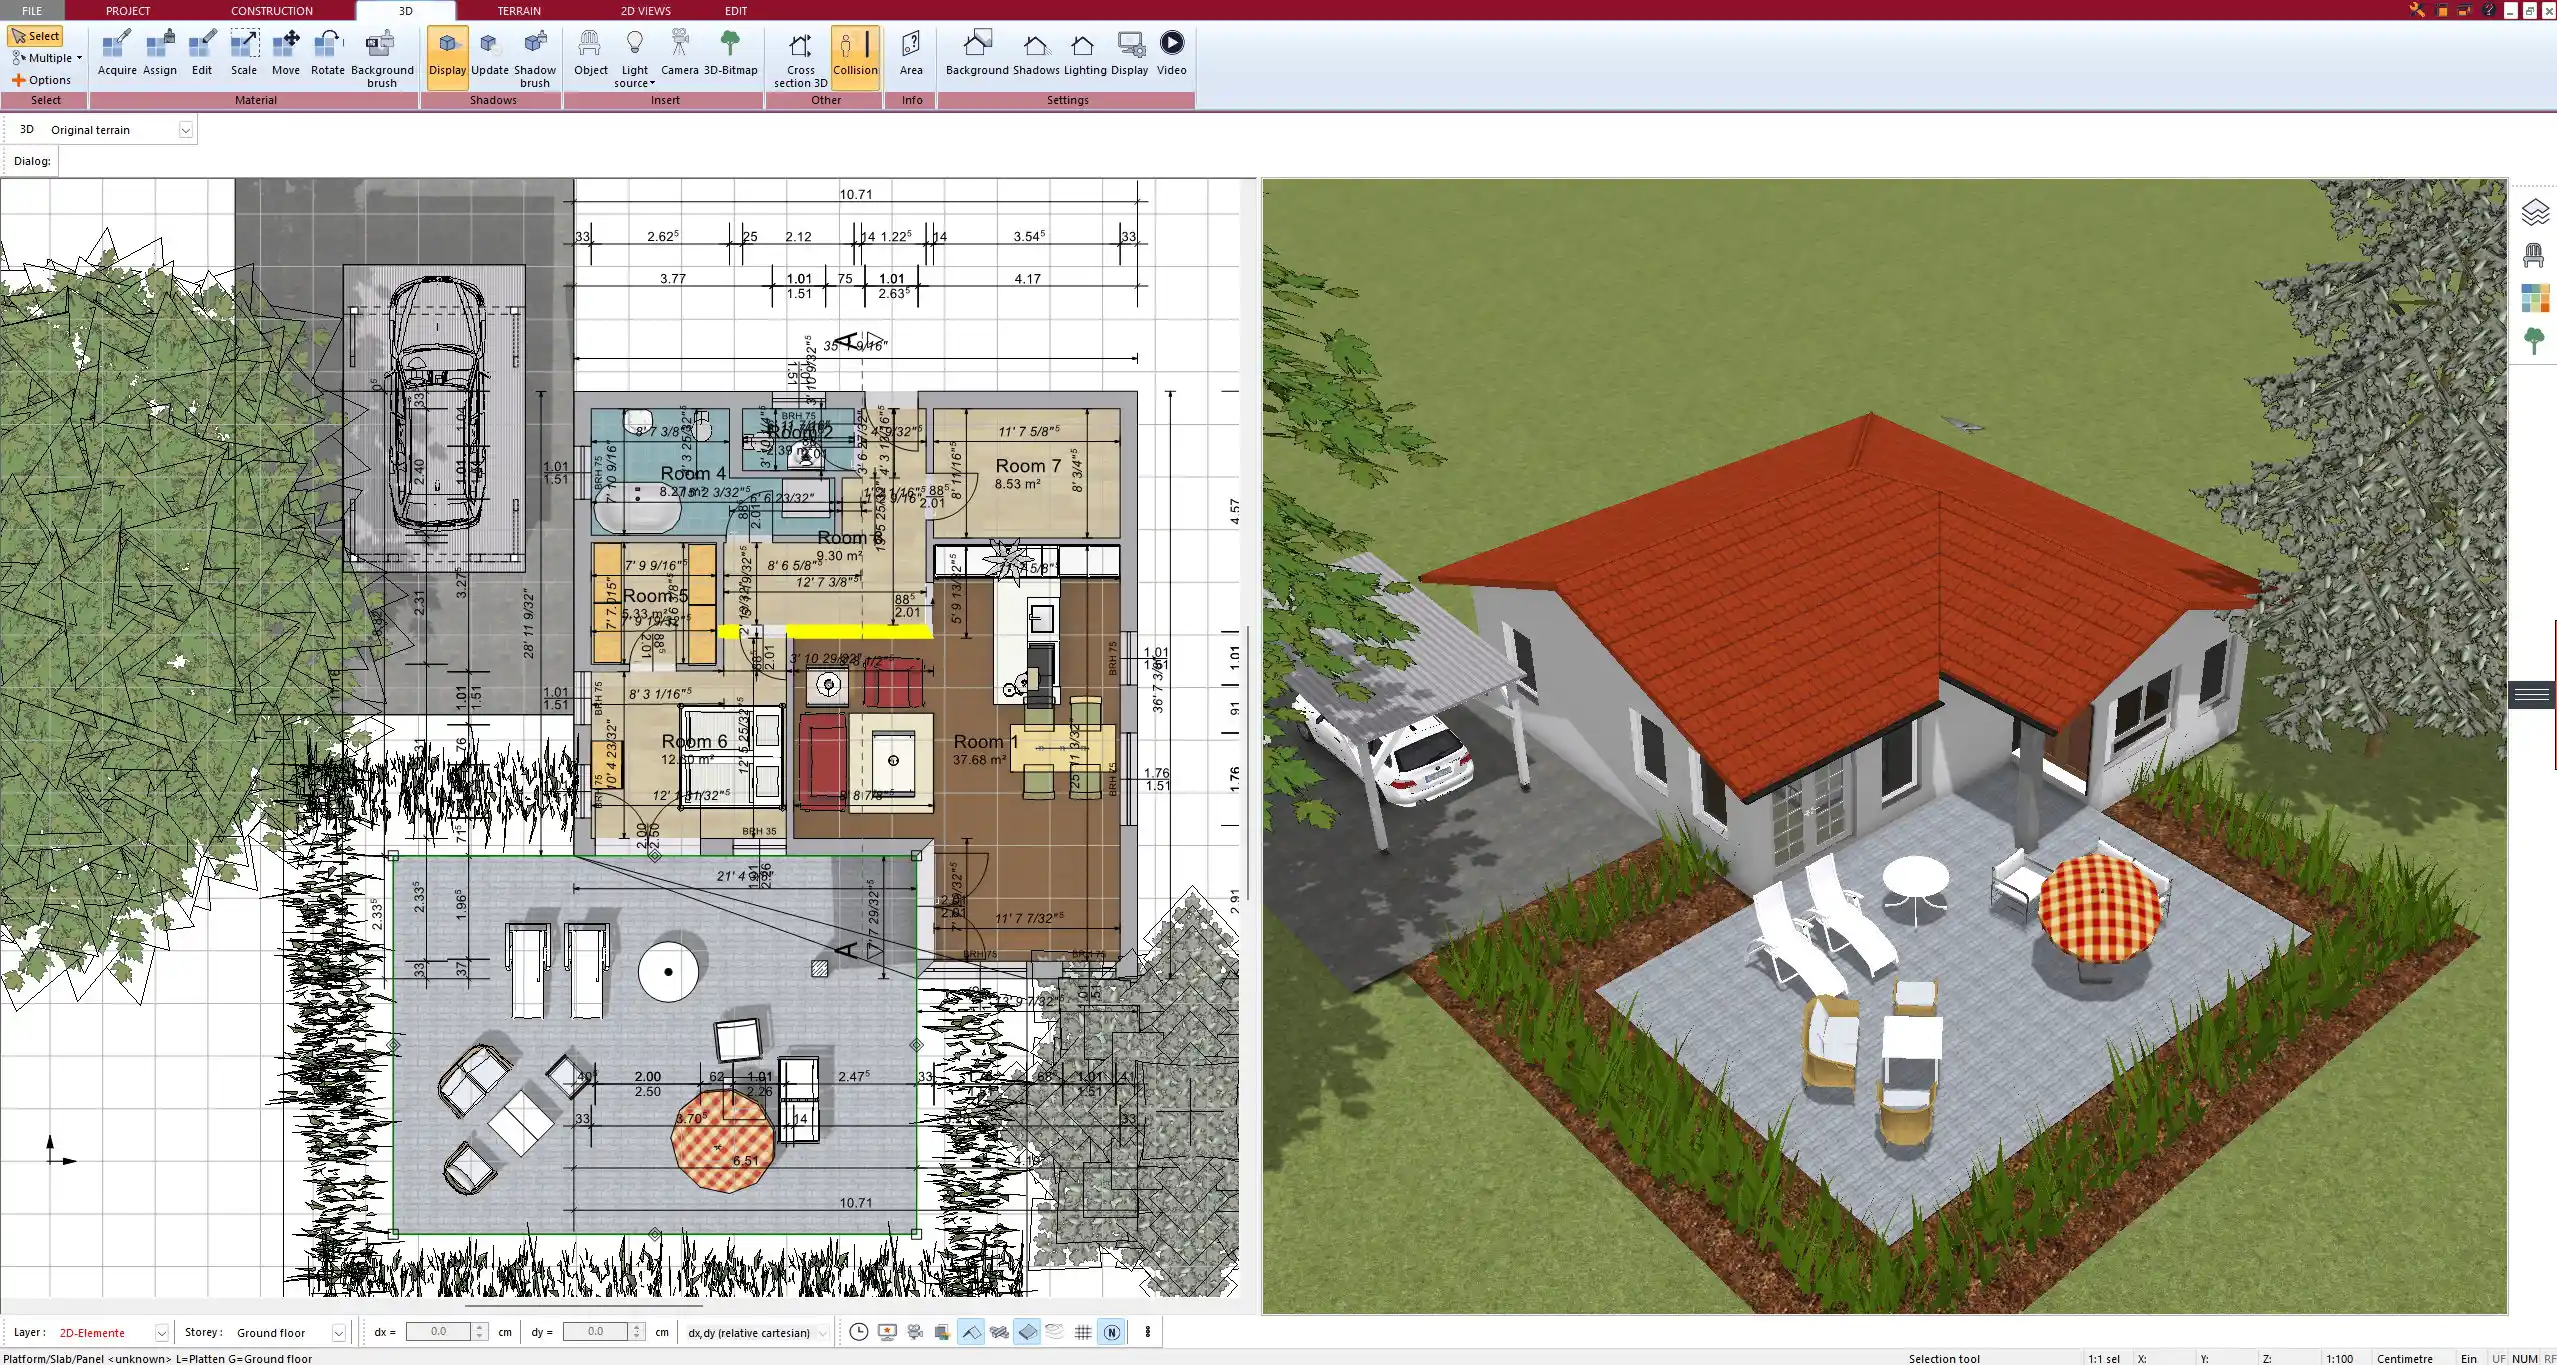
Working in 2D and 3D for Better Accuracy
The strength of Plan7Architect lies in its seamless switch between 2D precision planning and 3D visualization. In 2D mode, you can define exact wall placements, dimensions, and object positions. In 3D mode, you walk through your design virtually.
This combination lets you:
-
Spot layout issues early (e.g., narrow walking paths)
-
Test different color and material combinations
-
Validate sight lines, lighting, and visual balance
You can also export a 3D walkthrough or save still images to present your plan to professionals or family members.
Design Tips for Small and Large Bathrooms
Small Bathrooms
In compact bathrooms, every decision counts. I’ve found these strategies especially helpful:
-
Use wall-hung toilets and vanities to open floor space
-
Choose sliding doors instead of swinging doors
-
Install a corner sink or shower to save space
-
Use mirrors to create visual openness
Large Bathrooms
With more space, you can introduce elements that add comfort and luxury:
-
Double vanities for shared usage
-
Freestanding bathtubs as design highlights
-
Separate shower and bathtub zones
-
Seating or storage nooks
Use symmetry and balanced proportions to keep the layout elegant and functional.
Tip:
Even in large bathrooms, be cautious not to waste space. Group functions logically to maintain efficient plumbing and lighting routes.
American vs. European Standards – What to Know
Whether you’re planning in feet and inches or in centimeters and meters, Plan7Architect supports both systems. This is especially useful if you’re referencing fixture dimensions from different regions or communicating with contractors using a different measurement system.
While general space requirements may differ slightly—such as toilet clearance or minimum shower sizes—the software gives you the flexibility to plan according to your local standards.
Key benefits:
-
Easily switch between metric and imperial
-
Enter values manually or resize objects visually
-
Avoid confusion when planning internationally
Exporting & Sharing Your Bathroom Plan
Once your design is finalized, you can export your plan in various formats:
-
2D floor plan: Print or save as PDF for permits or documentation
-
3D model: Export as image or walkthrough video
-
Project file: Share with professionals or other Plan7Architect users
This makes it easy to collaborate with plumbers, tilers, and electricians or simply keep the plan for your own records.
You can also include dimensions, annotations, material lists, and object tags, which helps with budgeting and procurement.
Final Thoughts – Why Plan7Architect is Ideal for Bathroom Design
Based on my own use, Plan7Architect is an ideal tool for bathroom planning. It combines precision, simplicity, and flexibility in one package. Whether you’re designing a compact guest WC or a full master bathroom, the software offers everything you need to create a functional and attractive layout—without needing professional training.
It supports both imperial and metric systems, includes thousands of real-world objects, and allows for instant 3D visualization. With Plan7Architect, you’re in control of your design from the first wall to the final detail.
If you’re serious about getting your bathroom layout right the first time, this is the tool to use.
Plan your project with Plan7Architect

Plan7Architect Pro 5 for $99.99
You don’t need any prior experience because the software has been specifically designed for beginners. The planning process is carried out in 5 simple steps:
1. Draw Walls

2. Windows & Doors

3. Floors & Roof

4. Textures & 3D Objects

5. Plan for the Building Permit

6. Export the Floor Plan as a 3D Model for Twinmotion

- – Compliant with international construction standards
- – Usable on 3 PCs simultaneously
- – Option for consultation with an architect
- – Comprehensive user manual
- – Regular updates
- – Video tutorials
- – Millions of 3D objects available


