If you’re looking to design your own tiny house floor plan, the fastest and most professional solution I’ve personally worked with is Plan7Architect. With this software, you can create your own tiny house layout in 2D and 3D—without needing prior architectural experience. It’s intuitive, flexible, and designed to support small-scale living concepts like micro homes and container houses.
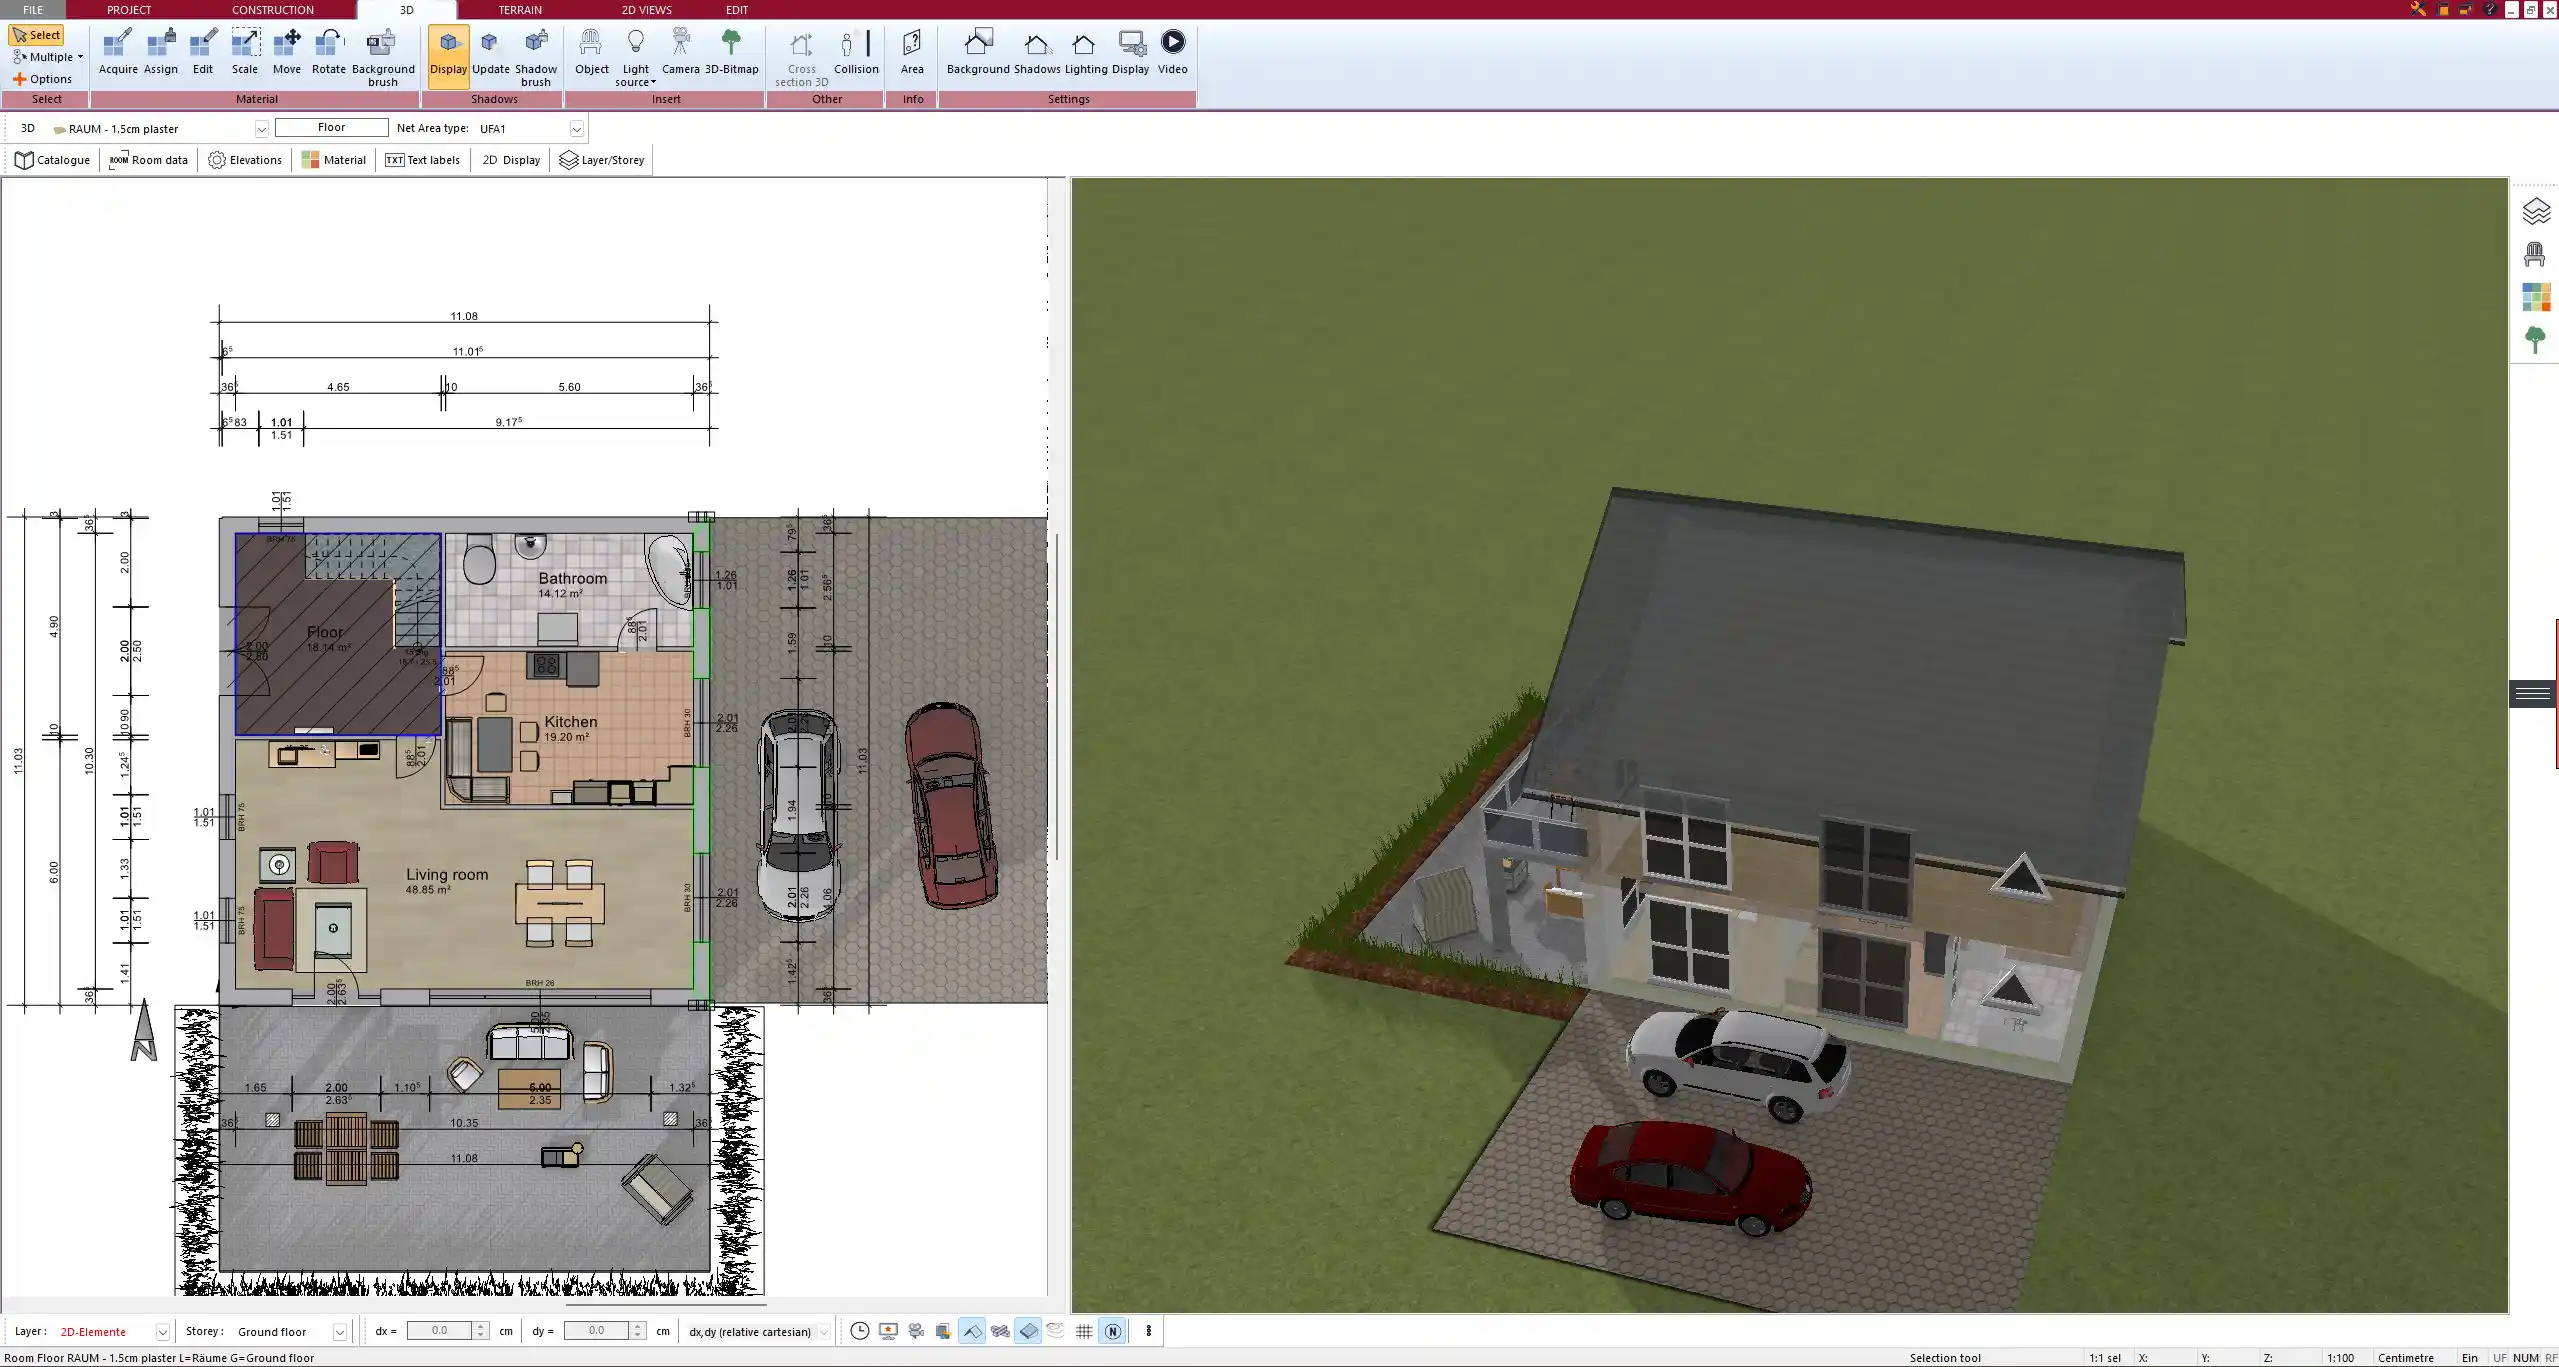
You can define the exact dimensions of your project, place walls, doors, and windows, arrange interior zones, and view everything in a photorealistic 3D view. Whether you’re planning a layout of 18 square meters or 40 square meters (approximately 194 to 430 square feet), Plan7Architect gives you precise control over every square centimeter or inch of space.
The software supports both metric and imperial units, so it works perfectly whether you’re used to meters or feet. You can switch between units at any time, making it ideal for users in Europe, North America, or anywhere else.
Key Features for Tiny House Planning with Plan7Architect
Optimized for Small-Space Design
Tiny house projects are all about making the most of minimal space. In Plan7Architect, you can work with very small layouts without compromising precision. You can zoom into details, place thin partition walls, and test different arrangements until every square meter (or square foot) works exactly the way you want.
The software also helps you simulate practical situations—like what happens when you open a cabinet, fold down a bed, or slide a door—by using real measurements and collision warnings. This is especially useful in tight spaces.
Features I use often when designing small spaces:
-
Real-time 3D view with exact spatial proportions
-
Adjustable ceiling heights and loft levels
-
Sliding and folding door templates
-
Flexible wall thickness settings
Flexible Measurement Units
Plan7Architect makes it easy to work internationally. You can switch between metric and imperial systems in the settings. This means you can draw in meters and centimeters or in feet and inches—depending on what’s more familiar or required for your project.
This is especially helpful when collaborating with contractors, clients, or suppliers across different countries. I’ve used the same file in both systems without losing accuracy.
Interior Design Integration
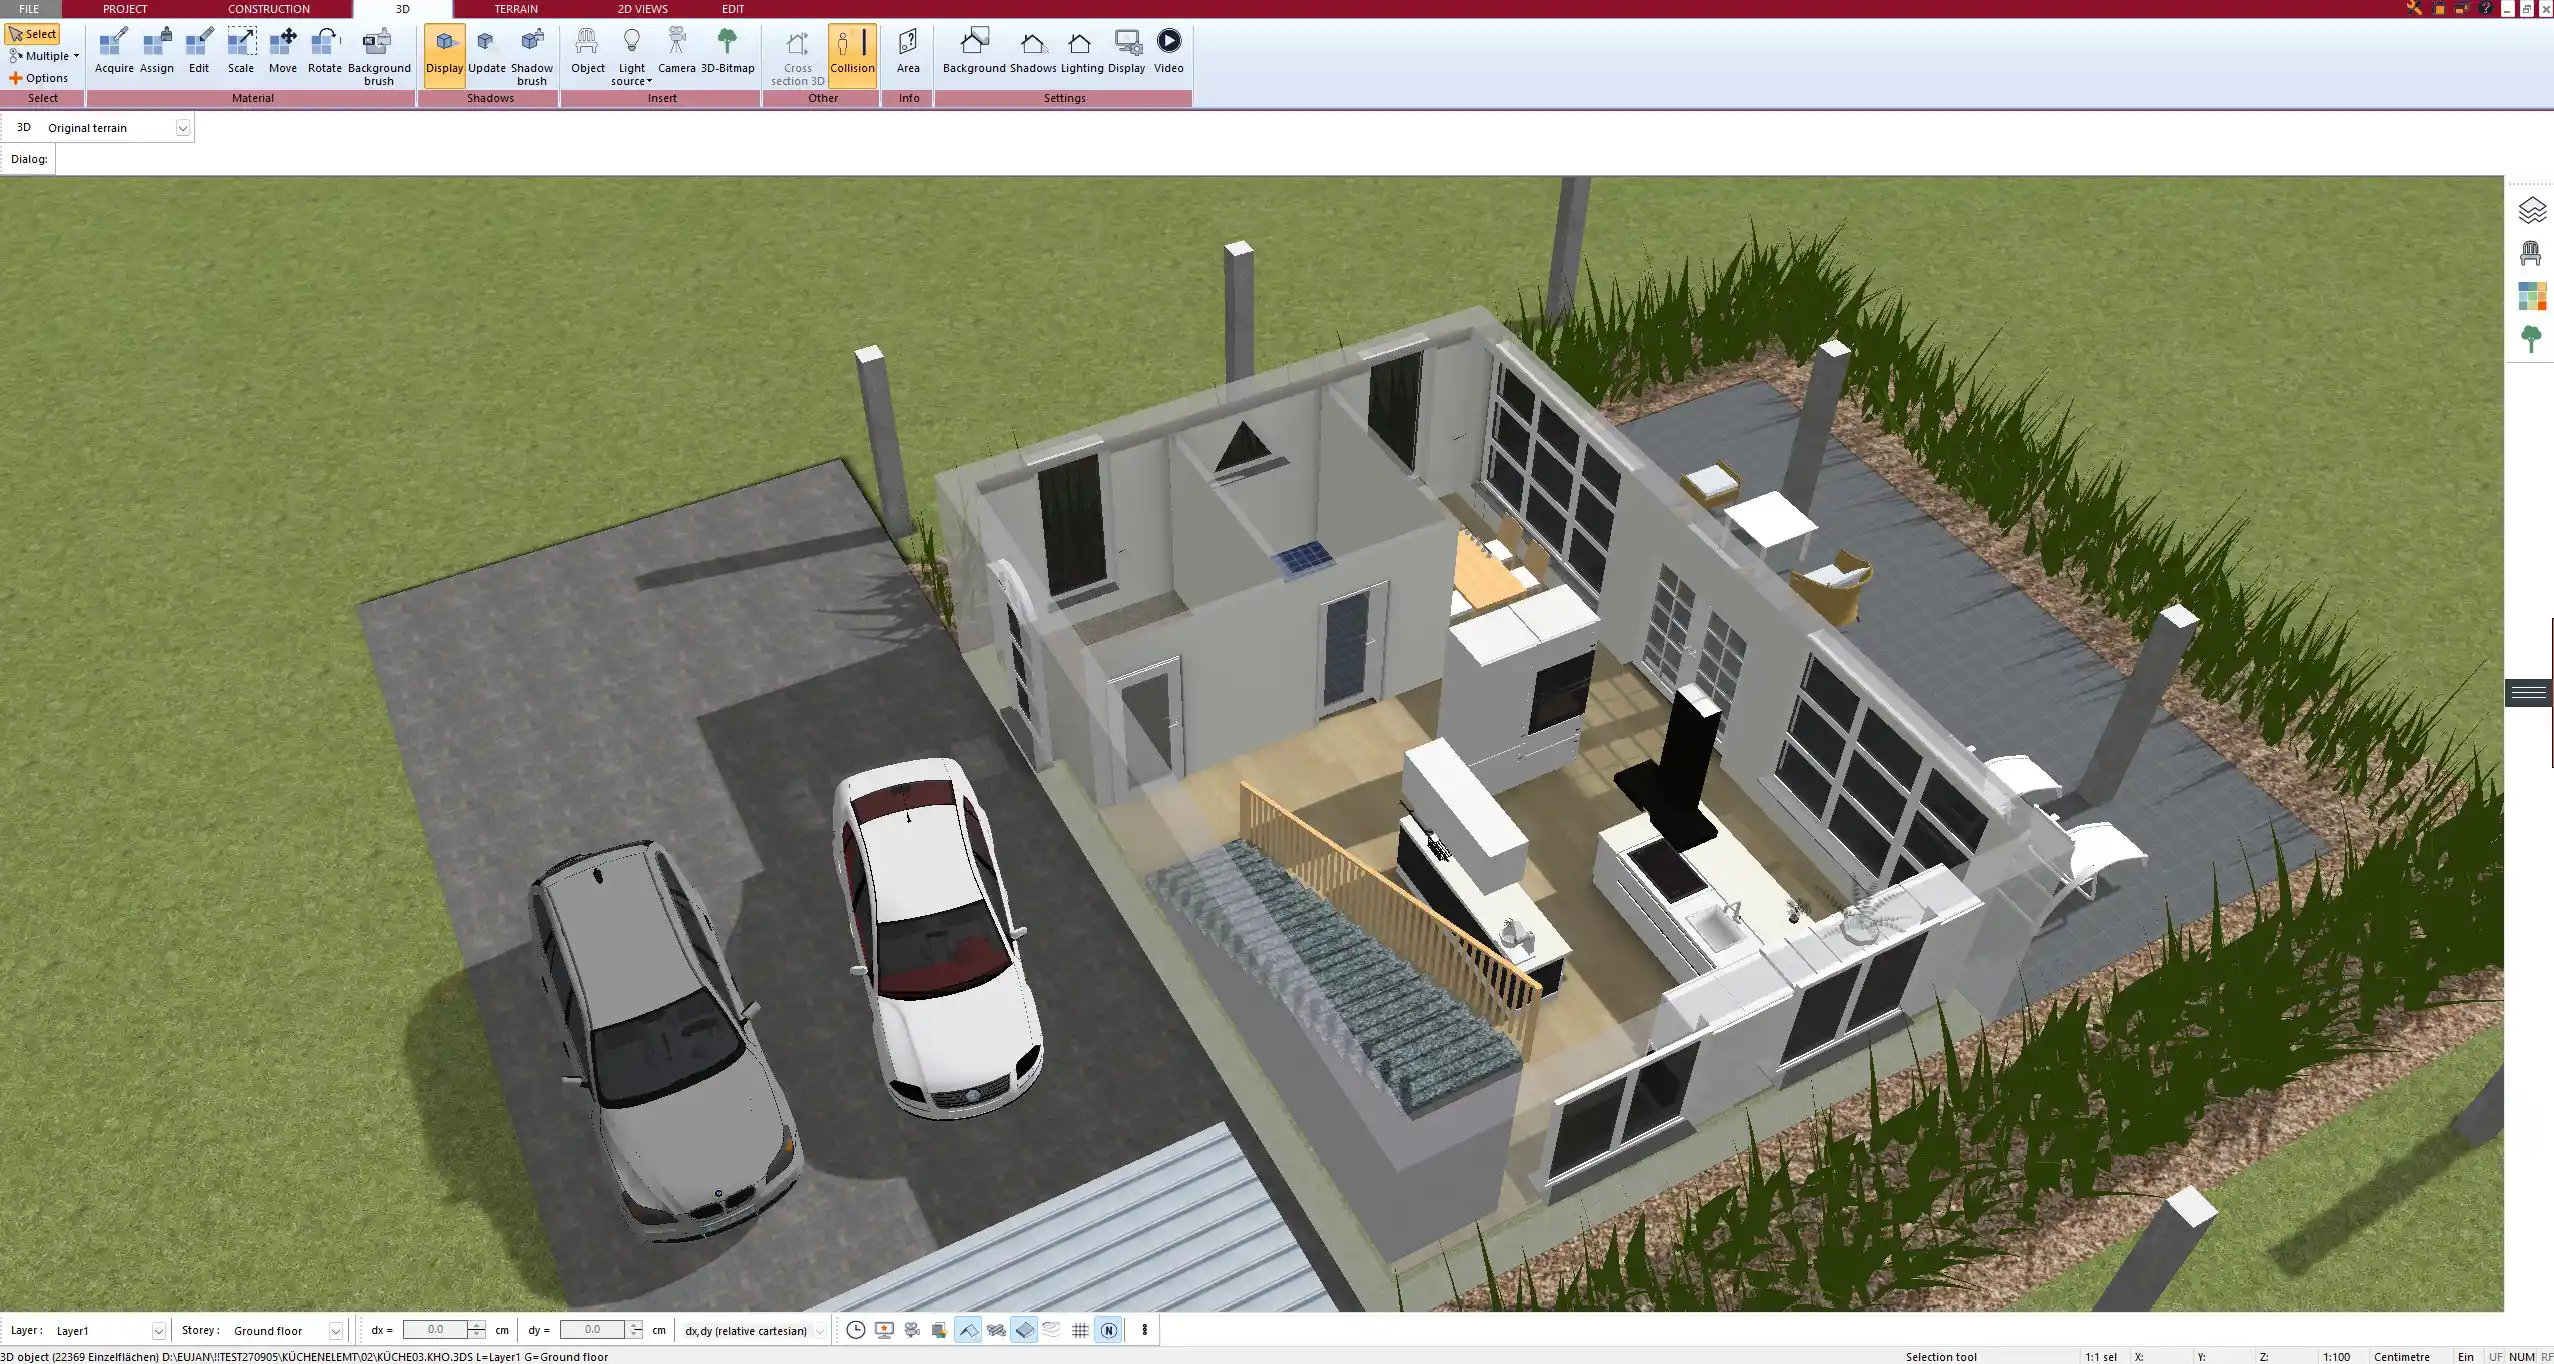
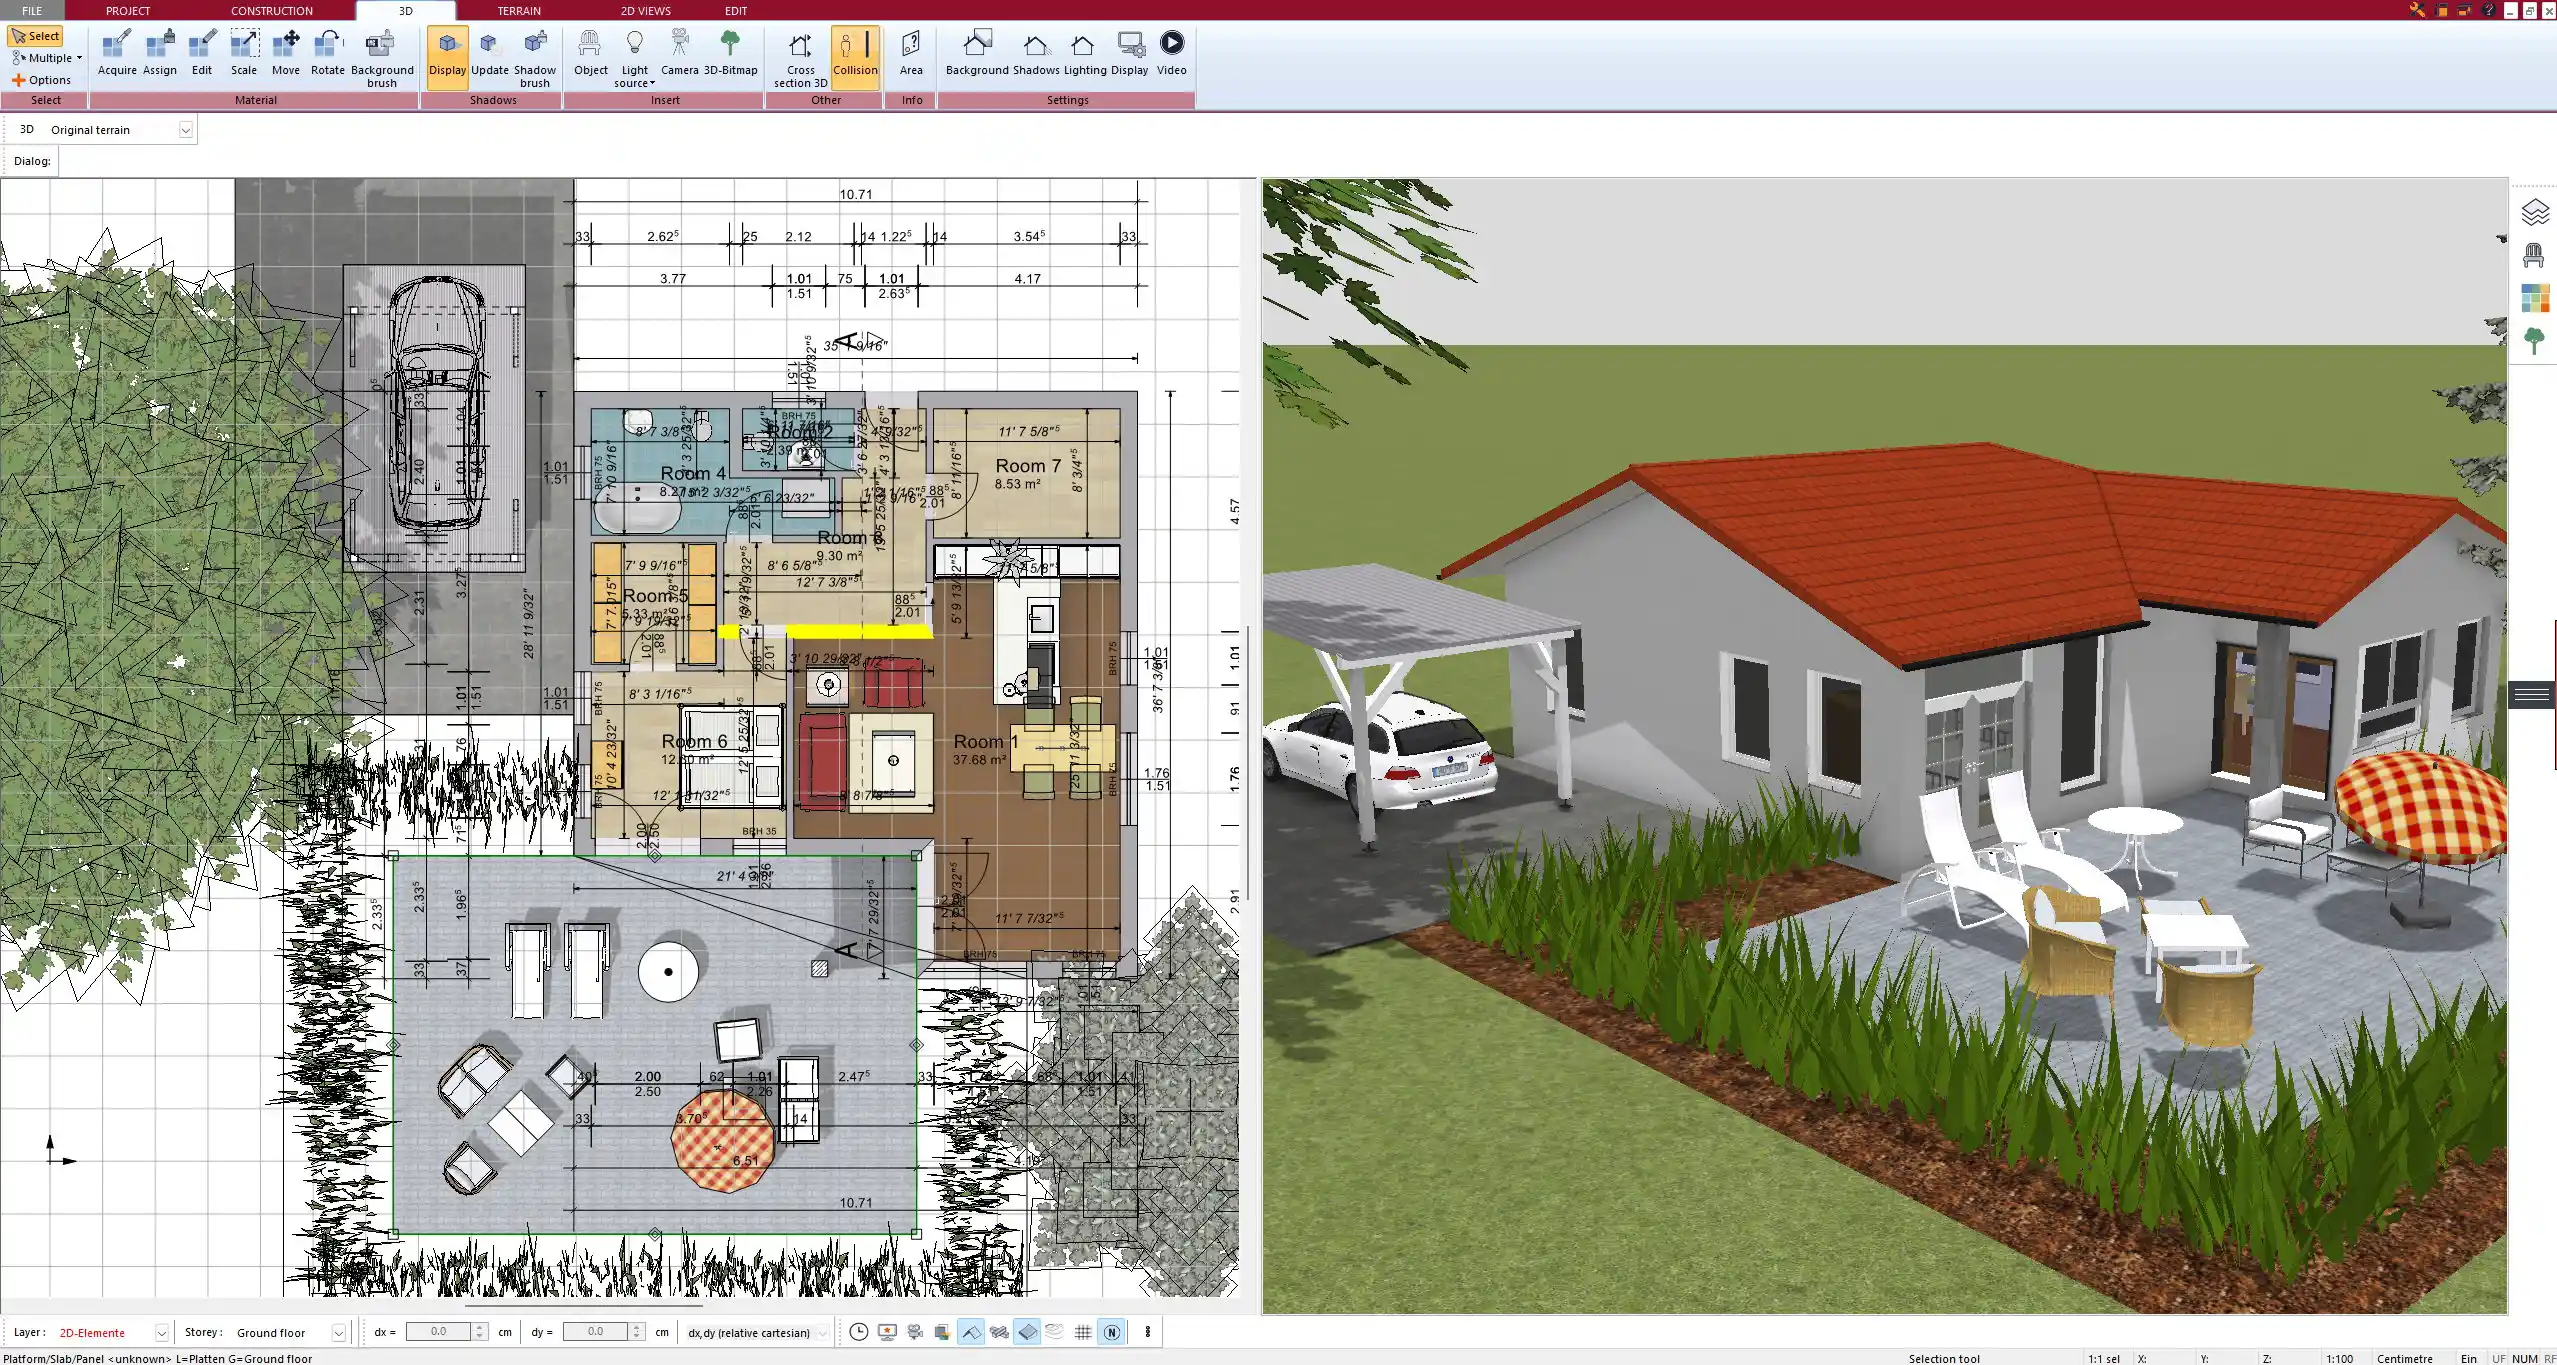
Once your floor plan is in place, you can move straight to the interior layout. Plan7Architect includes an extensive library of furniture, appliances, and fixtures specifically suited for small spaces. These are not just static icons—you can adjust their dimensions and placements freely.
You can simulate multifunctional zones, such as:
-
A living room that doubles as a bedroom with a fold-out bed
-
A kitchen area with compact appliances
-
Bathroom layouts with walk-in showers or corner sinks
The 3D view helps you visualize proportions, colors, materials, and walkways—before you commit to anything in real life.
Step-by-Step: How to Create a Tiny House Floor Plan
Step 1 – Define Dimensions
First, decide on the overall size of your tiny house. A common range is 18 to 40 square meters (194 to 430 square feet). In Plan7Architect, you simply enter these values as room dimensions and the program generates the exterior boundary.
You can set individual room sizes or keep an open-plan layout. Wall thickness can be adjusted to suit construction type (e.g. timber frame, container, or modular build).
| Example Layout Dimensions | Metric | Imperial |
|---|---|---|
| Small (Studio) | 18 m x 2.5 m | 59 ft x 8.2 ft |
| Medium (with loft) | 6 m x 5 m | 19.7 ft x 16.4 ft |
| Large (two zones) | 8 m x 5.5 m | 26.2 ft x 18 ft |
Step 2 – Place Doors, Windows, and Walls
Next, drag and drop interior walls, doors, and windows into your plan. You can choose from sliding, folding, or regular doors, depending on your concept.
Natural lighting plays a major role in tiny homes. With Plan7Architect, you can place large windows or skylights and preview how light falls into your space at different times of the day.
Tip: Use floor-to-ceiling windows on one wall to visually expand your living area.
Step 3 – Plan Multi-Use Zones
Tiny houses often require each area to serve more than one function. In Plan7Architect, I’ve created layouts where the dining table folds into a wall, the bed folds over a sofa, or the workspace disappears behind a sliding door.
You can design these zones freely and then test them in 3D to see how much space is left for movement or storage. Loft areas can be added as second-level platforms without full-height walls.
Step 4 – Add Utilities
After zones are set, I usually start placing fixtures for kitchen and bathroom areas. You can position water lines, sinks, toilets, and kitchen elements. You’ll also be able to add:
-
Electrical points and lighting
-
Heating systems like compact underfloor heating or wall-mounted units
-
Air conditioning or ventilation systems
Every object can be rotated, resized, or replaced.
Note: The software doesn’t automatically calculate utility costs, but it does allow you to measure exact areas for estimating materials.
Step 5 – Fine-Tune Interior Layout
This is where the fun begins. You can fully furnish the space with sofas, beds, tables, cabinets, lighting, and decoration. Every object can be customized in size, material, and color. You can either use pre-installed furniture templates or import your own 3D models.
When I planned my own layout, I spent time rotating furniture in tight spaces, testing multiple configurations to optimize flow and comfort.
Checklist for efficient interior layout:
-
Ensure a minimum walkway of 60 cm (24 inches)
-
Use wall-mounted storage instead of standing cabinets
-
Opt for furniture with integrated storage space
-
Keep corners clear to improve mobility
Practical Tips for Tiny House Floor Plans
-
Use vertical space: Add shelves up to ceiling height or create a loft sleeping area
-
Choose light colors for walls and furniture to make the space feel larger
-
Use glass partitions or sliding doors instead of solid walls
-
Incorporate outdoor living (deck, veranda) into the plan for added usable space
-
Avoid oversized kitchen appliances—stick to essentials
Tip: Always simulate a “day in the life” walkthrough in 3D. It helps you find out what feels cramped or inconvenient before construction.
Export, Present, and Print Your Design
Once you’re satisfied with your layout, you can export the plan as a high-resolution PDF, image, or 3D model. This is ideal if you’re submitting the plan to a contractor or using it for permit applications.
You can also print the design to scale, or in an isometric 3D view that highlights interior details. I’ve used this feature for client presentations and feedback rounds—it saves time and improves clarity.
Why Plan7Architect Is Ideal for Tiny House Projects
From my experience, Plan7Architect is one of the few programs that combines user-friendliness with professional capabilities. It’s perfect for people planning their own tiny house from scratch. You don’t need any CAD skills, and yet you get control over every single wall, angle, and layout element.
It includes templates for compact homes, a wide furniture catalog, and flexible options for walls, materials, and technical systems. The real-time 3D view is essential when planning small spaces—because it helps you catch planning mistakes early.
There’s no trial version, but you do get a 14-day cancellation window if you purchase and then decide it’s not the right fit. Cancellation is easy—just send an email, no hassle.
You can plan entirely offline, and all files are stored locally on your device.
Plan your project with Plan7Architect

Plan7Architect Pro 5 for $99.99
You don’t need any prior experience because the software has been specifically designed for beginners. The planning process is carried out in 5 simple steps:
1. Draw Walls

2. Windows & Doors

3. Floors & Roof

4. Textures & 3D Objects

5. Plan for the Building Permit

6. Export the Floor Plan as a 3D Model for Twinmotion

- – Compliant with international construction standards
- – Usable on 3 PCs simultaneously
- – Option for consultation with an architect
- – Comprehensive user manual
- – Regular updates
- – Video tutorials
- – Millions of 3D objects available


