With Plan7Architect, you can design a custom carport in both 2D and 3D, allowing for precise planning and realistic visualization. The process is straightforward:
- Define the dimensions and layout in 2D mode
- Add structural elements like pillars, beams, and roofing
- Switch to 3D mode to visualize the structure
- Apply materials and textures for a realistic look
- Export the plan in various formats for construction
This approach ensures a well-structured design before building, minimizing errors and saving costs.
Why Plan a Carport with Software?
Precision & Customization
Using 2D & 3D CAD software ensures that every detail of the carport is planned precisely, reducing mistakes during construction.
Cost & Material Estimation
With Plan7Architect, you can calculate materials accurately, helping to create a realistic budget.
2D Planning for Permits
Many regions require blueprints before construction. Plan7Architect enables you to create detailed 2D plans that meet legal requirements.
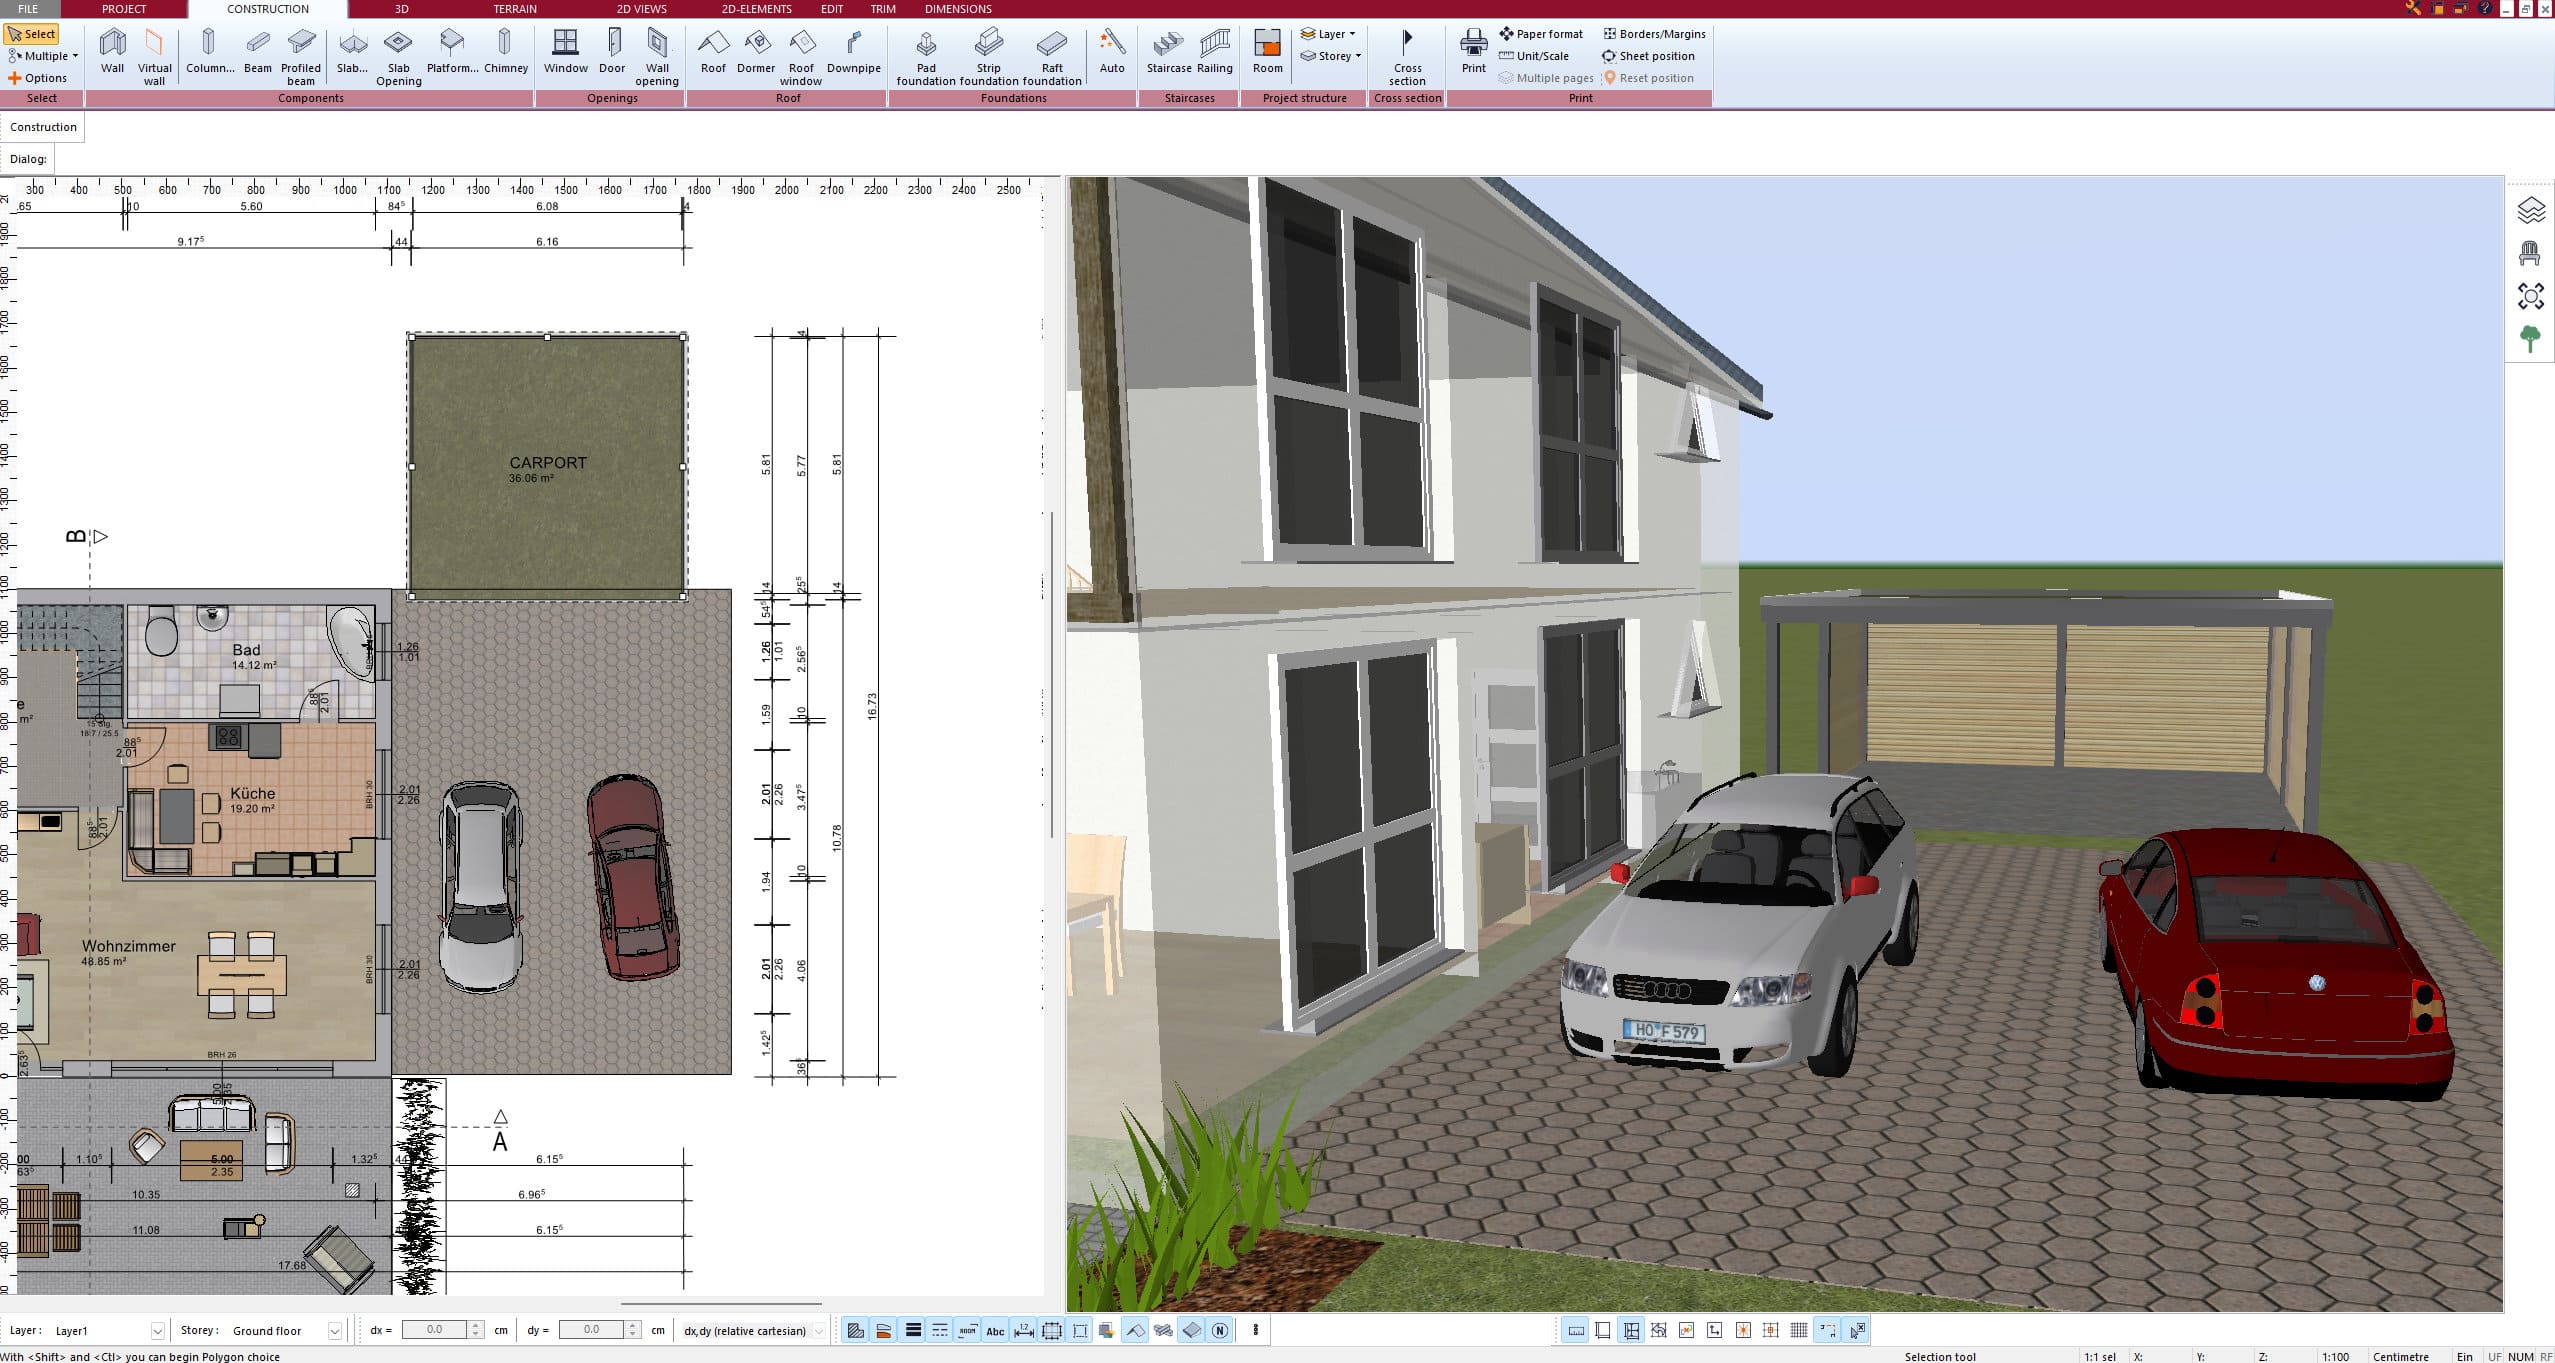
3D Visualization
By switching to 3D mode, you can see how the carport fits into your property before construction begins, ensuring the design aligns with your home.
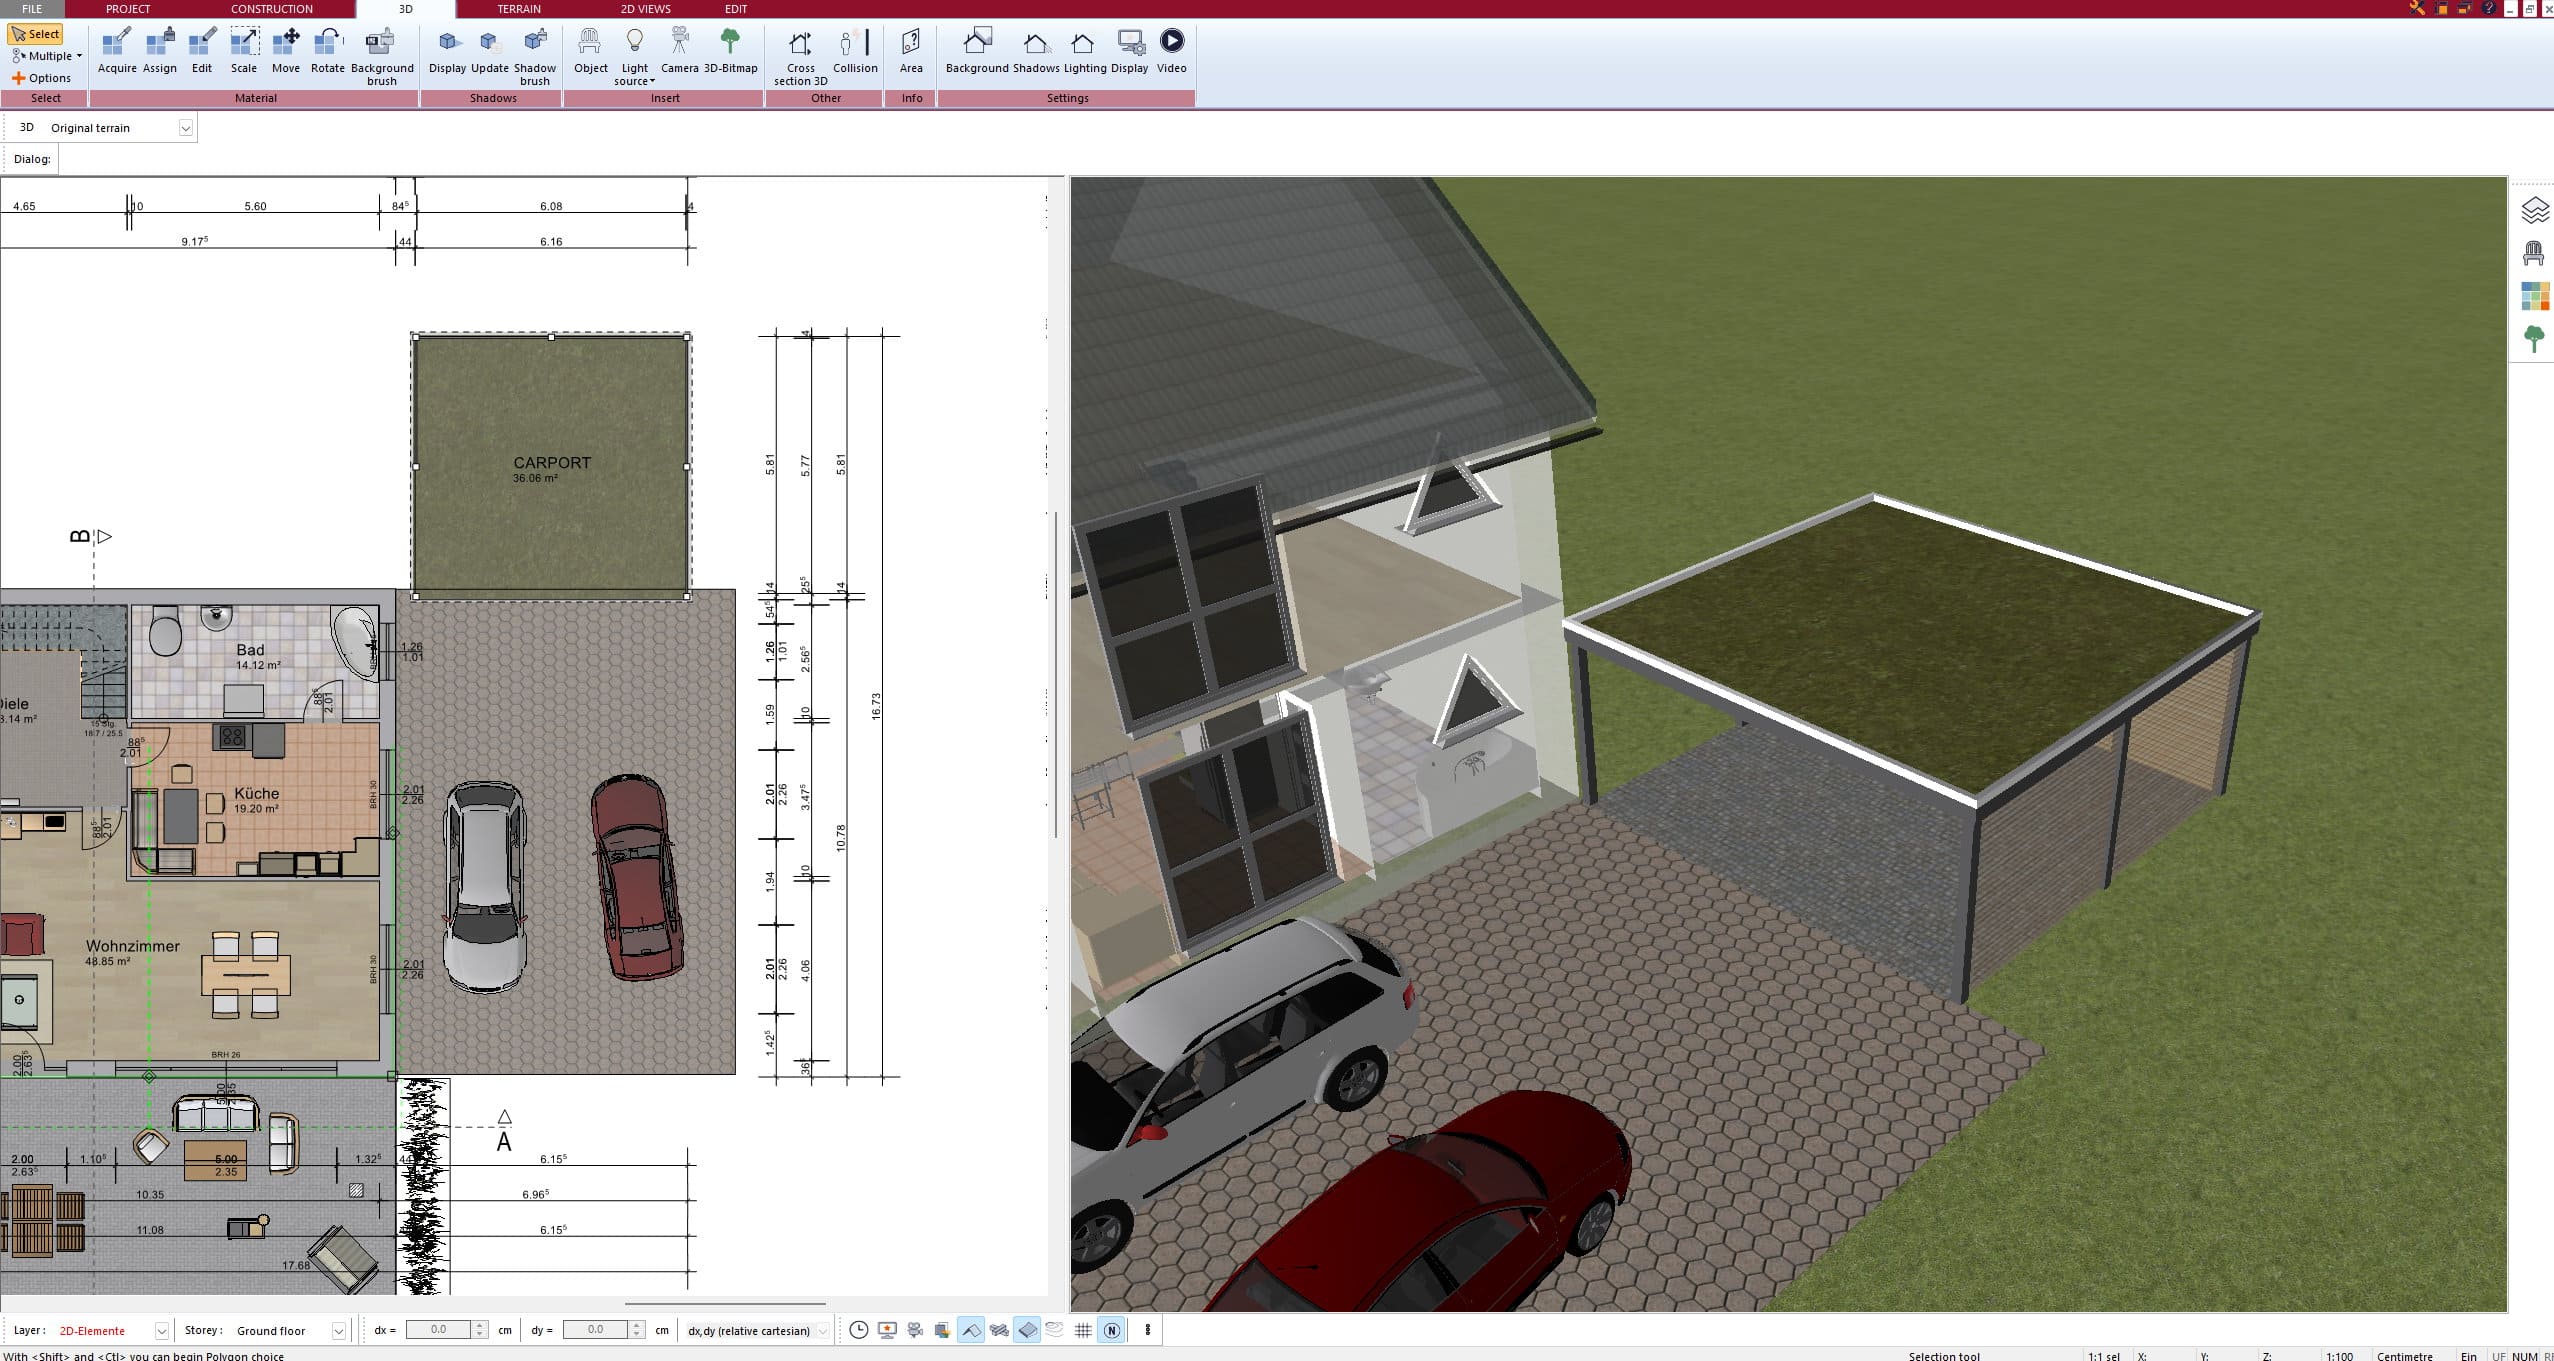
Setting Up a Carport in Plan7Architect (Step-by-Step Guide)
Creating the Basic Structure in 2D
Start by opening Plan7Architect and creating a new project. Define the carport dimensions, ensuring they fit the available space. A standard single-car carport typically measures 3×6 meters / 10×20 feet, while a double-car carport might require 6×6 meters / 20×20 feet.
Using the 2D drawing tools, outline the following:
- Support pillars at each corner
- Beams and crossbars for the frame
- Roof structure, whether flat, gable, or curved
- Optional side walls or storage areas
Ensure that the layout aligns with existing driveways or garages.
Switching to 3D Mode
Once the 2D plan is complete, switch to 3D mode for visualization. Adjust:
- Height and roof pitch, depending on climate conditions
- Structural details, such as beam thickness and material
- Positioning on the property, ensuring accessibility
Customizing the Design
Select materials for different components:
| Component | Material Options |
|---|---|
| Roof | Polycarbonate, metal sheets, wood |
| Beams & Posts | Aluminum, steel, treated wood |
| Side Panels | Wood, glass, metal mesh |
Use Plan7Architect’s material editor to apply textures and colors for a realistic look.
Adding Extra Features
Consider the following enhancements:
- Side panels for weather protection
- Lighting fixtures for night use
- Drainage solutions to prevent water accumulation
- Storage units integrated into the structure
Tip: If your region experiences heavy snowfall, ensure the roof slope is adequate to prevent excessive weight buildup.
Measurements & Units in Plan7Architect
Plan7Architect supports both metric and imperial systems, allowing users to choose their preferred unit of measurement. When setting up a carport, users can switch between meters, centimeters, feet, and inches seamlessly, ensuring compatibility with local construction standards.
Exporting Plans & Preparing for Construction
Once the design is finalized, you can export the plans in different formats:
- PDF & Image Files – for easy sharing
- DXF & DWG Files – for compatibility with other CAD software
- 3D Models – for rendering or visualization purposes
These exports allow seamless communication with contractors and authorities.
Key Considerations for Carport Planning
Legal Permits
Before building, check if your local government requires construction permits.
Local Climate
Adapt your design based on weather conditions:
- Windy areas – Use heavier materials and strong anchors
- Snowy regions – Opt for a steeper roof to prevent snow accumulation
- Hot climates – Consider ventilation gaps or heat-resistant materials
Accessibility
Ensure there is enough space for cars to enter and exit smoothly. The recommended clearance height for most vehicles is 2.1 meters / 7 feet.
Integration with Existing Structures
Match the carport design to your house’s roof type, colors, and materials for a cohesive look.
Why Use Plan7Architect for Carport Planning?
- User-friendly 2D & 3D tools for precise planning
- Realistic visualization to prevent costly mistakes
- Accurate measurements and material selection
- Flexible export options for professional use
Plan your project with Plan7Architect

Plan7Architect Pro 5 for $99.99
You don’t need any prior experience because the software has been specifically designed for beginners. The planning process is carried out in 5 simple steps:
1. Draw Walls

2. Windows & Doors

3. Floors & Roof

4. Textures & 3D Objects

5. Plan for the Building Permit

6. Export the Floor Plan as a 3D Model for Twinmotion

- – Compliant with international construction standards
- – Usable on 3 PCs simultaneously
- – Option for consultation with an architect
- – Comprehensive user manual
- – Regular updates
- – Video tutorials
- – Millions of 3D objects available


