How to Create a Chicken Coop Building Plan in Plan7Architect

You can create a complete, build-ready chicken coop plan in Plan7Architect by starting a new project, defining your preferred unit system (metric or imperial), drawing the floor layout with exact dimensions, adding walls, doors, windows, ventilation openings, nesting boxes and roosts, designing the roof, and finally generating professional construction drawings including floor plans, elevations, sections, and dimensioned layouts for printing or PDF export.

In practice, the process looks like this:

  • Start a new building project and select your preferred unit system. Plan7Architect allows you to work in both American and European units.

  • Define the overall footprint of your chicken coop based on the number of birds.

  • Draw exterior walls and define wall thickness.

  • Add internal partitions if needed.

  • Insert chicken doors, human access doors, and windows.

  • Plan ventilation openings high in the wall area.

  • Design nesting boxes and roosting bars.

  • Create the roof structure, such as a gable or shed roof.

  • Switch to 3D view to check proportions and usability.

  • Generate floor plans, elevations, sections, and fully dimensioned drawings.

With this workflow, you can move from an idea to a printable construction plan without needing separate drafting software.

Floor plan layout of a chicken coop created with Plan7Architect

Planning the Right Chicken Coop Size (Before You Draw)

Before you draw the first wall, you should determine the required space. In my experience, the biggest mistake beginners make is underestimating how much room chickens actually need.

Space Requirements per Chicken

For a healthy and low-stress flock, I recommend planning the following minimum dimensions:

Element Recommendation per Bird
Indoor coop space approximately 0.3 to 0.5 square meters or 3 to 5 square feet
Outdoor run approximately 0.9 to 1.5 square meters or 10 to 16 square feet
Roosting space approximately 20 to 30 centimeters or 8 to 12 inches per bird
Nesting boxes 1 box per 3 to 4 hens

If you are planning for cold climates where birds spend more time indoors, lean toward the larger indoor area. Overcrowding leads to stress, feather picking, and hygiene problems.

When defining your coop size in Plan7Architect, you can enter exact numeric dimensions, which makes scaling extremely precise. Because the software supports both metric and imperial units, you can work in the system you are most comfortable with.

Choosing the Coop Type

The type of coop significantly influences your floor plan.

Common types include:

  • Small backyard coop for 4 to 8 hens

  • Walk-in chicken coop with full human access

  • Mobile chicken tractor

  • Large stationary poultry shed

A walk-in coop typically requires a minimum internal height of around 1.8 to 2 meters or 6 to 6.5 feet so you can stand comfortably. A small backyard coop may only be 1.2 to 1.5 meters or 4 to 5 feet high if access is from outside.

In Plan7Architect, I usually start by defining the footprint first, then adjusting wall height depending on whether the design is walk-in or compact.

Step-by-Step: Designing the Coop in Plan7Architect

Setting Up the Project

After starting a new project, define:

  • Unit system

  • Wall thickness

  • Building height

  • Foundation concept

Typical wall thickness for a simple wooden coop is around 10 to 15 centimeters or 4 to 6 inches, depending on whether insulation is planned.

Foundation options you can model include:

  • Concrete slab

  • Pier foundation

  • Raised wooden floor

If you are building in a wet climate, I strongly recommend planning a raised floor structure to prevent moisture damage.

Drawing the Floor Plan

I begin by drawing the outer walls according to the required footprint. For example, a coop for 6 hens might measure 2 meters by 2 meters or approximately 6.5 feet by 6.5 feet.

Use the wall tool to draw the exterior shell. Enter exact dimensions numerically for precision. Plan7Architect allows you to activate snapping and grid functions, which help keep walls perfectly aligned.

If you need separate areas for storage, feed, or a brooding section, add interior partition walls. These can be thinner than exterior walls.

Important aspects to consider during layout:

  • Cleaning access

  • Egg collection access

  • Feed storage

  • Movement space for chickens

3D visualization of the designed chicken coop generated in Plan7Architect

Adding Doors, Windows, and Ventilation

Ventilation is critical. Many beginners focus only on insulation but forget airflow.

For a standard chicken door, I use approximately:

  • 25 by 30 centimeters or 10 by 12 inches

For human access:

  • Standard door sizes such as 80 to 90 centimeters wide or 32 to 36 inches wide

Ventilation openings should be positioned high on the wall, ideally under the roof overhang. This allows warm, moist air to escape without creating drafts at chicken level.

In Plan7Architect, you can:

  • Insert doors and windows from the object library

  • Adjust width and height numerically

  • Place them precisely using snap functions

Tip:
Always place ventilation openings above roost height to avoid direct airflow onto the birds.

Designing Nesting Boxes and Roosts

Nesting boxes are typically:

  • 30 by 30 by 30 centimeters or 12 by 12 by 12 inches

They should be slightly elevated but lower than roosting bars. Chickens naturally seek the highest available perch to sleep.

Roosting bars should be:

  • 4 to 5 centimeters wide or about 2 inches wide

  • Placed around 40 to 60 centimeters or 16 to 24 inches above floor level

In Plan7Architect, you can model nesting boxes as simple rectangular structures. For roosts, you can use beam or custom object tools.

I always switch to 3D view at this stage to visually confirm spacing and usability.

Roof Construction

The roof protects against rain, wind, and snow.

Common roof types:

  • Gable roof

  • Shed roof

  • Flat roof with slight slope

For snowy climates, I recommend a steeper roof pitch to prevent snow accumulation. In rainy regions, sufficient overhang protects walls from moisture.

In Plan7Architect, you can:

  • Define roof pitch angle

  • Adjust overhang length

  • Automatically generate roof surfaces based on wall outlines

A roof overhang of around 20 to 40 centimeters or 8 to 16 inches significantly improves durability.

Switching to 3D Mode

3D visualization is one of the most powerful parts of the planning process.

I use 3D mode to check:

  • Door usability

  • Head clearance

  • Nesting box accessibility

  • Roof proportions

  • Overall aesthetics

Errors that are hard to detect in 2D become obvious in 3D. For example, you may realize that the nesting boxes are too high or the human access door conflicts with interior structures.

Creating Professional Construction Drawings

Once the layout is finalized, you can generate construction-ready drawings.

Plan7Architect allows you to create:

  • Floor plans with dimensions

  • Elevations from all sides

  • Building sections

  • Fully dimensioned layouts

  • Printable PDF files

For construction, you should ensure that the following are clearly shown:

  • Overall length and width

  • Wall heights

  • Roof slope

  • Door and window dimensions

  • Foundation details

Table: Essential Information in a Chicken Coop Plan

Drawing Element Must Include
Floor plan All wall dimensions and openings
Elevations Height and roof shape
Section Wall build-up and internal height
Detail view Nesting box and roost construction

Because you can switch between metric and imperial units inside Plan7Architect, you can adapt the drawings to your regional building standards without redesigning the project.

Roof structure and elevations of the chicken coop designed using Plan7Architect

Important Design Considerations for Different Climates

Cold Climates

In cold regions, insulation and draft control are essential.

Key considerations:

  • Insulated walls and roof

  • Reduced ventilation openings but still sufficient airflow

  • Higher roof pitch for snow load

  • Wind-protected entrance

Avoid completely sealing the coop. Moisture buildup causes frostbite on combs and respiratory issues.

Hot Climates

In hot regions, airflow becomes the priority.

Key considerations:

  • Larger ventilation openings

  • Mesh-covered wall sections

  • Elevated floor construction

  • Extended roof overhang for shade

In warm climates, I often reduce wall mass and increase airflow while still protecting against predators.

Common Mistakes When Creating a Chicken Coop Plan

Over the years, I have repeatedly seen the same planning errors:

  • Underestimating required space per bird

  • Poor ventilation placement

  • Roof pitch too flat

  • Nesting boxes placed higher than roosts

  • No easy cleaning access

  • Forgetting predator-proof construction

  • Insufficient structural stability for wind

Planning these aspects correctly in software is much easier than correcting them after construction.

Advantages of Using Plan7Architect for Chicken Coop Planning

From practical experience, the main advantages are:

  • Precise dimension input

  • Flexible unit system

  • Real-time 2D and 3D planning

  • Professional construction drawings

  • Beginner-friendly interface

  • No need for separate drafting software

Even if you have never designed a structure before, you can follow a logical workflow: footprint, walls, openings, interior layout, roof, drawings.

From Idea to Build-Ready Chicken Coop Plan

With a structured approach in Plan7Architect, you can create a fully dimensioned, professional chicken coop building plan that is ready for construction. By defining the correct space per bird, planning ventilation properly, adapting the structure to your climate, and generating accurate drawings, you move from a simple idea to a build-ready project without guesswork.

Plan your project with Plan7Architect

Plan7Architect Pro

Plan7Architect Pro 5 for $99.99

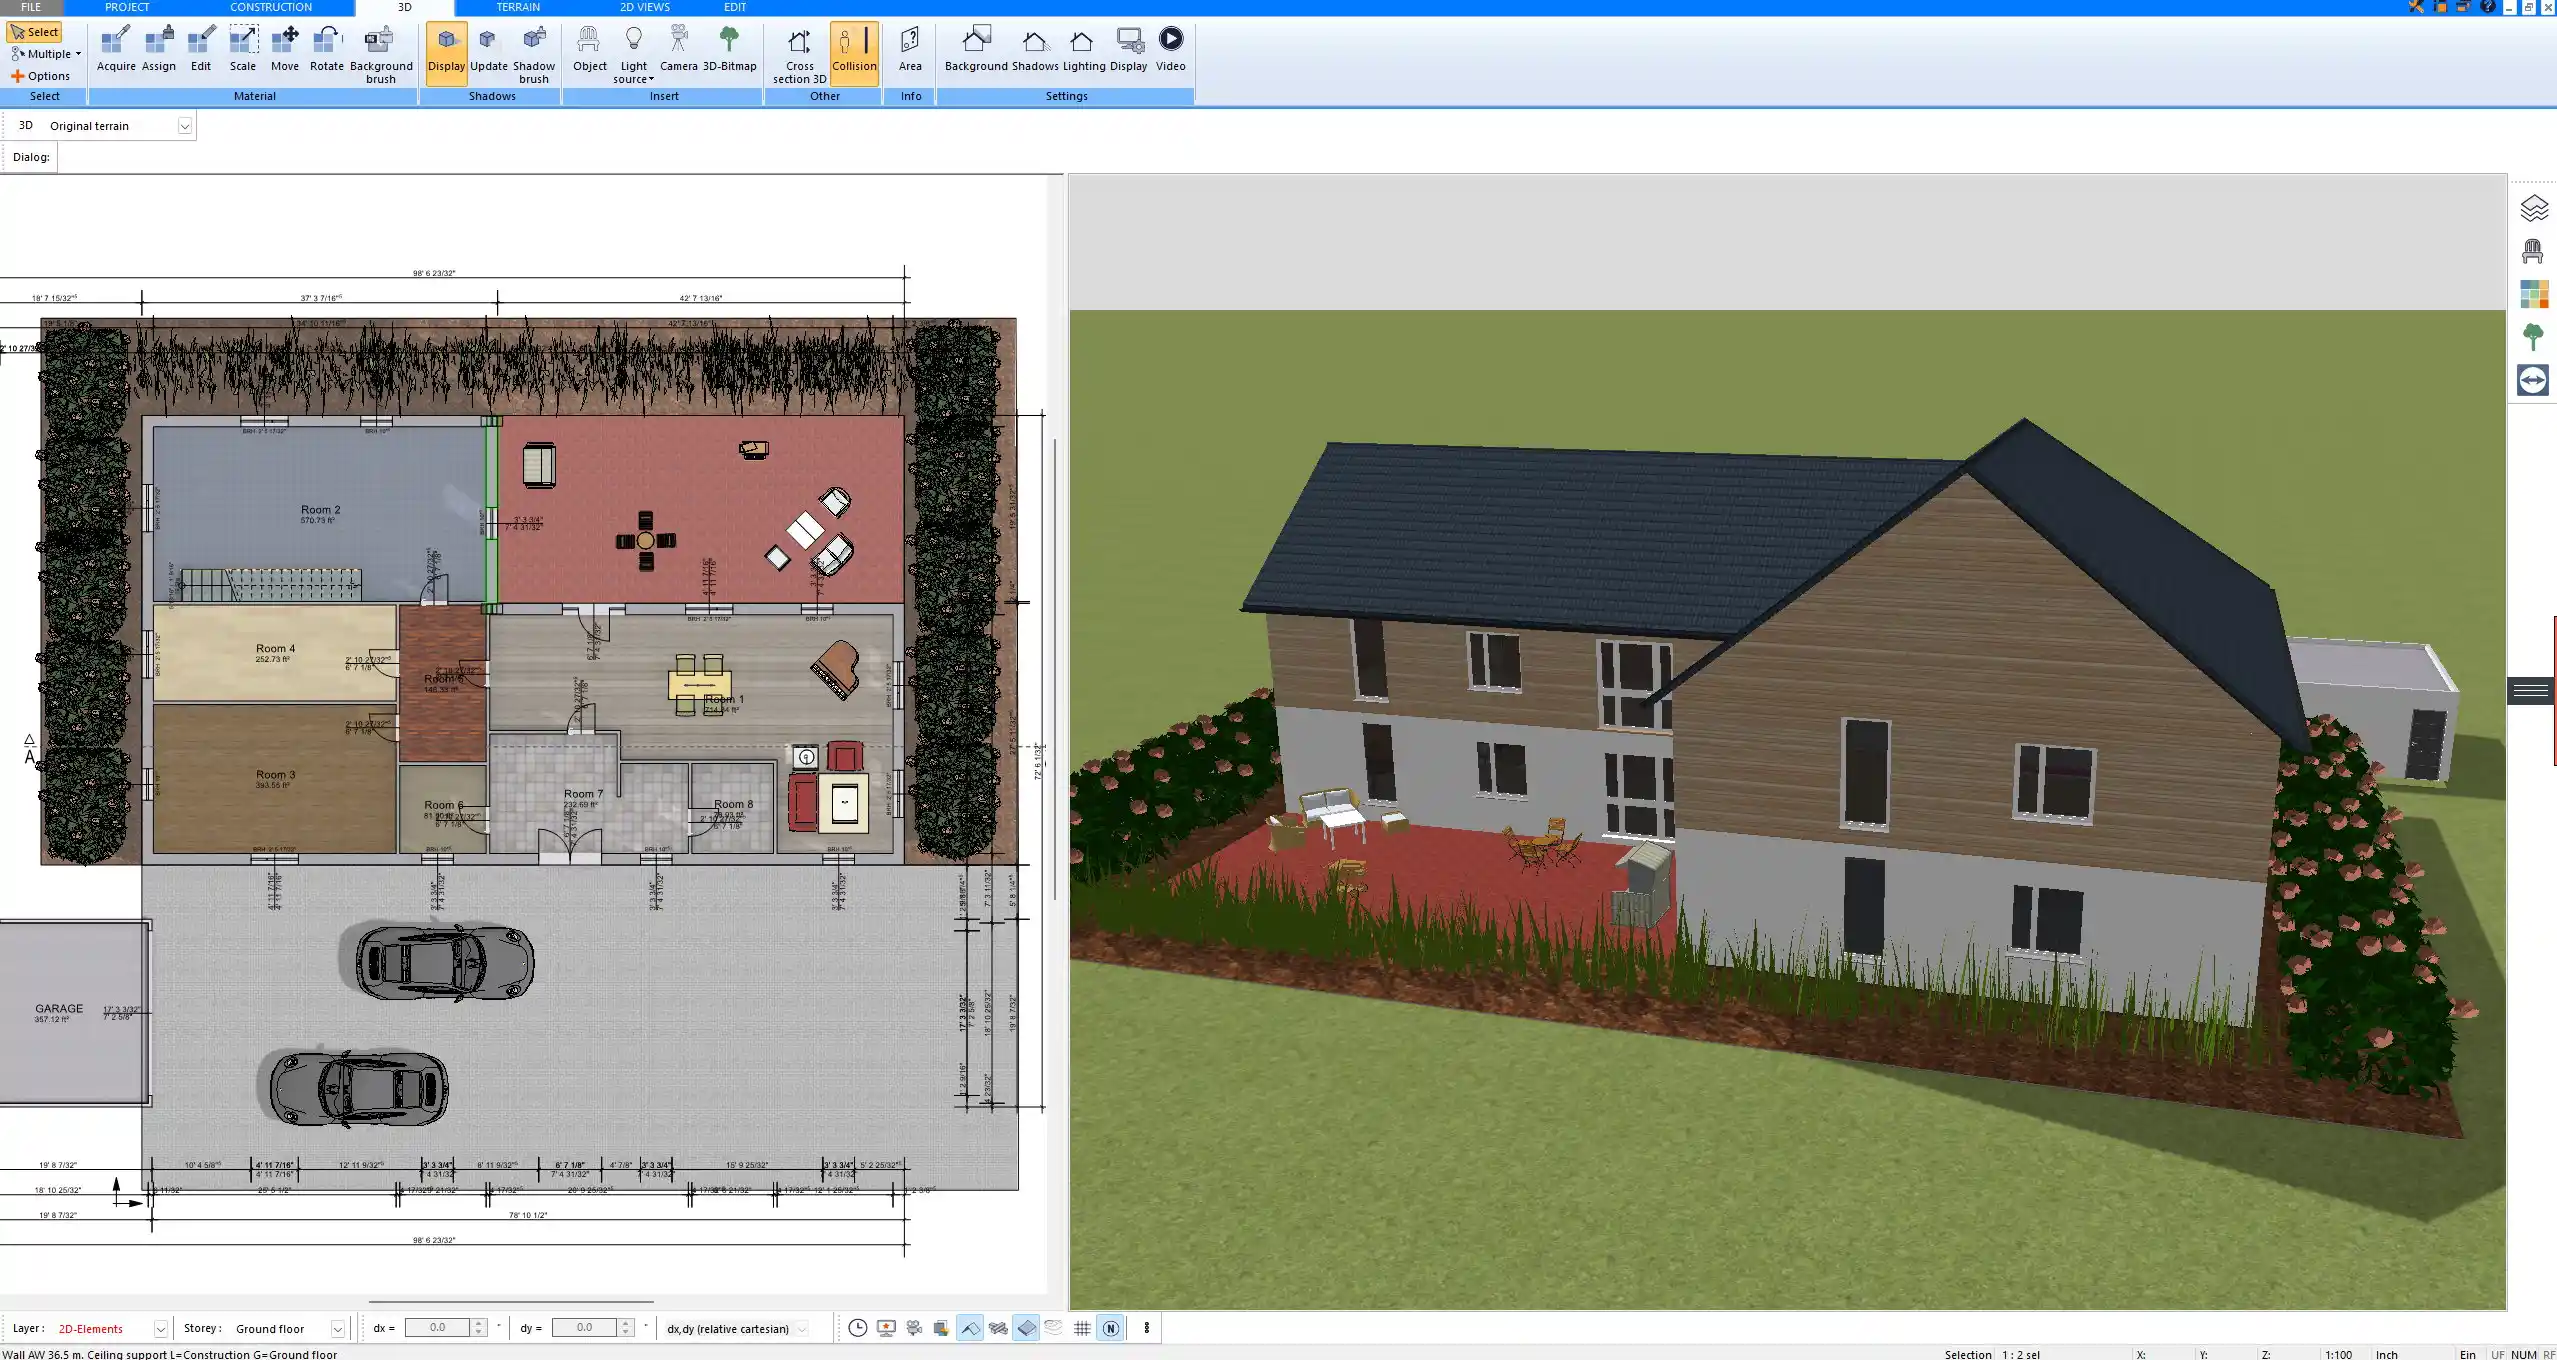
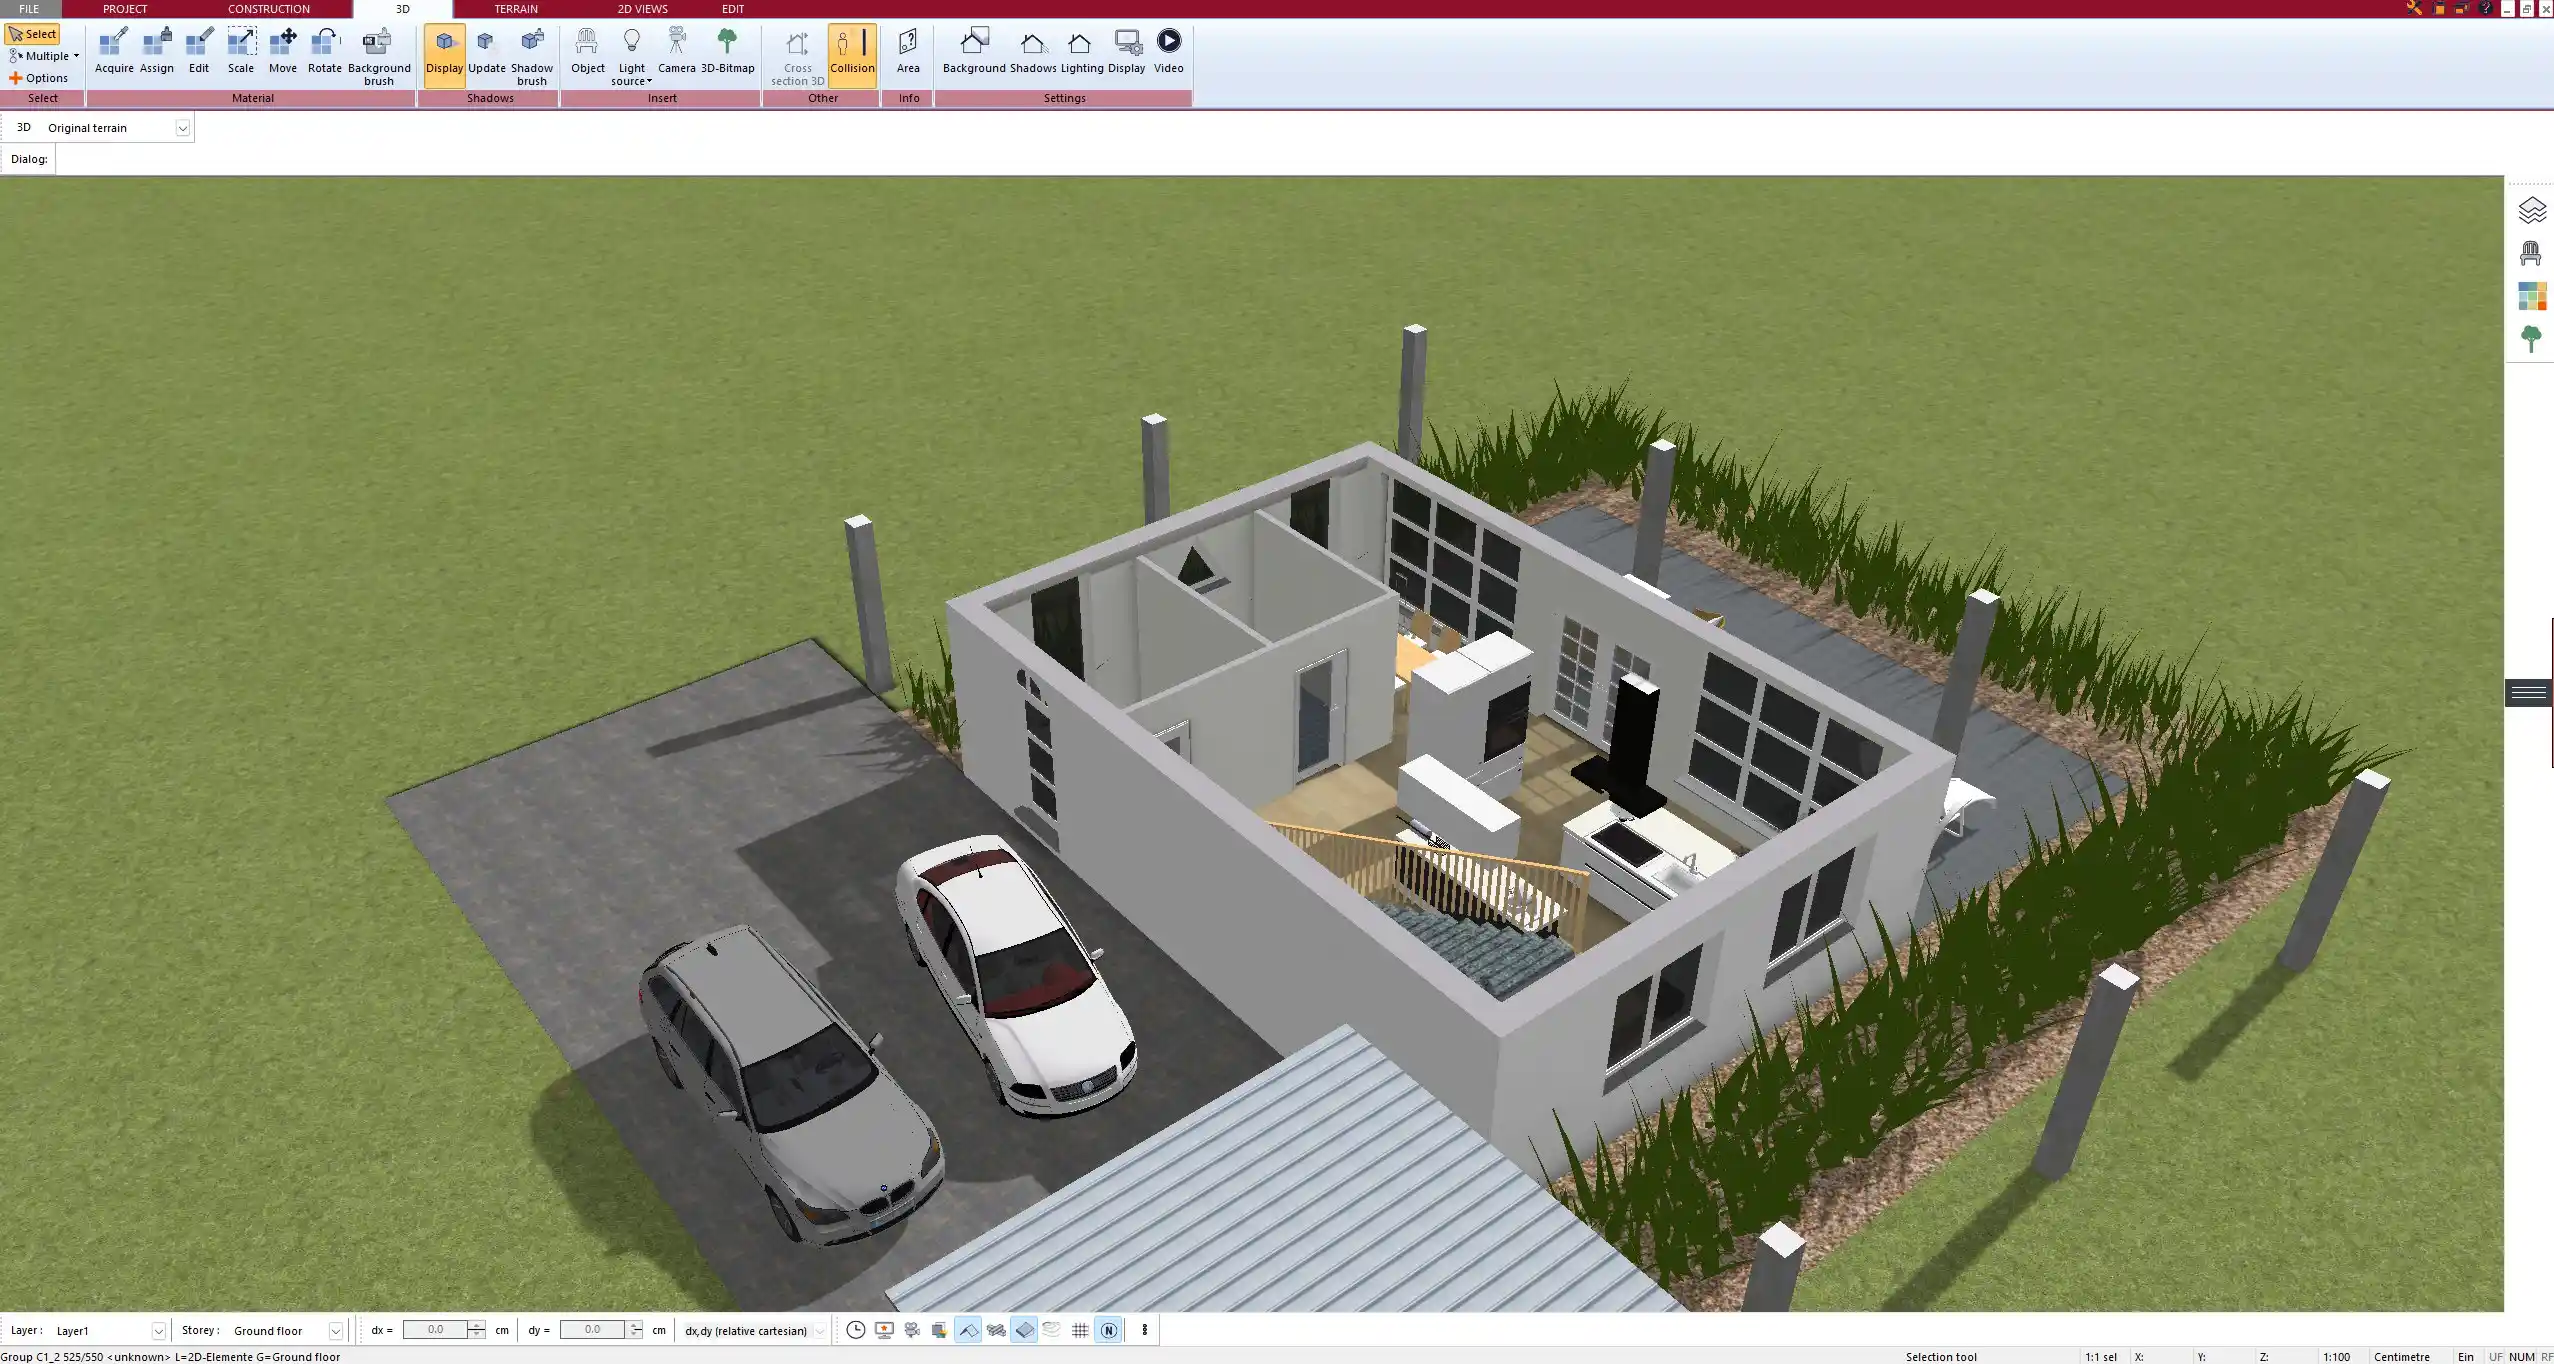
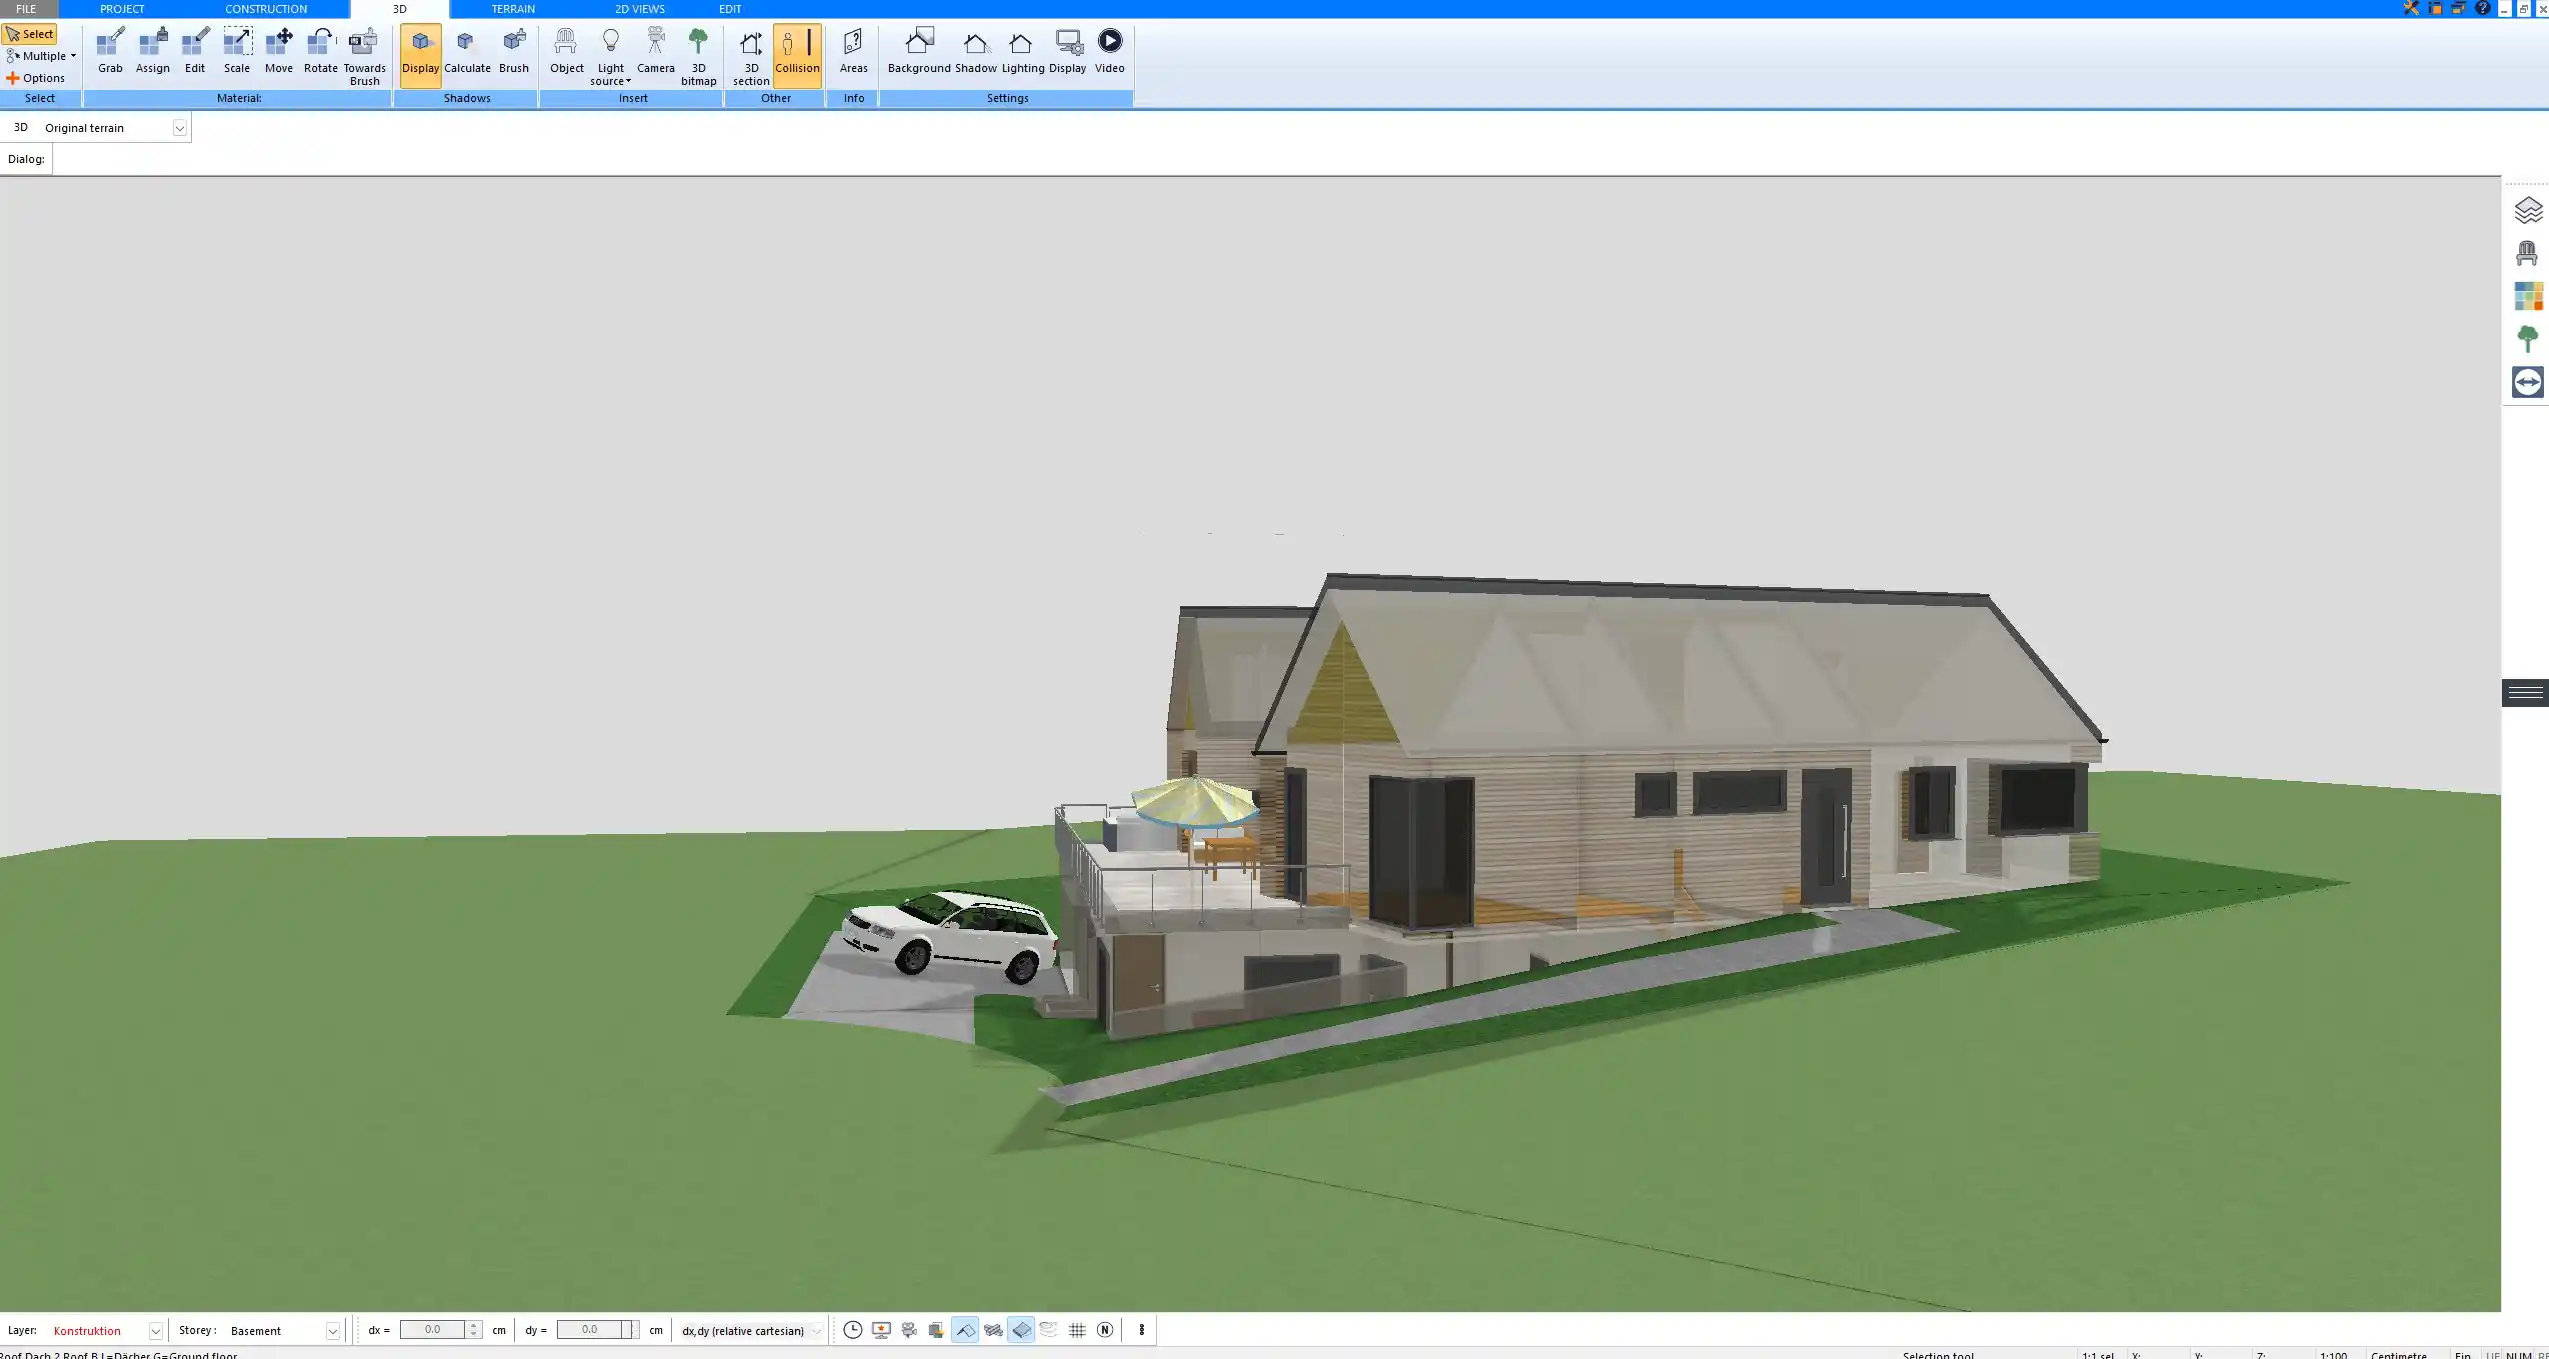
You don’t need any prior experience because the software has been specifically designed for beginners. The planning process is carried out in 5 simple steps:

1. Draw Walls

Create your 2D floor plan by accurately drawing and adjusting rooms and walls for your home design.

2. Windows & Doors

Optimize your space layout with perfectly fitting door and window elements.

3. Floors & Roof

Visualize different levels and roof types for your home design.

4. Textures & 3D Objects

Choose materials and textures to customize floors, walls, and 3D objects individually for a realistic representation of your design.

5. Plan for the Building Permit

Sections and views for the building application can be created with Plan7Architect (1)
Create professional construction drawings with elevations, sections, and complete plan compilations.

6. Export the Floor Plan as a 3D Model for Twinmotion

Visualize your project with cutting-edge 3D technology and create high-quality image renderings and videos using Twinmotion by Epic Games.


  • – Compliant with international construction standards
  • – Usable on 3 PCs simultaneously
  • – Option for consultation with an architect
  • – Comprehensive user manual
  • – Regular updates
  • – Video tutorials
  • – Millions of 3D objects available

Why Thousands of Builders Prefer Plan7Architect

Why choose Plan7Architect over other home design tools?

14-Day Money-Back Guarantee
No questions asked. Just email us within 14 days if you’re not satisfied.
One-time payment – no subscription
Own the software forever. No hidden costs. No monthly fees. Updates are optional.
Based on $2,500 professional architecture software
Plan7Architect is an optimized version — used by professionals and private users alike.
Supports international building standards
Adaptable to US, UK, Canadian, Australian, and European requirements.
Works offline – use on up to 3 devices
No internet required. Install on up to 3 computers – ideal for home and office use.
Metric & imperial units
Switch freely between feet/inches or meters/centimeters — perfect for global use.
++
All key export/import formats included
DWG, DXF, OBJ, 3DS, STL, PDF, image export/import, and SketchUp import — for smooth collaboration.
ii
Create real building permit documents
Generate floor plans, elevations, cross-sections, and full construction drawings.
Supports wood framing for walls and roofs
Design wall and roof structures, gables, dormers, and freely constructed wood frameworks.
Easy learning curve with full support
Includes video tutorials, ticket system, detailed PDF manual, sample projects, and access to our customer forum.
Excellent verified reviews
Top ratings on Trusted Shops and Amazon.
Ongoing development – 3–4 updates per year
Always improving, with a modern 3D engine and regular feature upgrades.

Watch how a complete house is planned from start to finish – in under 25 minutes

Detailed House Planning (25 Min)

Small Home Planning Demo (12 Min)

The 3 Plan7Architects

Sale!
Plan7Architect Pro
Original price was: $259.99.Current price is: $99.99.

Verified Customer Reviews

Verified Customer Reviews

Trusted Shops:

Home » Floor Plan Guide » How to Create a Chicken Coop Building Plan in Plan7Architect
Youtube
Select your currency