Designing your own house is absolutely possible today—even without architectural training. Thanks to user-friendly 3D software like Plan7Architect, you can draw a full floor plan, arrange furniture, and visualize your dream home in both 2D and 3D. Whether you live in the US, Europe, or elsewhere, you can switch between imperial and metric units and plan with confidence. I’ve gone through this process myself and was surprised how intuitive it became once I had the right tool.
What You Need to Start Planning Your Own House
Before opening any software or sketching ideas, a bit of preparation goes a long way. Planning a home requires both creativity and clarity. Here’s what you’ll need to start:
Personal Requirements
-
How many people will live in the home?
-
How many bedrooms and bathrooms do you need?
-
Do you want an open-concept layout, a home office, or a guest room?
Plot and Building Rules
-
Know the exact size and shape of your plot
-
Understand local zoning laws or building codes
-
Check any regulations about setbacks, roof heights, or energy efficiency
Tools and Software
A proper planning tool is essential. Hand drawings may help during brainstorming, but digital planning ensures accuracy, flexibility, and better visualization.
Plan7Architect is ideal here because:
-
It supports both metric and imperial units
-
It allows full 2D and 3D planning
-
It’s built for non-professionals but delivers professional-grade results
Step-by-Step: How to Design a House Yourself
Choose the Right Tool
I started my planning process by testing several tools, but Plan7Architect made it easiest to get results fast. You can switch between 2D (for precision) and 3D (for visualization) seamlessly. What’s more, you can work in meters/centimeters or feet/inches depending on your preference or local standards.
Key software features to look for:
-
Customizable walls, windows, doors, and roofs
-
Drag & drop furniture and fixtures
-
Real-time 3D preview
-
Layered planning (for plumbing, electrical, etc.)
-
Printable scaled plans for builders
Create a Floor Plan
Begin with the outer walls of the house. Add interior walls to divide spaces. Then place doors and windows—paying attention to natural light and room flow.
Here’s a basic order that worked well for me:
-
Draw the perimeter and room layout
-
Add internal walls
-
Position windows and doors
-
Define staircases and levels if needed
-
Place bathrooms and kitchens based on plumbing routes
Tip:
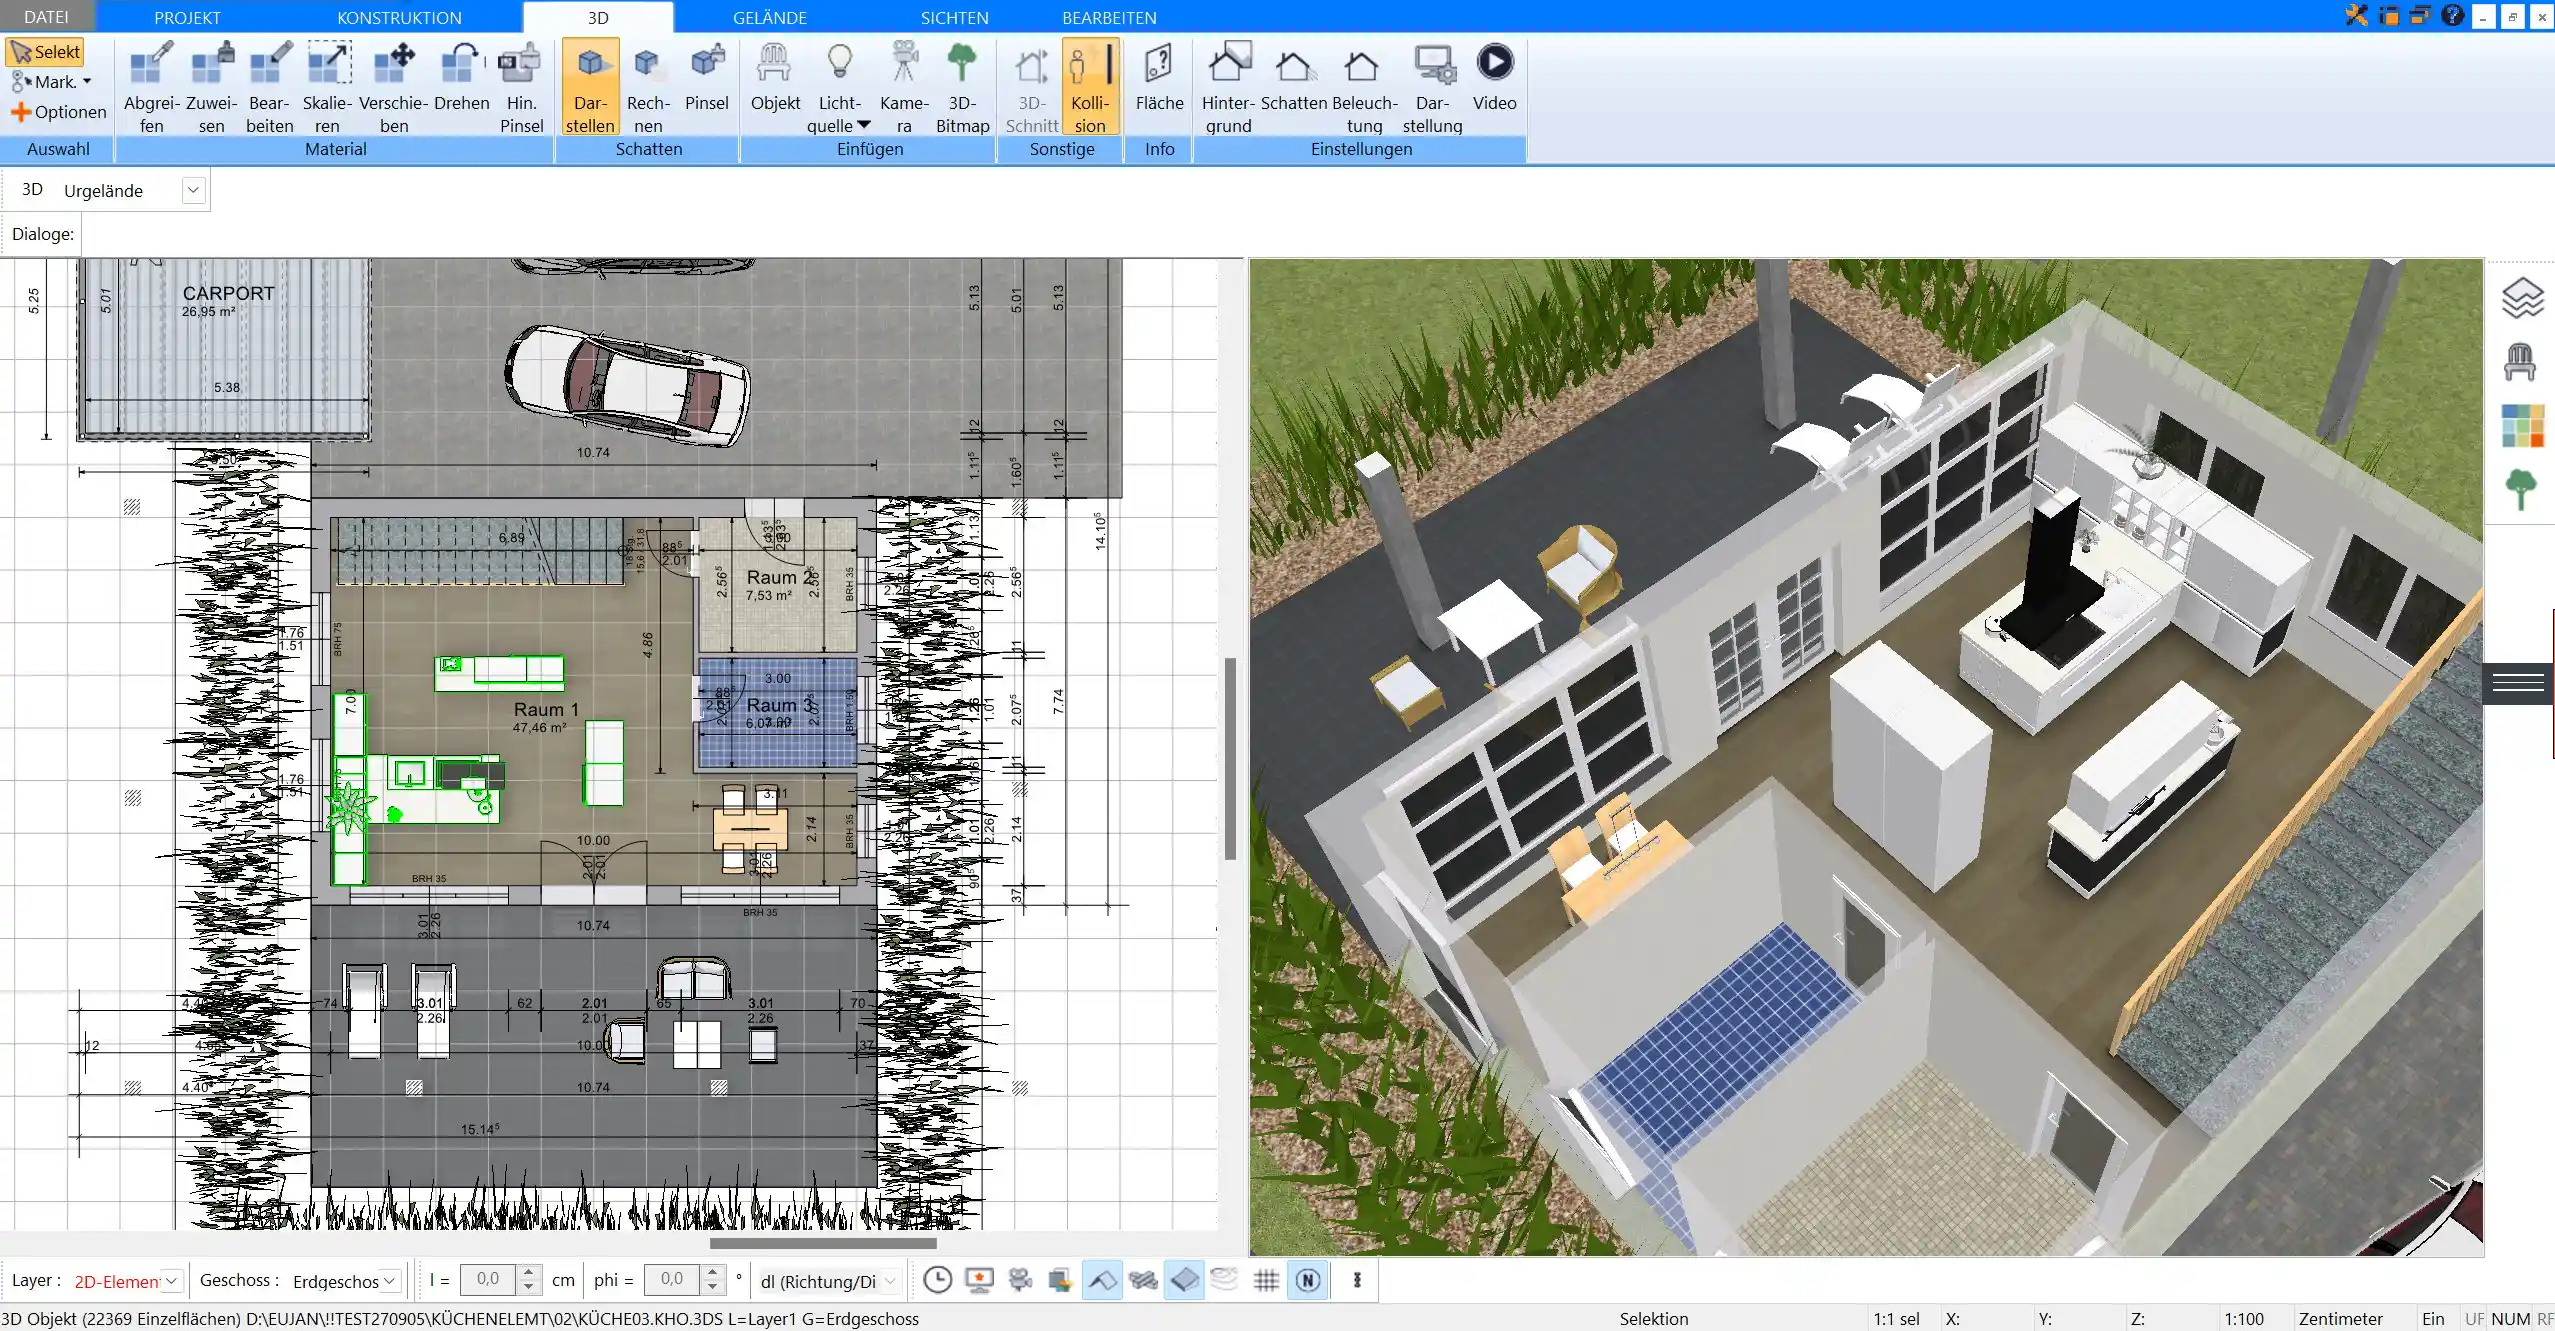
In Plan7Architect, you can click to place elements and instantly see their impact in 3D—great for testing different ideas quickly.
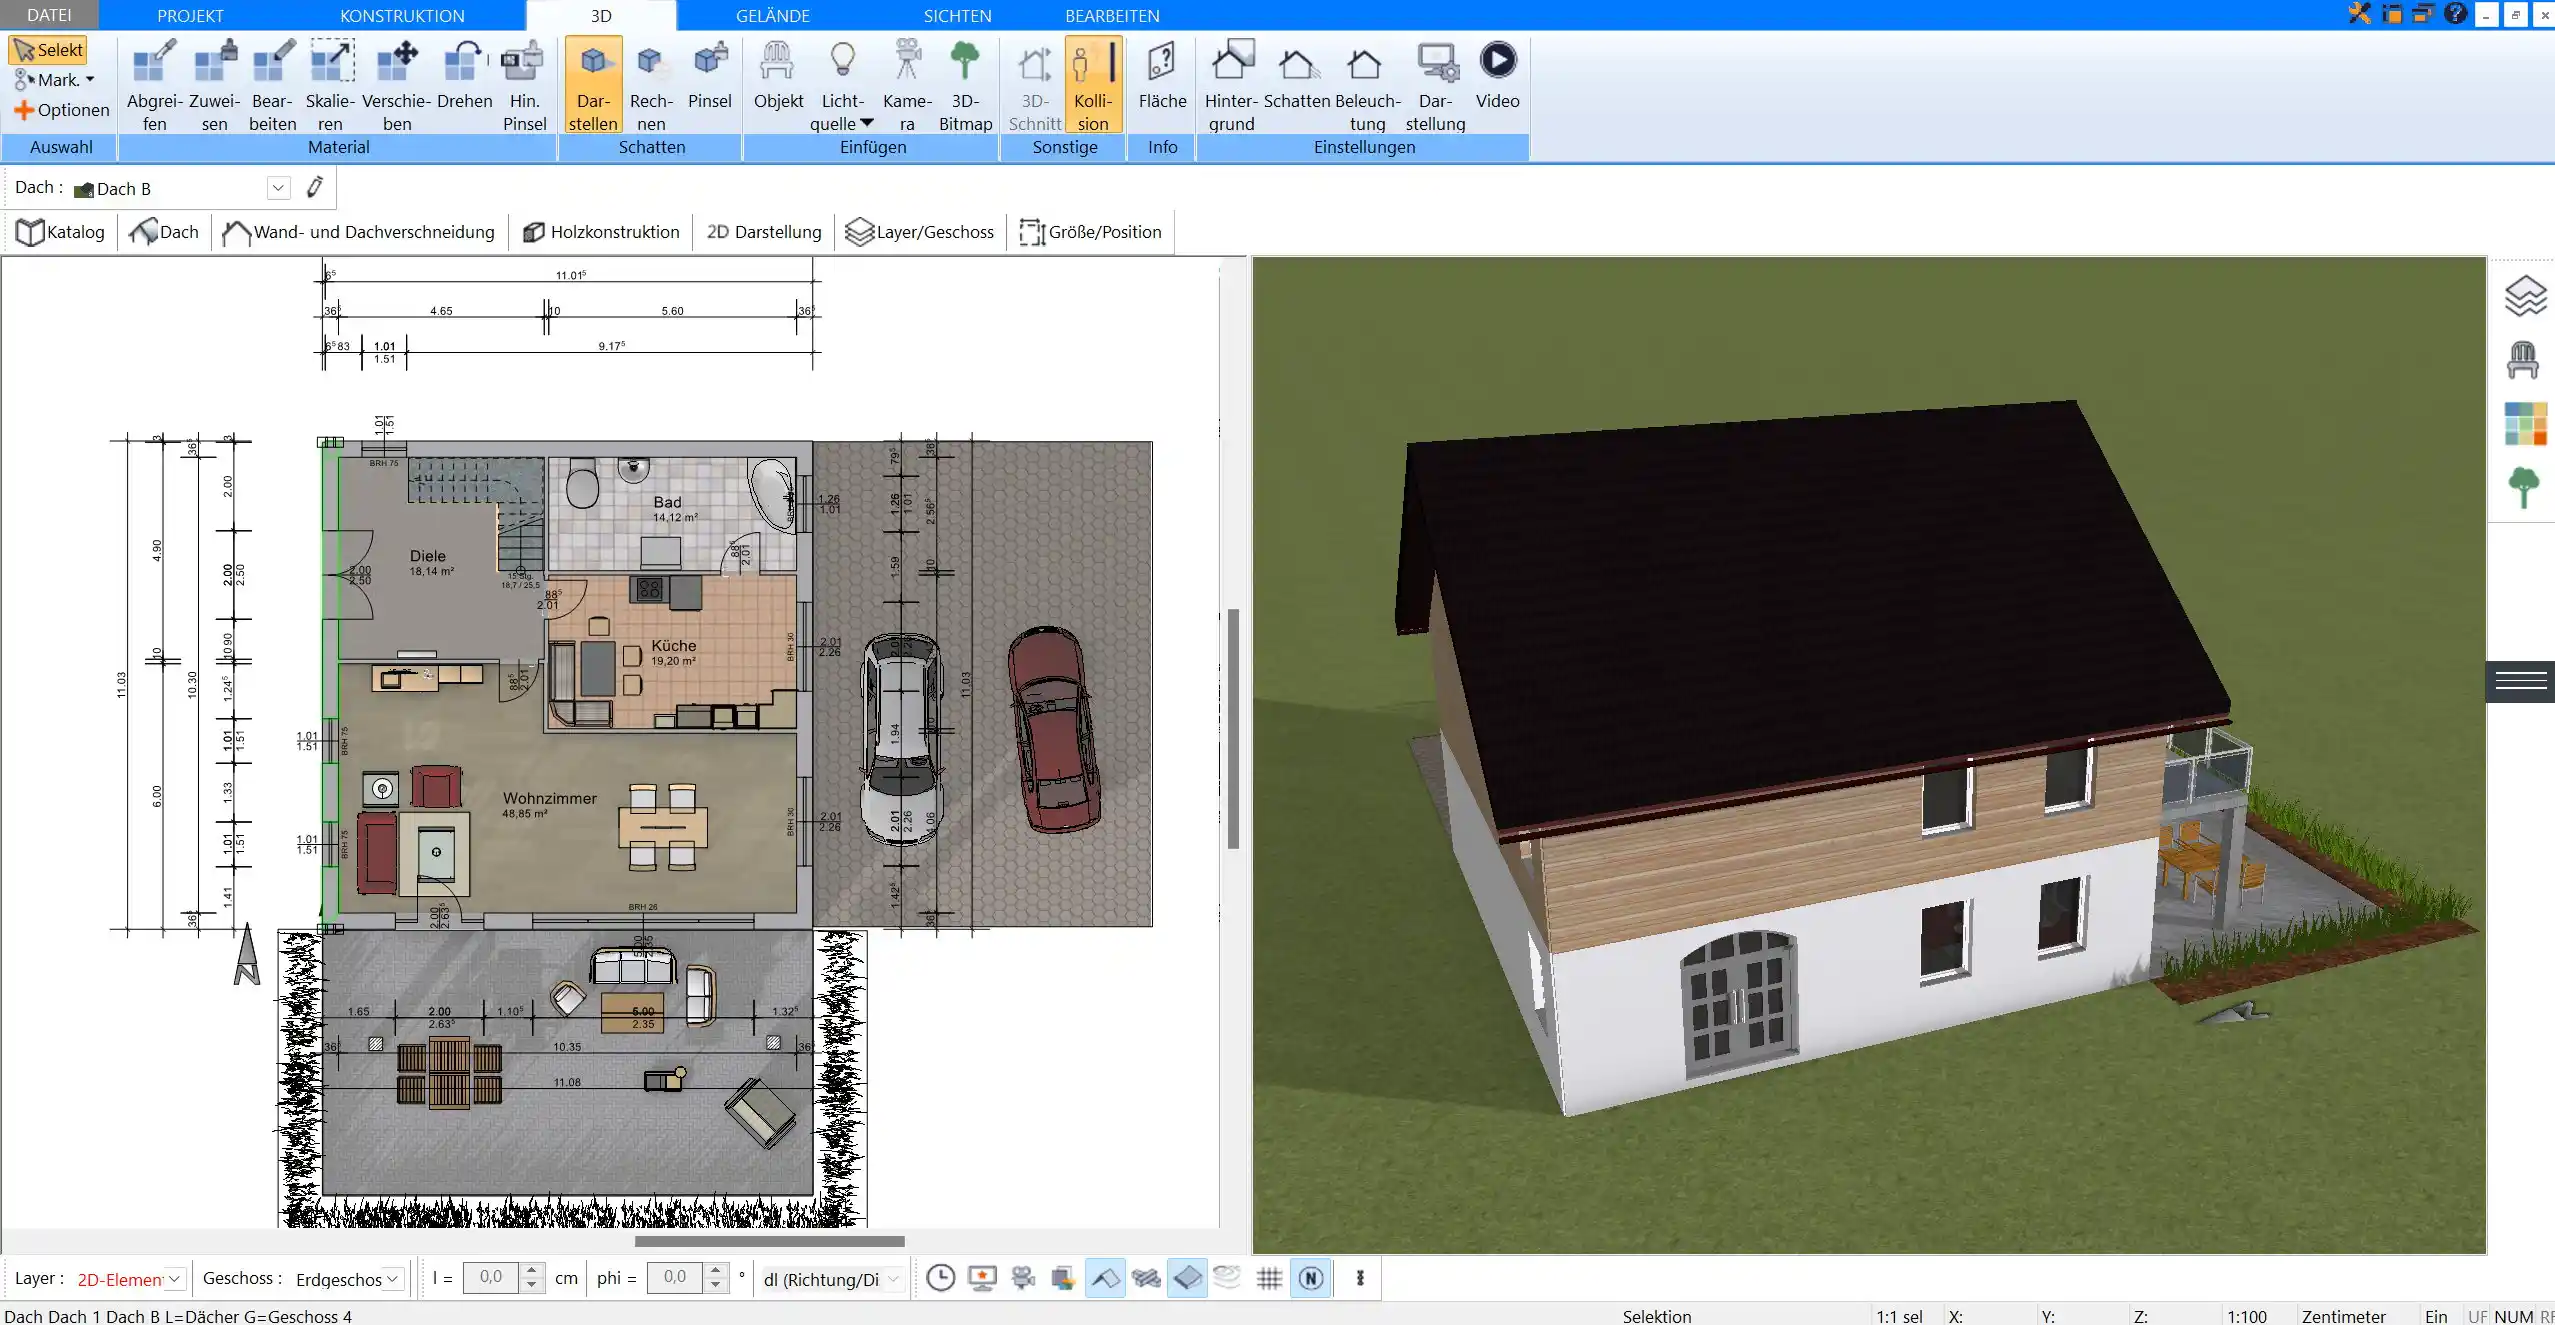
Refine the Design in 3D
Once your floor plan is in place, switch to 3D mode to explore the house spatially. I found this helped me spot areas that felt too tight or awkward. It also made choosing roof types and façade styles more intuitive.
You can:
-
Adjust wall heights and ceiling types
-
Try different roof angles and dormer windows
-
Add balcony or terrace elements
-
Experiment with materials for walls, floors, and exteriors
This stage helps bridge the gap between technical floor plans and the feel of a real home.
Set Up Electrical, Plumbing & HVAC Zones
Planning technical systems early avoids expensive fixes later. I recommend marking electrical outlets, light switches, and radiator positions directly in your floor plan.
Table: What to Plan Where
| Area | Electrical | Plumbing | HVAC |
|---|---|---|---|
| Living Room | Power outlets, ceiling lights | — | Radiators or vents |
| Kitchen | Appliances, task lighting | Sink, dishwasher, fridge | Air conditioning vents |
| Bathroom | Shaver sockets, lights | Shower, sink, toilet | Radiator or floor heating |
| Bedroom | Bedside sockets, ceiling fan | — | Radiators or vents |
Plan7Architect lets you work in layers—so you can toggle electrical, plumbing, or HVAC views on and off for clarity.
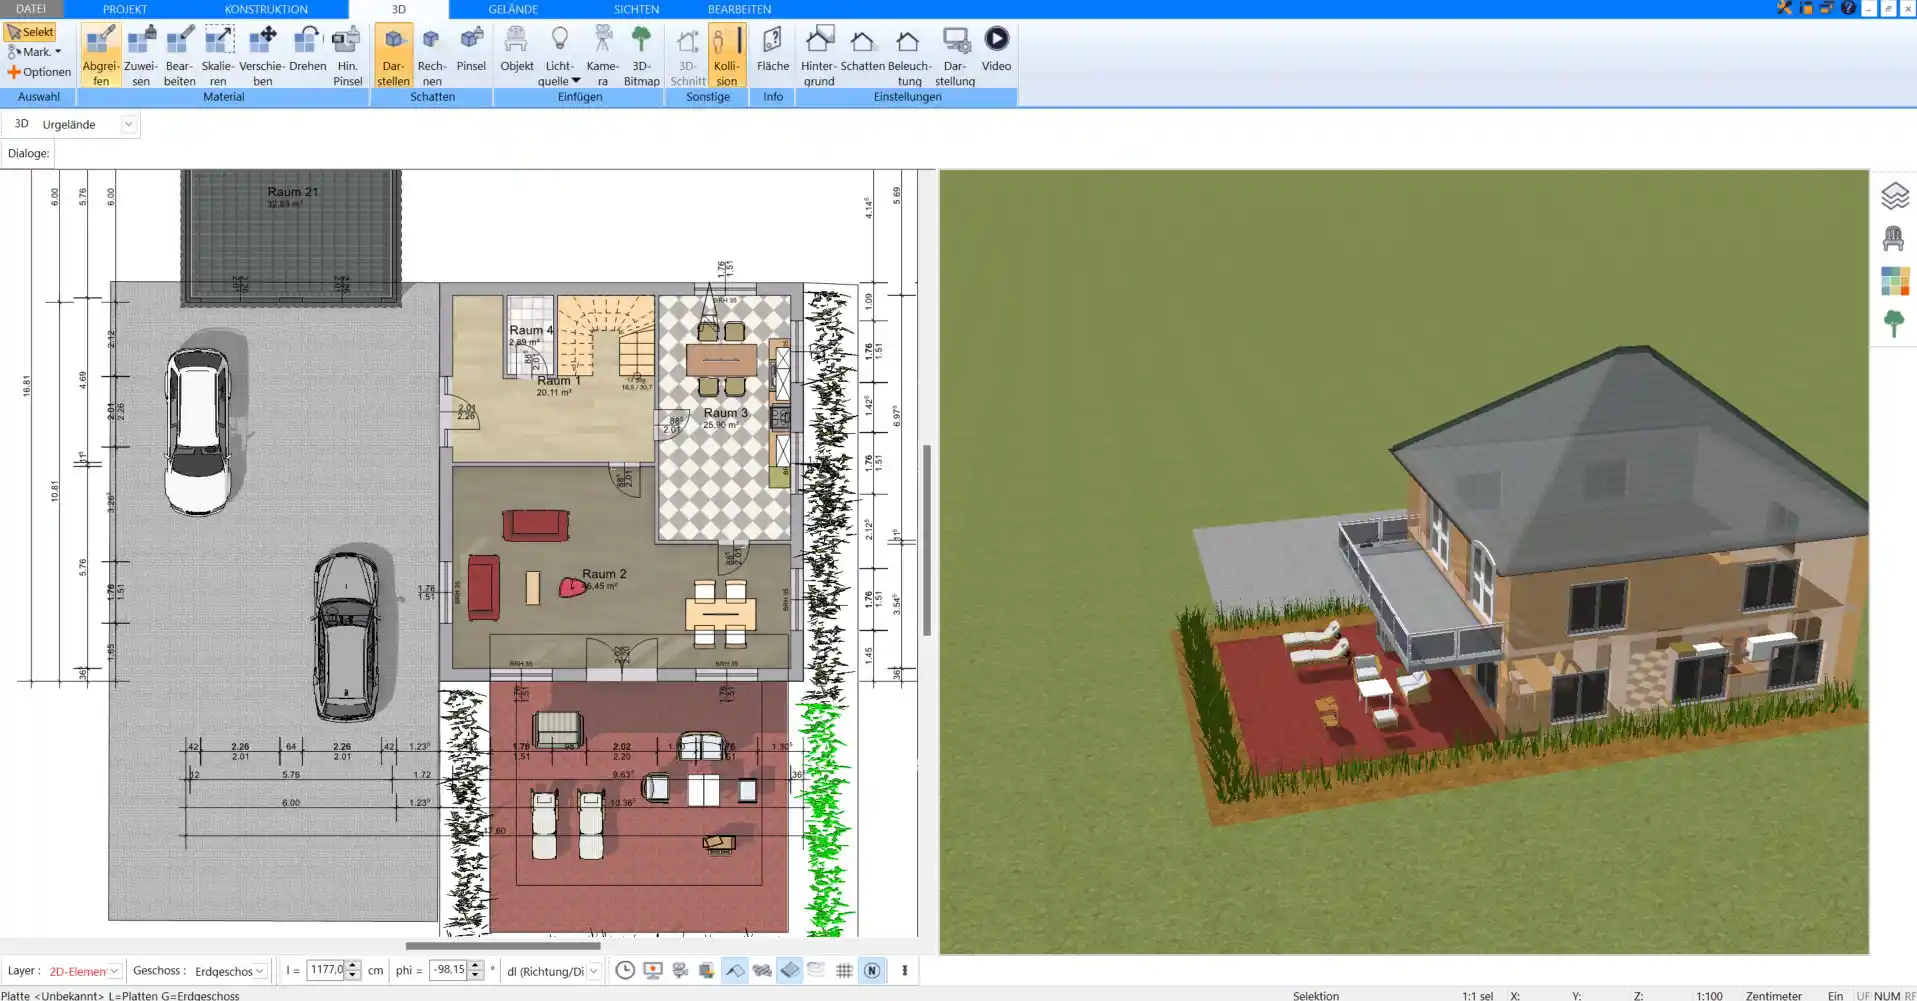
Plan Outdoor Areas
Don’t forget the surroundings. Your home doesn’t stop at the exterior walls. I designed my terrace, driveway, and garden zones within the same software.
You can add:
-
Carports and garages
-
Pathways and driveways
-
Fences and walls
-
Slopes or elevation changes
-
Landscaping with trees and bushes
Being able to see the house in its environment makes a huge difference—especially if you have a view, neighbors, or sun orientation to consider.
Key Features to Consider When Designing Your Own Home
These are things I learned to pay attention to after testing multiple layout variations:
Light & Orientation
-
Place living areas toward the sun (south-facing in the northern hemisphere)
-
Keep bedrooms on quieter, cooler sides of the house
Energy Efficiency
-
Optimize insulation thickness
-
Use modern window glazing
-
Plan for solar panels or heating systems
Functionality
-
Include storage in halls and under stairs
-
Ensure bathrooms and kitchens are close to existing water lines
-
Think about future needs—children, aging, working from home
Accessibility
-
Step-free entrances
-
Wide doorways and hallways
-
Ground-floor bathrooms
Common Mistakes to Avoid When Planning a Home
I made some of these mistakes before fixing them—hopefully you can avoid them altogether:
-
Overdesigning: More rooms and features increase cost and complexity. Stick to what you need.
-
Neglecting storage: Wardrobes, utility rooms, and pantry space are often forgotten.
-
Ignoring furniture space: Make sure beds, couches, and tables actually fit.
-
Skipping local code research: What’s allowed in one country may not be in another.
-
Poor kitchen workflow: Keep sink, stove, and fridge close (the kitchen triangle rule).
Helpful Tips for First-Time Home Designers
-
Start simple: Begin with a basic layout and improve it. Don’t aim for perfection in the first draft.
-
Use templates: Plan7Architect has pre-made plans you can customize.
-
Name your layers: Electrical, plumbing, furniture – keep them organized.
-
Walk through the space: Use 3D mode to simulate movement through the home.
-
Design for real life: Think about noise, privacy, clutter, cleaning, and daylight.
Tip Box: Furniture Dimensions Matter
Double-check the real dimensions of your furniture and place them in the software. A sofa that looks good in 3D might feel cramped in reality if the room is too narrow.
How Plan7Architect Helps You Design Like a Pro
Plan7Architect is a powerful yet beginner-friendly software I used throughout my own home planning process. It offers everything you need to bring your vision to life:
-
Full 2D and 3D editing with real-time switching
-
Support for metric and imperial units – perfect whether you’re in the US, UK, Europe or elsewhere
-
Extensive object library with furniture, fixtures, roofs, landscaping, and more
-
Layer-based planning for structure, electrics, plumbing, HVAC
-
Printable professional plans that builders can work with
-
Live walkthroughs to experience your design before building
You don’t need to be an architect. With a bit of creativity and the right software, you can plan your future home exactly the way you imagine it.
Pro Tip
Plan7Architect offers a full version with a 14-day money-back guarantee. That means you can try it without limitations and cancel easily by email if it’s not for you. There’s no need for a stripped-down trial—just start designing.
Plan your project with Plan7Architect

Plan7Architect Pro 5 for $159.99
You don’t need any prior experience because the software has been specifically designed for beginners. The planning process is carried out in 5 simple steps:
1. Draw Walls

2. Windows & Doors

3. Floors & Roof

4. Textures & 3D Objects

5. Plan for the Building Permit

6. Export the Floor Plan as a 3D Model for Twinmotion

- – Compliant with international construction standards
- – Usable on 3 PCs simultaneously
- – Option for consultation with an architect
- – Comprehensive user manual
- – Regular updates
- – Video tutorials
- – Millions of 3D objects available
The 3 Plan7Architects


