Yes, Plan7Architect allows you to draw floor plans with precise dimension lines—also known as dimension chains—quickly and intuitively. These dimension lines can be added both automatically and manually around walls, windows, doors, and structural elements. You can measure individual segments, total lengths, and even vertical elements such as wall heights or ceiling levels.
Plan7Architect supports both metric units (centimeters, meters) and imperial units (feet, inches). You can switch between these systems in the project settings at any time, depending on your regional standards or personal preferences.
Step-by-Step: How to Add Dimension Chains in Plan7Architect
1. Start or Load a Floor Plan
Begin by either opening an existing floor plan or creating a new project. To start from scratch:
-
Open Plan7Architect and choose “New Project”
-
Select the unit system you prefer (metric or imperial)
-
Begin by placing exterior and interior walls using the wall tool
You will see that the software works in a 2D layout by default, which is ideal for placing exact dimensions from the start. As you draw, you can already monitor the length of each wall segment live on the screen.
Tip: Activate the grid and snapping features in the bottom toolbar to improve drawing precision.
2. Activate the Dimension Tool
Once your basic layout is in place, go to the annotation tools in the toolbar. There you’ll find the measurement tools, including:
-
Linear Dimension
-
Chain Dimension
-
Angular Dimension
-
Radius and Diameter (for circular elements)
To create standard dimension chains, choose the Chain Dimension Tool.
Click on the wall or element you want to measure. The dimension line will appear above or beside the element, depending on your selection. Plan7Architect allows dimensions to be added both inside and outside of the plan for better clarity.
3. Place Automatic or Manual Dimensions
You can choose between automatic and manual dimensioning:
Automatic Dimensions:
-
Apply to entire walls or rooms
-
Useful for outer dimensions or total room sizes
-
Auto-updates if the wall length changes
Manual Dimensions:
-
Place point-to-point dimension lines between two specific positions
-
Ideal for showing distances between doors, columns, furniture, or other internal elements
Example:
-
Distance between a door edge and a wall corner
-
Width of a window or stair opening
This dual system allows you to fully control what’s displayed on the plan and tailor it to your needs, whether for construction, permit submission, or client presentation.
4. Adjust Unit Settings
To define the unit system for your plan:
-
Click on “Project Settings” in the menu bar
-
Navigate to the “Measurement Units” section
-
Choose either:
-
Metric (meters, centimeters)
-
Imperial (feet, inches)
-
This setting determines how dimensions are displayed in the floor plan and on all generated documents. You can switch between systems anytime—even mid-project.
Tip: If you’re working with international teams or clients, you can also include both units side-by-side in exported PDFs for clarity.
5. Customize Appearance
Dimension chains are highly customizable in Plan7Architect. You can adjust the visual style to suit your use case, such as:
| Feature | Options Available |
|---|---|
| Text size | Small, Medium, Large |
| Font style | Standard, Bold, Italic |
| Line thickness | Thin, Medium, Thick |
| Color | Full color picker |
| Arrow style | Line, Dots, Filled Triangles |
| Placement | Inside, Outside, or Along the Wall |
This makes it easy to adapt your plan to meet architectural drafting standards or company-specific guidelines.
Additional Tips for Professional-Looking Dimension Plans
Use Multiple Dimension Levels
For clarity and accuracy, I recommend using up to three layers of dimension chains on the same side of a building:
-
Inner chain: Exact placements of doors, windows, and structural openings
-
Middle chain: Segment lengths between structural elements
-
Outer chain: Total width or length of the entire wall section
This structure ensures that anyone reading the plan—whether a builder or a permit reviewer—has all necessary information at a glance.
Enable Snap & Grid for Accuracy
Make sure the snap-to-grid and snap-to-object features are turned on. This guarantees that your dimension lines start and end exactly where they should, with no misalignments.
-
Activate via the bottom toolbar or the settings menu
-
Adjust grid size depending on your scale
Tip: When zoomed in, snapping becomes more precise—ideal for millimeter- or inch-level adjustments.
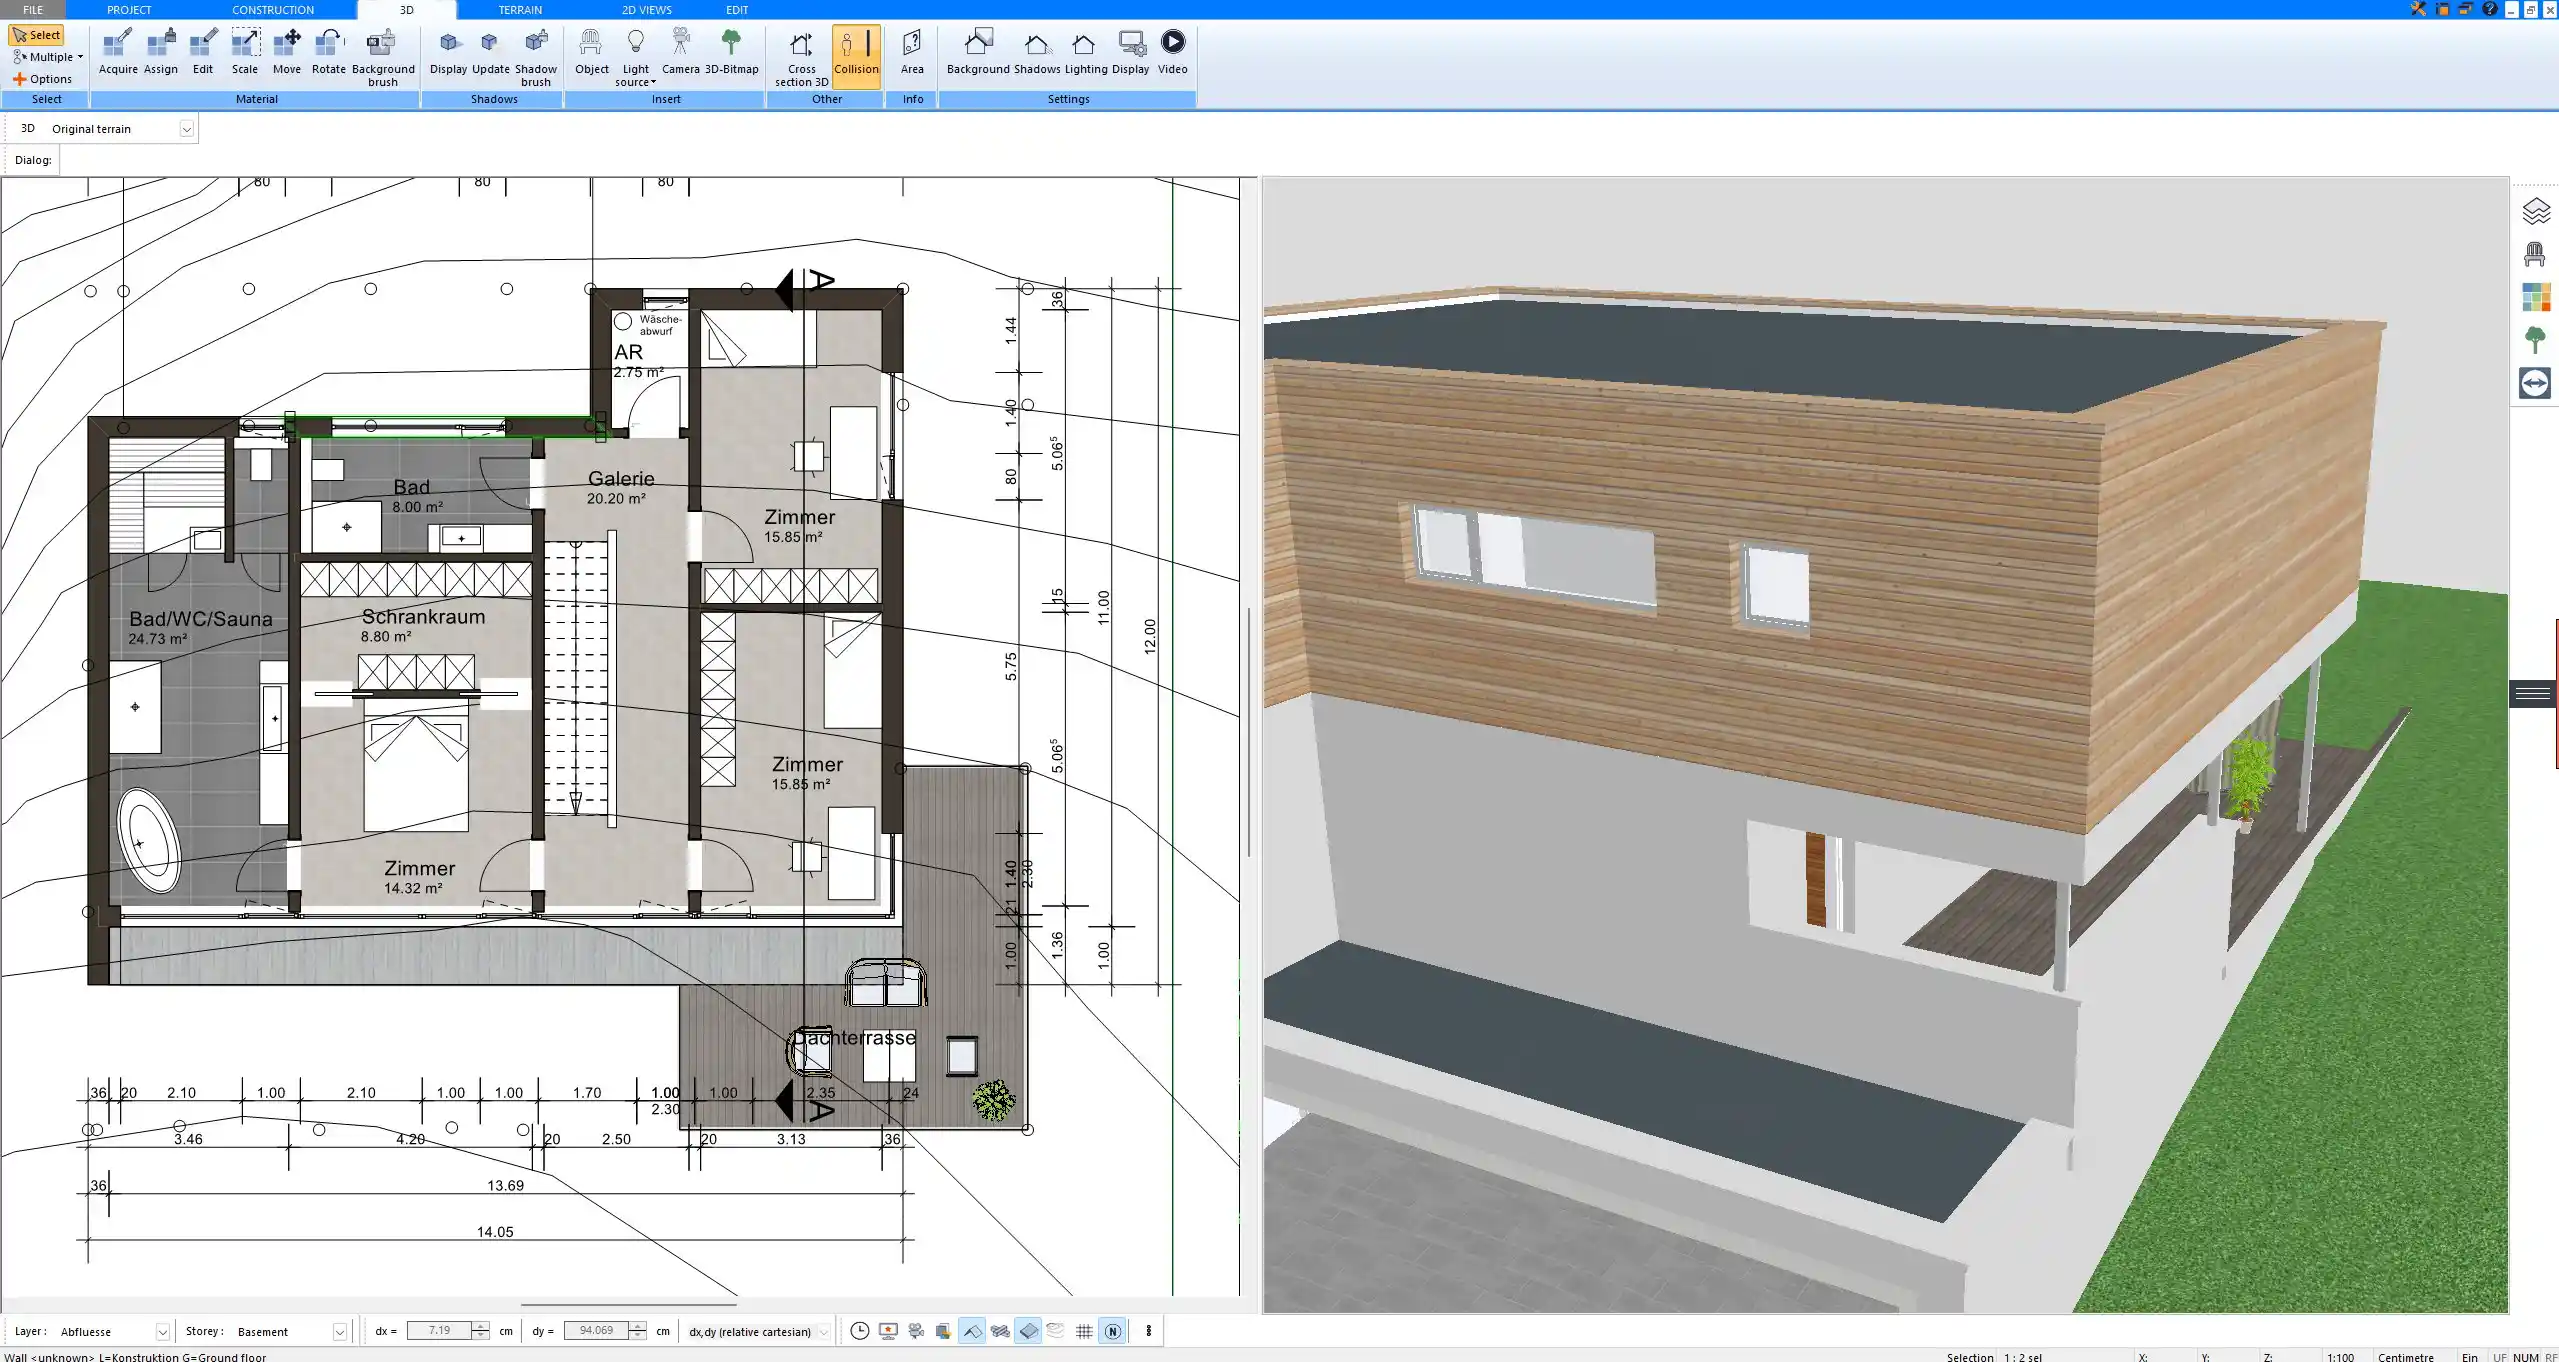
Add Height Dimensions (Vertical Chains)
Plan7Architect supports vertical dimensioning for section views and elevation drawings. You can measure:
-
Floor-to-ceiling heights
-
Window heights from floor level
-
Roof slopes and attic angles
These are essential when preparing detailed construction drawings or remodeling plans.
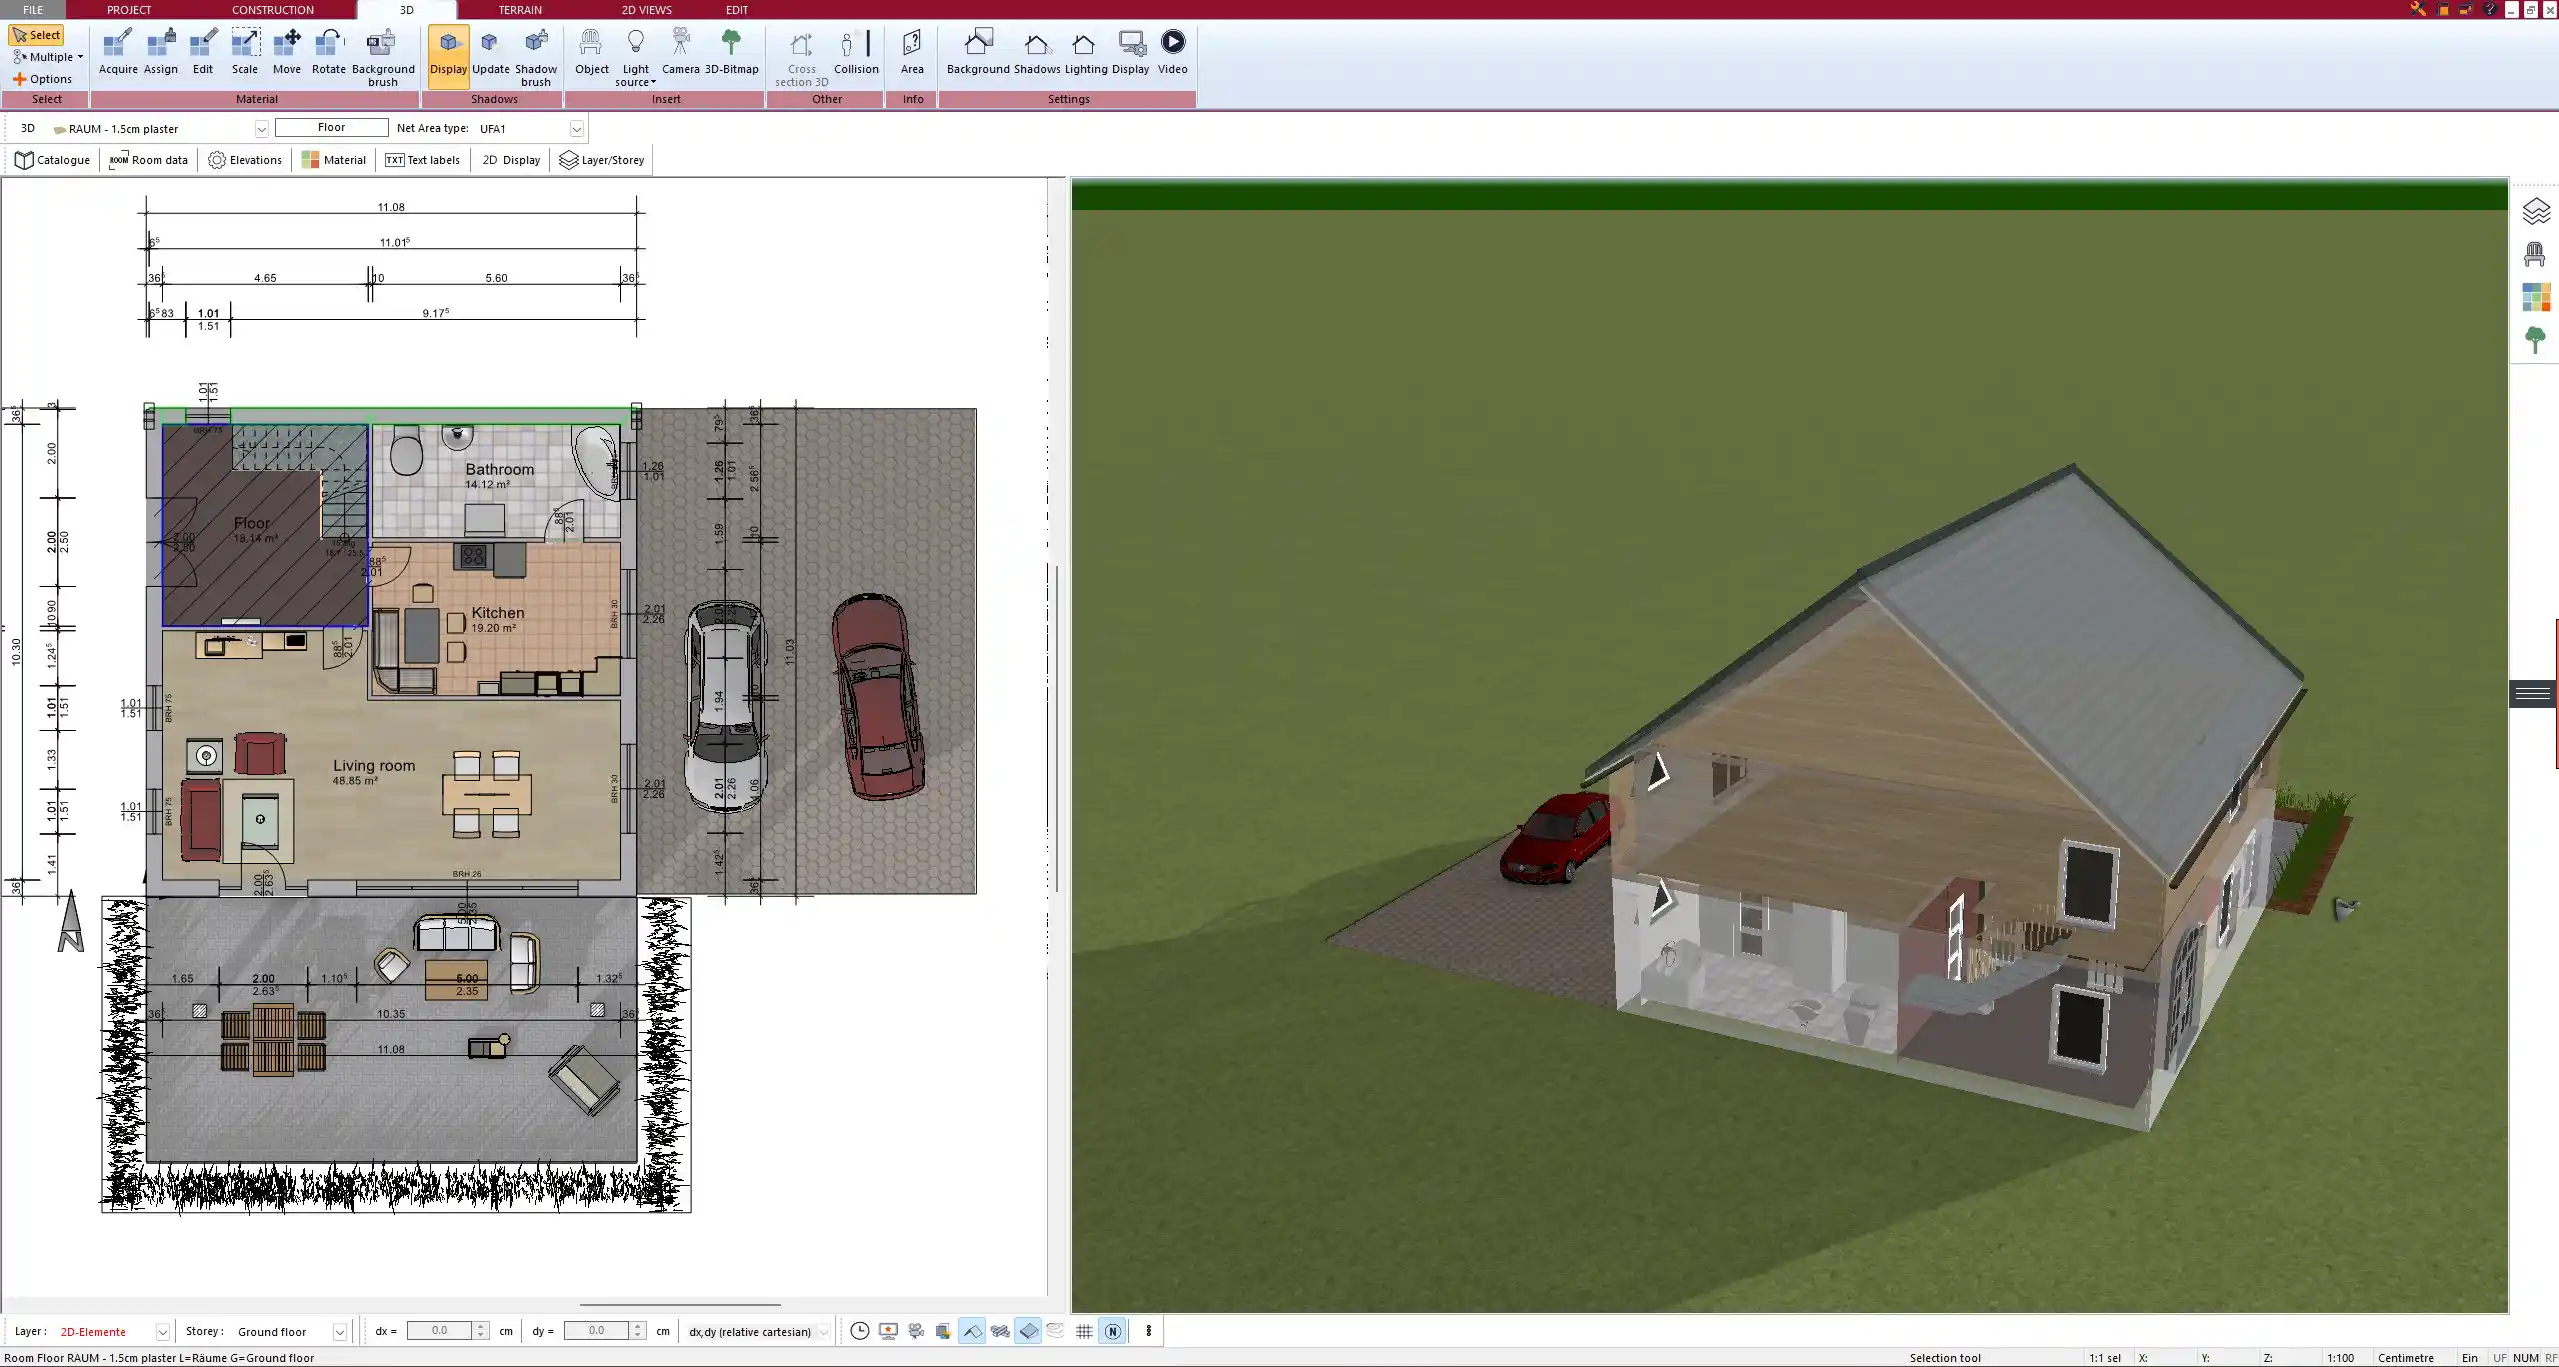
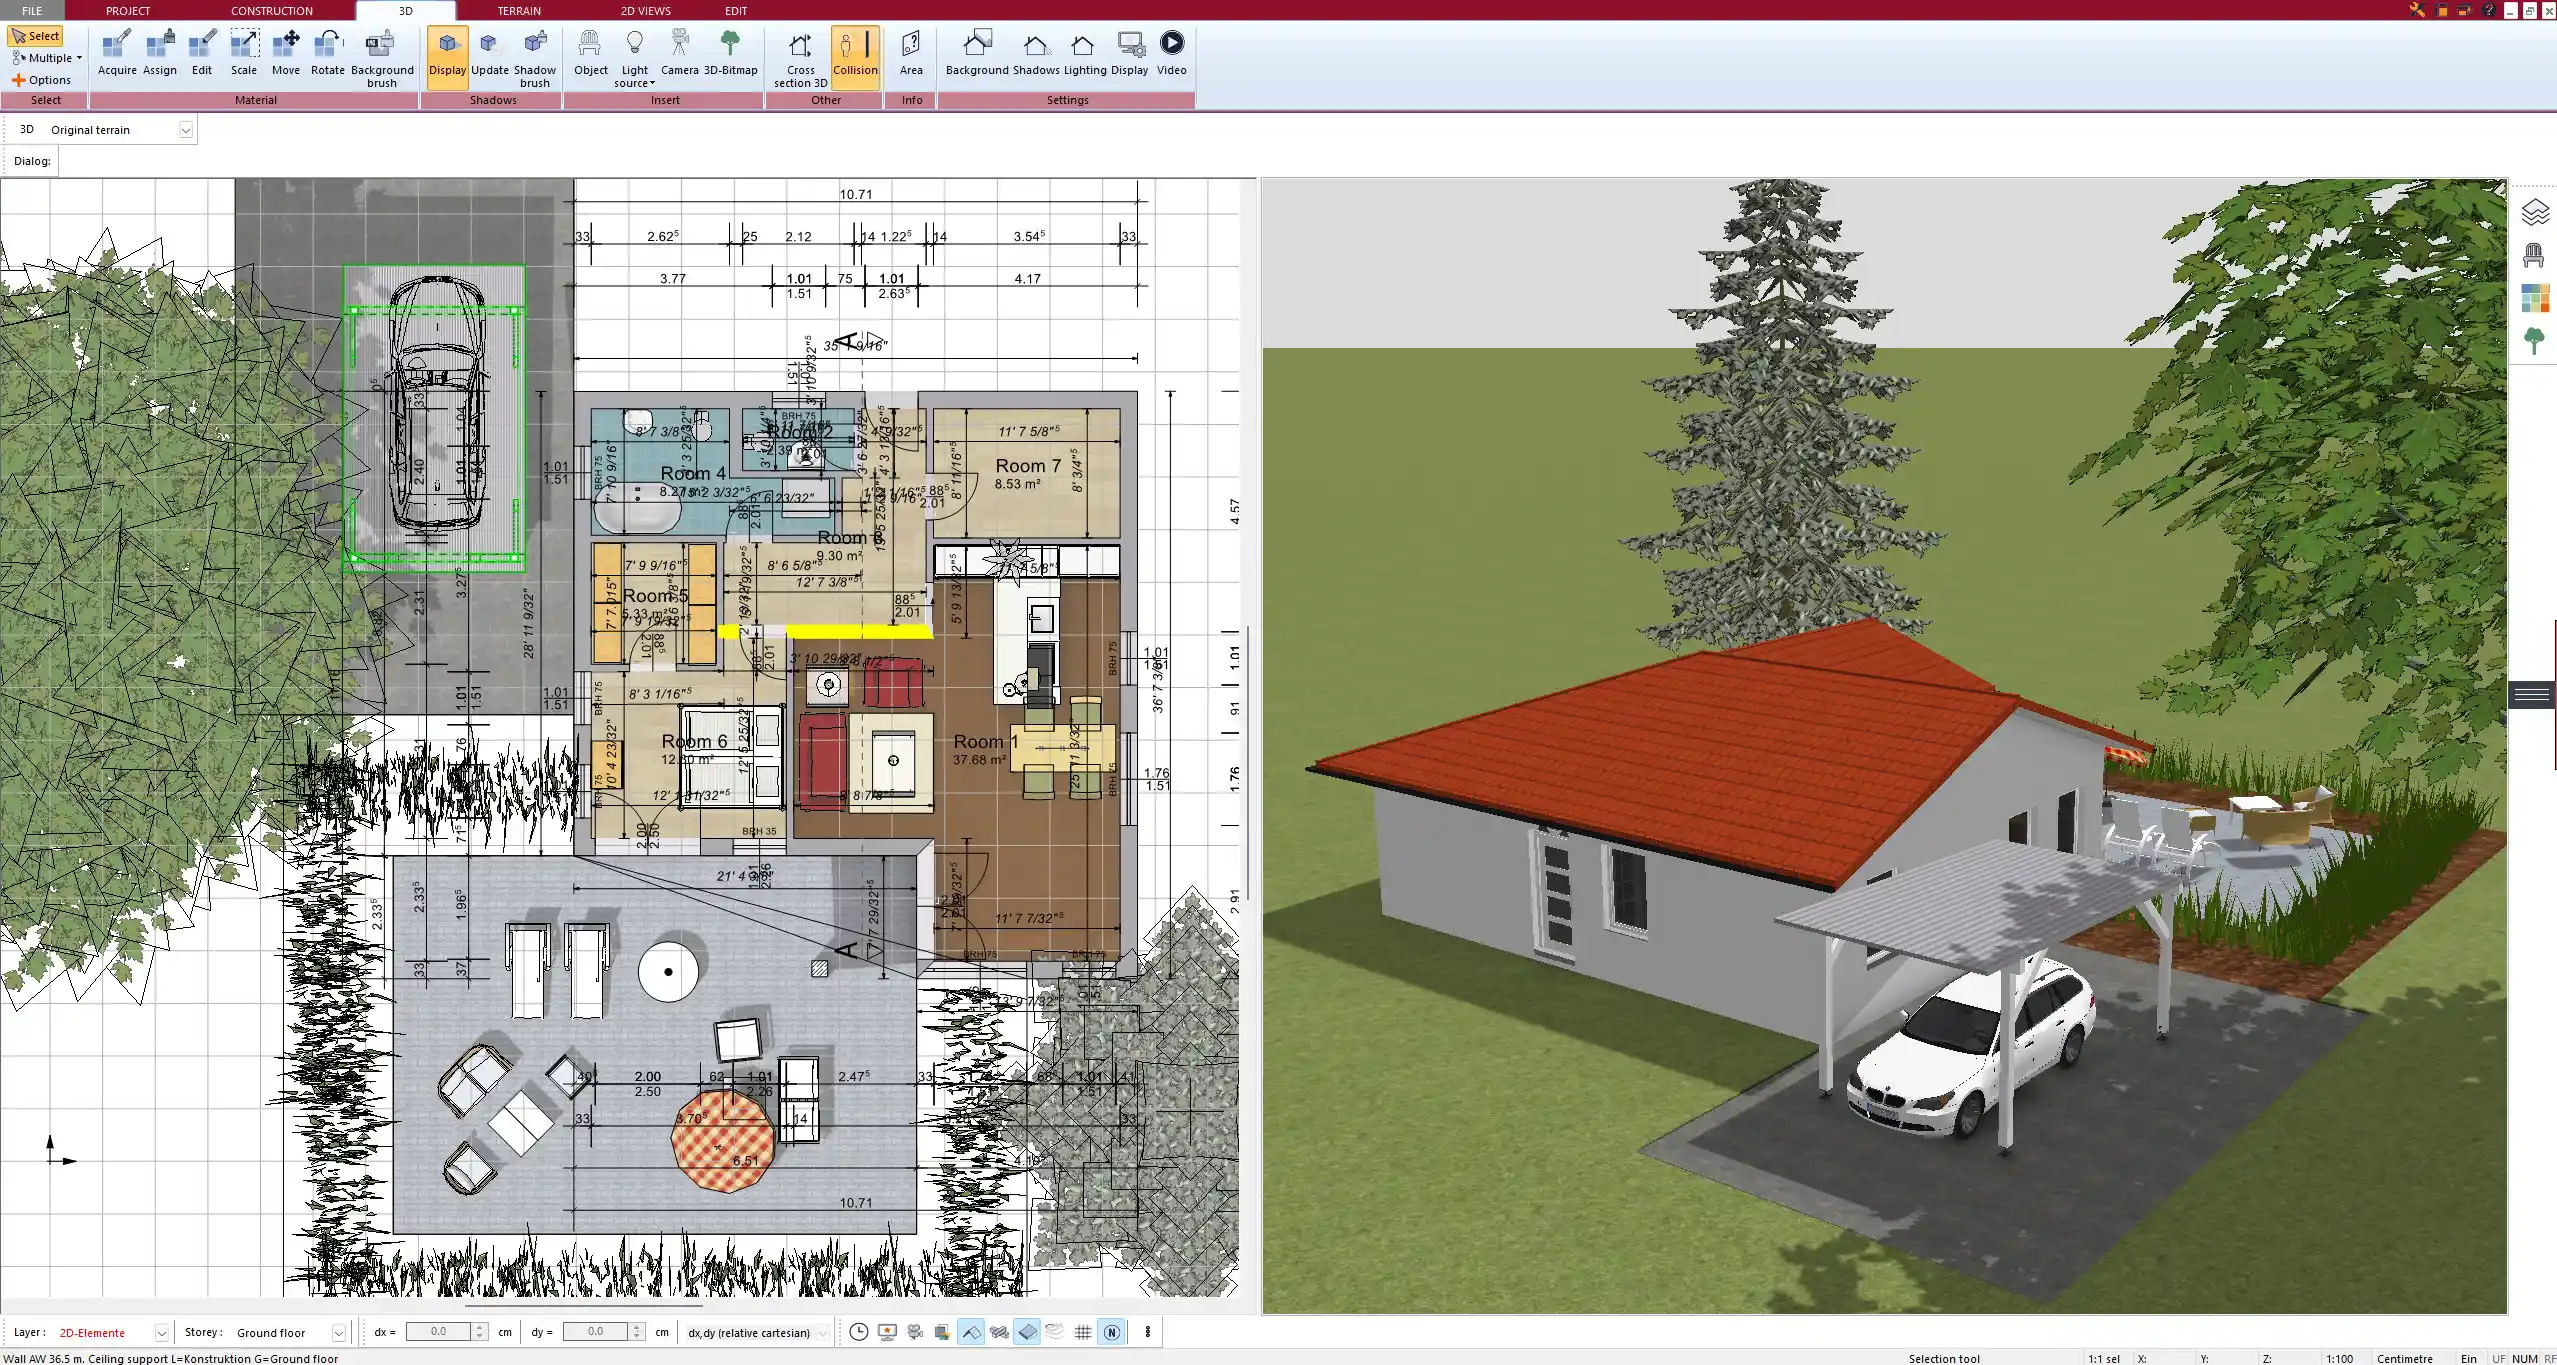
Combine with 2D & 3D View
One of the greatest strengths of Plan7Architect is the live connection between 2D and 3D views. When you place or adjust a dimension line in the 2D view, the 3D model instantly updates to reflect the changes in real-time.
-
Navigate to “3D View” or use the split-screen option
-
Use this to verify room proportions, check for design inconsistencies, or present the layout to clients
Tip: You can also walk through your dimensioned plan in 3D mode using the virtual tour function.
Units and Global Compatibility
Plan7Architect is designed to meet international standards. Whether you’re working in Europe, North America, Asia, or elsewhere, you can rely on the software to support your workflow.
-
Unit settings can be set per project or as default for all new plans
-
All tools, including dimension chains, respect the selected unit system
-
Area calculations, lengths, and volumes also adjust automatically
This flexibility is especially useful if you’re collaborating across regions or preparing plans for regulatory bodies in different countries.
Summary: Why Use Plan7Architect for Dimensioned Floor Plans?
Plan7Architect provides a complete toolset for drawing precise and visually clean dimensioned floor plans. Whether you’re designing a small apartment or a complex multi-story home, the software offers:
-
Fast and accurate dimensioning tools (manual and automatic)
-
Professional visual customization for every line and label
-
Full support for both metric and imperial measurement systems
-
Instant synchronization between 2D drawings and 3D models
-
Powerful layout control for clear, multi-level dimension chains
If you want to ensure that your plans are not only accurate but also easy to understand by builders, engineers, and clients alike, Plan7Architect is a strong choice.
Would you like a German version of this article as well?
Plan your project with Plan7Architect

Plan7Architect Pro 5 for $139.99
You don’t need any prior experience because the software has been specifically designed for beginners. The planning process is carried out in 5 simple steps:
1. Draw Walls

2. Windows & Doors

3. Floors & Roof

4. Textures & 3D Objects

5. Plan for the Building Permit

6. Export the Floor Plan as a 3D Model for Twinmotion

- – Compliant with international construction standards
- – Usable on 3 PCs simultaneously
- – Option for consultation with an architect
- – Comprehensive user manual
- – Regular updates
- – Video tutorials
- – Millions of 3D objects available


